


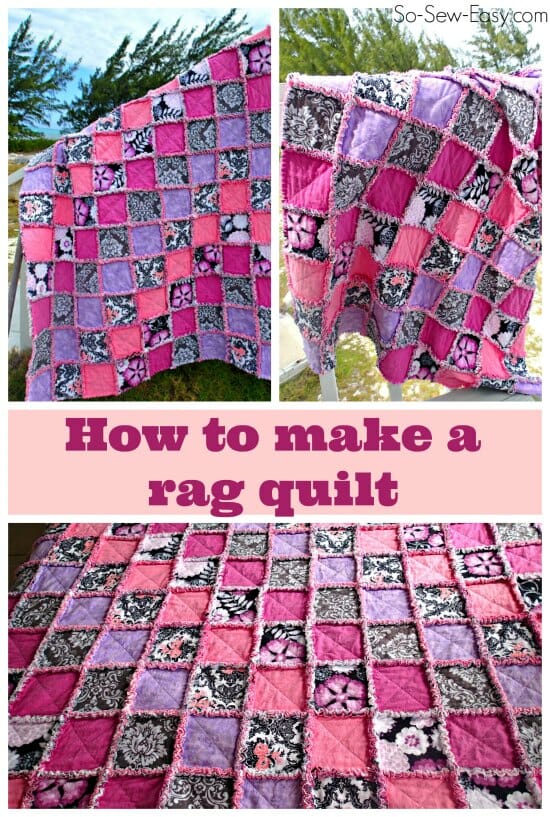
I'm sure you've seen these before. I've been drooling over all the lovely soft and snuggly rag quilts I see on my Pinterest feed and have been longing to find out how to make one. So I gave it a try, took some photos and a video along the way to share the process with you, in case you'd like to give it a go too.
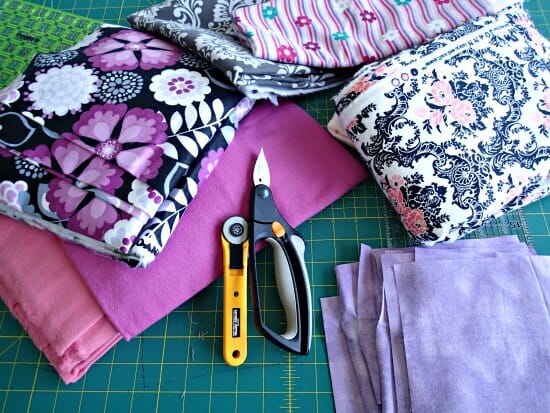
Materials to make a rag quilt
- Flannel fabric in prints, solids or both
- Matching or contrasting thread
- Ideally but optional – ragging shears
- Ideally but optional – rotary cutter and a long ruler
- Ideally but optional – walking foot
- Time and patience 🙂
How much flannel you need will obviously depend on how big you want your quilt to be and how many layers you want to add. My finished quilt is 9 squares by 13, each square started out at 6 inches and I used 3 layers in each square. So I used a total of 351 squares. Assuming you can get 36 x six-inch squares from a yard of flannel (you might get more depending on your fabric width) then I needed 10 yards of flannel to make my quilt in total. That's a lot! You can obviously make a smaller quilt and use less fabric. Making bigger squares would also mean a bigger quilt or less fabric because of less seam allowances.
Watch me make my flannel rag quilt
Subscribe to the YouTube channel:
How to make a rag quilt
Decide on what size to cut your squares. Ideally a larger finished quilt size can support a larger square. Keep in mind that this can be a time consuming project, and I recommend not making your squares any smaller than 6 inches.
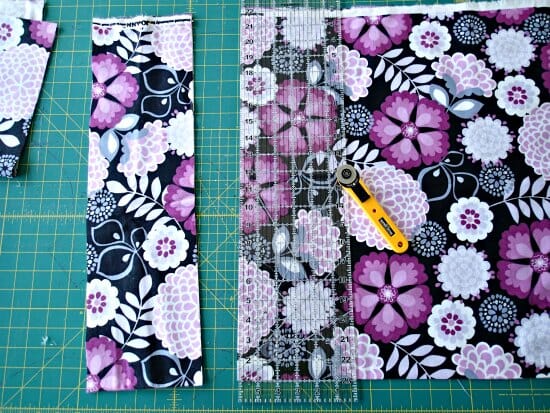
Use a rotary cutter and long 24 inch ruler if you have them. If not, mark your fabric and cut with scissors (but that will take you much longer). Cut out rows of fabric and then cut the rows into squares until you have all of your squares.
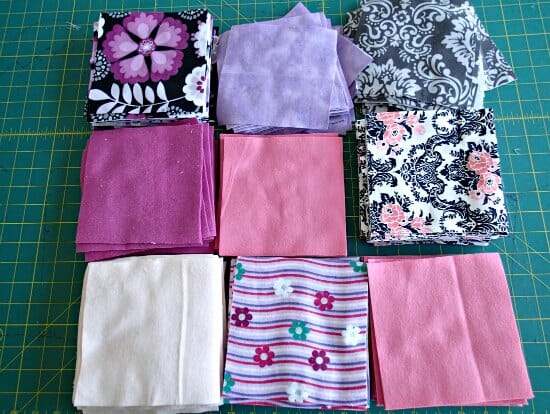
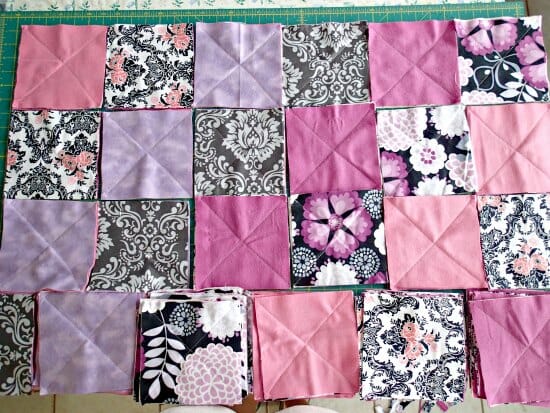
Now have fun designing your quilt. Will you use the same fabric top and bottom? Will you go for a regular placement, something entirely random? I went for a regular placement, offsetting by one in each row. More on that later 😉
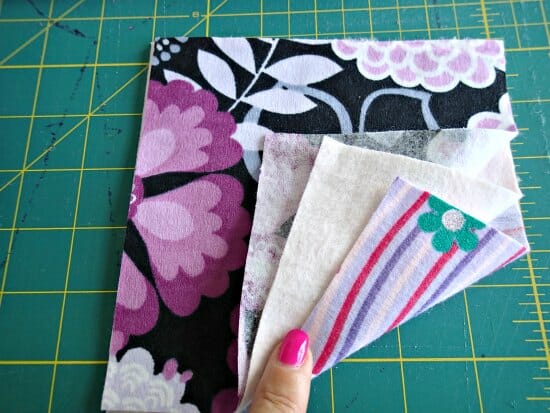
Set out all of your sets of 3.

Place the backing piece face down, then your middle layer face up then your top layer face up.
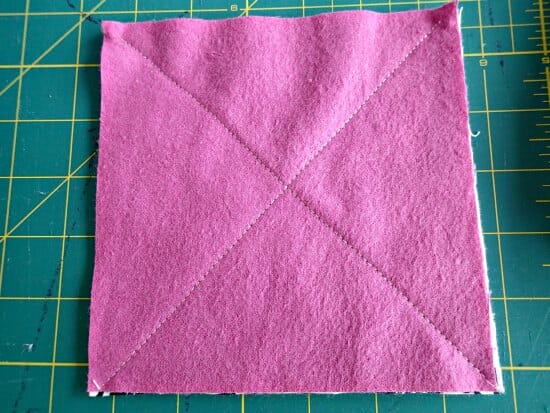
Stitch a large X through the center of your 3 layers from corner to corner. A walking foot is going to be useful here in keeping all the layers neatly together as you sew, but its not essential. The flannel clings to itself so you won't really need any pins.
Repeat, repeat, repeat until you have all of your squares sewn with crosses. This is an excellent time to do a bit of mindless sewing. Sew a few squares here and there when you get 10 minutes. This is an easy pick up and put down project.
Now start to sew your rows. Decide on a seam allowance – for my 6 inch squares I used 1/2 inch. For a larger square you could use a larger seam allowance to get more of a balanced look.
Opposite to usual sewing, you'll be sewing with the WRONG sides together – whatever you want on the back needs to be sewn facing and then the fabrics on the front and the seam allowance will appear on top. Repeat, repeat, repeat until you have all of your rows sewn.
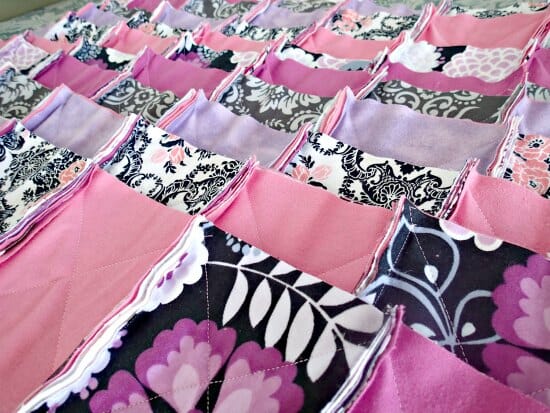
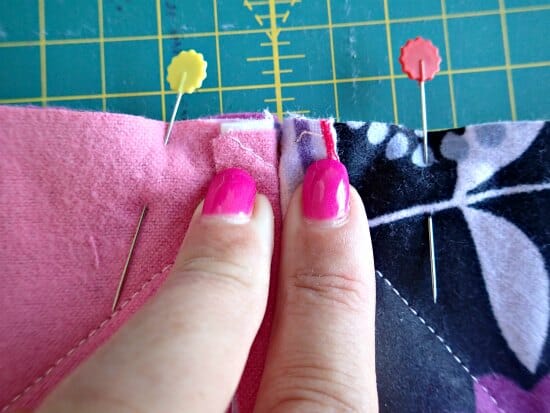
You're starting to see the big picture now. Time to sew together your rows. Remember to sew them WRONG side or back sides together. Open up the seam allowance front and back as you sew and try to match the seam allowances on your squares.
Phew, its been a sewing marathon and we're not quite finished yet. We need to take care of the outside edges, so now sew a line of stitching all the way around the perimeter using your same seam allowance. Now you are done. Put your sewing machine away and put your feet up. But not too long….
Now it's time to snip. Use your spring loaded ragging shears if you have them, or your regular sewing scissors if not. Depending on the size of your quilt and the number of seam allowances you could be snipping for some time! Put on your favorite movie or an audio book and snip away. I snipped about every 3/8 to 1/2 of an inch. Of course be careful not to snip into your stitching or you'll have to sew that seam again.
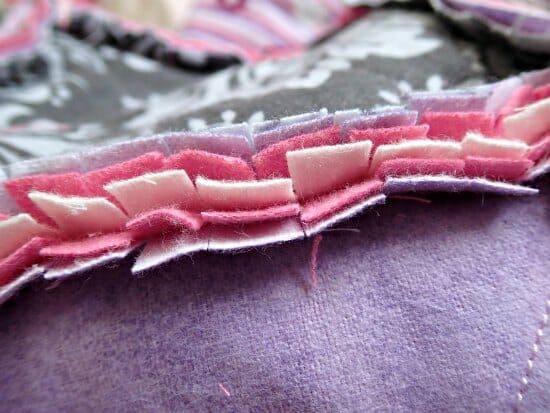
Snip all around the edges too. I created quite a blister on one knuckle where it was rubbing on the scissors – who knew this could be so dangerous!

OK, nearly done. It looks good but here is where we make it look awesome. Toss it in the washing machine with a couple of towels. I read its best not to use a liquid fabric softener. You'll get quite a bit of fluff in your washer, but it should almost all end up stuck onto the damp towels after spinning so should be easy to just wipe around and pick up any last little bits. Then throw it in the dryer or line dry. Repeat the washing and drying if you like to get a more frayed effect.
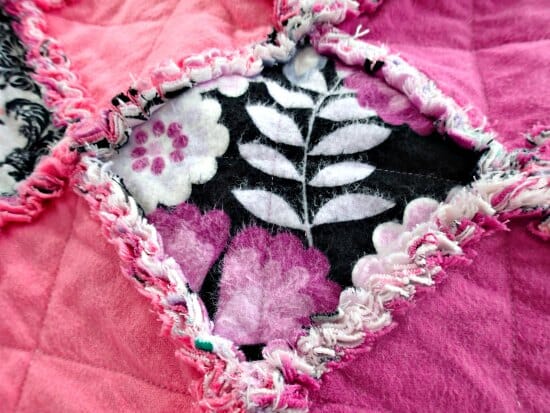
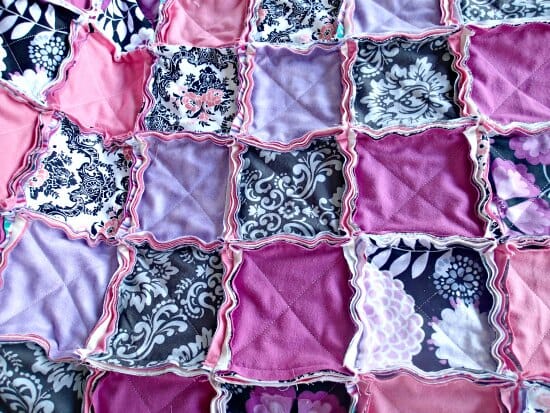
And you are done. Isn't it lovely. All soft and snuggly and so pretty.
I held it up proudly and showed it to hubby after all my hours of work. What do you think I asked? Erm he said, what's wrong with the pattern?
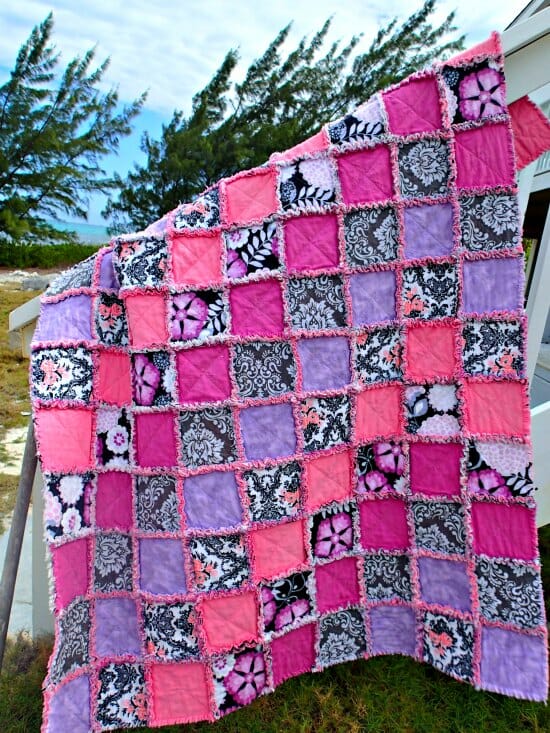
Arrghghh. I don't believe it! After all that hard work, I sewed the very last row on wrong – look, it goes the wrong way. Not sure yet if I'll remove that last row or just leave it as a design feature. I never even noticed until he pointed it out! Sigh.


What about using a bunch of different kinds of fabric? want to make a memory quilt out of clothing and thought a rag quilt would work, but now wondering about it. What do you think?
Hi Becky, I think that would be a great idea. Please let us know how you go. It would be great if you could send us a picture of the finished quilt. I’m sure it will look great!
Did you wash your fabric before cutting it all? Or only after you cut in the frayed edges?
Hello Karry, do sew your quilt first, then nip all the edges, about 1 cm apart and wash the quilt in the washing machine and it should come out all ragged. Happy sewing!
Mayra
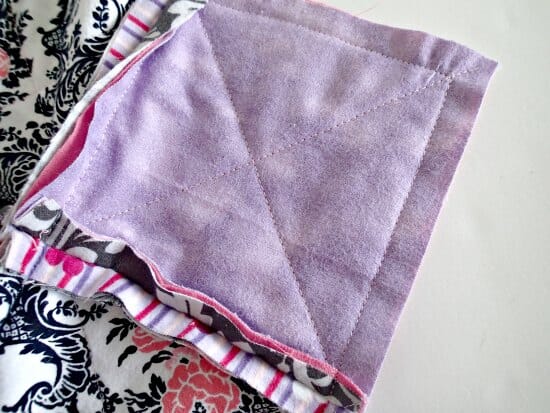
So because you are folding all the edges and seeing them in one side only, that the back side doesn’t have the frayed edges between the squares? Sorry if you answered this already.
Yes you are right!
Someone asked about using fleece – fleece doesn’t fray so it wouldn’t give you the same look.
Great Quilt 🙂 What kind of material do you use for the batting?
The standard 60/40 poly cotton thinner batting. It is really up to you what you want to use. Enjoy the project!
How do you determine how much thread to buy for a rag quilt this size? I have one spool of multi coloured Luana Rubin thread but I don’t know if it will be enough. Lovely colours, btw.
I have no idea how big is your spool, if your run out just find a thread that will closely resembles the one you had. Hope it works out for you!
My spool is 500 yards. The thread is a special multi-coloured thread, so it would be very difficult to match with a regular thread and I don’t want to start quilting and then change colours. Ugly! My particular quandry is that the quilting store I bought it from has closed, as have the two other quilting stores near me, so I don’t have ready access to a place that would carry this line of thread. My rag quilt will be 50″ by 60″. And as I’m in Canada, ordering online from an American site is pricey. I don’t want to waste this thread as it is lovely and expensive.
I think it will be enough provided you don’t make any mistakes. At the end it is you who will have to decided to use the thread or not. Good luck! I am sure it will be beautiful!
I have a idea for this that may be less expensive. Why not use those inexpensive fleece throw blankets and cut them up. They come in different patterns and solids. It will make them doubly warm and cozy
When you say 10 yards of flannel, do you mean 10 of each color (using 3) or 3.3 yards of each color?
Love it. I just started making quilts and I’m currently working on a denim and flannel quilt. I love it, but sometimes I find that my squares don’t quite end even (on one side, I’m going to have about a 2 inch gap with no fabric in that spot. I’m making a big quilt (13 squares across that are 7 inches); so it’s kind of hard to make sure I measure each seam exactly even as all the others. Any tips on how to avoid this? I think I know what the problem is; but just asking. Thanks
I am interested to know why you think that is happening. Is hard to comment without a picture but if I was using denim and flannel, the flannel would probably be slipping under the denim, I would use more pins to secure the two layers before stitching or sewing the flannel always on the top.
what do you think is happening?
Hi there Alicia. I am so sewer but as far as I am understanding, it sounds like the material is either ‘slipping’ and not staying even at each edge or that the squares are not exactly squares. Any millimetre will make a difference and if you think about it, adding all those millimetres up, it will work out to the 2 inches that you are now missing. This may all sound silly (as I am no sewer – I hand sew), but I thought I would say, just in case I do make some sense haha.
Love it …… when I first saw it I thought what a great variation I’m going to do that on my next rag quilt then I read what you wrote… It doesn’t matter I’m still going to do it.. I use 3 layers of flannelette the same size because the quilt can get very heavy and I practise free style quilting instead of the X unless I have to make one quickly. I don’t wash my quilts until they r finished and I will wash them 3 times by then all the loose bits have gone and the flannel has fluffed up nicely
I just made one today. I started this morning and finished it finally. I was doing my laundry in between. I am so happy with the outcome even though its not perfect. I will try and do another one. I am also a newie on quilting but like the others I like it coz no need on binding the edges. 🙂
Congratulations! So great to hear your are happy!
I love this idea, I make dresses and other things for my girls, but never a quilt. The sizes are a little confusing to me. I want to make a quilt for my daughters twin bed. Is the quilt you made big enough?
Love the quilt…I’m still learning but would love to make one. Question ..do you wash the fabic before you start or wait until its all done to wash it? Thanks so much
No I didn’t wash mine first. I thought if it shrunk up a little during washing, it would only add to the nice texture of teh quilt, and I was happy with that.
do small squares of fabric make u look smaller and larger squares make u look bigger? want to make rag sweater
It all depends on how tall you are and the colors you choose. I suggest to look around Pinterest and find somebody with your body type, it would give you an idea how the sweater would look on you.
I just made one of these rag quilts and all went fine, but all of the outside premier of quilt did not Frey well.. Do you think it has to do with less expensive flannel fabric
The outside edges won’t be so thick as the ones where the seams meet up because there is only one edge there not two, so it won’t look the same as the rest. Otherwise the fabric is the same for all the pieces so it should fray uniformly really. Maybe try putting it through another wash to see if you can get the look you are after.
Hi frommelen the netherlands loveley idea gonna make oneens to oneens question wich program and tempature do I need to set my washing machine? Ty so much
I think you should use warm water, not hot, and set it to a gentle wash without fabric softener. Better to wash it a couple of times gently than one harsh and heavy wash I think.
Keep the mistake and give it to an OCD friend to drive them batty 🙂
Debi to the rescue!
I had planned on making quilts for my 5 granddaughters – but then my sister has started to make them quilts with machine embroidered squares. She make fabulous items and I didn’t want to tell her that I had started buying fabric to make quilts, too.
Now I can make a unique quilt which won’t ‘compete’ with my sister’s quilts. Who knew flannel could make such a beautiful quilt!
Thank you, Debi, you just saved me a lot of heart wrenching decisions.
Give Oliver a Snuggle from me, please.
Fabulous tutorial! I just finished making my first rag quilt. I used flannel with batting for the inner layer. Everything was going great until I washed and dried the quilt. It came out of the dryer covered in lint and completely pilled. What did I do wrong and is there any way to salvage it? It’s a mess 🙁
Oh no Brenda, the flannel is all pilled? That’s terrible after the first wash, it shouldn’t do that. Sure, it will be all covered in bits of fluff, but you give it a good shake and when dry all that brushes off, or blows away when you dry it on the line. Oh, now I read that you put it in the dryer. I don’t have a dryer so I’m not sure if that was the issue. Is your batting OK to put in the dryer? It sounds like the flannel wasn’t happy with the washing and drying process for it to have pilled so badly. I’m not sure what you can do about that – maybe one of those sweater shavers?
I use a fabric comb after my 2nd washing. Once I do that it comes out fine on the 3rd wash.
I actually used my dogs flea comb. I’ve never heard of a fabric comb- I’m a newbie 🙂
That’s a great idea Brenda, thanks for sharing it with us.
Your quilt is the first quilt I am excited about trying this winter. I think I will struggle with reversing the blocks to sew them together, but I love the fact that the blocks can be sewn with an X together and there is no bias binding to deal with !
Tell me about it! Binding a quilt makes me nervous 🙂
I think your quilt is beautiful and has inspired me to have a go. I enjoyed watching your tutorial, keep up the good work!
I don’t sew alot but, I really don’t see a mistake! I’ve made some quilts, but where is the mistake? Hey, If you’re giving this to someone who has never sewed or only sewed off and on through the years, they will NOT see the mistake, cause I still can’t find it !!!!!!!!!!
On the very last row, instead of moving all the squares one place to the left, I moved them all one place to the right. So everything is all nicely lined up on the diagonal, until the very last row when it all goes back in the other direction! I never noticed either until hubby pointed it out.
This is so pretty!! I have been seeing it on many websites and have read this post when it came out. Finally decided to comment because I love it so much!!! Great job – really wonderful blog!! Thank you for sharing.
That’s so kind of you MJ, thank you.
I would love to see the back of this beautiful rag quilt.
Great choices for colors, I may try and copy your fabric choices, I want to make 2 for my grands who live in another state. Thank you again for the informative and easy to follow tutorial an youtube video.
Hello from Perth, Western Australia!
All quilters ensure there is at least a small flaw in every quilt they make – they believe perfection has no place in quilting. Go to any quilting convention and spend some time looking at the perfect quilts – you’ll always find at least one deliberate flaw. This is your deliberate flaw in an otherwise perfect rag quilt.
I’ve made one rag quilt (so far, more to come) and I had no idea what to do with the seams when sewing the rows together (I actually stopped sewing, skipped over the seam and started sewing again on the other side. I ended up with small gaps in my seams – not so good) – your tutorial was immensely helpful – thank you 🙂
Thanks for the encouragement PK – yes, its a ‘design feature’ for sure!
my grandparents would make quilts together. she did the handsewing and applique work by hand and he would use an old singer sewing machine with a trundle foot. she was afraid of catching her fingers under the needle of the machine. i remember them telling me when i would help cut out squares and shapes that the mistakes made is “where the love goes in “
Great job, and it is not a mistake, it´s your design.
To me the most difficult thing of your great tutorial is to cut all the squares the same measure. To me is impossible. Have a good time.
Very pretty and so cuddly! I agree, don’t worry about the mistake ! I am going to make one for my granddaughter .
Beautiful and amazing, don’t think I have the time or space to do this project but it is lovely.
I wonder if a method used in woodworking (eg. for making checkered cutting boards) would speed things up? Instead of cutting–and joining!–kajillions of small squares, I wonder if this would work:
1) Cut long rows of each top fabric pattern/batting/backing fabric (instead of small squares)
2) Sew the rows together to form a “quilt” with horizontal bands of different fabrics
3) Cut this “quilt” evenly into strips from top to bottom–each vertical strip will alternate squares of fabric
4) Finally, sew these vertical strips together in an alternating pattern.
The vertical strips would have to be cut allowing for a seam allowance I guess, otherwise the squares would turn into rectangles…
Just an idea, might work better for folks like me who’d never be able to cut two squares the same size 😀
when I make rag quilts, I cut the cotton batting an inch smaller, to allow for i/2″ all around. That way you are only snipping 2 layers of flannel, since the middle piece is within the seam allowance. Not so hard on your hands, and still a nice soft fringe. I love your colors
Wouldn’t the batting bunch up in the squares when quilt is washed and washed, if not sewn in place?
The batting is held in place by the large X sewn through the center which joins all the layers together so I’m sure it would be OK.
First I didn’t see the mistake but it’s a variation. I like your very nice quilt. It’s an intersting work.
Lovely quilt – and it’s nice to know you are fallible like the rest of us.
Oh yes, there are plenty of terrible failures along my sewing path too. This one not so bad…
Making a rag quilt has been on my To Do list for ages, Deby. I have all the fabrics. Yours looks great!!!
I’m with Tina! Leave it, every mistake is a style and a memory. It looks beautiful!
I have a very beautiful intarsia plate inherited from my parents, apparently bought in Chichester just after the last war (WW2). It has one piece of enamel deliberately missing, because only God came makes things perfectly. QED Don’t Stress
Cute quilt! Thanks for the tutorial. I may have to make one of these.
Think the beautiful work you have done. Be happy with the little things (Though it is not a little one) because there are not a lot of big wonderful things in life to be happy only waiting for them.
I don´t know if you can understand what I mean. It is not English my mom language.
All the same BE HAPPY you are a fantastic professor. Love you from Spain
Thanks for the tutorial. The middle layer is just a solid flannel, not any type of quilting/batting right? I love it and will be looking for some material today. I’m going to start with a crib size for my granddaughter. What size squares do you think I could get away with? I’d like the largest size I can on my first project, but I think 6″ might be too big for this size quilt?. Appreciate the advise. Your last row looks fine! Didn’t even notice.
Yes, I just used a regular flannel layer in the middle, the same size as the outer ones, no batting. I still think 6 inches will be OK for a small quilt. When you sew with the 1/2 inch seam allowance all round, it finishes as 5 inch squares. Maybe cut out a few and run up a quick test to see if you like it before deciding and cutting them all. It will be more work if you make them smaller. Hope it turns out nicely for you. And by the way, JoAnn has a 60% off flannel sale today!
Deby, I love this quilt! The colors in the fabrics are wonderful! I didn’t notice the last row until you pointed it out. If it’s always going to bother you, then if it was me I would probably re-do it. But, you know I’m a perfectionist, and my own worst enemy! 🙂
I think I’m going to keep it there as a reminder of sometimes, theres no need to sweat the little things in life 🙂 Mistakes happen.
I must be blind because I can’t see it!! lol If I wanted to make a rag quilt with more loft, could I use batting, but cut it about an inch or so smaller than my squares and then just sew the edges together so the batting didn’t stick out?
Yes absolutely, I’ve seen them made this way too. That would be so lovely and cozy. You’ll hold it in place when you sew ther cross and then it will be sandwhiched in the middle when you sew all the squares together. Just have to make sure it doesn’t poke out or it may be seen when you snip the edges later. Good luck.
It’s not a mistake, it’s a design variation! Thanks for the tute.