


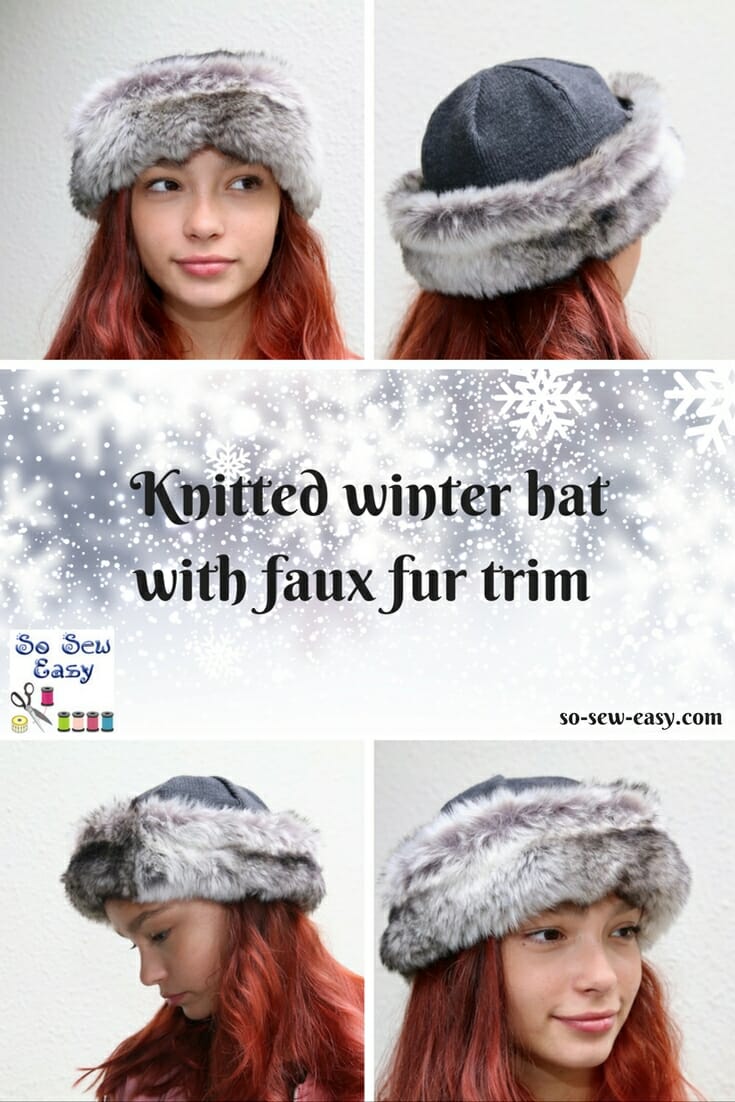
A winter hat with faux fur trim will be the perfect accessory for those cold winter days ahead. The amount of fur you will need is very little, which makes this the perfect project if you have never worked with fur before. This is a super cool and adorable winter hat. I promise you that it will make a very nice present for Christmas or a great accessory addition to your wardrobe.
I am using ribbing fabric for the cap and the brim, but this is the perfect opportunity to upcycle an old sweater that you do not like and transform it into a winter hat. No fur for the band? No problem, use fleece instead.
Key Features:
- Elegant fur trim framing the face
- Perfect hat for a day on the snow, sky lodge hangout or a windy day
- Casual yet elegant
- Very easy on the making and the budget
- Opportunity to upcycle an unloved sweater
Tools
- Sewing machine
- Walking foot (optional)
- Long sewing pins
- Sharp scissors or cutting knife
- Tailor's chalk or marker
- Tailor's ham or rolled towel.
- Jersey needle size 14. (Click HERE to learn all about sewing machine needles.)
Fabric Requirements:
- One (1) piece of faux fur of 22 3/4″ by 4″ (or Double knit or Fleece)
- One (1) piece Ribbing 22 3/4″ by 4″
- One (1) piece Ribbing 23″ x 8″
Recommended Fabrics
Winter Hat Trim
Winter Hat Body
Pattern Download

You can download the pattern for this Winter Hat from our account at Payhip.
For help downloading and printing PDF patterns, please CLICK HERE.
Finished Garment Measurements
22″ diameter by 7″.
Step One: preparing the fabrics for your winter hat
We will be using imitation, fake, fun or faux fur and ribbing as it is known. For the ribbing, you can use any knitted fabric you can find or simply repurpose an old sweater or cardigan. Before you start cutting the fur if you have never worked with fur, I recommend you read tips to working with fur. This article will give you the necessary background to be successful in working with fake fur.
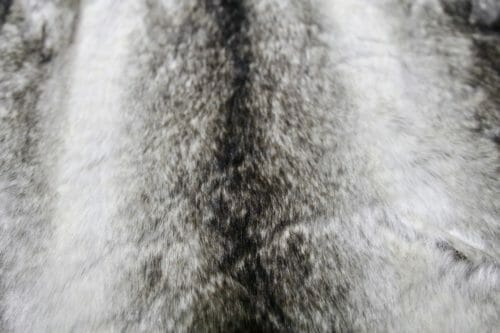
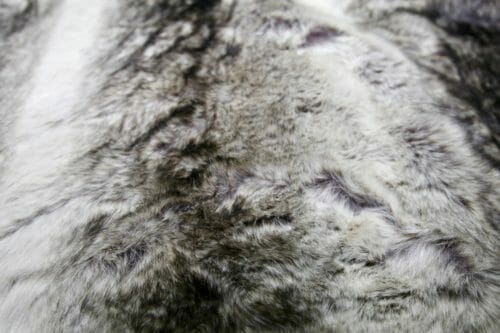
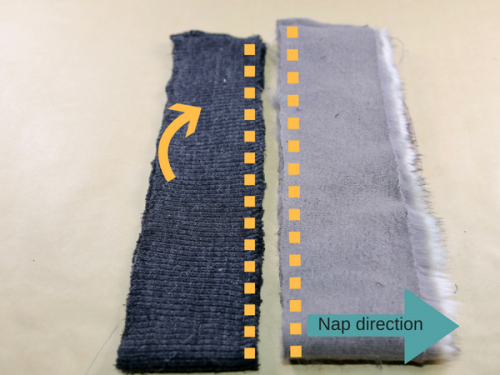
One of the most important details of working with fur is to know the direction of the nap (picture below). Against the direction of the nap.
Step Two: cutting the fur
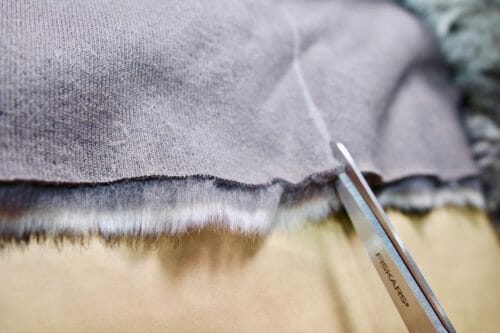
Follow the pattern markings for the direction of the nap. Turn the fur side down and mark the nap direction with a marker or a sharp tailor's chalk. Do not worry, the mark will not be seen on the other side. Insert the tip of the scissor under the knitted part of the imitation fur and cut. Cut a couple of centimeters at a time. This can be time-consuming but it will guarantee the preservation of the length of the hairs.Pin the sides using long pins and pushing the hair down as much as you can between the jersey.
Sew at 3/8″.
Step Three: cutting the fabric
Cut a piece of ribbing or double knit fabric making sure the stretch of the fabric is horizontal. If you are repurposing a sweater, place the pattern on the belly area and add 3/8″ to the pattern where the fold line marking is located. Alternatively, you can use one of the side seams of the sweater and just cut the pattern using the fold line.
If you have bought ribbing, follow the pattern instructions for the stretch of fabric. Zigzag the edges and sew a stay stitch at 1/4″ from the edge. This is to prevent the ribbing from over stretching and losing the shape.
For even more information on sewing sweater knits, please check out the great article by one the real experts in the field: Sewing Sweater Knits.
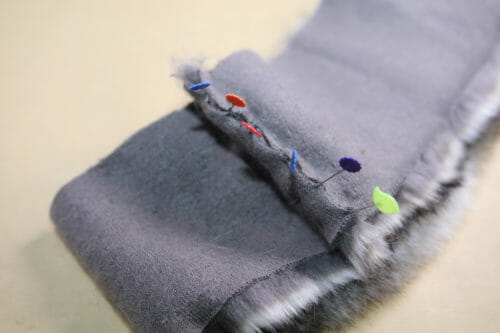
Step Four: sewing the fur to the winter hat brim
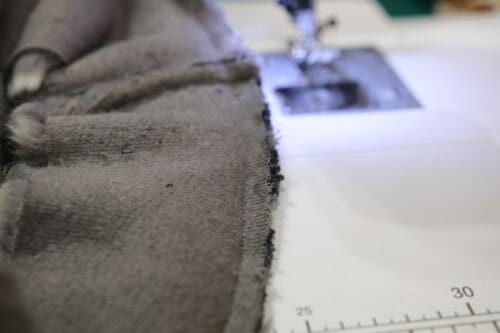

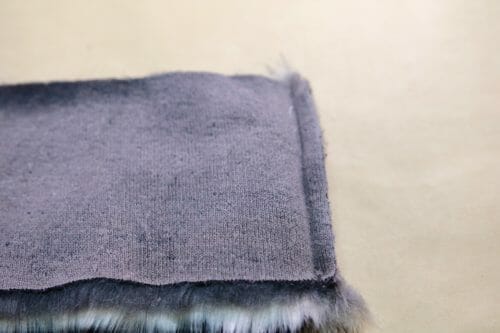
Pin the ribbing to the fur on the opposite side of the nap direction as illustrated above. Sew at 3/8″ using a big stitch. My machine is able to handle the thickness of the project, however, you might have to adjust the feed dog height. If after making all these adjustments you still have difficulty sewing the hat you may have to use a walking foot. This is what the underside looks like. You can not see the stitches on the other side due to the color of the thread. I'd often use contrasting color for a better example, but I am planning to use the hat, so I do not want to make a sample that no one will use;)
We are going to topstitch the seam allowance. The fur side will lie flat, while the ribbing side will fold up while you are wearing the hat.
Step Five: sewing the crown of the hat.


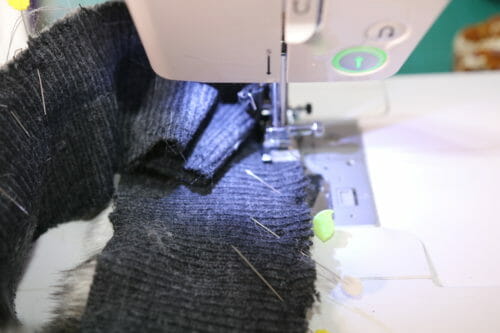
I am using a thick ribbing fabric which unravels very easily so I have to manipulate it as little as possible. Start by pinning the peaks of the hat to shape it into a dome. Pin and stitch at 3/8″ seam allowance. Zigzag the seam allowance or use your serger. Continue pinning and sewing until you have sewn all the peaks. Close the side of the hat by pinning and sewing the side at 3/8″ and align with the stitch row on the other side. To find it fold the hat in half and it will be the one that aligns with the side seam. Sew at 3/8″ making sure all the seams are flat.


Press the seams to one side using your tailor's ham. Please use a bit of steam and a pressing cloth to make the seams lay flat. If you are using wool as I am, work the fabric on the proper wool setting on your iron.
Step Six: attaching the brim to the hat.


This is the tricky bit of the tutorial, and it is all because of the nap pile of the fur. Place the cap right side out with the edges folded upwards. Place the brim with the fur on the outside of the cap. Notice how the edges of the cap have stretched out a bit. This was caused by me handling the fabric too much. I was careless. However, it is jersey and the stitching line is only 3/8″. Before I sew I have to see if the size has changed. The way to check is to measure the edge, then measure the pattern if it has changed, take in the difference at the side seam. The fur will be sandwiched between the 2 layers of ribbing. We will need to join the three layers of fabric (two layers of ribbing and one of jersey) while not sewing the long hair.
By pushing the long hairs down, you will be able to see the down hair shown here on the picture below. Right under the down hair is the jersey. We will catch the down and hair with the jersey, while avoiding the long hair.


Pin at an angle with long pins. Sewing all these layers will be a challenge for your machine. Here is where you might need a walking foot. If you do not have a walking foot, start by using a large zigzag to catch all the layers of fabric.


Then sew the three layers at 3/8″. Zigzag with a large stitch, but do not trim the edge. You will have caught a few hairs here and there. Pull the hairs gently back out of the seam allowance to return the hairs to the nap pile underneath using a long needle. The last step is to topstitch the seam allowance at 1/4″ so it lies flat. Use a zigzag stitch.
Give your winter hat one last steam with the iron and a cloth and you are ready to wrap this baby for a wonderful gift. This is an easy and fast hat to make, in an hour you will have a wonderful accessory that is sure to last you or your loved ones for many winters to come.


I am confused. Do I need to purchase the ribbed material in a 4″ or 8″ wide piece? Can someone help me here?
Hi Phyllis, Please see the fabric requirements listed in the materials needed for this project.; I used an old sweater it worked just fine.
I went back and re-read, I need two pieces of ribbing?? one 4″ and one 8″? is this correct now??
Yes, one piece to make the cap and the other to line the fur.
I tried it before. It looks so simple. But somehow I have always made a wrong pattern for it. Now I will try yours. Thanks.
It’s Liz again. – I finally did get the pattern. It’s all OK. Thank you so much. I love it and hope to get it made in the next day. 🙂 Liz
Hello – I have downloaded this pattern after having followed directions to download latest Adobe Acrobat Reader. When I tried to open the pattern, I got a message saying “There is no application set to open the document “Hip9qlpJpdf.part”.
Can you tell me what I must do? Thank you for your help. I would really like to make this pattern – It is just what I need. 🙂 Liz
Can fleece be used in place of ribbing?
This hat is nice, I don’t usually wear winter hats (even though I live where it is COLD in the winter), Most winter hats are just not that good looking. This is one I might actually wear! I love your patterns and very clear instructions.
A great pattern for winter. Easy enough with the easy to follow instructions. Thank you!
Great pattern but why not buy a knitted hat and trim the brim with faux fur. Then you can fit any size, from child to adult.
Great idea, but this is a pattern for people who want to use and old or ugly sweater and repourpose old clothing.
Hi. I am a pretty expeienced sewer but I am having some trouble with the directions. Are there any directions available that are a little easier to follow?
How can I help you, Debbie, what part is not clear to you?
If I were to knit the hat instead of using fabric or ribbing (or sweater) do you have any idea how many stitches I would cast on and what the directions would be? I am thinking I would knit a 4″ band of K2 P2 to keep it flat and then stockinette stitch the rest. I have seen where you actually make 2 knitted hats and the mink fur is placed inbetween the 2 hats with a thin lining attached to the fur and sewn just like yours. I’d like to use your pattern but at a loss as to cast on # and directions.
Thank you so much.
I have not knitted this pattern so I do not know how many stitches you would have to cast. However, I do think you need the size of the head (around 22″). Cast as many stitches you need until you achieve 22″ then continue making the 4″ band the rest you will have to judge by the sight because it all depends on how many stitches you started with.
Can this be adjusted to fit a child?
It can, you would have to reduce the pattern depending on the age of the kid. Compare the pattern with the measurement of the head of the kid, then make the necessary adjustment.
what exactly is ribbing and where do you get it
Ribbing is a fabric that is knitted as a band and sold by the yard or meters on any fabric store. Here is a good example
I have an old mink coat of my aunts (very short empire waist length)! that i will cut apart to use for the fur. Perfect! Perhaps earmuffs for the remainder of the coat fur, or does anyone have any other ideas for what i can do with the rest of the mink?
How about a detachable collar for a favorite coat to dress it up or maybe detachable tops like the faux boot socks for your favorite boots?
You can make a pair of gloves with the knit and trim them with fur to match the hat .
I have heard of people using old mink to make teddy bears.
You could use the rest of the fur for the cuffs of mittens. SO soft and warm!!
Thank you for sharing this article. It’s feel good to wear fur hats in winter. I have brought a fur hat from an online store Amifur, this provides good quality of products. I have experienced.
Where are the directions for sewing the winter hat with faux fur trim? They don’t download with the pattern.
They are in the blog article, still free. Enjoy!
Thank you! One question…how would you make the hat smaller?
Justs take out on the sides the amount you want to reduce it to.
[…] Knitted winter hat with faux fur trimming tutorial – 1 freebie(s)? […]
Very cute. I’d love to make a Cloche. Could that be coming later? It seems like Craftsy might be open to a sewn hat class. They have knitted & crocheted ones, but none that are sewn that I know of. Wishing….
So cute! Can’t wait to try this!