


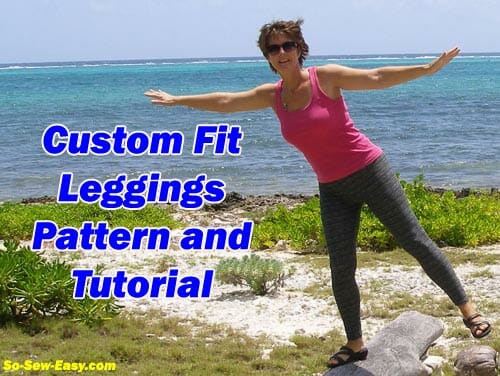
In many parts of the world Autumn or Fall is here and Winter is on the way. It's time to think about wrapping up warm and adding an extra layer. When I'm not in shorts, I'm in leggings. So enjoy this free tutorial for a custom leggings pattern.
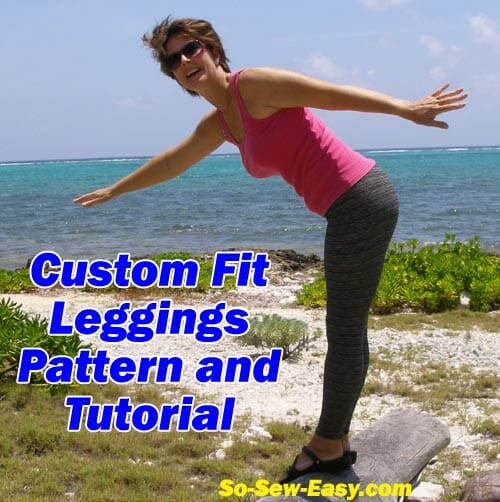
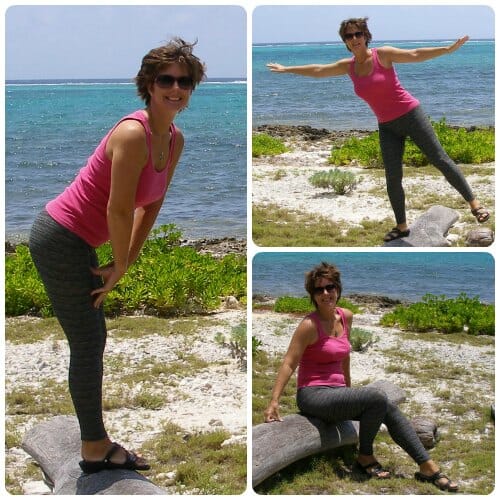
(There's no sensible or glamorous way to model leggings on the internet, so I thought I might as well make a complete fool of myself and have some fun. I can't remember the number of times I fell off this log after setting the timer and running ! These wobbly photos are the best of the lot.)
Surely everyone love leggings. Wear them under short dresses or tunics, wear them to the gym and for exercising, lounge around at home and even sleep in them. Wear them long and ankle length, calf for jogging, knee length or even as cycling shorts. Wear them in wool, jersey, lycra, stripes, prints and lightweight for summer. Leggings are versatile and an essential part of your wardrobe.
This tutorial will show you how to easily draft your own custom fit leggings pattern and my unique spreadsheet will make drawing your pattern easy. This is a quick and easy sew and once you have your pattern to keep, you can run up a new pair of leggings whenever you like in whatever fabric you like.
Taking your measurements
Equipment needed:
- Tape measure and note pad
- Paper to draw your pattern (I use this large roll of paper for pattern drafting and tracing too. Strong but see-thru.)
- Ruler
- Paper scissors
- Painters tape/masking tape
- Close fitting clothing such as existing leggings, tights or just in your undies
If you are lucky, you might have a helper to assist with the measurements, but perhaps its just you, so I've made a video to show you how and where to take these measurements to get the best fit.
(Once the video starts to play, you can change the quality for a clearer picture using the little ‘gear' icon on the bottom right.)
Subscribe to the YouTube channel:
All about ease
Now that you have your measurements recorded, before we start to draft the pattern, there's one important decision to make – ease. You may have come across the term ease before in sewing. Most usually in woven garments that don't stretch, the ease is the difference in the measurement of the finished garment and your corresponding body measurement. So a shirt may have a finished bust measurement of 38 and if your bust actually measures 36 inches, then there are 2 inches of ‘positive ease' in this pattern. Ease is there for two reasons – comfort and movement, and design and styling.
However in stretch garments, comfort and movement are not as much of an issue because the fabric stretches while you move. So ease is more about styling. For leggings, there would not normally be any ease – they fit your body. In fact, in a very stretchy fabric, you may even decide to add ‘negative ease' where the fabric measurement is LESS than your body measurement. This is particularly true of swimwear, maybe exercise wear and certainly shapewear and underwear such as Spanx.
So you need to decide about ease. You can have no negative ease and make the leggings to fit you according to your measurements, or you can add negative ease of up to 10% to make them fit you skin tight with a little stretch – like the leggings in the shops will usually do. The calculator spreadsheet allows you to use any number you like, but I recommend 90 -100% with 90 giving the tight fit and 100 giving the looser fit. Note – adding a number greater than 100 won't work with this calculator.

Using the easy spreadsheet
Now that you have your measurements, you'll want to enter them into the spreadsheet in order to work out the length of the lines for drawing your pattern. You can enter your measurements in centimeters or in inches (but not both) and the results come out in both too.

Remember to fill in the box for ease percentage, a number in the range 90-100 is recommended. 90 for very stretchy fabrics and a tight fit, 100 for less stretchy and a looser fit, and any number in between.
Download the Custom-Fit Leggings spread-sheet from our website.
How to draw your pattern
Start with a large piece of paper. This will need to be the full length of your leggings from waist to ankle plus about 4 inches. For the width, use your thigh circumference plus about 4 inches. Tape together smaller pieces of paper if you need to.
Now find the center of your paper and draw a long straight line from the top to the bottom. This is your ‘center line' and represents the line along the side of your leg where you measured earlier. There is no seam line here on leggings.
Follow along with these instructions as I draw my own pattern. I'm working in a smaller scale to make it easier to see and photgraph.
1. About 2 inches down from the top of your paper, make a mark on the center line. Then measure down this line towards the bottom measurement A. This is the approximate length of your leggings. Make a mark.
2. Now take the ankle circumference B, and draw a horizontal line where you have marked, centering it on the middle line. So if your line B is 9 inches, draw 4.5 inches on one side of the center and 4.5 inches on the other side.
3. From your ankle line, measure up C and make a mark. This is where your knee will hit.
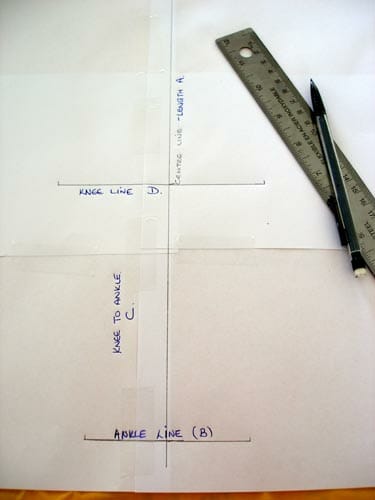
4. Draw line D at the knee point, centering the knee circumference over the center line, same on either side.
5. Measure up from the knee line measurement E and mark. This is your thigh line. Draw on your thigh circumference F, centering it on the center line.
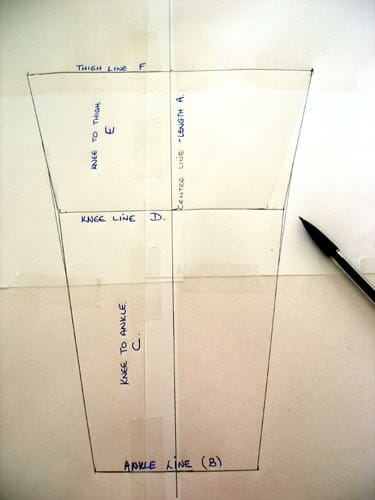
6. Connect the ends of the lines down to make the inseam of your pattern on either side. As our bodies are curved not pointed, smooth out the transition at the knee to make a gentle curve rather than a point.
7. Now it's time to deal with the rise depth. On the right hand side of the pattern, this will be the front of your body. Write front there to remind you. From the right hand end of the thigh line, measure in and mark measurement G.
8. From this mark, draw a line straight up, at right angles to the thigh line, your front rise height measurement H.
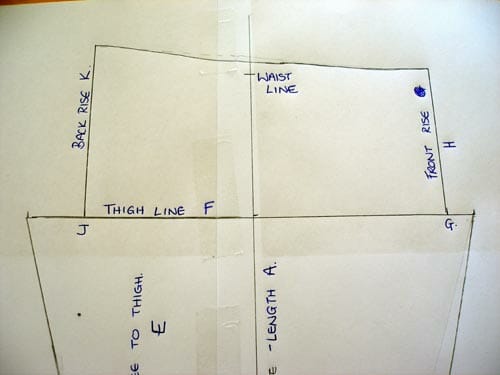
9. Let's repeat for the back. On the left hand side of the thigh line, measure in and mark the back depth J and mark. Draw a line up at right angles, measurement K.
10. Now draw in the waist line at the top between these two upright lines. Start out straight for a little while at the right hand side (front) and curve the line gently to meet the waist at the back. The back rise will usually be higher.
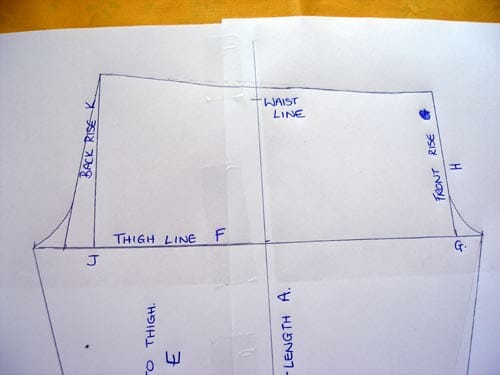
11. Now take your ruler and draw in a line from the top of the back waist to about halfway along that little line that is sticking out at thigh level on the left. This allows for some extra space in the back for your behind.
12. Finally draw in curves using a plate or other round object to fill in those lower corners. Your basic pattern is now drawn.
13. Decide on your seam allowances. For the waist, add the width of your elastic – usually 3/4 inch or 1 inch. For the ankle seam, you only need a small amount – say an inch. For the side seams, it depends on how you intend to sew. If you are using a regular zig-zag or stretch stitch, then you might want to include a standard 5/8th inch seam allowance and trim your seams later. I'll be using an overcasting stitch which sews close to the edge of the fabric so I only need a small seam allowance – about 1/4 of an inch. Draw in your seam allowance all the way round your pattern.
14. Cut it out and mark it up so you can save it to use over again. Add any notes you think will be useful.
This full tutorial on drafting the pattern and sewing the leggings is available as a PDF download for you to keep. To make downloading easy and reliable, the tutorial is hosted in my design account with Payhip. If you don’t already have an account, you will need to sign up to download, but don’t worry, it’s free, quick and easy. Add the pattern to your cart, and then checkout – no payment/address details etc needed.
Types of fabric to use
If you already own leggings then you will be familiar with the types of stretch fabrics they are usually made from. When selecting fabrics, stretch and recovery and most important. If the fabric is fairly thick and only has ‘give' rather than stretch then you will find your leggings hard to get on, and stiff to move around in. Look for fabric that contains lycra/spandex at least 5%. 5-10% would be better. Lycra/spandex allows the fabric to stretch, but it also gives it rebound.
A 100% cotton jersey will certainly stretch, but test some out in your local fabric shop or on a scrap you own – give it a good stretch. When you let go, does it look the same as before or does it still look a bit stretched, a bit wrinkly? Without that lycra, the fabric won't rebound back into shape the same way. That's Ok for pj's but you won't want to go out in leggings that don't rebound because before you know it, your leggings will be suffering from baggy bum and loose knees.
How to sew your leggings
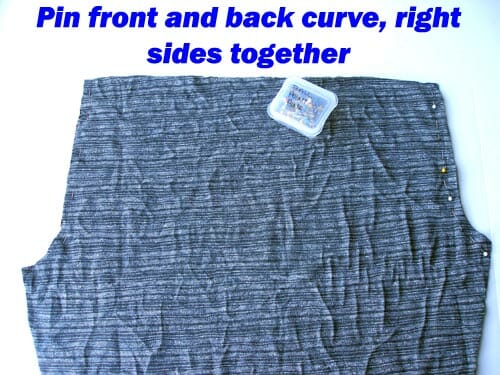
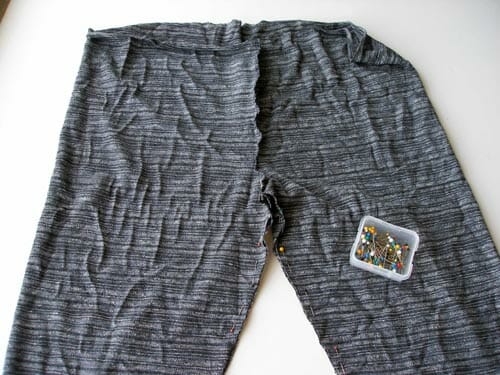
Fold your fabric in half with the two selvedge edges together. Place your pattern on the fabric with the center line parallel to the selvedge. Cut out two pieces of fabric using your new pattern so you get two mirror image pieces.
Put these two pieces right sides together and pin along the front and back curve only.
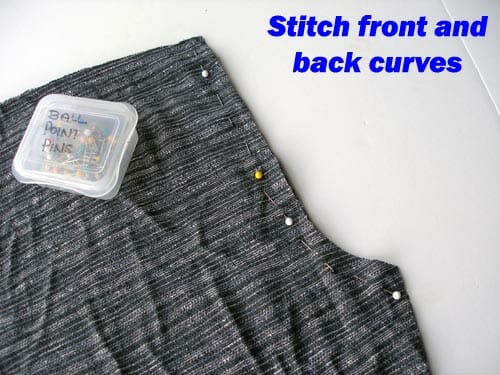
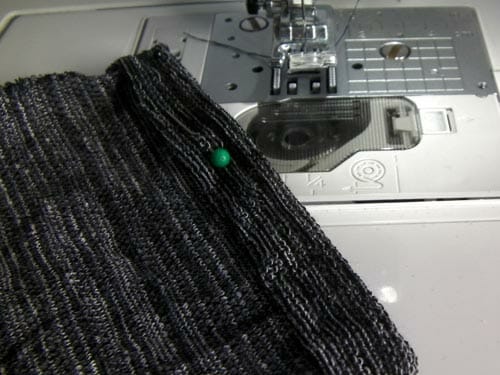
Sew using a stretch stitch, narrow zig-zag stitch or serger to allow the stitches to stretch with the fabric.
Most knit fabrics don't unravel but you might want to trim your edges down to about 1/4 of an inch and then finish with a zig-zag or another row of stretch stitches for strength.
Now pick up the pieces and put the front and back center seams together and now they look like leggings. Match up the leg seams, pin and then stitch.
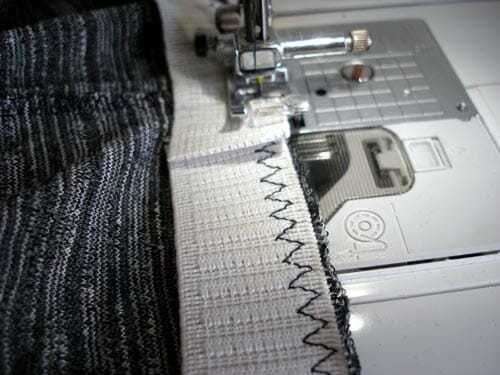
Try on your leggings for fit, adjust if necessary. Check out the height of the waist front and back and make any adjustment. Take your wide elastic around your waist (or where you want the top of the leggings to come on your body) until you get a comfortable fit and mark it where it overlaps, but don't cut it just yet.
On the inside of the leggings, pin one end of the elastic to the center back seam. Now mark half way and quarter way around on both the leggings waist seam and the elastic. Match up those marks and pin in place so the elastic is evenly spaced. You may have some excess fabric.
Stitch the elastic to the waist of the leggings using a triple stretch stitch if you have one, or a large zig-zag stitch. Slightly stretch the elastic if needed to match the fabric, but don't stretch the fabric at the waist as you sew.
When you get to the overlap, cut the elastic flush with the other end to reduce bulk. Secure the two ends together with a few zig zag stitches.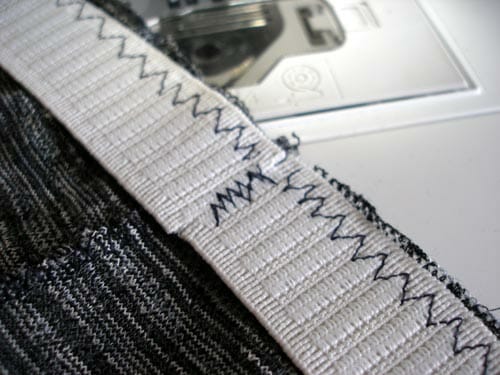
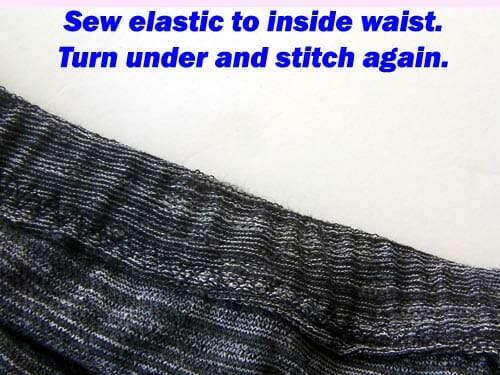
Turn the elastic inwards, keeping a nice tight edge and then stitch again over the previous stitching to hold it in place.
Try on the leggings and check the length. Turn in the hemline and stitch using a twin needle or a narrow zig-zag stitch. And you are finished. Now use that same pattern to go and sew lots more. They're really quick to sew!
The pattern can also be adapted to make leggings for children too. In the case of children, you may probably prefer leaving the ease setting at 100 for a looser fit.
Want to be featured on So Sew Easy? Send in photos or links to things you've made with my patterns or tutorials. Feedback, comments, suggestions and requests all also welcome.
Authored by: Deby at So Sew Easy


Hi, Thank you for this pattern. I really enjoyed making it! I did have to adjust the measurements quite a bit though. One tip I’d like to share: use the material you plan to make the leggging from and use it to take the thigh/knie/ankel measurements. Just take a bit of the material in hand and stretch it around your leg at those 3 points. Hold the cloth where the two points of cloth meet each other again. Remove from around your leg and measure the distance between the two points. It’s not a very accurate measure, but it will give you an indication if adjustments might be necessary. Because I’ve learned that material that is very stretchy requires a much smaller pattern than material that has a lot less stretch. This way you can be more sure that the pattern is correct not only for your body measurements, but also for the chosen material. For me, even after that adjustment, I still had to decrease the front side of the pattern with 5cm for it to fit well. Every body is different I guess. But it was so much fun to make this pattern myself and now I have a greater understanding of how to adjust for different materials and can use this to make lots and lots of leggings that will fit perfectly and comfortably.
I LOVE this tutorial as well as the calculation xcel spreadsheet you created. I just completed my first pair of leggings and fit is PERFECT everywhere except behind the knee where there is quite a bit of excess fabric. How do I correct this or alter pattern so my next pair is a better fit at BEHIND the knee? At front is a perfect fit above and below on BOTH sides :/
Thank you for any suggestions you may have.
Hi again, I am having difficulty find anti pill fabric here in the UK but will continue to look. I do need though a general idea of how much is needed in general for a size 14UK. Thank you
Hi, I have made this pattern before but cannot remember in what fabric. I am thinking of Cotton Jersey but what is the best weight. I’ve seen 210gsm and 240gsm. Which is the best for this pattern please
Hi Jennifer, 210 gsm is the norm for leggings however “anti pill” is far more important since a few wears can make the leggings weak on the crotch area.
Can you help? I have rechecked my measurements and the pattern. I wanted to make 3/4 length leggins. I put a length of 85cm but have ended up with a pattern closer to 97cm. I have full length (and baggy) leggings. But I don’t understand why they are so so long.
I don’t understand what has happened. Where do you start the rise – lower than the thigh measurement? According to your calculator my rise + t-k length and k-c length equals 92/97cm not 85cm. Any help would be appreciated.
Thank you for this pattern guide! I’ve been struggling to find leggings that fit me so it’s awesome that I was able to whip up this pattern. I was wondering though: Why do you not ask for the low hip / butt circumference? What adjustments should be made if someone has a big butt?
Thank you!
This pattern works with the measurements of the body whatever they are.
In point 7. It says From the right hand end of the thigh line, measure in and mark measurement G. Measure in what? How many cm? Or how do I calculate it?
Hi Mayra,
I cannot get the sheet to perform as it should. What is the correct excel version for this spreadsheet?
Thank you for a fantastic leggings pattern. I must have made an error on the front & back measurement, because even adding the seam allowance for the width of the elastic, they are about an inch too low in the front, and two inches too low in the back, before I add elastic. Any helpful hints on adding a waist band? I plan to reverse engineer one from my workout pants, but thought I would ask in case you have a handy guide for that. Aside from the front and back rise, the leggings turned out great!
Hi Am, it certainly depends on the fabric you use, the amount of stretch is paramount in this project. Measure the width for the waist of your leggings and cut a rectangle that is the width of the waist minus 1 to 2″ Times de height you want by Two, in your case 4″ in height. Sew the ends together to make a band. Pin the seam of the band to the back and the rest divide in front and sides and pin to the leggins. Sew using and overlocker for best results. Good luck!
Ah ha, I figured out how to get the spreadsheet to work halfway (by using a Chrome Office reader/editor to open the file.) I entered the measurements but the ease percentage field does not seem to affect the results. Also, the results are only offered in cm, although I entered my measurements in inches. I can calculate the inches I need by dividing all the cm results by 2.54, however I don’t know if there are any other calculations needed. If I want to use -5% ease, do I multiply my resulting inches by .95? Thank you for any help you can offer!
I have no idea what to me so long – I had started the pattern, almost three years ago!, and finally decided to give it a try – without even checking any if the measurements. I don’t think I’ve ever had better fitting leggings before!
I plan on making more of then them at shorter lengths – to wear against chafing under dresses/skirts, from leftover of the same fabric. Thanks for a great pattern and tutorial!