


 Sewing gives me a lot of pleasure, but actually sometimes also quite a bit of pain. I get a pain in my back when I sew for a while, and when I took a good hard look at that recently, I realised that a lot of it may be due to the fact that my foot-pedal leg often starts off in a comfortable position, but the more I sew, the more it extends outwards as I chase my foot-pedal across the floor.
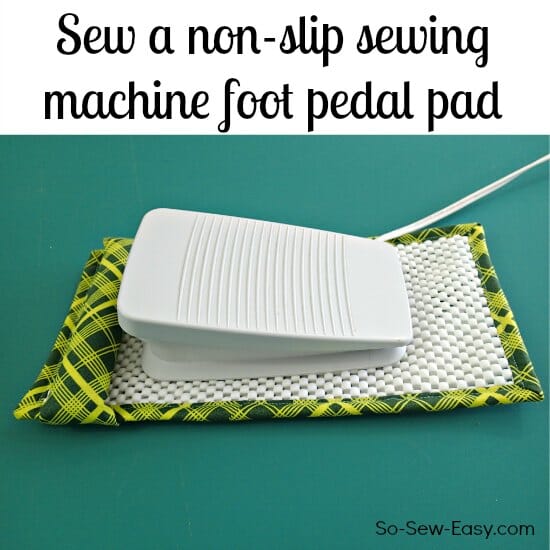
I have a tiled floor and the foot pedal seems to slip further and further away throughout my sewing session, until I have to fish it back again. It's this sitting with one leg extended, sitting at an angle that I'm convinced in a back-breaker for me. So I set out to solve this dilemma and sew a non-slip sewing machine foot pedal pad.
It's not pretty, but it works, and that's what matters. My foot pedal stays put now a lot more than it did before. I think this would work if you had a wooden floor or carpets too, not just for tile. Here's how you can make one – it's pretty cheap!
Materials to make a non-slip sewing machine foot pedal pad
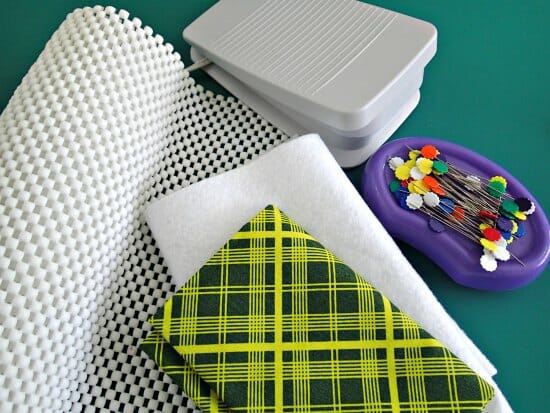
- Roll of non-slip spongy material, often sold as drawer or shelf liners (alternative UK Link)
- Some fleece, batting, felt or similar
- Quilting cotton, or other fabric, less than a Fat Quarter
- Straight cut or bias strips, 2.5 inches wide
Start out by measuring your foot pedal and decide on how big you want your mat to be. I'm guessing the bigger you make it, the more grip it will have. But bear in mind, this stuff is non-slip so it will also grip onto all your little pieces of thread too and could end up a big thread nest, so don't make it huge.
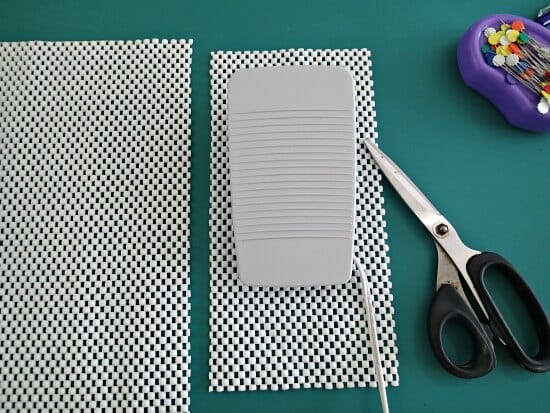
I drew a rough ‘pattern' from a sheet of paper and used it to cut 2 pieces of the non-slip liner. Make it round, oval, square – whatever you like. I made mine rectangular so that I had some padding under my heel too.
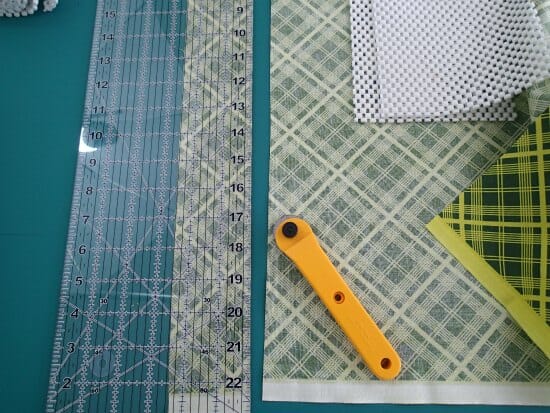
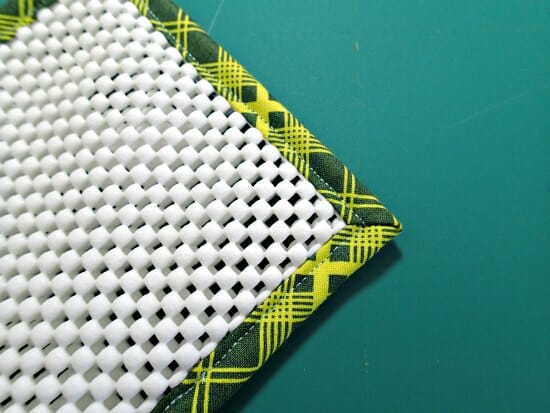
Now make or unwrap some binding tape. If your mat is square, you can use a straight cut binding. A jelly roll strip would be ideal for that. If you've made it round or oval, you'll want to use a bias binding tape. Check out these tutorials on how to estimate and make continuous bias binding, and how to get neat corners.
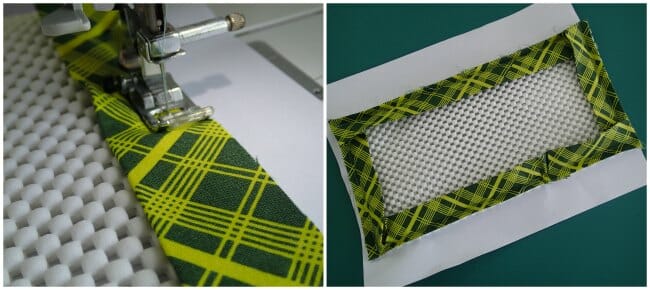 Apply the binding all around the outside of the two layers of non-slip grippy stuff. You might find because it's grippy, that it's going to grip the plastic of your sewing machine. If that's the case, slip some tissue or even some regular paper underneath to help it feed through. Here's mine sewn to the paper. It perforates as it sews so it just pulls off afterward.
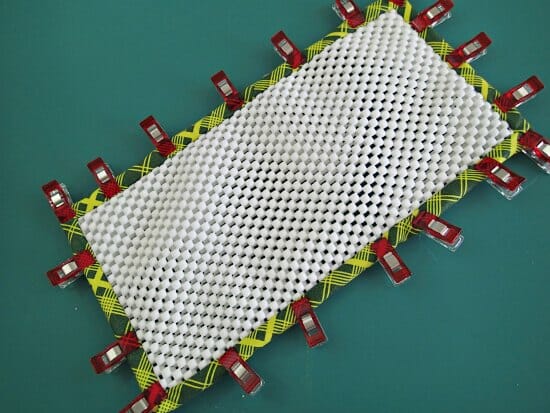
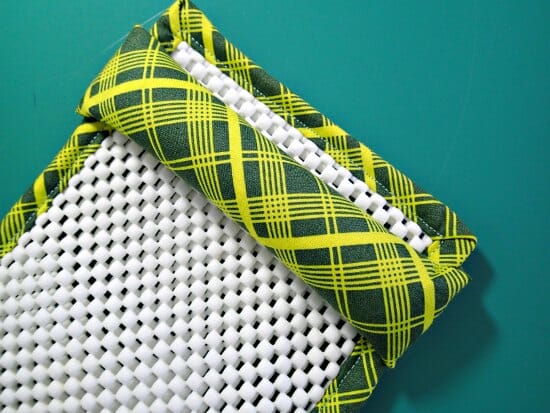
I folded my 2.5 inch binding in half and sewed it to the top, then folded it over to the back and stitched again. It's not the greatest of neat jobs, but hey, who's looking under my sewing table! Get out of there…
Because we are constantly applying pressure to the back of the pedal, it can still slip forward so I thought having something to prevent it slipping off the front of our mat would be a good idea. I created a roll of some scraps of felt that I had layered with some fabric.
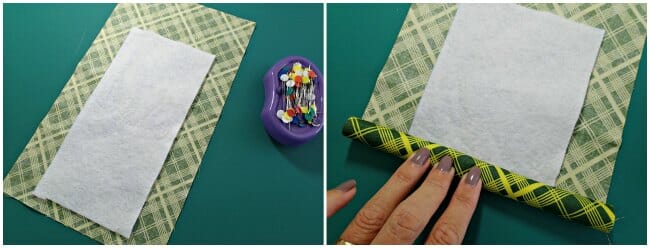
Cut a rectangle of fabric a couple of inches wider than the mat. Cut your inner padding piece an inch narrower than your mat.
On the wrong side of your fabric, place your piece or pieces of felt, fleece, or batting and start to roll it up. When you get it as thick as you want it, snip off any remaining filling. Leave your fabric an inch longer.
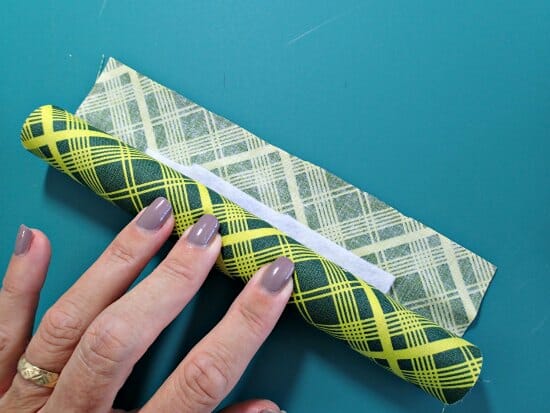
Turn under the raw edge on your fabric, roll it up and then hand stitch it down to complete your ‘sausage' to go at the front of the mat. The ends should be thin, without the filling so these will be easier to sew. You can even get your scissors in there and snip any fabric from the center of the roll that you don't need.
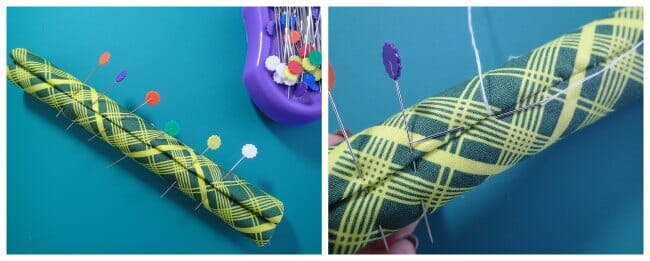
Now tuck in under the ends on your stopper roll, and tuck those ends underneath to the backside and stitch them in place.
It's done. Place your foot pedal where you want it to go, more confident now that it's going to stay in place better than it did before. Your back will thank you.


When I made this wonderful little project I copied your instructions and pictures from the webpage. Is it okay to share the document I created with others that I communicate with on the internet? Or do you consider that inappropriate? Please advise!
Yes that would literally be unethical since we make money from people actually spending the time to read from the site. It would be better to share the link with the people you communicated.
Thanks so much, we will certainly direct people your way to learn from you. You always have good information!
I made two of these for me and my Mum. I didn’t roll the fabric but instead made a tube and stuffed it with toy stuffing.
Making these for my sewing friends this year for Christmas.
You two are geniuses!!! I have needed one of these for such a long time. They are so expensive. I will try your pattern. Thanks so much!!
When I injured my ankle, I had to go to physical therapy and do an exercise which used a little thing I’ll call a “teeter totter” to stand on and rock it from side to side without it touching the floor. Anyway, I had my husband make me one for home so I could use after therapy ended. I had him put the non-slipping stair tread strips on it, so I put the non-slip shelf liner like you are using around my presser foot and am holding it on with large heavy rubber bands like what come on produce with an old washcloth in between. It moves a little, but I find if I turn it sideways and put my left foot on the one side, I still have access to the other side for pressing down with my right foot. This works for me on my Featherweight, but this looks a whole lot easier. Maybe I could put the bumper roll all the way around as well as across as someone suggested previously. I think I’ll have to put this on my “to do list.” Thank you for the tutorial.
Hello,
I made one yesterday and it’s perfect for staying the pedal in place. I don’t know how to post a picture…
Neat Idea!! I use the spongy shelf liner under sewing machines (cut to fit) to keep them from sliding around on tables or counters, under my cutting boards in the kitchen to keep them from moving in use (no more cut fingers from moving boards), and anywhere else I can think of where I want to keep something from moving! Inexpensive, and works everywhere I’ve tried it.
This is so cool. I need to make one of these for my drum pedals.
I love your idea and may make one since I happen to have some of that gripper stuff. However, for more years than I can count, I’ve used a computer mouse pad – remember those? They had a rubber bottom, so I just put a small piece of adhesive velcro on the bottom of my foot pedal and on the top of the pad where the foot pedal would rest, and voila! It never moved on a floor or carpet. I still have several more of those old mouse pads in my sewing room closet in case I find another use for them!
What an awesome idea, can’t wait to make myself one and also for my daughter, thank you so much for sharing.
Thank you so much for sharing this tutorial. When it came time to make one I couldn’t remember where I had read it. Went ahead and made it from memory. I used one layer of the gripper material on the base and padded the top with some denim from upcycled old jeans. I also added a loop the the side of the mat to slip the pedal cord through to keep it out of the way, has the added benefit of always being attached to my pedal and can’t be lost. Thinking I might make a sewing machine mat and matching pedal mat for one DIL for her birthday. Thank you.
Creative Art Work! You have something in you. Keep going…
I LOVE this idea and have to make one ASAP. Funny story–I thought my sewing machine (only 3 years old) was not working, because it would keep sewing even after I lifted my foot from the pedal. Several times, I had to turn the machine off in order to get it to stop. After many mishaps over several days, I discovered my pedal was creeping UNDER MY SEWING CABINET and was getting stuck!!
Oh dear! that is funny!
I had that same problem, but I knew what it was . One day my husband was watching me sew when it happened and I couldnt get it pulled out fast enough and was panicing as it was sewing away, I quickly hit the off button and he was standing with a shocked look on his face, he said he though I was sewing my finger..lmao
LOL – I’ve had that happen too. Or, mine wouldn’t sew and turned out I had just enough leg pressure on my knee lift to keep it from stitching (they’re very sensitive) LOL
Love it! Made one & it works great so far. Thanks!
Hi Vickie, thanks for the feedback. Would love to see a pic if you can post here in the comments.
Great idea and I went right to work. I had already tried putting that non-slippery stuff on the bottom of my pedal but it didn’t help but this seems to be working. Because I’m always leaping from one machine to the other I had to make two of them and the second one came out better than the first of course. I ended up adding a button to make that role more secure. So thank you I’m grateful.
Those of you with hard wood floors, sew a piece of the grip stuff on the bottom of the pad. OR just put binding around the grip fabric so it grips both sides. I’m going to make one.
I made one and put a rolled area on both ends doesn’t move at all, also made second one with padding around all four sides worked even better. one for guild and one for home, so one is packed all the time.
Great pattern. I’ll be making one with a bigger raised heel rest for my overlocker & coverstitcher (they use identical pedals) as that really helps to control them better at slower speeds. This design will be ideal. Thank you ?
I made one a couple of months ago and love it. I’m actually going to “show-n-tell” it at our monthly mixers day. Should be a great hit.
I made one to take to my guild and on retreats I love it.
I just slide my pedal sideways against the wall in back of my sewing machine. It never moves but it is on carpet. Very comfortable for me.
This is fanastic. So simple but very effective. Thank you for sharing your design and construction instructions.
Is there a printable pattern for this ? Would like to use this at a quilt retreat for everyone.
Think I could do it but would like more directions thanks
I had made a footpedal pad similar to the one shown here. It certainly slowed things down on my hardwood floors, but the footpedal still shifted over time and I would have to re-position the it again, just not as often. Then, a little brainstorm happened! I placed an old mousepad under the whole thing and Voila! nothing moved at all! So before you make a footpedal rest, try using an old mousepad. Maybe it will work for you!!
I had the same problem. I will give the mouse pad a try; great idea.
I took it a bit further and got a mouse pad with wrist rest. Set it down backwards on the floor, put the pedal on it and the mouse pad wont move nor will the pedal move because it’s up against the wrist rest.
I love it. I want to make one for my sewing room but where can I buy roll on non-slip spongy material?
Geraldine
In the housewares dept at Walmart,etc…look for the under rug products..works great
I found it at the dollar store, for guess what? A dollar!
Dollar tree..dollar general.. Walmart.. target.
I am using the non skid fabric that I put on grandkids footed pj’s. Purchased at Joanns.
this is just what I have been looking for! I’m a little confused how the rolled stopper is sewn onto the mat. I don’t see any stitching on the top? could I see the back of the finished mat that would help a lot. thanks
I turned the “roll” over and sewed it to the back binding, then flipped it around and over to the front. I hope that makes sense.
. Brilliant. Thanks for the idea and tut.
Brilliant idea much better than just using non slip mat, which can still move. Padded bar will stop it moving under the back of my sewing cabinet .??
Thank you so much! Chuckled at your “get out of there” comment!
I accomplished something similar by using the same nonslip material and double sided tape. Put the tape on the bottom of the pedal and the nonslip material (cut to the size of the bottom of the pedal) on top of it. I like your idea of the stopper strip so I will try making your method as well. Nice idea!
I just made this tonight and I accomplished so much more consistent sewing without having to find my foot peddle. Thank you for this pattern!
I Love the idea. I have been using something similar. Just using the nonslip material under my foot peddle. I has worked great on the rug too. This would make a great gift for my sewing friends.
I made 3 of these for each of my machines. They work great.
Sorry if I missed this info somewhere else: is it washable?
Thank you! Brilliant!
love this. My freinds and I get together to sew once a week. We each will make three one for the sewing machine, the serger and the embroidery machine.
So sorry for the previous question. I should have studied the pattern closer. I see it has the gripper on both sides.
Can’t wait to get it made.
I had the same question,Bonnie. Thanks for clearing that up.?
I have all the materials around to make this but was studying the pattern and realized, no gripper on the bottom. Maybe most have carpet, I have wood floors so worried it will slip around still. Any suggestion So?
I had to read the instructions twice…there is gripper on both the top and the bottom. The binding goes around both layers. I am going to pick up what I need today!
Brilliant idea. I’m going to make one.
I made one yesterday. I have carpet so when I make another one for my surger I will put cardboard between the layer of shelf inner, which I have used for years. It will give it more stability. great idea. thank