


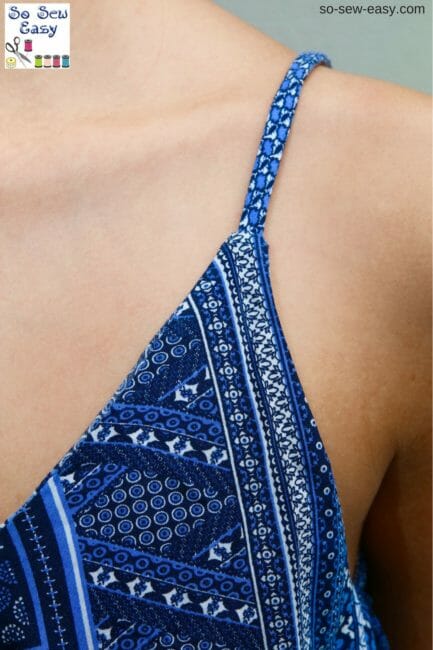
Step Three: Making The Straps
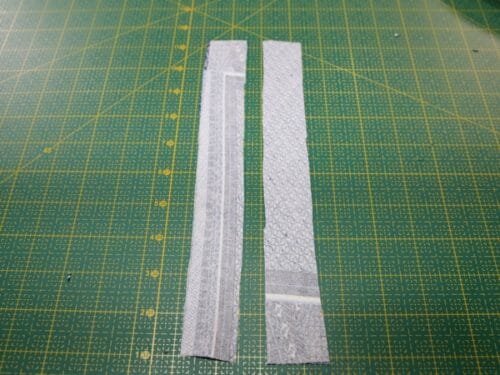
Cut two strips of 10 1/2″ long by 1 1/4″ wide. Apply a very thin fusible interfacing.
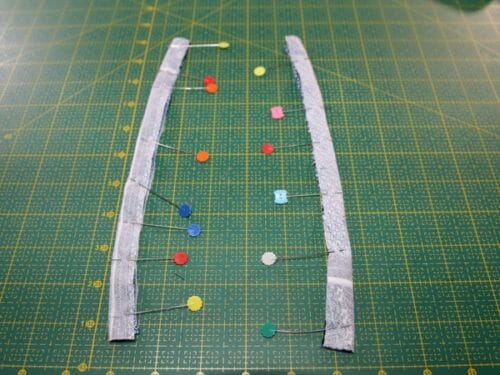
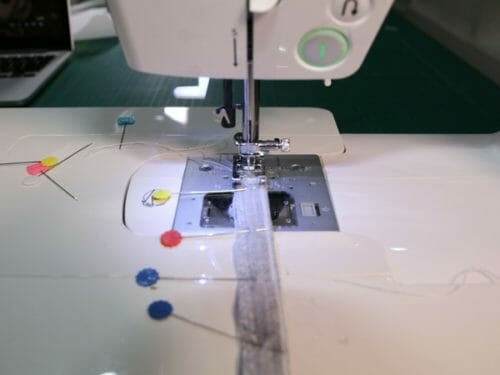
Fold the strips right sides together in half and sew a 3/8 ” seam. It should be right down the middle of the strip. There is no need to trim the seam allowance because we will be using it to stabilize the straps.
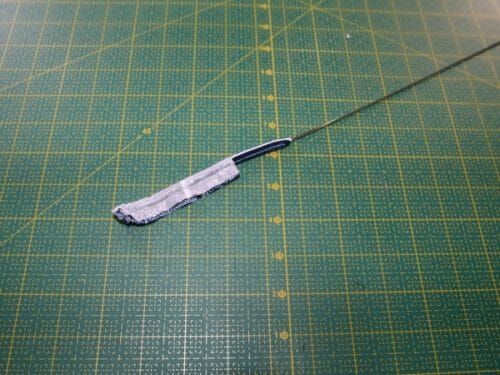
Using a loop turner, turn the strap inside out. Iron and put aside.
Step Four: Assembling The Easy Romper
Sew the sides of the flounce and zigzag or serge, turn right side out. In the next steps, you will be working from the inside of the romper.
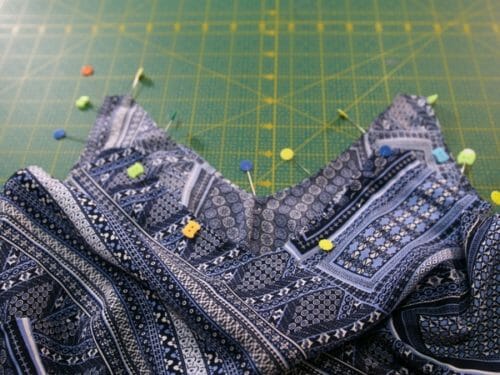
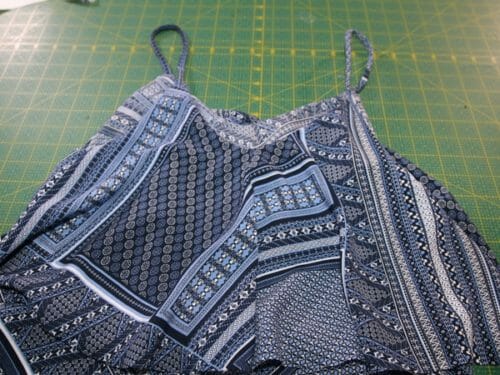
Pin the straps on the wrong side of the top. The strap will be hanging around the armhole area.
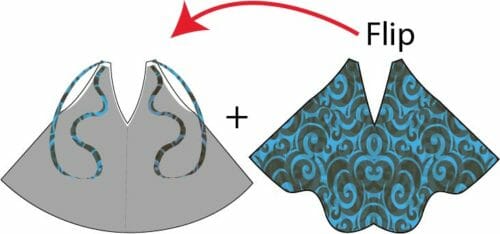
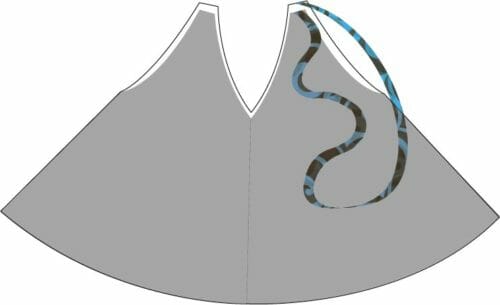
Pin the flounce (right side of the flounce to the wrong side of the top). When you see inside the romper, the flounce will have the wrong side showing.
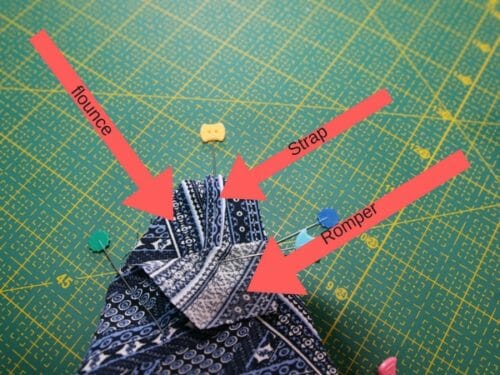
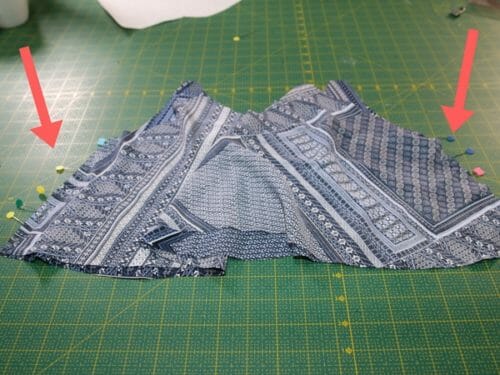
Lay the romper on your table wrong side out. You should have three things pinned together at this point.
- the romper the wrong side showing
- the straps
- the flounce pinned to the top, wrong side showing. This means the strap is sandwiched between the top and the flounce. Turn your work inside out. This is so you can control the seam allowance perfectly. If not, the top will deform. Trust me I have done it..
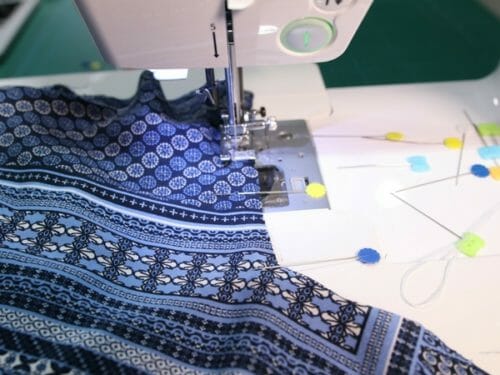
Start sewing on the right side from the strap around the neckline, then the armhole area, then the back. Leave the strap for last. This point is important as it will make the difference between someone asking did you make that or where did you buy it?
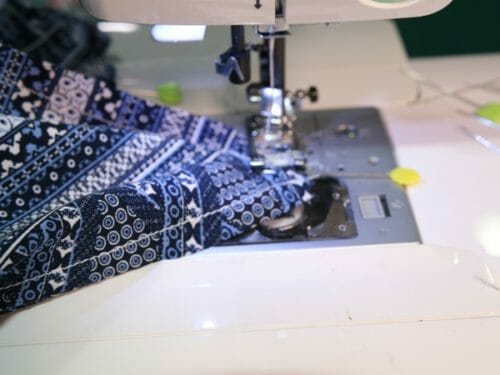
Sew the straps down last. The reason for that is so that you can adjust your sewing in case that area is too big for the strap. It needs to be just right so the top can turn inside out well. As you can see in the picture, I had to adjust a bit. It happens often even to experienced sewers. The important thing is to know how to fix it.

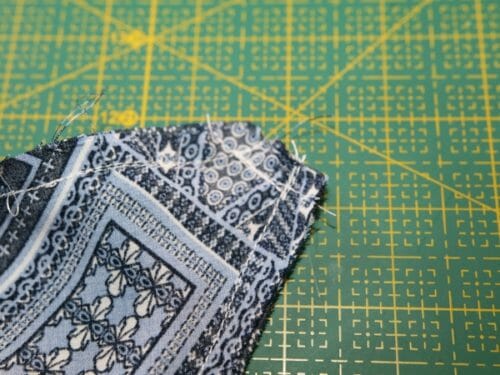
Clip the corner and trim the seam allowance and zigzag or use your serger. Turn the flounce to the outside of the fabric and press.


I’m thinking the front flounce needs to be MUCH longer in the larger sizes! For us well endowed ladies the flounce on a size 14 barely covers our boobs! It just looks weird. I’m trying to figure out how to add more fabric….a ruffle maybe? I don’t have any wide lace that would go with it sadly
I am having a problem with the shorts. I cut out size 6 following the red dots. The front crotch is one inch longer than the back. I have checked and rechecked the pattern and I cut it out right. What am I doing wrong?
Mayra, perhaps there could put more effort into marking the pattern pieces to be taped together ie 1-3, 2-5 , etc.
OR, ….
each main pattern piece should include the following numbered pattern pieces.to complete, confusing when there are 2 backs, no flounce and 2 fronts with flounce the same with the shorts. . All they say is “Front, back” of what?
Hello Mayra, I am jut about finished sewing this romper… The double fronts and backs were really confusing. I am not a beginner. I made the top inside out and flipping to front side.. Thank goodness I left my frt and bk notes on the pieces. (recommended). Having to slide the straps in from the frt, top, then tacking them in. ‘Waiting for my model to show up to make final adjustments. My fabric was so drapey that the pins would not stay in long enough to sew. ‘had to use plastic clothespins . I put in pockets but may be too heavy. with phone or keys in them. My thoughts for next time.. line up the pieces and use matching bias tape for neckline. Tap pants are finished, so cute.
Hi
I have a question. I cut out my pattern now I am cutting the fabric. But I am confused. On the patern pieces with number 9 it says ‘Cut one on fold’. But there is no indication on which fold I have to cut?
I hope you understand what I mean.
I do understand what you mean, what I mean is the piece needs to be placed on the fold of the fabric and cut so when you unfold the fabric the piece opens as a double. https://so-sew-easy.com/5-mistakes-to-avoid-when-cutting-fabric/
Hello! I’m confused by this piece too as there are no arrows to indicate where the fold should be?
The smallest hips are 25” BIGGER than mine ( 25” is my waist lol) the waist is 7” too big, why is your sizing so large? Do you only cater for large sizes?
There is elastic at the waist and the reason is there is because there is not zippers nor buttons so the waist part needs to go through the widest part of the body, the hips. I would kindly suggest reading the instructions before you cut the fabric.
I’m pretty sure they meant that there’s no indication for which edge to put against the fold. I’m sitting here wondering the same thing!!
I would make a romper
How would you sew a shelf bra unto the top?
I would use a bamboo knit fabric with a 1″ elastic base.
How do I get to the “next page”?
Scroll all the way to the end of the page.
I’m not sure I understand the sizing….is it in cm or inches?
All inches in this site.
do you have away to print the directions
Hi Sandra I only share the sewing instructions on paid patterns. I am working on adding them to the Ko.Fi donation crowd, I think they deserve to have the PDF complete, sadly I have very little extra time, as it is I work around 12 to 16 hours a day.
12 to 16 hours a day to continue to rake in that money! You are a fortunate woman.
why can’t print all pages of the direction or save them I can only print the first page
Thank you so much for this! Mayra, is there a video available to compliment this pattern?
Not Yet Stacey, i do not recommend making this unless you know hoe to join a strap to a point, it is rather tricky for a beginner. It does requires a video, this is the feedback I have gotten from the people who have made this romper.
The pattern will not download ;(
Thankyou so much for this free pattern! I’ve run it up in some cotton fabric for sizing. I will definitely sewing this up in stretchy fabric when I can decide which one I like. I have a quick question, any tips on how to turn this into a trouser suit rather than shorts? I can see this in a 2 colour trouser suit xx
Just lengthen the pattern. you will end with a wide leg romper, would that suit you? It will be fab if you use a soft, drappy fabric.
Super cute pattern! I’m wondering if you’ll ever make a sewing tutorial for this pattern on the YouTube page? I’m a little nervous about attaching the flounce, straps and top. It’s pretty confusing to me. Would love to see it being done!
You are right Krystan, it is simple once you see how tit is done, and it is a technique I used often on summer dresses and long party dresses, lingerie and swimsuits. So it requires a video to refer to in the future, thanks for reminding me.
I love your patterns! How can I download this pattern (and others) now with Craftsy no longer available?
Thank you Danielle, I will get back to you on that!
[…] Schnitt: Den Schnitt habe ich wie gesagt auf „So sew easy“ hier gefunden. Da ich nach etwas Bequemem und Sommerlichem gesucht habe, hat es mich direkt […]
HI! Ive just come across your site and I love your patterns. Any chance you have this amazing Salina Romper design with sleeves???
Hi Nicole, I do not. But, I will be sharing a long sleeve romper pattern for Early Spring.
Thanks Mayra, one question, when i place the pattern on the fabric, i am placing the fabric with the good sides together. Easy to place pattern with the ones that are to be cut on the folded edge. However, when i place the back and front of the shorts, it says I need to cut 2 pieces. Do i place them on a single piece of fabric all on the same “wrong” side or do i place them on a “wrong side together fabric”, and just end up with 2 pieces? Gosh i hope that makes sense!
Hi Nicole, you can cut the fabric on a fold and just move the other pieces away from the fold and you will have two pieces together. Thanks for your question I will explain in a video on how to cut fabric for beginners. Please keep sending me questions, it really hel;ps me to see where I need to improve my posts and videos. I tend to take a lot for granted.
Hi! Is it US size or UK?
Hi Silvia, it is US size.
Hey, what are this for sizes? We tried to figure out, which size would fit, but our measurements are 36, 28 and 39 inch (boobs/waist/hips).
Hi Jette, you need to put this romper on trough your hips so go with measurement. Allow some inches of ease.
I’m not sure if it’s just me, but the link doesn’t work.
Hi Myra! I love this pattern. I was sceptical I could sew it myself but I gave it a go on an old bedsheet as a test. I’m happy to say I will be buying fabric to make a nice version of it for myself today as the test came out fabulous! Thank you for sharing your pattern!
It is my pleasure!
Where are the actual instructions?
https://so-sew-easy.com/salina-the-easy-romper/
I’m sure you get tired of other people’s opinions…. but I’d rather see a larger model wearing the clothes. In this case, the size 4 model is swimming in a size 6 garment, which gives me the impression that it’s going to be huge on my size 14 body. I’d also like to see how it looks on someone that has boobs and a belly. At my size I hesitate to wear a romper and would like an idea of how it’s going to look on my body type. I would adore it, if it looked good on me.
Hi Kim, I don’t mind you expressing your opinion.
Hello Myra,
I am having trouble underatanding at what point ai attach tbe back of the top? I am not understanding the instructions. Also, when cutting out the front top, do I cut out the triangle bit (dart) or leave it and use it as a guide to fold fabric for the dart?
Thanks
Hi Anita, you are supposed to joining the triangle and sew the tip. Maybe you should wait for the video. The instructions are step by step but if you have never made a garment this might be a little advance for you at this point.
I figured out the darts and have made a few garments but I am also stuck on the part where you attach the straps to the romper top and then the flounce. Do I have to have the romper inside out at this point or just normal and pin the straps to the inside? I am waiting for the video but do you have any idea when you might upload it? I would love to finish the romper soon as it is a lovely garment.
Thanks.
Hi Anita yes you need to sew the straps inside out however this is better explained on a video. doing my best to finish it.
super funny u are a begginer
Myra
IS there an easy way to print out all 4 pages of the instructions? I have tried the the 3 dots to the left and then the printerfriendly link. It only prints or pdf the 1st page. I have tried everything to get page 2, 3, 4 etc. I like to print the instructions and place in a 3 hole punched folder and include the folded taped pattern. This way I have the pattern stored to use again. Thanks
Hi Sherrie, not at the moment, I am looking for an asistant to help me do this an a million other things I need to do for the site. Let you know when the PDF is printable.
Hi Myra I like your Rompers how do I get to print it
Use adobe reader, on Actual Size and landscape mode, as of now it is hosted on my Craftsy store, however when is is no longer free you will be able to purchased it on my Etsy shop.