


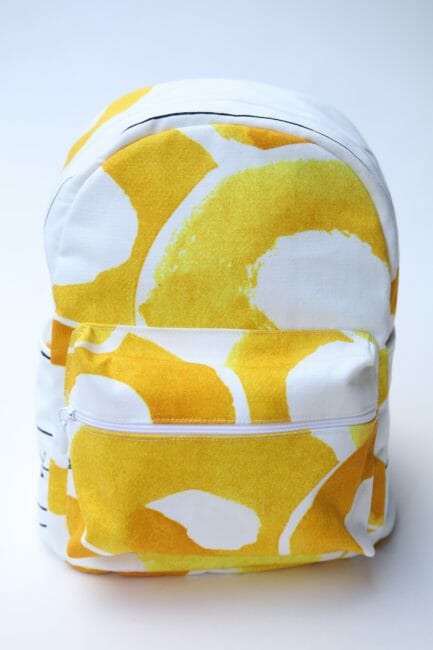
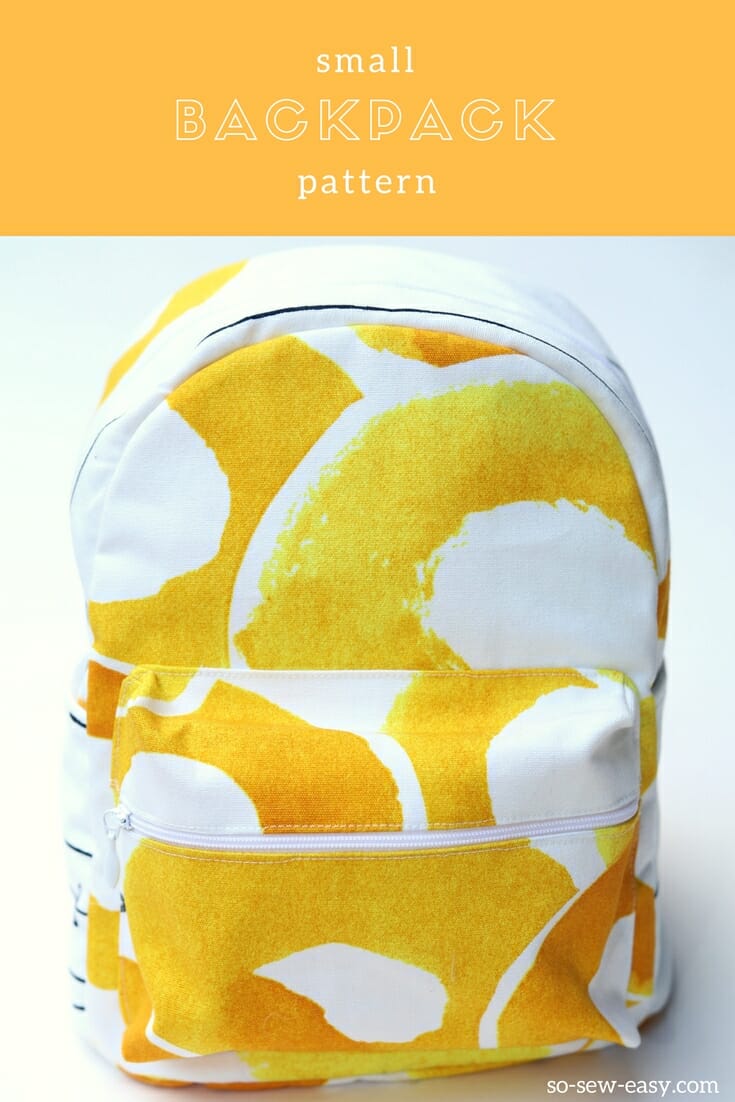
If you have been watching the size and style of bags lately, you've probably noticed all those impossibly cute little backpacks everyone is carrying. Along those lines, I've made this small backpack pattern to be small (and cute) but still big enough to be practical.
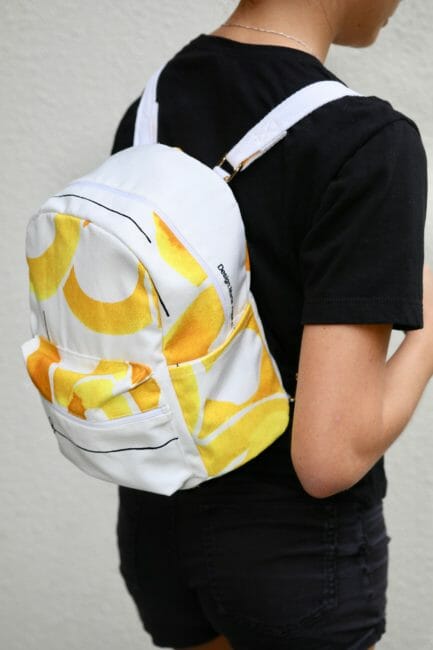
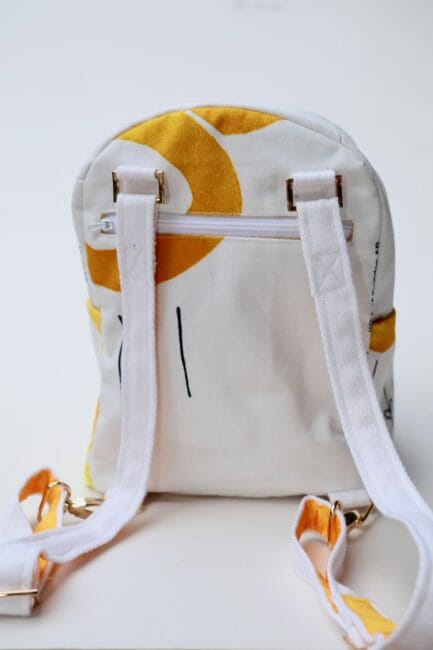
You can also use this small backpack as a cross-over or cross body bag as well. I made that way because I like to have options and truth-be-told, I am a bit paranoid with a backpack. I guess having grown up in Panama where, as the saying goes, “pickpockets can remove your socks without even taking off your shoes” I have had my share of missing money and wallets. This is why I've added a pocket in the back with a zipper. There's an internal pocket, also with a zipper, and even the outside pocket has a zipper. So if you can remember where you put your wallet, the chances of keeping it are high..
There's also a possibility of adding one more pocket to stash your mobile phone, but I will leave that up to you. I will show you how to add it you want it. Please note, however, it will not be included in the pattern, so this is probably for the intermediate to advanced sewists. The rest of the project is suitable for beginners.
This is not an easy-to-make backpack because it involve a few steps, so I have decided to offer this pattern and project as a kind of sew along. The first part will give you a general idea on how to make the backpack and the inside components. You'll find this below.
If you want to find all the parts and instructions to make this free small backpack project, the easiest way is to navigate to this page where you'll find links to all three parts and the video tutorial.
Part two will show you how to make the straps and attach them to the small backpack, and part three will show you how to assemble and finish the bag. Combine this with the our complete video tutorial, and you should have all you need to make this mini backpack pattern.
This is an advanced project but if you love to be challenged particularly if you have just started out making bags you will find rewarding to make. It will make a great accessory for your wardrobe or a fantastic gift for a friend or a loved one. I made two for this tutorial and I'm keeping one and giving the other to my teenage daughter. She loves it.
Video Tutorial
Materials:
- 1/2 yard of canvas, oilcloth, thick nylon fabric.
- 1/2 yard fusible interfacing
- 1/2 yard of lining
- 2″ cotton tape (66″ in total)
- 1″ ribbon (66″ in total)
- Thread to match
- One (1) 18″ Nylon zipper
- One (1) 10″ nylon zipper
- One (1) 10″ nylon zipper (inner pocket optional)
- Jeans needle or leather needle
- Four (4) D Rings
- Two (2) Lobsters Claw
- Two (2) 1″ Rectangular buckles for tensioning the straps

Tools:
- Zipper foot
- Scissors or a rotary cutter
- Walking foot (optional)
Small Backpack Pattern Download:
You can download the pattern for this Small Backpack from our account at Payhip.
For help downloading and printing PDF patterns, please CLICK HERE.
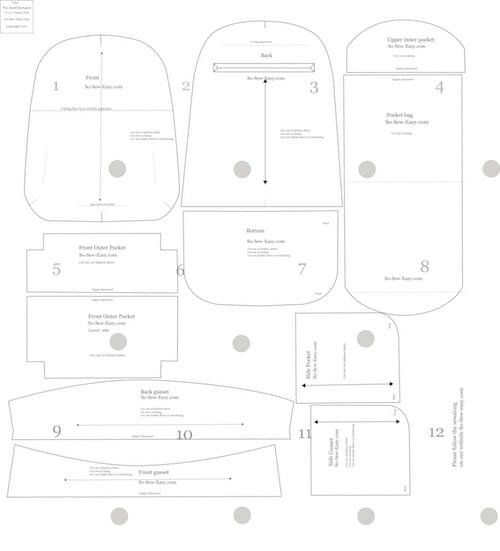
Pattern layout:
This is just meant to show you what the pattern will look like once it is printed and assembled.
Part One [of the Three Part Series]
In this part of the sew along, we're going to be printing the pattern, assembling the materials, and sewing the inside pocket as well as the gusset and the main zipper.
Cut all pattern pieces following the pattern.
A note on fusible interfacing: The use of fusible interfacing will depend on the fabric you choose to work with. Canvas and think upholstery fabric do not need it. Cotton quilting will need both in the outside fabric and it the lining.
I am using 100% cotton fabric from the upholstery section at IKEA and have opted to fuse a medium weight interfacing to both outside and lining fabrics. In hindsight, I wish I hadn't since it made it impossible to sew a cotton tape handle (to hand carry the bag) on the top of the backpack. I could have done it, had I used my industrial machine to finish the bag. However, not everyone has an industrial machine at home. Before placing the handle or using thick upholstery fabric make sure your machine can handle many layers of fabric.
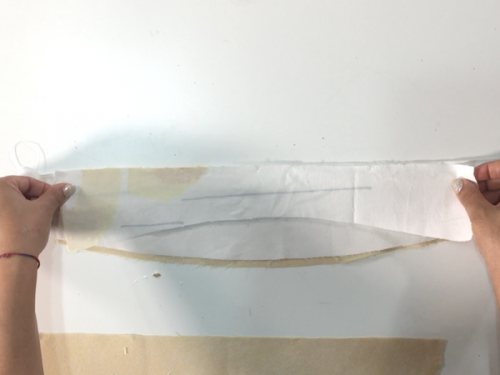
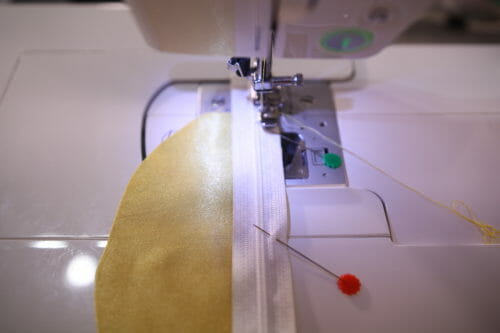
Step One: Attaching the outer zipper
Place the right side of the fashion fabric up.

Place the zipper right side down.
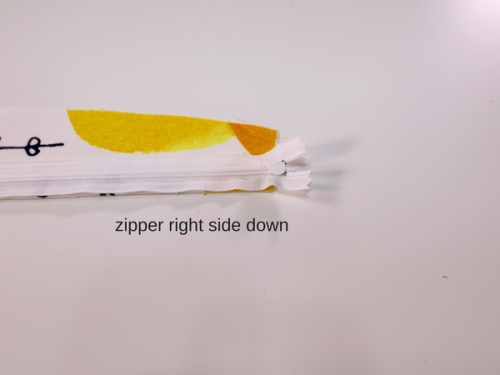
Place the lining wrong side up on top of the zipper.
This will make a sandwich with the fashion fabric.
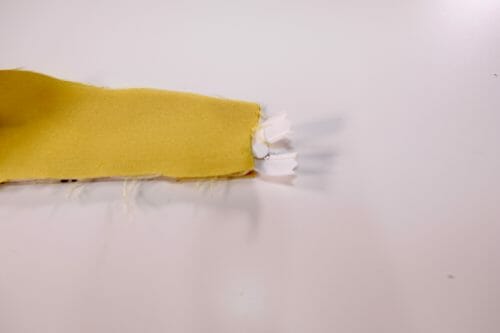
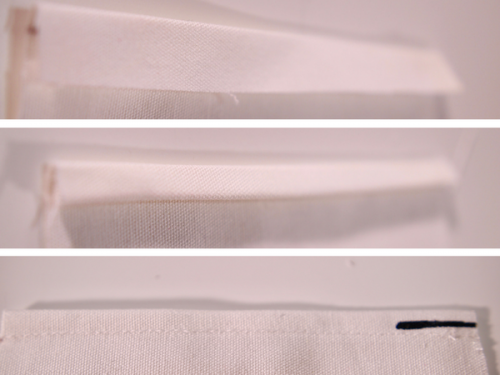
Use the zipper foot and sew at 3/8″. Once you have sewn the zipper down, open to turn to the work to the right side and iron. (We show this in the video tutorial, as this might be a bit confusing for the beginners in the group.)
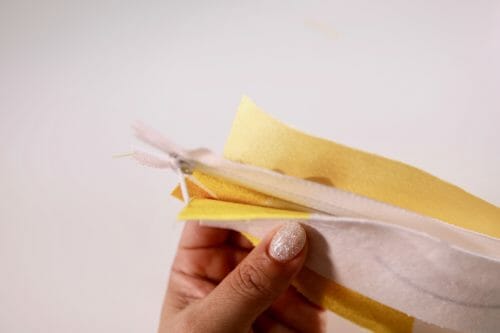
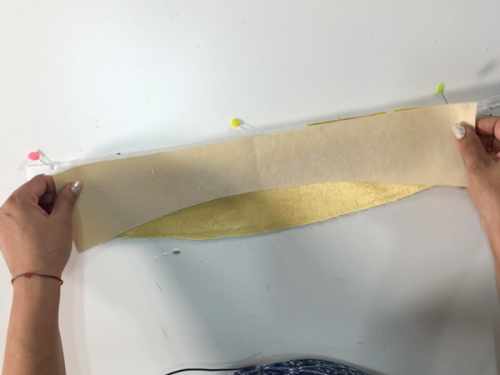
We will repeat the same procedure, but this time on the other side of the zipper. Lay the fabric right up and place the other side of the gusset wrong side up aligning the sides. Pin together and turn to the lining side.
Pin the lining and sew at 3/8″. Iron once again and topstitch.
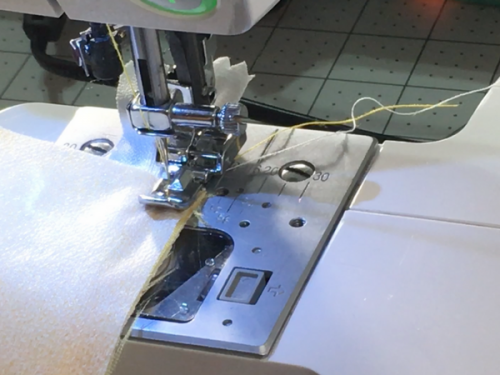
Sew 1/8″ from the edge using the zipper foot.
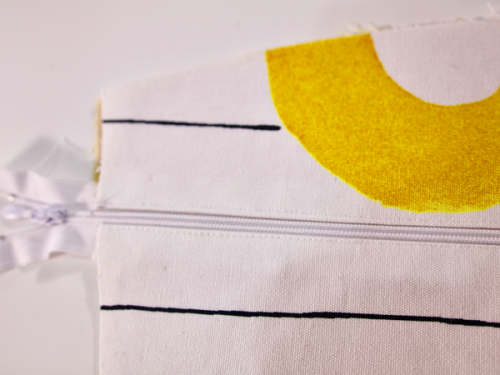
Pin the lining and fashion fabric and sew at 3/8″.
Top stitch 1/8″ from the seam and trim the seam allowance. You can trim the zipper to the edge of the gusset at this point as well.
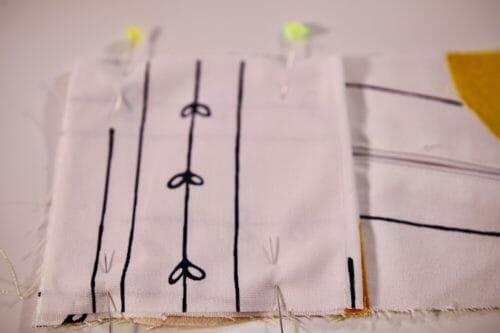
Step Two: Adding the lateral small pockets
Following the pattern, fold the top edge 1/2″ and iron. Use the crease to fold the edge 1/4″ in so it does not show.
Pin the pocket to the bottom of the gusset.
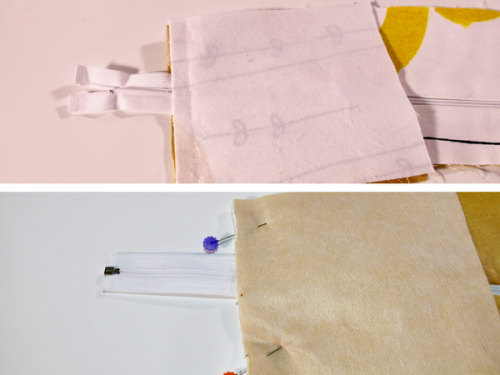
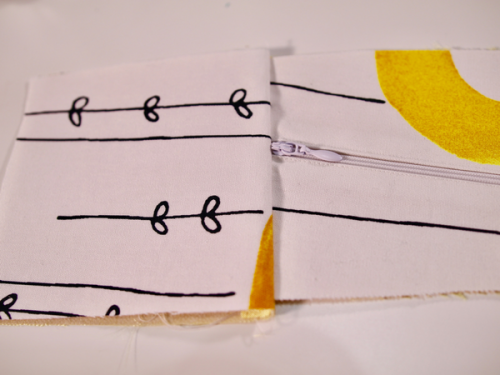
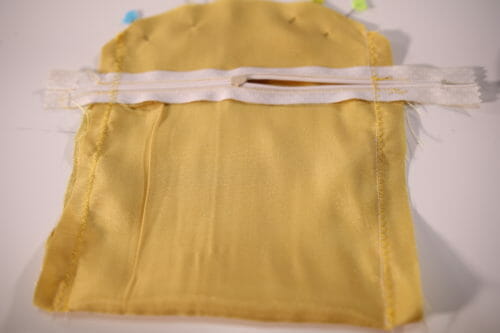
Step Three: Making the small inner pocket
I have chosen to use the lining to make this little pocket. This pocket is small enough for a small wallet but you can adapt it to a bigger size if you wish.
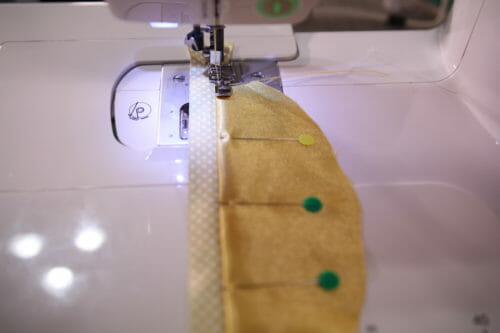
On the wrong side of the fabric, pin the zipper right side down and sew using your zipper foot.
Turn the fabric to the right side and topstitch the zipper at 1/8″.
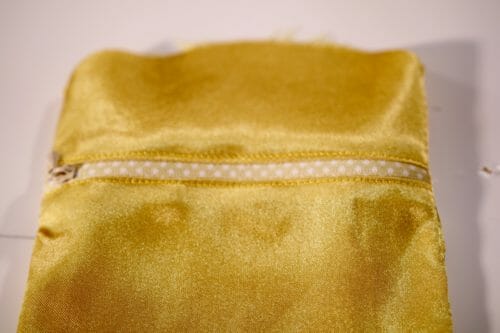
Place your zipper horizontally with the piece you just sewed up.
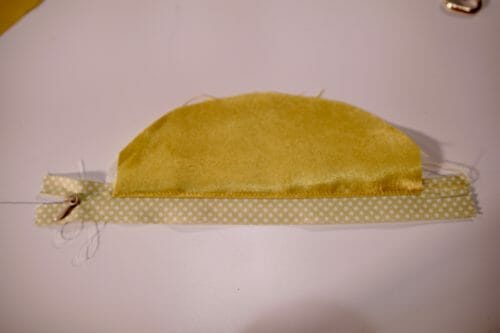
Place the other part of the pocket right side down on the lower side of the zipper.
Sew the zipper using the zipper foot turn and topstitch at 1/8″.
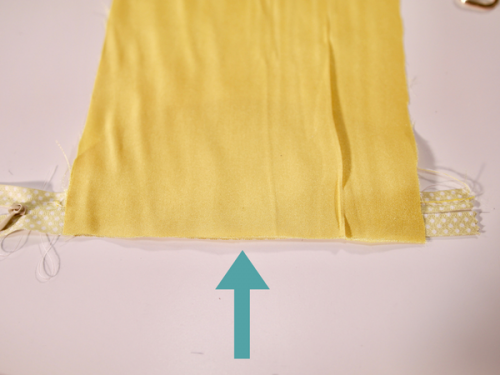
Open the zipper half way.
Sew, zigzag and trim both sides but not the top.
Iron your work.
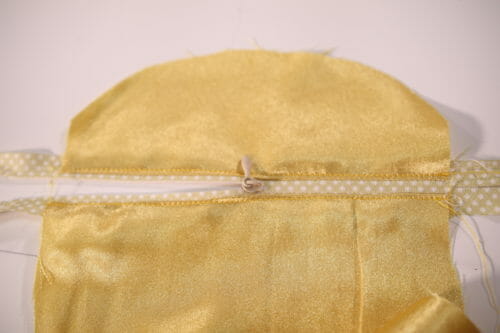
Pin the pocket to the back lining of the small backpack.

As I have mentioned above, there is no pattern for the internal pocket that is big enough for your phone. However, this is very easy to add. Depending on your phone size.
Trace the bottom part of the front pattern side, add 1/2″ for seam allowance on the top fold and stitch as you did on the lateral small pockets.
End Of Part One Of This Mini Backpack Project
And you're done with this part of the project. I really hope you enjoyed this project so far. As a further refinement of this design, I am going to make one in leather which should be fantastic. When I am done will share it with you on Pinterest.

Access All Parts Of The Small Backpack Pattern
All three parts with a video tutorial are out! Click the link here or the panel below to find all three tutorials.


I would appreciate if you would offer a pdf of the entire pattern pieces. I have a printer that does 24″x 36″ paper and I do not want to tape them together.. The cost of printers have come down so much that many pattern makers are offering a separate pdf of patterns.
I like your little back pack !!!!
I will keep it in mind.
Is there an easier way to download your directions? I get multiple pages with many blank spots. I tried it on the mini backpack and the same thing happened.
Hi Sandra, the tutorial is free on the site. You can use the video (3 of them) also free on YouTube.
Hello,
First, sorry for my english …! (I am French!)
Thank you very much for this very complete tutorial: I can not wait to get started!
Only, can I not find information: are seam margins included in the pattern? How much are they exactly?
Thank you in advance!
Gwénaëlle (from Saint-Malo!)
Bon Jour!Gwénaëlle, le marge de couture change et dépend de la pièce que vous cousez. Mais la plupart c’est 1cm. Je n’ai pas parlé français depuis 10 ans donc que mon français n’est plus aussi bon, désolé!
I thought your French was spot on! (and I only took HS French!)
Hi Mayra – I think you need to add 1 more zipper to your materials list. Unless Im mistaken, there are 3 zippers for the outside and then 1 optional zipper for the interior pocket for a total of 4. 🙂
You are right Cathi, above. I made it with the main zipper to open up the backpack, the one on the outside front pocket, the one on the back side, and finally the one on the inside zipper pocket for the iPhone. That is a total of 4 zippers. Also I wanted to mention that I made this, but didn’t cut an extra piece of lining fabric to go behind the inside zipper pocket and actually makes a pocket for the outside zipper pocket. lol My little backpack was super cute also, I just didn’t add that lining piece and so my hand goes all the way through under the zipper pocket from the back side zip pocket.
Thanks for the free pattern! I made it at 70% of its size to make a kind of small purse. It turned out super cute!
I bet! If you use Instagram please use #soseweasy so I can have a pick at your backpack. Thanks!
I’m going to try this for my next version! I can imagine how cute it is that size. 🙂
I am so excited to make this for my toddler out of an old shirt and jeans of Daddy’s 🙂 I’ll send you the outcome when it’s ready.
Looking forward:)
What are the dimensions for the backpack? Its is lovely.
Thank you Mary, it is Width 17″ X Height 13″.
Hi Mayra, is it 1/2 a yard by 1/2 a yard or do I need more width?
I’m very excited to make this bag!!
Hi Milly, 1/2 yard by the width of your fabric typically 44″ to 54. Please read the instructions before you start the project. there is a sew-along on our YouTube channel.
https://www.youtube.com/watch?v=Uy0_zMvB-ig
This is a lovely pattern but you say not the easiest. what would you suggest I try first not having made backpacks before ?
Hi Janet, this is a project that takes a couple of days to make and requires you to handle your machine well. The outside pocket would be the hardest thing to attach. I would suggest to start with this one https://so-sew-easy.com/reversible-fabric-vinyl-tote-bag-pattern/
Do i fuse the interfacing to the fashion fabric before starting anything? or should i do it as i go? also I’m a beginner so I’m still learning what to do for the parts not in the video
Hi Kiko this is a sew along lease click on the different parts of the posts. I like to fuse the fabric first and then cut.
Am I dumb? I see amounts for interfacing and li int but how much of the actual outside fabric is needed???
Hi Kimberly, please check the first item on the list of materials.
this looks amazing! but I can’t figure out where to click to download it or the ipad backpack… help?
After the Tools heading it is an elongated orange button.
Your nails are lovely. Grubby nails on a sewing video are a turn-off.
What size D rings, lobster claws and width of ribbon?
Should there be two side gusset pieces? I thought there would be one for each side. I’m also a little confused why the side pocket piece indicates the curved side goes towards the back. It actually says “back” twice but doesn’t say front anywhere. Should the curve go towards the front or the back panel? Thank you for an awesome free pattern!
Hello that was probably a typo and a mistake on my part please watch the video sew-along it will help you understand the patten. https://so-sew-easy.com/new-video-tutorial-sewing-small-backpack/
What are the dimensions of the finished product?
Absolutely love your nail polish! Keeping my eyes open hoping I’ll come across one like it? Do you remember the name/brand by any chance?
Love the tutorial too! Quite clear intructions and pretty! Will be starting mine soon.
You are welcome Kay, it is gel polish by OPI. I love it too.
I want to make this back pack bigger for my college age daughter in the fabric she chooses. With extra pocket strap side for lap top.
Thank you for your tutorial! It helps ver much!
My pleasure!
I made some adjustments so I could use it for my toddler for preschool. Thank you for the pattern.
This is such a beautiful backpack. Lovely job!
I just made this bag. I loved it for the size and have seen many adults wearing these smaller bags. There were several issues I found between 1) the pattern and what needed to be cut and 2) the video. I literally spent 3 days on this when it really should have taken me only a day to do so. I really appreciate that you did that and that it’s FREE !!!! There are pockets you sewed but didn’t have any pattern pieces for and then, when looking at the bag at different places, one bag has the “D-rings” above the back zipper and one has them below …. I will be making me another one and making my own modifications for some things I want to add to it that aren’t on the original. Thanks again for a cute pattern….. I’ve been sewing for @ 50 years, and to be honest, I thought it bounced around too much from one thing to another, then back to the previous, then back to something else. I think for future try to do something like all pockets together if possible, all zippers together, etc. etc. Also, it would be great for picture purposes to photograph any white items not on white or the same if you’re making something darker. THANKS again !!!
Mayra,
thank you for getting back to me. I tried adobe reader to print out the
small back pack pattern. My test square does not equal 2″x2″ it is
1 9/16″ x 1 9/16″. So my back pack will be a little smaller but it should be
fine.
Thank you again for helping. Have a nice day
HI Florence, that is odd and worth working out why your pattern is a bit smaller. That would really be a pain in a clothing pattern. Make sure it is on an “Actual Size” print setting. Good luck with the project. Kind Regards,
I can download the pattern. However the pattern hangs over the copy paper
and so the whole pattern is not available for print. Tried actual size
tried 70% and still nothing. The side pocket, side gusset and front gusset do not fit on the 81/2 x 11 sheet of copy paper and nor do the print out on another sheet that can be matched up. What am I missing?
Pattern small back pack
HI Florence seems to me you are not using Adobe Reader to download the pattern. Am I correct?
The same thing happened to me. It’s because the printing goes all the way to the page edge, and my printer will not print all the way to the edge of the paper. I tried it several different ways as well and ended up just eyeballing it so the circles and lines matched up. I haven’t sewn the project together yet, so wish me luck!
P.S. I did download it and save as a .pdf file, which I opened with the latest version of Acrobat Reader, so that’s not the issue.
This pattern calls for fusible interfacing but the instructions do not show where it is used.
The cutting instructions generally call for cutting one piece of the fusible fleece per pattern piece — so does that mean it is only applied to the fashion fabric? and the fashion fabric used for the side and front outer pockets will not have the fusible interfacing attached?
Hi Elaine, please read all the three-parts before attempting this pattern. Depends on the fabric you use. Canvas or upholstery fabric do not need fusible interfacing if you are using cotton quilting (some people have) you need to fuse both fashion fabric and lining. However, make sure your machine can handle all the layers.
why i cant download pattern?
Not sure Sophie, I just checked the link and it works fine. Are you using adobe reader?
Is the interfacing ironed on to all the main fashion fabric pieces? I noticed this step was skipped it seemed and I was kinda confused.
Depends on your fabric.
cant download the pattern, hellpppp!
Pls I can’t find the measurements used
Hi, Jane, it varies, you need to read the posts or watch the YouTube playlist.
Hi, what type of fusible interfacing to use on a very light weight cotton fabric for this backpack?
Medium weight fusible interfacing. I would line both lining and fabric to give the backpack somebody. Or you can use a stiff fusible interfacing and just apply it to the fabric.
Thanks for the sewing pattern and tutorials. Questions about the fusible interfacing.
What type of fusible interfacing should I use on a 100% light weight cotton fabric for this backpack?
You can use Flexfoam FF78F1by Pellon. See your other comment for alternative solutions.
Hi again I just want to show the back of the bag – It is obviously a denim refashion and I didn’t do a pocket to the front as shown in the other picture
Its very comfortable over the shoulders too
Hi There
I tried to leave a comment before but I think it did not work so sorry if this is up twice
I just want to say that joining the pattern was difficult – The thinner Zipper gusset didnt match the length of the wider zipper gusset – I dont know if I just had extra trouble matching the A4 papers and joining the pieces and left something out or what the problem was , but this is not the first bag Ive made – Anyway after some adjustment I altered the pattern adding bits I felt were missing. In the end I made the bag but pattern connection was not easy – Has anyone fed this back to you before?
The video tutorial was excellent !
I like the outcome very much its a great size backpack – Thankyou for having this free online : )
Hello Mayra. I was wondering if this pattern could be made about an inch smaller? My granddaughter loves it but wants even smaller.
Yes, darling, it can be done. Be mindful of the bottom if you change the size the rest will not fit. I would suggest pinching the pattern in the middle, do it to all the pieces and adjust the zipper length to the new requirement. I have been meaning to make a smaller one in leather with some studs. Not sure how popular leather will be though, the sewing will need to be by hand.
I really love the way the backpack was sew.thank u very much
I really want to make this backpack ASAP as my best friend’s birthday is arriving, but I am unable to download the patterns even after clicking on the yellow box which says “pattern download” it takes me to crafty.com which only gives me the option to buy the backup, and there onwards I cannot find any pattern download option. Please help me out. ?
HI, Nivedita, you need to proceed to the cart and it will be on checkout.
This is so amazing! It looks so professional, and I totally agree about doing what you can against pickpockets! Love this! Pinning and featuring in my next newsletter! 🙂 Lisa
I have a question about the side gussets. The pattern only has one but the video shows sewing two (one on each side).
Yes, Robin, that was a typo of mine, do cut two of them.
I want to make this. But I can’t read the templates.
Hi, Annie, you need to download the pattern the picture of the layout is only to show you how is laid out. Click on the link with the orange button.
i am so excited to make this backpack.i am going to use the back pack to hold fabric and anything related to sewing in it as cali pay to use there bags and i always forget to bring mine. and also make another for my son to use for school once he is 5
I’m wondering if I really need to use interfacing? I’m using a cotton canvas for the exterior, and the lining is hempcel. Both fabrics are quite sturdy, so I don’t see that interfacing would be necessary, but I wanted to ask before I begin constructing the backpack.
Hi Lainee, you do not given the combination of textiles you got going, very nice! I must say I think you will have a very beautiful item. Do share a photo with me. Thank you in advance 🙂
Hi Mayra — Great bag! But there seems to be a couple steps missing for the exterior pocket.
In your pattern pieces it says to cut one of lining and with it, we make the interior pocket. But it looks like you actually used two of these (without the zipper cut in the middle) for the exterior pocket as well. Is this a correct assumption?
I attached all the D-rings and then the exterior pocket video tutorial seems to miss telling us what lining to use and how. It looks like the interior pocket (minus that cut for the zipper; it’s one big piece instead). And it looks like right sides are together to create the exterior zipper “hole”, correct? The written instructions do not seem to have the exterior pocket in its instructions.
Thank you!
Hi Missy, the small back is a 3 part series, I sent you an email with the links. If you need any further help email me with photos and I will get back to you ASAP. Kind Regards, MC
I am also confused about the inner pocket that you attach to the back portion of the backpack. The video does not cover how that pocket got there or what piece you used.
Hi, Jennifer, there are 3 videos to this sew-along.
pls,can u hlp me wit the parttern? dont knw how to download on craftsy
Hi Debby, sorry you’re having trouble. Are you logged in to Craftsy? Here’s the direct link to the Craftsy page: https://www.craftsy.com/sewing/patterns/small-backpack-pattern-for-small-budgets/479842?SSAID=1217208&sasClickId=c1k1_km8zh
can this be enlarged? would it make sense to add a couple of inches to each pattern piece both ways length and width from the center point?
HI Liz, you can but you need to understand pattern construction or the pieces will not fit especially the rounded corners. Keep track of every millimeter you add to the front and back and add it to the gusset as well.
Such a great bag! But when sewing on the side gussets, does the side with the curved corner go to the front or the back of the bag? Thanks!
Hi Kayla, it goes to the front. Please check out the video tutorial.
https://so-sew-easy.com/new-video-tutorial-sewing-small-backpack/
What are the dimensions of this backpack? Length, width, height? Thanks!
It is 11″ x 7″ x 4″, entra 1″ because of the outside pocket.
Tried to download but it’s not possible. And I am really interested in sewing it.
Is there anyway you can aid me on even more?
Hi Sophia, tested the link and it is working fine, please do try once again.
11″ tall x 7″ wide x 4″ deep?
What seam allowances are used thru out?
Yes, those are the dimension. It varies, Flora, you really need to follow the sew along. Thank you!