


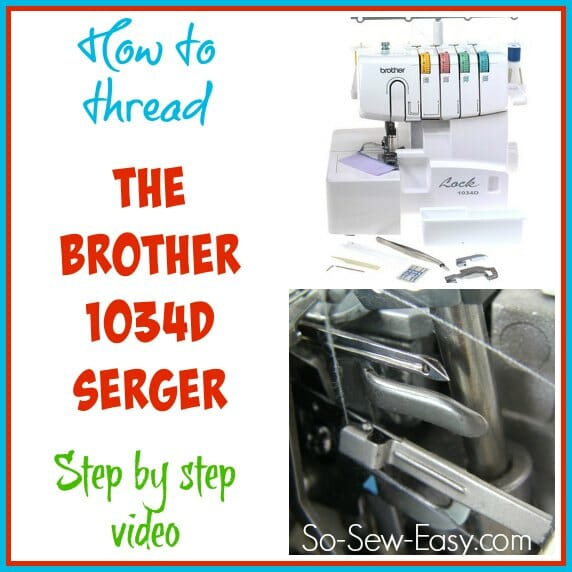
I know several of you also got the Brother 1034D serger for Christmas, or maybe another model. No doubt you've all made more headway with it than I have, and are already threading experts. Just in case there is anyone still not quite sure or confident, here is my step by step video on how to thread the Brother 1034D serger.
If you've also lost the manual or bought a used serger without the manual, this might also be useful. Although I'm not very experienced in serging, I have watched the Beginner Serging Class from Amy on Craftsy and the principles of threading seem pretty much the same regardless of model. Well, unless you have one of these super-duper self-threading sergers like this awesome serger package from Juki. Now wouldn't that be nice!
It has some close up shots and a couple of photos here and there to help you out.
How to thread the Brother 1034D serger
Subscribe to the YouTube channel:
Here is the link to the great little spring action needle threader I was using in this video. Makes threading the serger needles a breeze, and also helps take them in and out when you want to change needles. Highly recommended. If you are also looking for a threading tool to use other than tweezers, this one was recommended to me as well, although I don't own it myself (maybe for the future…)
It should be all very straight forward. Try not to be overwhelmed by the whole thing and just do one small step at a time.
Threading order:
- Your upper looper – the green route and the third spool along.
- Your lower looper – the blue route and the far right spool.
- Your right needle – the red route and the second spool along.
- Your left needle – the yellow route and the far left spool.
If you still aren't feeling confident in threading the machine from scratch, you can always use the ‘cheating' way to change your colors, but remember if your thread should break, you'll usually have to rethread, and it has to be done in the correct order.
Get out your serger and give it a try now. Got a different model? Take a look through your manual, it's probably not that different to this one.
Earlier serger articles to check out:
Must have features for your first serger
 Getting started and my first stitches – a jelly roll project
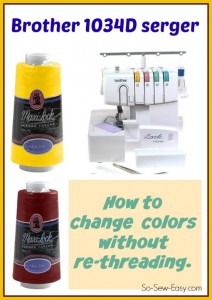
How to change the colors without re-threading


absolutely ???? % clear information, helps a lot!!! Thanks
Very very helpful ☺️
Absolutely the best clear instructions! Thank you!
Thank you so so much! I have a Brother 1634D and it is almost the same machine. Your video made threading this very simple! All I need to do now is learn the different stitches! 😀
Thanks to videos like yours, the serger is much less scary.
Thank you so much for your directions! I have had sergers for years,. just not the Brother 1034D. The only thing I couldn’t make work was threading the lower looper. The instruction book was so small, and so was the print. I just couldn’t do it! But thanks to you, now I can. Excellent directions!
Thank you so much for this tutorial. I keep coming back every time my thread breaks or if I need to change colors. Your tutorial is perfect for direction-challenged person like me. 🙂
Great demystifying video
Deby–thank you so much for posting this! I just got one of these, but the videos on CD-ROMs (I don’t have a CD drive on my computer so I had to borrow one that did) used another machine & weren’t very helpful. I appreciate your tips about stiffening the thread, too!
I don’t see a video on how to thread the 834DP. Is one available or is it similar to the 1034dp? Thank you
brilliant video. good close ups, was about to send my serger back thought it was broke lol
excelente el video, aunque está en ingles se entiende perfectamente, me gustaría que publicaras de esta misma máquina otras funciones que realiza y que se entiendan de la misma forma. Agradecida
Experienced sewer new to serging.
Following threading instructions and my problem is with needle #1 on what seems to be the easiest part. When bringing the thread from the tension disk ( all going well) down to #4 up around to #5 the thread gets tight and will not move. It isn’t the tension disk it is the hook at #4 behind the plastic – impossible to see what is happening. Any suggestions?
My 1 thread keeps breaking. I followed to a t. I am so frustrated.
Hi Denise, You might have to play with the tension. (loosen it a bit)
Wow, this video helped me understand my machine right away! The cd’s that came with the machine were not very helpful. Thank you!
Thank you. The close up shots were most helpful
Really helpful
Thank you for the threading video. Three thumbs up.
Awesome video thanks, just got my machine and broke a needle, so I reeally needed help re threading it.
I have a question . I came upon your site by googling how to thread the serger.
I have threaded it about 50 times and have a problem with the left thread not doing anything. I have noticed your needles are offset. Is this the problem for serging with only 3 threads?
Hi Hetty. If you only want to use a 3-thread overlock stitch then you would ideally remove the other needle that isn’t threaded. In this case I’m using a 4-thread so both needles are threaded and sewing. If you have both of your needles threaded, but the one on the left isn’t doing anything, and the stitches aren’t ‘catching’ then it sounds like it’s not threaded correctly somewhere. I’d suggest posting some pictures of your set up into the sewing chat group so we can all take a look and see if we can spot what’s going wrong. Join us at https://www.facebook.com/groups/soseweasychat
Thanks for the video. Very informative. Just received my Brother 1034D serger today, so I’m reading up on your articles about it.
Hi Vanda, congratulations on the new machine. Do keep in touch and show us some of the things you make with it. Take care, Mayra
Thank you so much for this tutorial!! I just got my Brother Serger this week. I am taking Amy’s Craftsy class as well and am learning about all the serger stitches and applications. But she uses the Bernina serger to demonstrate threading and it was extremely helpful to watch you thread the exact one I have! I think your tutorial is the best one on the Internet in terms of clear explanations and camera angles!
Wow Anna thanks for the kind words about the video. I’d heard so many horror stories about people buying a serger and never being able to thread it, that I was so worried! But in fact, with a bit of practice, its pretty straightforward.
Deby, it’s me again. I’ve just threaded my serger using your tutorial and it worked perfectly. So much for all the horror stories I have heard about changing serger threads! With your tutorial, I won’t think twice about changing mine regularly 🙂
That makes me so happy! Nothing to be scared of.
Debbie, your timing is perfect. I have just ordered this very serger and should receive it from my dealership by the end of the week. I was apprehensive of the threading process, but your tutorial is very clear and easy to follow. I can’t wait to get started. Thank you so much!