


 The baby seam finish hails from the faraway land of Haute Couture, France. Who exactly came up with such a stitch is unknown, as well as when it came into use. However, by the 1920s and '30s, it became very widely used and we can see many period examples.
This type of seam finish is used on delicate, semi-transparent, and transparent fabrics like silk, chiffon, and cotton voile. It is best used for loose-fitting garments.
This subject really makes me want to open and take apart some old garments for you, because they show so many interesting techniques, like this one, that are not done anymore. The baby seam finish is one that's hardly known and used today, even though it can be a very useful skill to know. The exception being if you are one of the lucky people who can afford a USD $3,500 silk chiffon blouse made by Chanel, Fendi, or Dior. But if you don't want to spend that much on a blouse, why not learn the technique and sew it yourself?
Imagine a world without the serger/overlocker or a cover stitch, and you are working with silk chiffon or silk taffeta. Then imagine that you cannot use either of the bias binding seam finishes (single and double), otherwise known in the mass-production world as the Hong Kong finish. This is the world that the baby seam was developed for. Additionally, if you wanted to make a garment that can last you for generations, the baby seam would be one of my top choices, if you had the skill and the best fabric you could find of course.
This is an advanced technique that requires cutting the fabric perfectly. If you've ever worked with silk chiffon you know that this is much easier said than done. The seam requires a 5/8″ to 1/2″ seam allowance to work well and once it is done will lay flat hence will hardly be noticed from the outside. This is why it makes it the perfect seam for sheer fabrics.
How To Make The Baby Seam Finish?
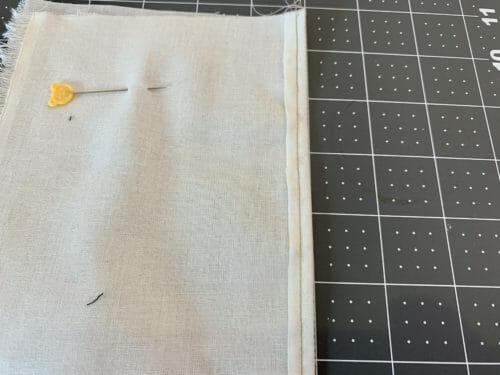
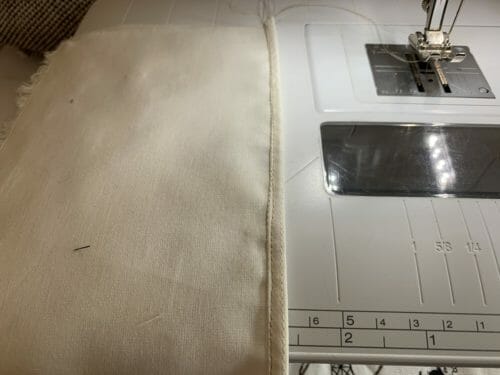
Start with the print sides together. As a rule, seams are ironed towards the back, so place the back of the shirt/skirt or tunic on top and the front at the bottom.
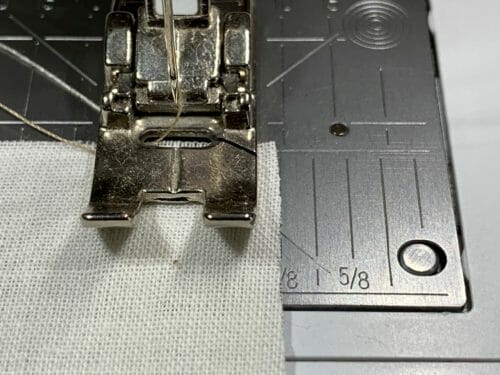
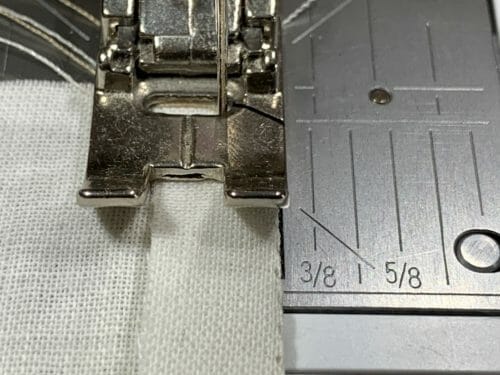
Sew a straight stitch at 3/8″ from the edge.
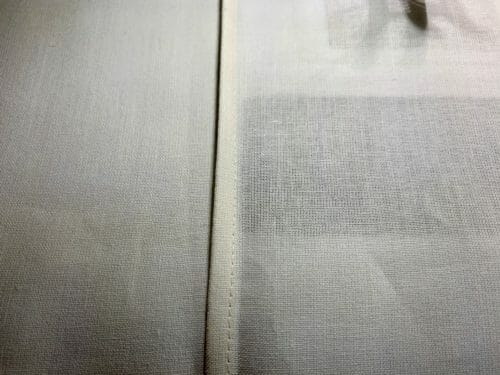
Iron the seam allowance using the straight stitch as a guide. I have to admit here that I hardly ever do this step. But in sewing especially in tailoring and Haute Couture, the rule is that you iron after every seam made.
Leave the stitching line visible on the folded seam allowance.
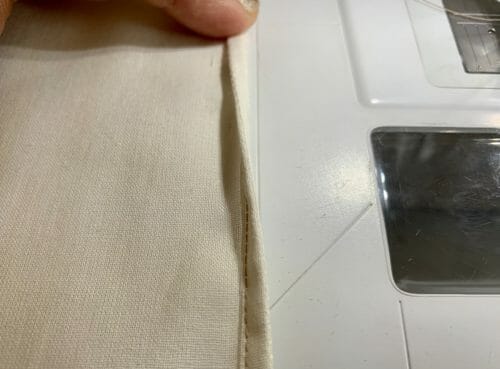
Sew another straight stitch at 1/8″ from the folded edge.
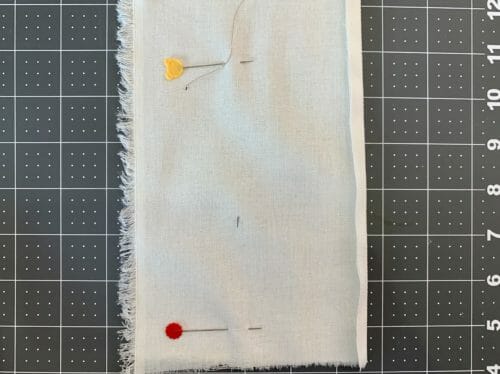
Cut off the seam allowance as close as possible to the stitching line.

Fold over the seam allowance one more time.
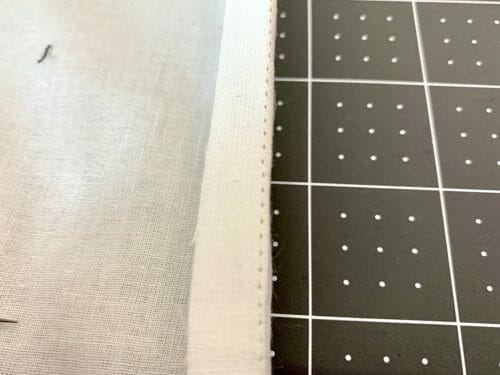
Stitch 1/8″ from the folded edge.
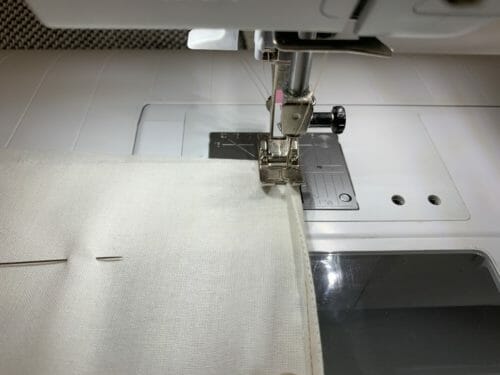
Iron the seam flat towards the back of the garment.
Many consider this seam finish time-consuming. But, let's not forget that it takes time to clean, oil, and try the perfect setting for the type of fabric that you will be using with the serger.
So why use the baby seam finish and not the french seam? In my humble opinion, I find making the french seam finish on chiffon very hard to do, the fabric moves and wiggles under the foot and it is almost impossible for a beginner seamstress to perform it perfectly. The other reason is that I find the french seam done on chiffon tends to come apart with time.
How to sew a French Seam, the best seam for delicate fabrics
This is a strong and easier finish that will preserve your garment for years to come. Let me know if you enjoyed this little-known technique, and let me know how you went on your first try.
Until Next Time, Happy Sewing!


Still trying to figure this out. I end up with a bulky seam with two rows of stitching showing, not at all what yours looks like, and nothing I would use to replace the French seam. Any chance you are closer to making a video?
Thank you for this article! Are you missing a step after sewing the first seam, though? You say to iron but not fold, and the second photo shows a fold. Maybe the “fold” part is understood by more experienced sewists, but I was a bit confused! 😉
I’ve done French seams and the Hong Kong finish, but never heard of this one. I’m sewing quilts right now but will definitely file this info for future reference. Thanks.
Mt pleasure!
Thank you for your careful directions. I would think very lightweight thread would work well for this. Also wonder if the first stitching could be done with a serger?
I would not use a serger because it adds bulk to the fabric, but I strongly suggest you try you never know you might like it for the purpose of your project.
This seems like a great alternative to a French seam, which I love to use because of the nice, clean finish. I wish I could see a video of how to do it. Is there another name for the Baby Seam Finish? All I could find seem to refer to rolled hems.
If there is one it will be in French, do not worry we will be using this in my chiffon romantic dress that I will be sharing with you soon. It will have a leather belt which I will show you as well.
I missed the wrong sides together totally but was confused when you pressed the first seam . Was it pressed open of flat? I agree it might be easier to follow with 2 different fabrics. I had not heard of this before as a seam but think I saw it recently as a way to hem sheer fabrics. I hate to ask you to repeat it but with 2 different fabrics it might be easier for all of us to follow.
Hi Alison, use the stitching line as a guide, sew the fabric together, press using the stitching line as a guide, fold the seam (both sides) Sew again, cut the top off, a video would be best I agree. I am in Segovia at the moment if I can find a seamstress to lend me a sewing machine I will try to make a video.
I was taught this seam some60 yrs ago and I know it as `run and fell` why this name I don`t know but it is used a lot in men`s shirt seams
This is the seam finish I used when I made our daughters wedding outfit last year. I had done lots of research on finishing chiffon. Her skirt was a high waisted skirt, base layer of a lightweight satin and 2 layers of chiffon. Each layer was 6 gores. Lots of seams. I think in total I stitched seams about 64 times. Ended up with beautiful tiny barely noticeable seams. Time consuming, but not difficult. I wish I had these instructions as they are well written
And you win the Oscar for most having the most patience, I have a lot of respect for you! I would looooove to see this dress sounds magical!
Reminds me a little of a flat felled seam with the narrow feller foot. I like it! Thanks so much for telling us about it. I can see how it might have been used a lot for those fancy heirloom christening gowns.
Hi! I love chiffon scarves, shawls, and over blouses but I have not had much luck in working with the material to make my own. This may be the technique I am looking for to solve my problems! Unfortunately, I can’t figure out what is going on! Have you by any chance made a video of this technique?
I just told my husband that after all these years of sewing, I’ve learned a new stitch that I’ve never heard of before. It’s saved in my “Reference” file on the computer so I can go back to it when necessary. Thanks so much!!! Sincerely appreciated!!
My pleasure!
I am going to be making a SPECIAL two piece dress for my son’s upcoming wedding, and this seams to be the to finish the seams of the chiffon overskirf! Never heard of this before and I have been sewing for a very LONG time! Thanks for your research!
HI Maggie congratulations on your son’s wedding, I would love to see your dress! pretty please…
Thanks so much for these instructions… A mystery solved! I have been doing this by hand over the years on delicate projects, like the sheer overlays of Christening outfits, but being shown how to do it on the machine will be a huge time saver! Yes, the method is time consuming, but SO worth it.
You are amazing, by the way by hand is the technique used before the invention of the electric sewing machine.
Step 2.”iron the seam allowance “.
Not clear what your saying here.
Is there a direction? Or do you simply mean “flat”? I often press my seams flat before ironing re-pressing them open. I thought it was because it strengthens it and helps secure the thread. In this seam it seems to serve a different purpose.
I love these instructions! I’ll try it soon. I love the finished look.
Thank you so much from Denmark. But isn’t it almost as the French seam? Apart from that the seam lies down and the French “stands up”?
Hi Charlotte, if you ever worked with chiffon (polyester) tulle, netting the french seam will allow some of the threads to pock through and itch, I learn this the hard way while making a witch costume for a child. This technique allows the edge of the seam the fabric to lay flat.
Thanks for the tip. I’ve always had Issues hemming chiffon. Going to try this technique on a dress, hoping it works.
Do I have to enlarge the pattern, this seems to take up more than the normal 5/8″ seam.
This is a new technique to me, one I’ll be trying out the next time I use a delicate fabric. Thanks for sharing.
Very interesting article. I’d never heard of this stitch although I’ve been sewing for many years. I’ll be trying this out on some lovely sari fabric my sister brought back for me from her holiday!
Very interesting, thanks so much for explaining these different types of stitches.
I found it difficult to see where you were stitching so I just enlarged the pics, much clearer.
Hope you use it and give me some feedback. I will be using this stitch on my next top Pattern.
Could not follow the instructions/photos for this technique. After the RST/WST typo was corrected, still cannot understand this technique. Sorry.
This method is so helpful. My daughter’s friends have bought me innumerable bridesmaids gowns to hem. Thanks!
I also have never heard of this seam before in about 65 years of sewing. It’s hard to tell from the pictures, but does the seam ever go to the inside? It doesn’t seem to be turned in at any stage.
I usually find your instructions very easy to follow, but for some reason, I just cannot grasp what you are doing here. Wrong sides together would put this seam on the right side of the fabric. Am I missing something here? Also, cannot really tell thru the pictures what you are sewing together. Maybe if you used two different fabrics, or pictures were closer up.
Hi Cherie, yup, you’re right. Typo. I’ve fixed it. Thanks so much for letting me know.
I’ve read it three times lol – still don’t get it!
Great technique! I have never heard of it before. Thank you so much for explaining it!!
Hi, the instructions state starting out with wrong sides together, so that would leave the seam on the outside of the garment?
Hi Frances, yup, you’re right. Typo. I’ve fixed it. Thanks so much for letting me know.
When the seam is finished, is the seam allowance on the right side of the garment? You started with Wrong Sides together and I did not see any where in your instruction that you were sewing with right sides together.
This seems similar to what I have heard called a “hairline” seam.
Hi Ann, yes, it should have read “right sides together”. I’ve corrected the typo. Thanks so much for letting me know.
Hi, I got confused when you said “Wrong sides together”. When do I put the right sides together?
(PS: the first time I used a French seam, I was making a fashion item called “Baby Doll Pajamas” at school at the end of the sixties …
http://www.birdhouse-books.com/2015/08/throwback-thursday-baby-doll-pajamas.html )
Hi Nick, you’re so right. It should read “right side together”. I have updated the article. Thanks so much for letting me know.
Dears,
Thanks for sharing. How does this work for curved seams or in corners?
Claudia
I have never used it on corners and I would not use it just because I think it would make it really hard to do. In curved do work but the curve can not be so rounded such as in the armscye of a large sleeve, otherwise, it is hard to do the last step. Also, works best on cotton batiste and very thin linen.
I have never heard of this stitch in my 60+ years of sewing. Thank you for sharing! I will be trying this when the project can use it. I have fabric in my stash that must be waiting for me to learn the baby seam finish.