


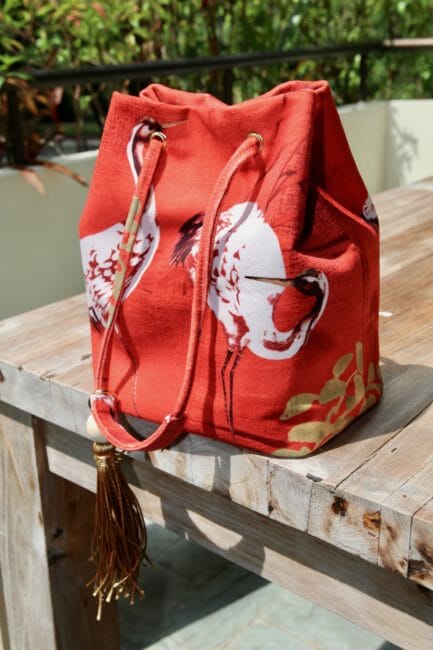
Here's the second part of our bucket bag tutorial and pattern. In Part One, we made the interior and the exterior of the bucket bag. In this part, we will be trying to avoid turning your bag into a “black hole” by making a small zippered pocket to be added to the lining for the little bits you do not want to have swimming at the bottom of the bag. We'll also be joining the lining with the outside of the bag and making and attaching the handles to finish the bag.
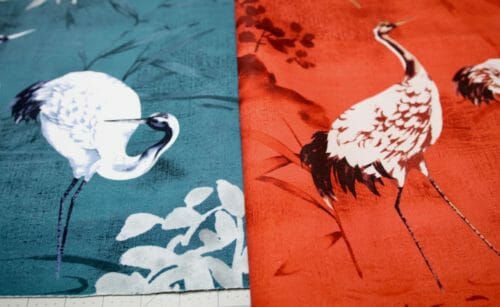
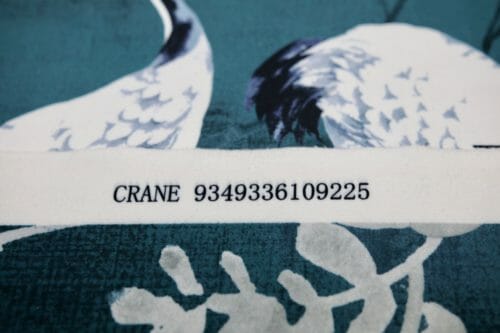
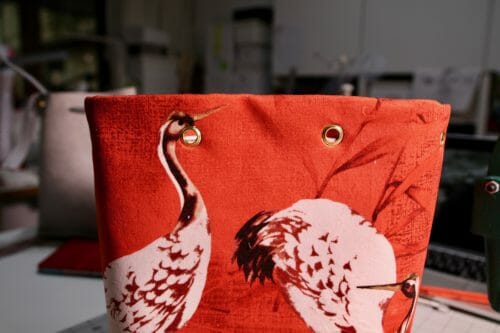
A few of you have asked me where I bought the fabric I used in my own project. I bought it a few months ago in a store called Spotlight which is found in Australia, New Zealand, and Singapore, but unfortunately not elsewhere. The fabric is called Crane Velvet and it came in four colors but appears to be discontinued now unfortunately. I bought two, an orange and a teal version which you will see when we release the video of this project in the coming weeks. Unfortunately, I've not been able to find this particular fabric with a US or European vendor yet so I have made some other fabric recommendations below. Perhaps you can leave a note in the comment below if you have more luck.
Materials:
- 1/2 yard, 54″ wide upholstery fabric, thick canvas (see recommendations below)
- 1/2 yard, 54″ wide Lining fabric
- 1/2″ Bias tape, one roll (approx 2 yards)
- 17 mm Grommets
- Polyester Thread for sewing canvas
- Double-sided tape 3/8″ wide
- One large bead for the tassel with a 10mm hole
- Pellon Peltex
- Magnetic bag clasp (optional)
My Fabric Recommendations
Tools:
- Kam tool
- Zipper foot
- Jeans needle
- Inches to centimeters converter (Optional)
- Rotary cutter (optional)
- Exacto or craft knife (Optional)
Pattern Download
You can download the pattern for this Bucket Bag from our account at Payhip.
For help downloading and printing PDF patterns, please CLICK HERE.
Bucket Bag Tutorial CONTINUED FROM PART 1
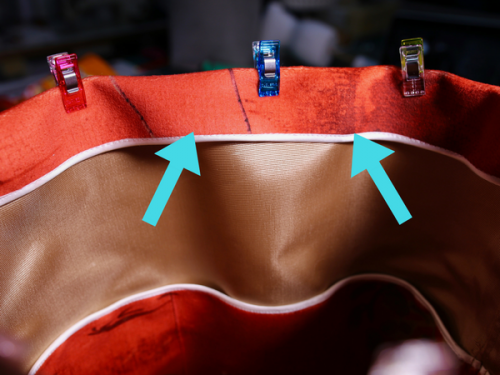
Step Six: Joining the lining with the outside
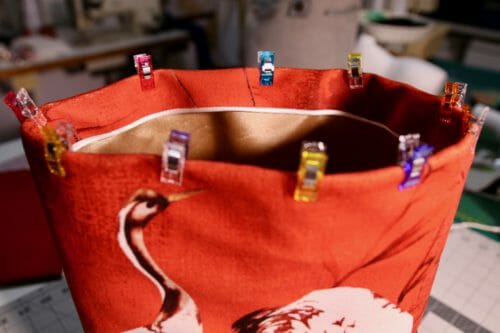
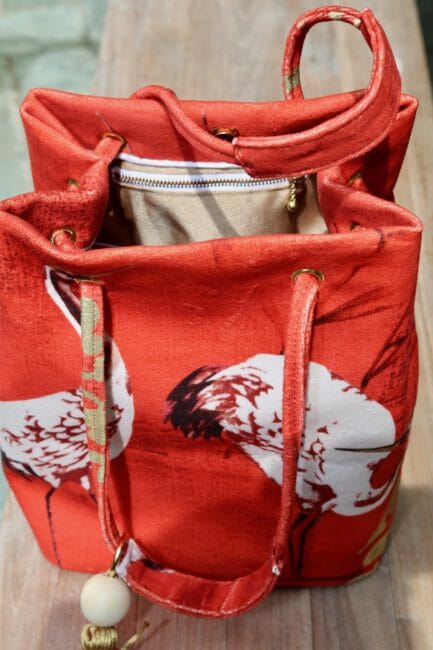
Insert the lining in the bucket bag and turn the top of the bag inside by two inches. Put aside, for now, we need to make the zippered pocket that will hang from the main fabric.
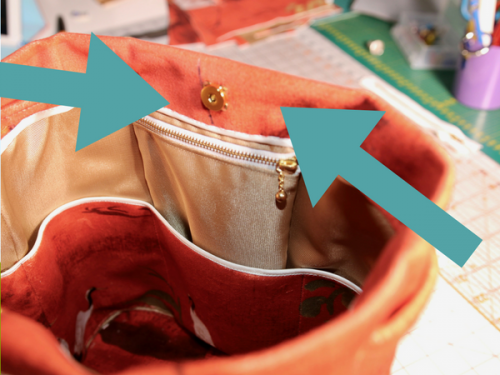
Step Seven: Adding an additional zippered pocket
This is an optional step, but I find it useful to have an additional zippered pocket between the lining and the main fabric. We did a similar thing in the Gleam bag but I'm going to show you here now as well.
I am only adding a 4″ zippered pocket, just enough for a few coins, keys or lipstick.
These are the extra materials you will need to make this additional zippered pocket.
- 12.5″ X 6.5″ rectangle in lining fabric
- 4.5″ metal zipper
Place the rectangle with the longest side vertical, right side up. With the zipper right side down, sew it to the top of the rectangle.
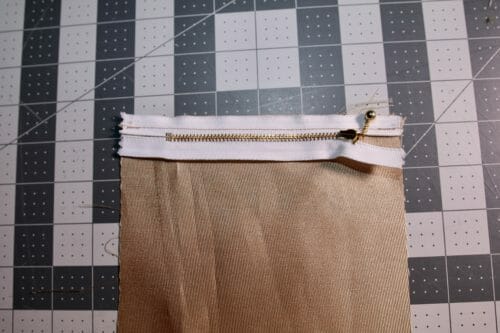
Turn the zipper the right way.
Topstitch in place 1/8″ from the fabric edge.
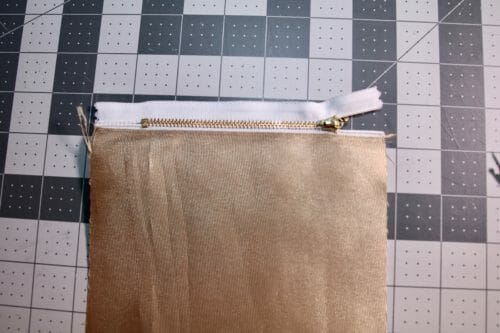
Bring the zipper tape to the other end of the rectangle.
And sew the zipper down. Turn the pouch inside out.
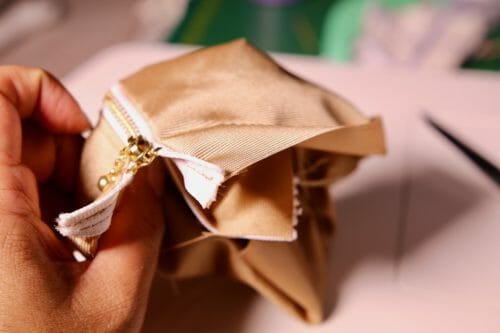
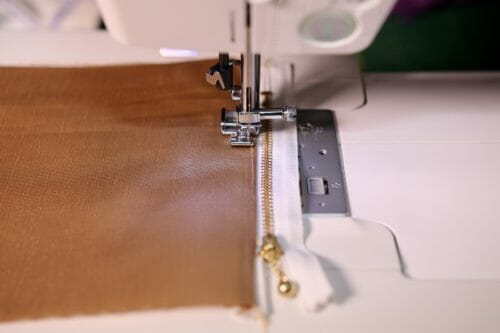
Open the zipper and topstitch on the other side of the zipper. Fold the pouch inch on the top and pin on the sides.
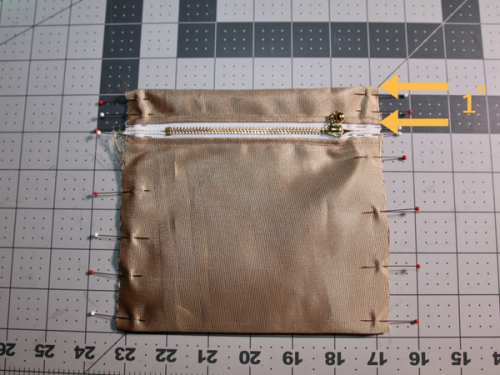
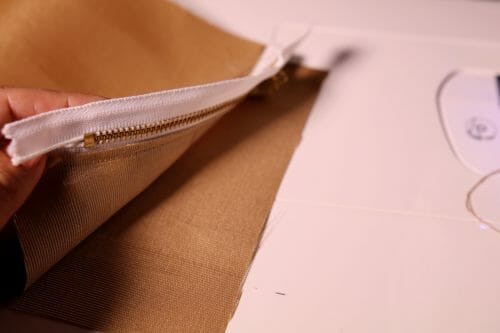
Sew on the sides at 1/4″ and trim the sides to 1/8″.

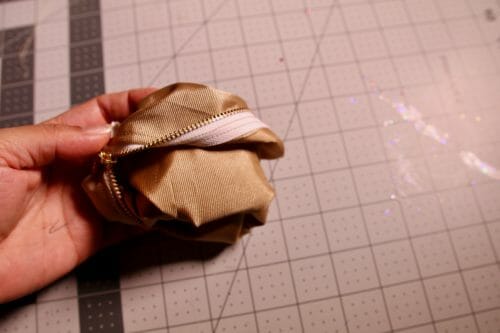
Turn the pouch inside out through the zipper.
Sew the sides at 1/2″.
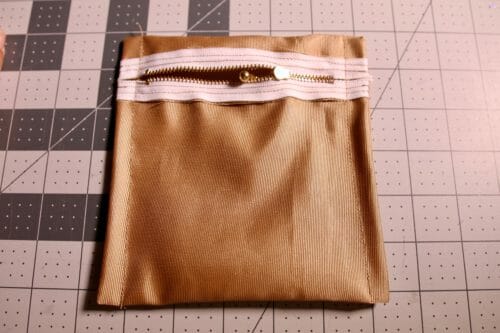
Turn the pouch the right way out through the zipper.

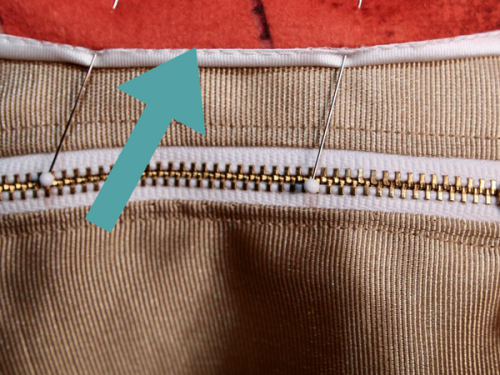
Pin the pouch to the main fabric and use the space between the bias tape and the fabric to stitch down the zipper pouch. Try to align it in the middle of the bag.
This step is also optional as well, but I find it useful to have a magnet to close the bucket. I have used a sew-on magnet because it is the easiest to apply. Just make sure you sew it centered with each part on opposite sides of the bag.
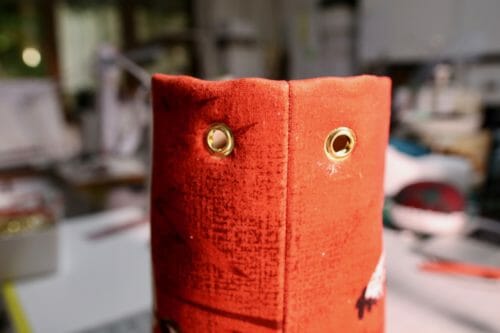
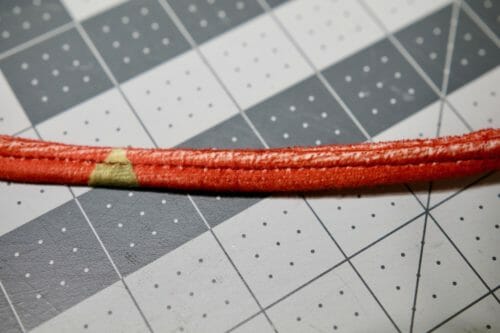
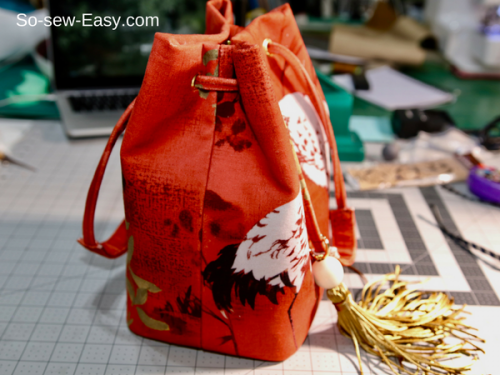
Step Seven: Attaching the grommets
Using the pattern, mark the bag to place the grommets. For a step-by-step demo on how to attach grommets please follow this tutorial on sewing with grommets.
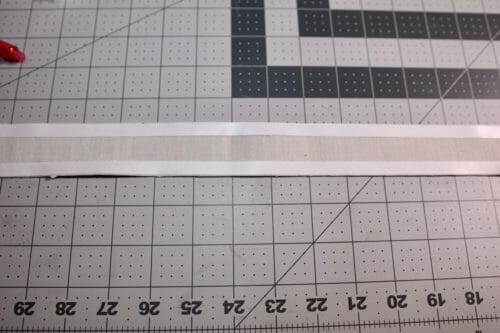
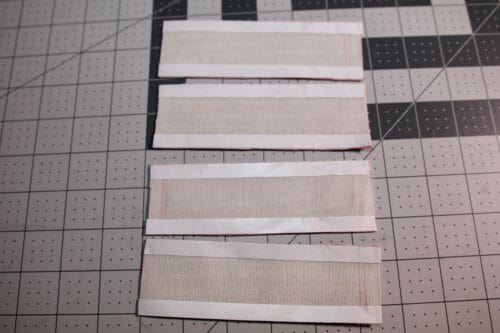
Step Eight: Making the handles
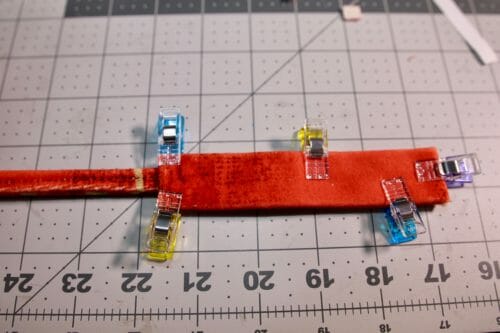
Place the double-sided tape on both sides of the strips.
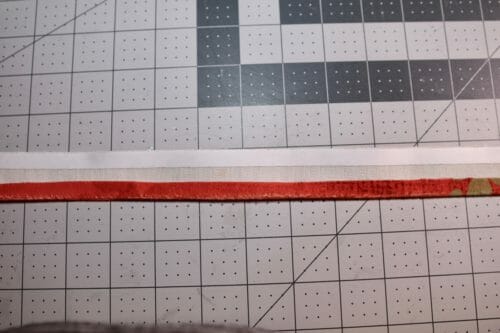
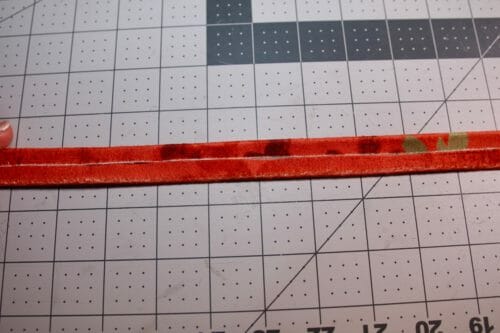
Peel the white paper off and fold the side in.
Take the other side off and fold in as well.
Fold the strip again and sew in the middle. Repeat the steps to make another strap. Put this aside.
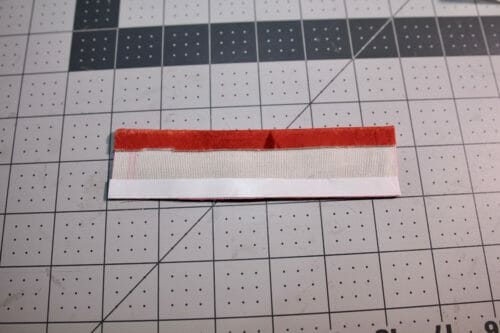
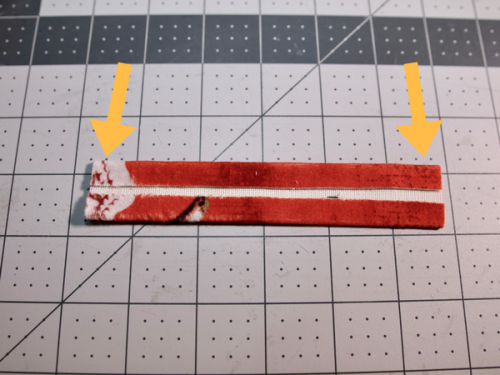
Take the small rectangle and use the double-sided tape to turn the sides in. Place the straps ends on either side of the handle. Place the other strap on the other side of the rectangle.
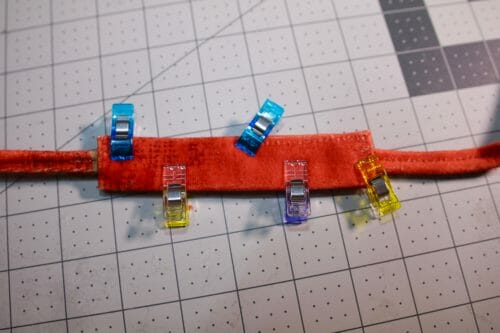
Sew the rectangle around at 1/8″.
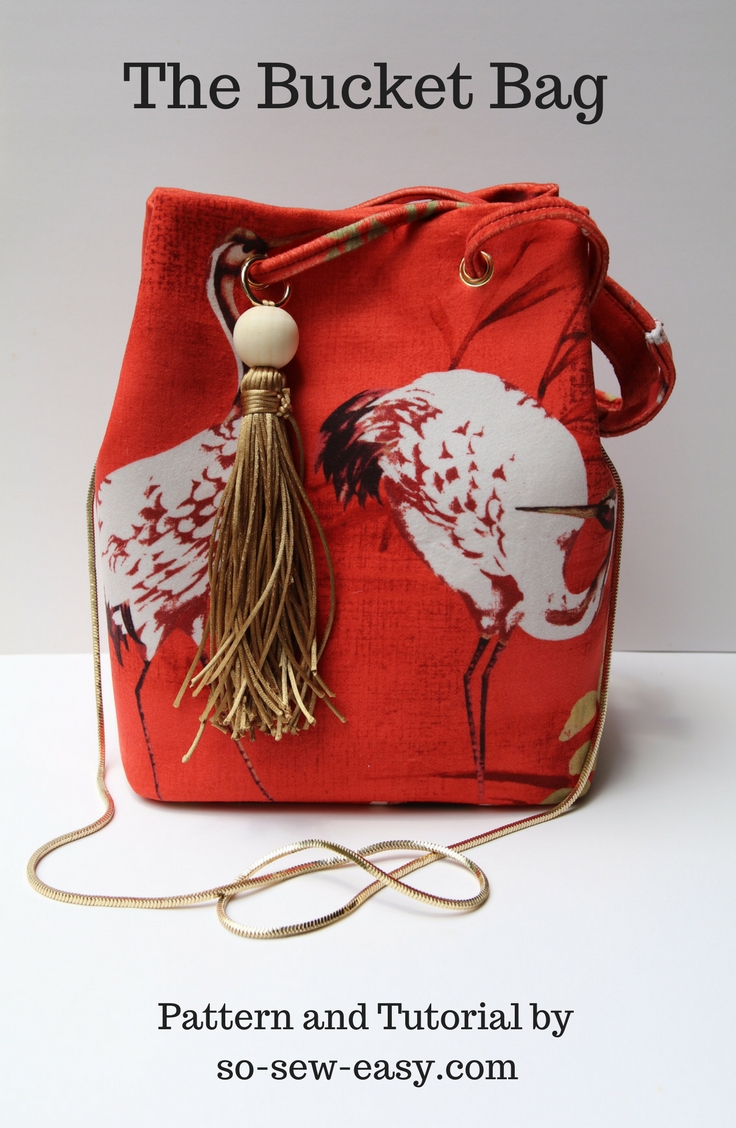
I have made a tassel for decoration. If you want to make to make an easy tassel like this one, just follow this tutorial.

Thread the strap to the tassel and lace the strap into the front grommets of the bag. In order to have the tassel hanging from the strap without the use of a lobster claw, you need to thread the tassel before you attach the next set of rectangles to join the straps together.
There is no reason why you can't make this bucket bag pattern using quilting cotton as well. All you will need is some batting to make the fabric thicker to about 2mm.
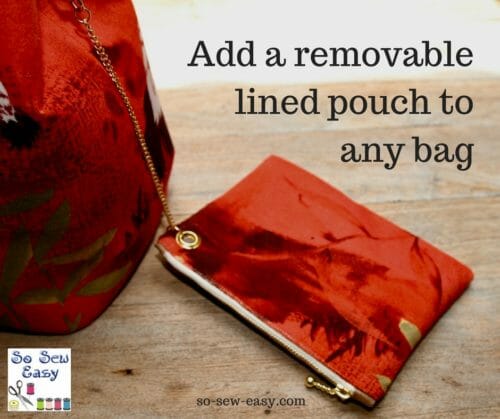
Join me next time when we will be making a removable lined pouch to go with this bucket bag or any other bag you have that needs an extra secure space.
Tutorial for adding a removable lined pouch to any bag
Please feel free to comment below and make sure to share pictures of your work. Until Next time!


Hello.. And Imblate I think finding this pattern.. I love it.. But I read in 2017 you were working on a video for this Bag..and was wondering where I could find it.. It will make construction easier for a beginner like myself.
Thank you again for such a very nice pattern.
Is there a video that goes with this? Just wondering. I thought that there was, but I can’t find one. So excited to try to make this though!
Hi! Thank you for this pattern! Maybe it’s written somewhere, but i i can find the leght of the straps… Can you tell me how long and wide they should be? Thank youuuu!
The straps are included in the pattern.
I am about to begin sewing this beautiful bag ! love the pattern ….
I notice that most comments are from a couple of years ago so i am hoping that if I have questions that i can still receive some guidance.
Sure, I am still here.
Sorry if it is obvious in the instructions Mayra – but I just want to be sure !
Is the lining hand sewn to attach it to the folded inside edge of the bag all the way around?
I never sew the lining since the grommets pierce through it and keep it in place.
thank you!!
Hi, I noticed that in the list of materials needed you did not specify the amount of interfacing that was needed for the bag or the type you used in your bag?
Thanks, Bernice
Hi Bernice, in the list of material I have Pellon Peltex click on that and it will take you to amazon so you know what I am talking about. The amount is the same as how much fabric you will use. Kind Regards,
I have downloaded the pattern and printed it. Some of the corners did not print but I drew straight lines with a pencil and ruler to see if it will be O.K. when I tape it together. This is my first attempt to put a PDF pattern together so I think of it like a puzzle for my brain.
I love this pattern and was looking for the pattern after seeing Chanel vintage bucket bags that go for several hundred to $1100. Chanel makes totes out of terry cloth to match beach towels. you just need to buy 2 beach towels and use one for a tote and pouch. There is so much fabric in a beach towel that the tote could be made larger with fabric leftover.
I think your pattern and instructions are nicer than an overpriced used Chanel canvas print that clearly shows where the red fabric bled when it got wet (the $1000 used tote). Your fabric is better quality and much prettier too. Thank you for the beautiful pattern. You can never have too many totes and they will make great gifts that will get much use by anyone who gets one.
I am so happy you enjoyed the pattern, thank you for your lovely comment. Readers like you are the reason behind all this hard work. You made my day!:)
I’m in love with you! Your skill, your sense of style! Gotta try this one — just adorable. Thank you!!!
Hi Mayra! I am working on the bucket bag. I wonder if the pattern I downloaded from Craftsy is an older version? I notice the file name says ‘revised’. On your layout diagram, the pocket piece is clearly labelled and notes how many pieces to cut. The pattern I downloaded has no label or notes on it at all. The strap piece says ‘Cut 2’, but as far as I can tell, I need 4 pieces. I don’t really understand the handle construction, so any help would be appreicated! How did you attach the lovely gold shoulder strap in the pictures?
Thanks
Shirley
Hi, Shirley, I think you do have the older version, you do need to cut 4. The instructions are on the site in a two-part sew-along. Here is part one: https://so-sew-easy.com/bucket-bag-pattern-fabric-leather/
and part two: https://so-sew-easy.com/bucket-bag-tutorial/
Do let me know if you need any clarification on the tutorial.
Thanks Mayra. I cut new straps, on the fold, so now have 2 long straps and I can see how they will attach. I don’t know how I would join the 4 separate pieces.
How did you attach the gold chain shoulder strap?
HI Shirley, one step 8 you see how it is done. I suggest sewing the bag as I have written the tutorial. You will need the grommets in place to be able to finish the straps.
Hi Gretchen,
I have the same question as Gretchen Jaspering. Do you hand stitch the bias tape on the 2 inch turn down to the lining? The outside of the bag looks beautiful without stitching, but there is no step indicating how you joined the turn down to the lining. Thank you for the stunning pattern – I’ve been looking for a bag like this for ages, and yours is the nicest finished product that I’ve seen.
My apologies, I should have said Hi Mayra.
HI, Janis, I am in the process of making the video, I will show you in the video how to finish the bag and the little details that make it look well constructed, just be patient I am still so behind with the videos but I will get there before next week is over.
Hi Mayra, Just inquiring as to where I can find the videos? I’m super excited about making the bag but have no idea how to finish it off.
Thanks so much,
Amie
Dear Amie, the file I have lost when water got spilled on my MacBook, so I found more fabric and will have to reshoot the whole thing. To finish the bag you fold the top and apply the grommets. I did not sew the edge because I do not like the look of the stitching on the top, however, this depends on taste.
Hi Mayra, great tutorial and pattern. I love bag making – the Turning Japanese was my first and is still pretty much my favourite! I love this one though, and I’ve made it in faux suede with a snazzy lining. I used medium interfacing and fleece batting, which I think has made it took stiff. I’ll make it softer next time!
Thank you for the photo Lynda, and for sharing the materials you have used, this really helps. Do you think the fleece batting is enough?
Thanks for the pattern, I just love it, finally received the grommet machine which made it so much easier, here is my creation, keep up the good work Mayra
LOOOVE it, Anne! This is wonderful 🙂 I am especially impressed you took the time to look for the fabric. Where did you get it? Did not know there was purple.
Thank you Mayra, your choice inspired me, it comes in Orange ,Teal, Charcoal & Purple, couldn’t believe my luck when I went there they had a huge sale on the fabric so my next one is in the orange, my brain is in overdrive, so I am thinking of a teak or two to suit my needs. A girl cannot have too many bags lol
Indeed, especially if you make them yourself. I could only find teal and orange and only a meter of each. I love the purple.
Thank you so much for your beautiful pattern! Do you think we need batting if using upholstery fabric (non-velour, non-velveteen) for the main fabric? Thank you. Marilyn
No, you don’t, You will, however, have to be careful when you sew the inside lower pockets because the stitching will show If you use a plain color. If you use a print and match the thread carefully this will not be an issue. Do stitch around the edge on the top to give the bag more body. But this is of course up to you and only if you think you need it. Love to see your take on this pattern 🙂
when do we thread the handle through the grommets?
The instructions are under the tassels pictures.
je ne peux pas avoir vos patrons car tout est ecrit en anglais, ainsi que les mesures
ce n’est pas en cms
desolée
Le patron se trouve sur la première partie. Vous pouvez utiliser pour convertir
Hello Mayra, I found you on YouTube a while back when I was looking for a cowl top to sew. Yours was so do able. Thank you. This is a breathtakingly beautiful bag. Your impeccable work inspires me. One question: Is there a reason why you didn’t top stitch the top of the bag for firmness and appearance? Thank you for all your lovely creations.
No there is no reason at all, other than aesthetics, in fact, I am shooting the video and I am topstitching the top of the bag to see how it looks. I was thinking of using a double stitching, what do you think?
Great, Great pattern. thanks so much.
YOu are most welcome! do share your picture when you make the bag. You can post now the picture in the comments for everyone to see.
Hi! In what step do I sew the top of the bag that has been folded two inches inside towards the lining? I don’t see any stitches on the outside of your bag where this is happening or holding the inside pocket.
Thanks!
Bea
Use the space between the bias tape and fabric to sew the pocket to the main lining without stitching outside. There should not be any stitching outside.
I am not adding the additional pocket. So with regards to the two inches of main fabric I turn down onto the lining should I hand sew it? Tack it? There are no instructions on what to do here. If I don’t do anything it will not seem finished. Please advise?
Hi Gretchen, I hope you did attach a bias tape. Ignore the pocket and move onto sewing the magnetic snap. Then place the grommets. You could topstitch but I decided against it.