


Some say we are at war, and some say we have been at war for many thousands of years, and we haven't even noticed; all I can say is that the only battle I will be raging is against the flies that come into my kitchen, the rabbits that are eating my lettuce, and the mosquitos that linger who knows where to come out when you lay your head down on the pillow.
We, as a family, are spending a few years developing a farm project. Off-grid, solar-powered, well and rainwater, free-range animals, thousands of trees, fruits, vegetables, and honey, and no TV. We live among the vineyards, bee hives, and wild birds. It sounds idyllic, and in a way, it is, but it is a lot of hard work. There is no place for silk dresses or Capri Swarovsky studded sandals here. My accessories are an apron, gloves and rubber boots, for this chapter of my life I require a new wardrobe.
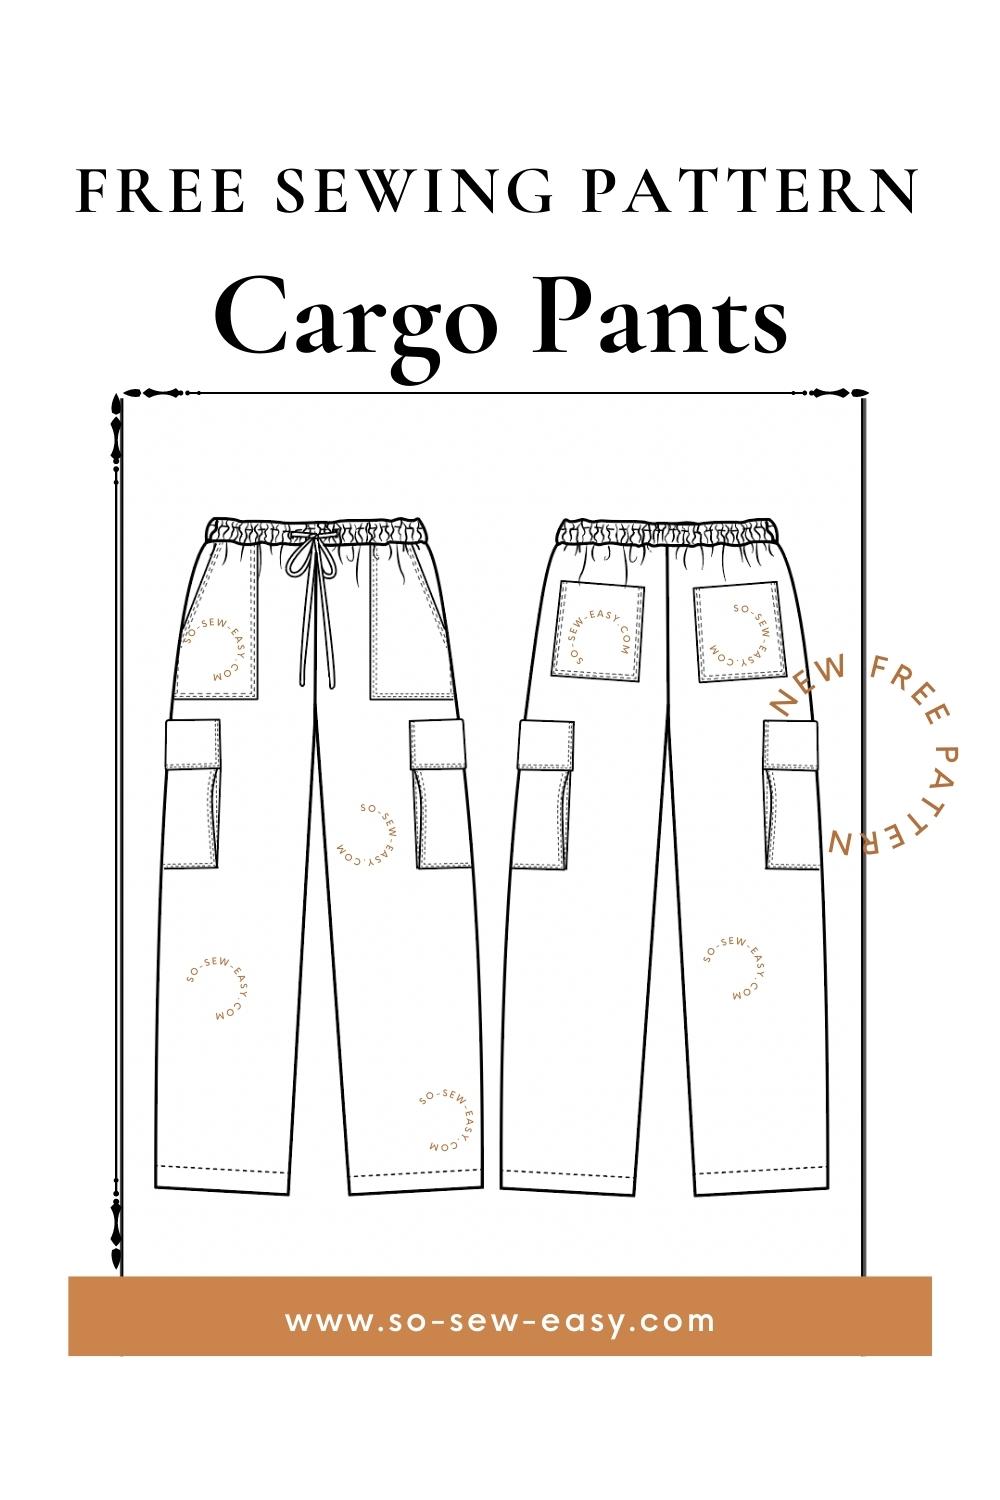
These pants are the first item on my list; this cargo pants free pattern will make a pair of gardening pants and some pants for dinner paired with a short Channel-inspired jacket. There is no need to look frumpy, even among my potato plants.
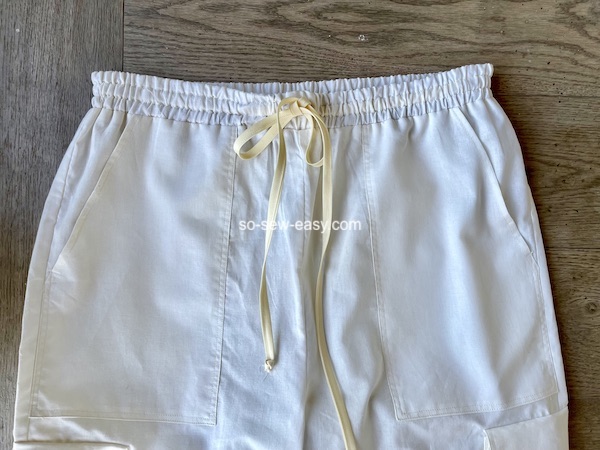
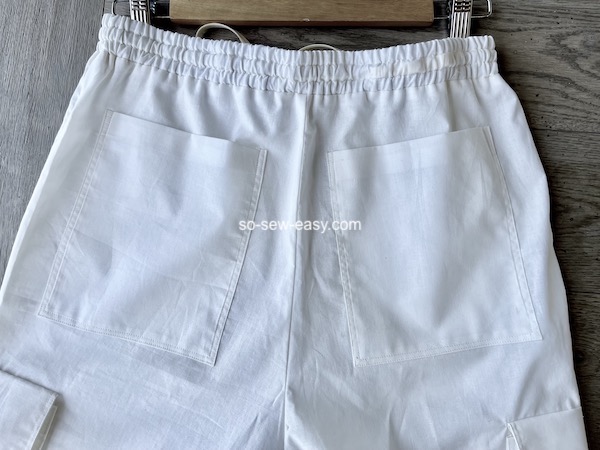
These cargo pants have an elastic waist for ultimate comfort.
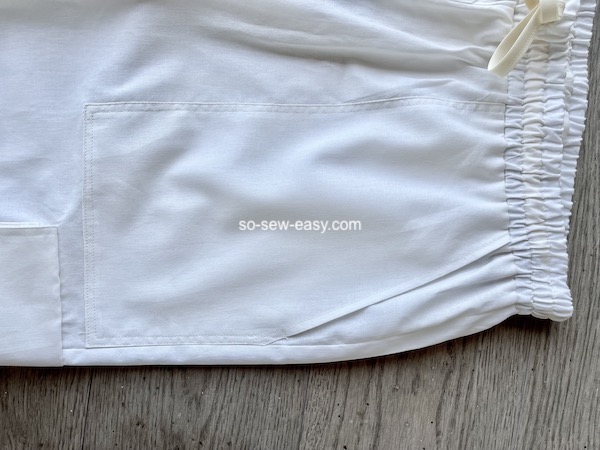
Front large pockets that can always be made larger
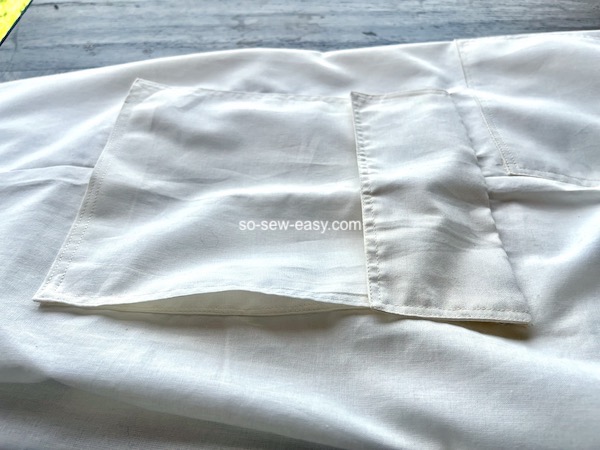
Applied and unlined back pockets
Applied side pockets, also known as bellows pockets, with a flap for tools or mobile phones. These pockets are not included in this tutorial; there is a separate tutorial for them.
Materials
- 1 1/2 to 2 1/2 yards of 54″ broad light woven fabric you fancy, cotton muslin, linen, silk, wool, satin or a combination of natural fibers.
- 2 1/2 to 3 yards of Elastic 3/8″wide
- Thread to match the fabric
- A small strip of velcro for the bellows pocket or a button.
Tools
- Scissors
- Sewing Machine
- Ruler
- Marking pen or tailor's chalk
- Serger (Optional but Ideal)
- Paper for the front and back pockets and the waistband
- Iron
Fabric Recommendations
Sewing Skill: Intermediate
Here are the skills you need to finish this project:
- how to find the file on your device once you download it
- how to use the print-friendly button on this site to print the directions without the ads
- to finish the pants you must follow the separate tutorials that are linked in this article
Having said all this, you do not require directions if you are an advanced seamstress.
Body Measurements
Choose the size according to the broadest part of your body.
| Size | Waist | Hips | Length |
| S | 26 | 35 | 36 |
| M | 32 | 39 | 38 |
| L | 36 | 43 | 39 |
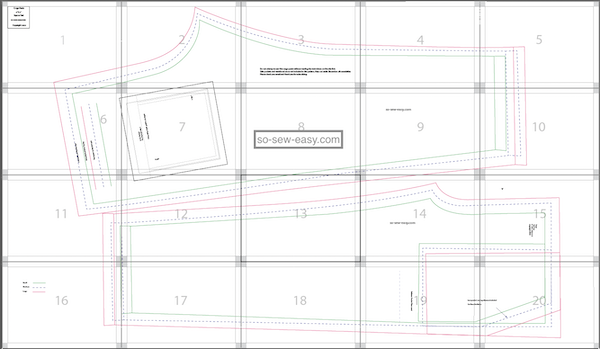
How To Download, Print, And Assemble Your Cargo Pants Pattern
Please use Adobe Reader a (free program), Landscape mode, do not scale. Tape the pattern horizontally from 1-5, 6-10, 11-15, and 16-20, Then tape 1-5 on top of 6-10 etc. The small greyed squares are 1″, and the distance between the thin lines is also 1″.
Fitting: The waistband must be able to pass over your hips. Choose your size according to your hips size or the widest part. Allow 4 to 6 inches of ease at the hips. Add two inches of length for men.
In this sew-along, I show you how to adjust a pattern to your requirements, how to increase the waistband and the crotch and how to increase or reduce the width of the legs.
We will continue using the new Payhip web store to distribute our patterns.
Our patterns are still free, but now you have the option of making a small contribution if you like our work! We'd appreciate it, and it will help us keep going with new and fun designs like this. Even a dollar or two goes a long way.
Thanks so much in advance for helping us out. You can use any credit card, and you don't need a Paypal account, although you can use one if you have one.
Cargo Pants Pattern Layout
How To Make Your Cargo Pants Free Pattern
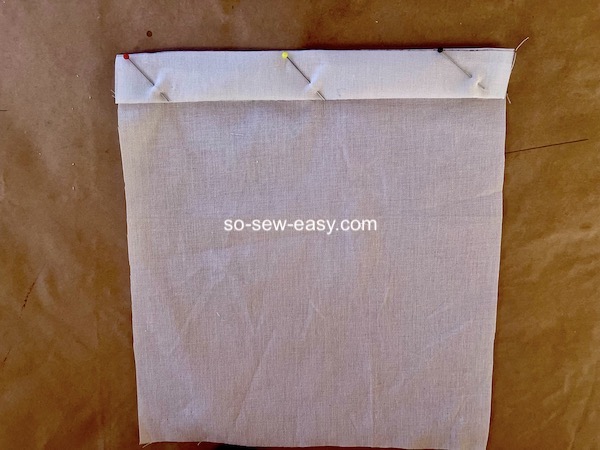
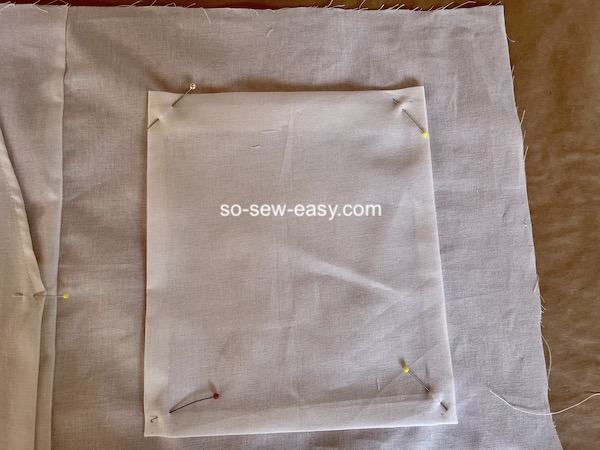
You need to trace the front and back pockets on a different piece of paper; I have drawn the placement and pattern for them on the front and back of the pants. The drawings have the seam allowance included. Sew the pant's front and back pockets at 5/8″ or 1.5cm. There is a separate tutorial for the Bellows pocket or side pockets. Please use pocket B for these pants.
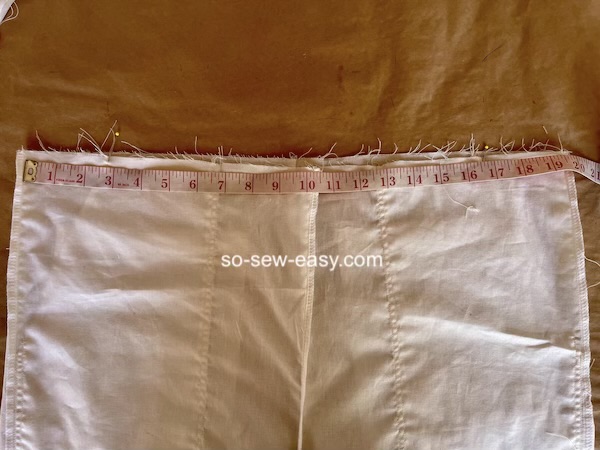
You also need to trace the waistband. Cut a band of fabric the size of the waist-finished pants by 4 1/2″. This is if you use a 1 1/2″ elastic.
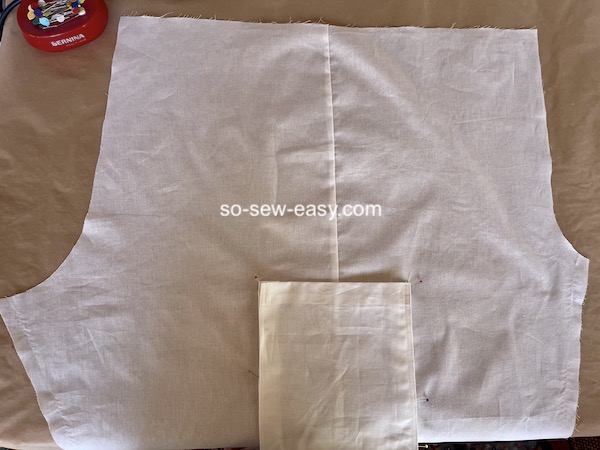
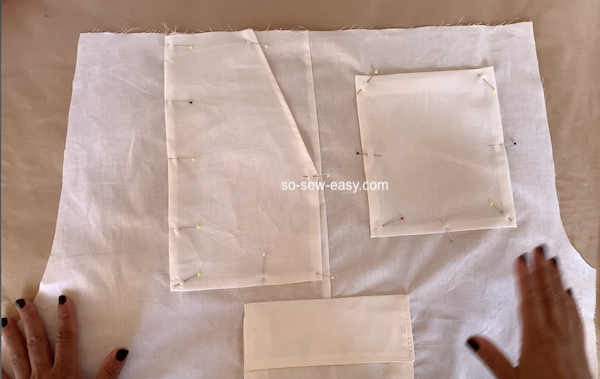
Step One: Making The Front, Back, And Side Pockets
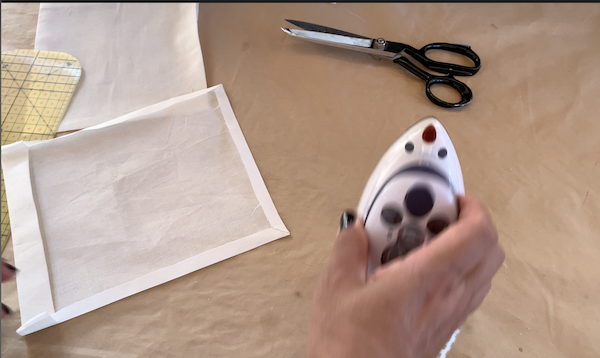
The front and back pocket is known as unlined applied pockets; in this case, they have a 3/8″ seam allowance. Turn the slanted side 1/4″ once, then 1/4″ again. Sew very close to the edge. Iron the sides at 3/8″.
Fold the top edge 5/8″ and again 1″.
Fold the sides at 3/8″.
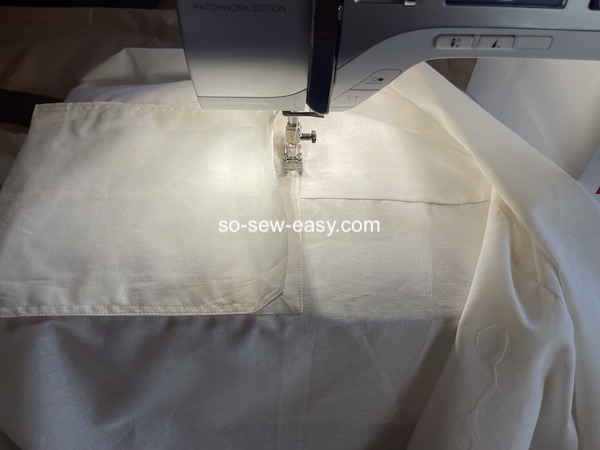
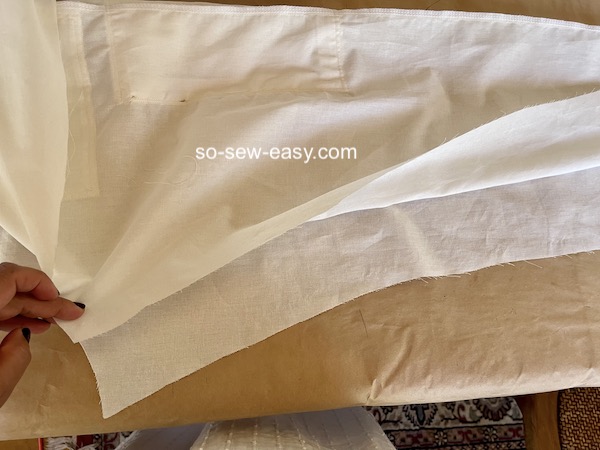
Step Two: Sewing The Front And Back Together
The front and back of the leg need to be sewn together before we can apply the bellows pocket.
Sew each leg separately, joining one front and back of the pants. Sew at 5/8″. Serge or zigzag the seam allowance, iron. Place the front pocket flush with the side seam. Place the back pocket and then the bellows pocket in the middle.

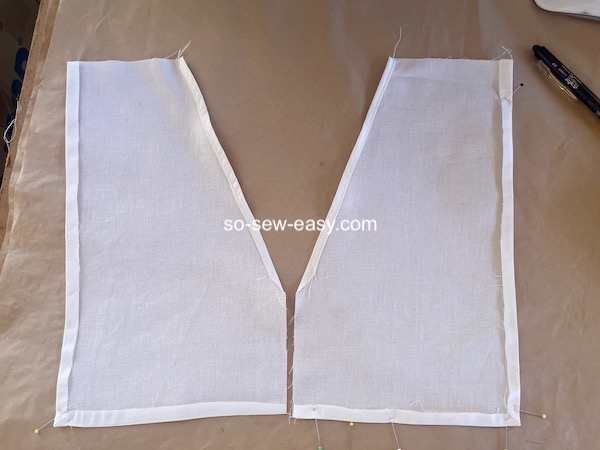
Step Three: Sew The Inseam
Sew the inseam at 5/6″.

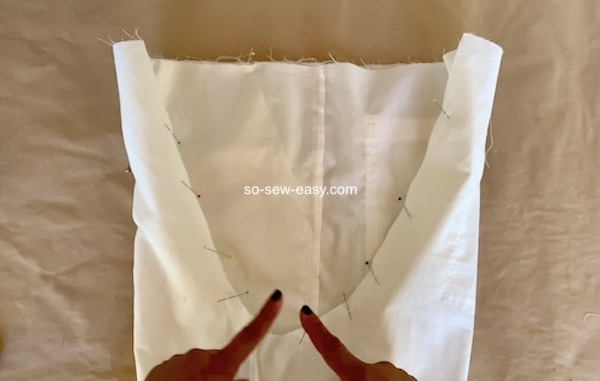
Step Four: Sew The Legs Together
Turn one leg right side out, insert one leg inside the other, and ensure the right sides face each other. Sew the crotch and serge or zigzag the seam allowance.
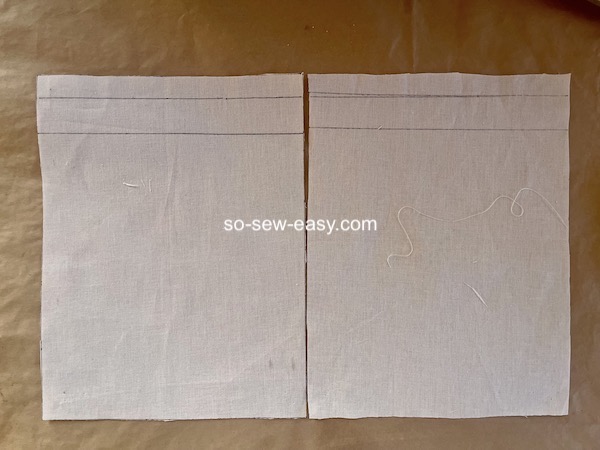
Step Five: Making The Waistband
Measure the waistband. Make a band with waist length plus 5/8″ by 4 1/4″. Sew to make a band.
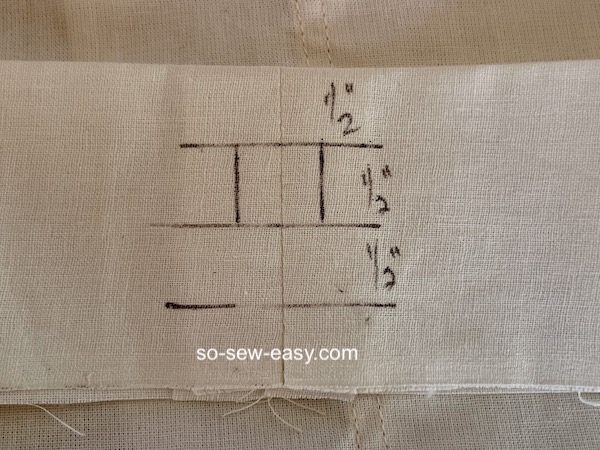
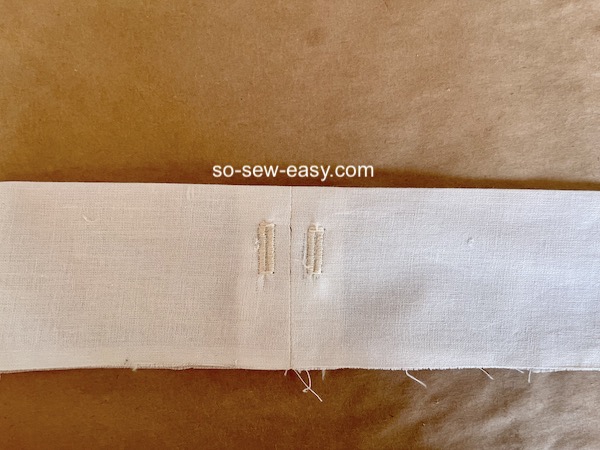
Make one buttonhole on each side of the seam waistband.
Make three stitching lines 1/2″ apart. Cut the elastic into three equal parts the size of your waist.
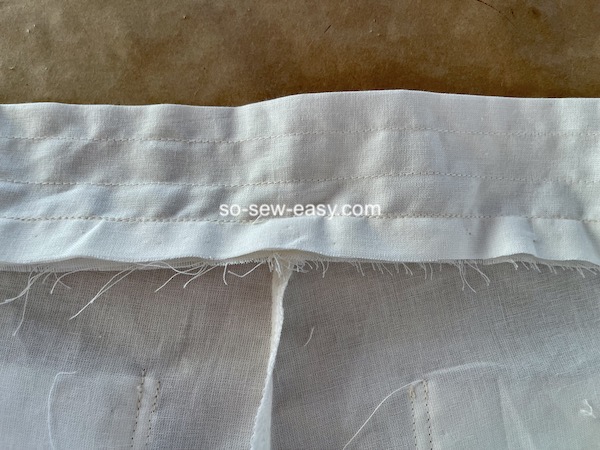
Serge the waistband seam allowance. Attach the waistband to the pants, and make sure the buttonhole are at the front. Use the buttonhole to insert the elastics inside the rows—
Note: I have made the stitching lines very close to the buttonhole; I suggest you stop 3/8″ from it.
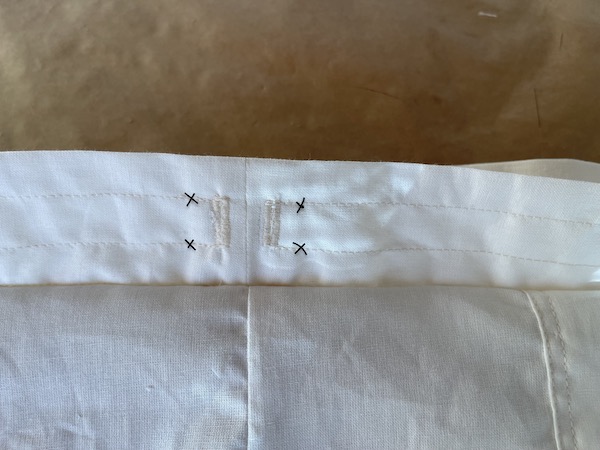
Insert a cord in the second row. I do not have a cord, so I am making one with a 1-inch wide bias tape.
Step Six: Hem The Cargo Pants
Serge the hems, fold the hem 1″ and sew.
I know these pants only come in three sizes; let me know in the comments below if you are interested in a larger size and which one you are looking for. The reason is that the three following sizes will take up 30 pages to print rather than 20 as above.
That's All
I hope you all enjoyed this pattern. Don't forget to always be creative in order to stay healthy and positive. Let's keep the world together one stitch at a time, And Until Next Time, Happy Sewing!


Thank you! This was just the perfect pattern for us. I drew smallest size but it was too big for a 12-year-old. It was easy to alter it smaller. I also added ankle elastics. I might sew pants for myself too!
Was a video tutorial ever made for these? I tried asking a few days ago, but it seems my comment didn’t get postes.
Is there a video for these yet?
I have just finished my first pair of cargo pants from your pattern and instructions. Thank you also for the extra tips below re grainline and threading/joining the elastic. I did cut the elastic in half as mine was too wide but zig-zagged the raw edge with the elastic stretched as much as possible – this stops it unravelling as you are threading it through the channels. The trousers were easy to make and they will not be my first pair that’s for sure! Thanks again.
Thank you, Jane, for your feedback! I am very happy you are satisfied, Kind Regards,
Did a video tutorial ever get posted for these? I’m unclear on how the waistband attaches.
HI Penny; I am still editing it.
Great pattern, but where is the grainline marking ?
Hello Matie-Josee, thank you for your comment; I did not realize is not there until you mentioned it. Please use the side of the pockets, take the inner side and lengthen the line with a ruler.
Hi I love this pattern and was hoping to make some cargos soon! Does anyone know how to get the side pocket pattern pieces? I saw it went out in the December newsletter but I’m new and didn’t see it when I got the pattern. Thank you for any help!
Hi Veno: https://so-sew-easy.com/bellows-pocket-tutorial-an-important-detail-in-sport-fashion/
Hi – thanks for posting. I have the following questions regarding elastic waist band :
Thank you
Hi Sian, yes, the rows you sew depend on how wide it the elastic is. Thread the elastic through the whole you left for that purpose; once you thread it you can sew the ends together and finish threading. Best to wait for the video if you are not sure how to sew the cargo pants. Thank you!
Thanks Mayra. I couldn’t locate your video but it’s clear to me now and Im excited to get sewing.
My Pleasure Sian, hope you give feedback so I can improve the fitting for curvy girls.
This would be great in a shorts option!
I just printed out the pattern and tried to tape it together and the pieces don’t match. This is not my first online pattern. It does not look like the picture when you put it together.
Thank you!
Is there any way you can add layers to your ,pdf so that you only print the size you want/need?
How about pick your size? Three sizes in one file and three on another. .Larger would be nice. When I try to enlarge more than a few inches, things can get crazy.
Life today seems to make one rounder but not taller.
Thank you for the pattern.
I’m getting on the band wagon for larger sizes. I’m a RTW 3X and there doesn’t seem to be any of your patterns for us more to love gals!
Hi!
These pant look fantastic and I shall be making them for my partner since she loves the look of them too.
Is there any chance you can make a free pattern man size, please? I wear shop bought cargos all the time but would love to make my own and the freedom of fabric choice that would enable. Thank you.
Dear Mayra:
I’m in line with Paula. As my number if birthdays increased so did the size of my hips. A size XL with 48″ hips would be great. Can’t wait to try out this pattern. All the pockets are great! Thanks a million.
Jane H
Dear Mayra
A simple tutorial on grading, how to make patterns larger or smaller, would solve the sizing problem here. These are such simple trousers. And very very useful.
Mary
Indeed you are right; I will consider your feedback. Kind regards,
These look great, but yes, I will need bigger sizes please.
What Size, please?
I love this pattern. It would be just what I need for daily wear if…it were in a larger size. At 68 my hips have spread out a bit and I think would need an XL with hips at 48″. I’ve decided that my retirement hobby will be sewing and since it’s been about 50 years since my home ec class in school your site looks like the perfect fit. Wish you luck on your little piece of heaven. My husband and I lived that life until his death in 2019.
Hi Paula, sorry for your loss; I will consider your requirements.
I also need larger sizing. Can I just add a bit to all seams without loosing the fir?
That would depend on your body type and whether you don’t mind the legs being wider by the amount you add. If you add seams all around, the crotch will also be longer. This is ok if you have a tummy or a long crotch. Just sit down in a chair and measure the distance from the chair to below the belly button where the pants fall then measure the pattern and see if you need to add to the crotch as well or just the sides.
Like others here, I would need a larger size. The XL with 48 inch hips would work for me,.. however, I also have a different question. Is the draw-string a fashion item or functional? I would prefer no drawstring, but I don’t know if the waist band has enough elastic to eliminate the drawstring.