


 Do you have a lot of supplies that need storing? Or kids that have small toys or cars to keep tidy? Or even Unfinished Works in Progress that need to be organised? Or want to keep a pattern, zipper, fabric, thread etc all together for a planned project.
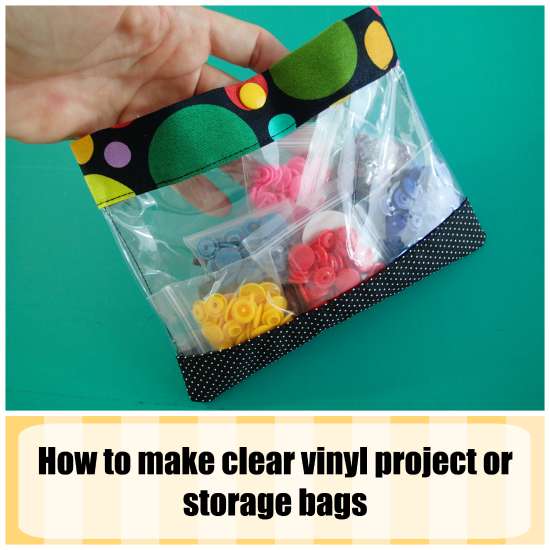
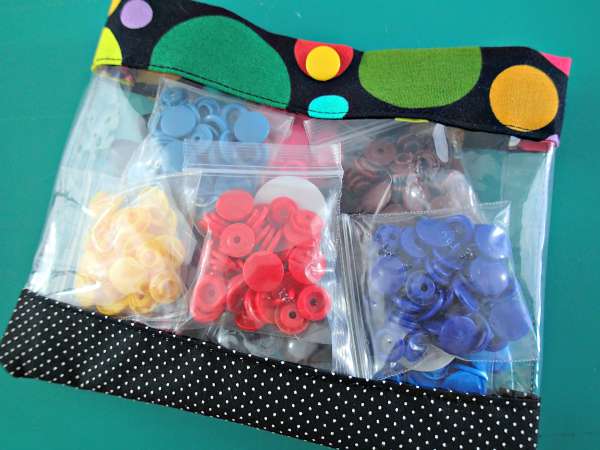
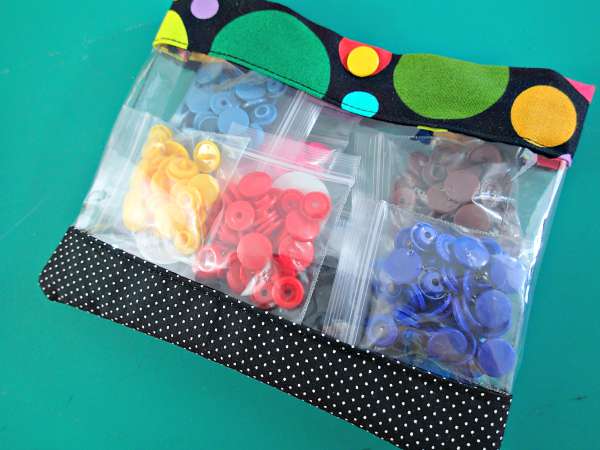
ME TOO! I love anything that helps me to stay tidy and organised so I've been making up whole bunch of clear bags and pouches to do just that. I like these because I can see at a glance what's inside.
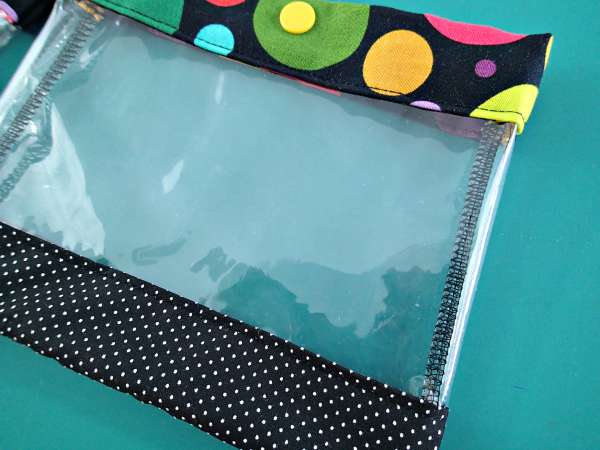
I made a couple of different types. Small and medium flat pouches with snap tops and then some larger ones with a zipper top too. Now I have plenty of variety and just the right bag to store all my goodies in.
If you want to have a go, here's how you can make the simple snap top vinyl project or storage pouches. I'll be making up a quick video on how I made the zipper top ones so this will follow on when I get a chance, soon I hope.
You will need:
- Clear vinyl
- Scraps of fabric (I used quilting cotton fat quarters)
- Snaps (I used KAM Snaps)
- Useful – Teflon or roller foot for sewing with vinyl
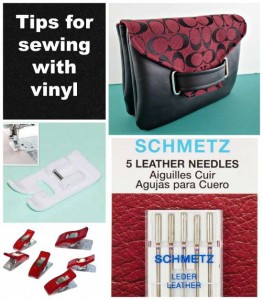
First time sewing with vinyl? Check out these tips.
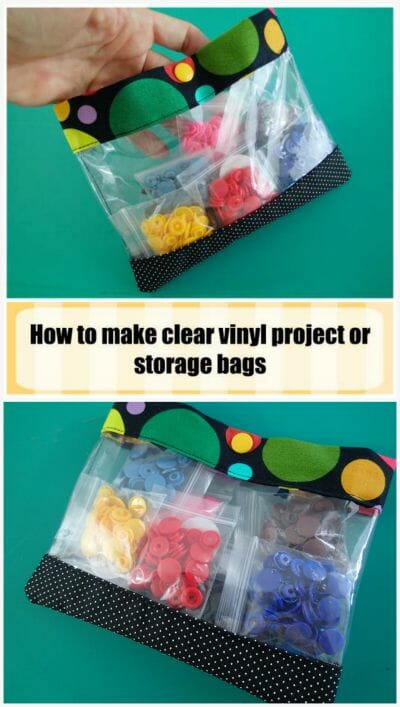
How to make a clear vinyl project bag
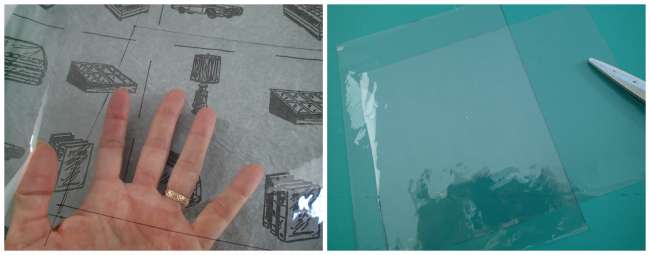
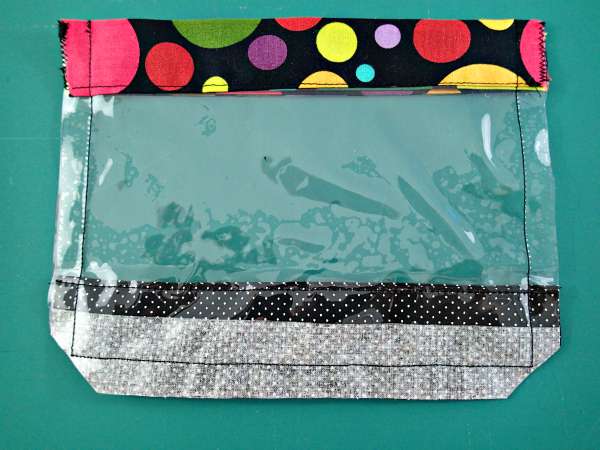
1. Decide how big you want your bags to be. I'm showing you my small ones here which are just right for storing small supplies like my KAM snaps, or for buttons, thread, needles, small toys etc. I cut my vinyl 9 inches wide by 6 inches tall for these. Remember that you will lose an inch width-ways and a 1/2 inch in height for your seam allowances.
2. Cut yourself two pieces of vinyl. It's not easy to see, so I drew the sizes with a thin sharpie so I could have a line to follow. You can also use a quilting ruler and rotary cutter – the vinyl cuts very easily, but it does stick to the ruler!
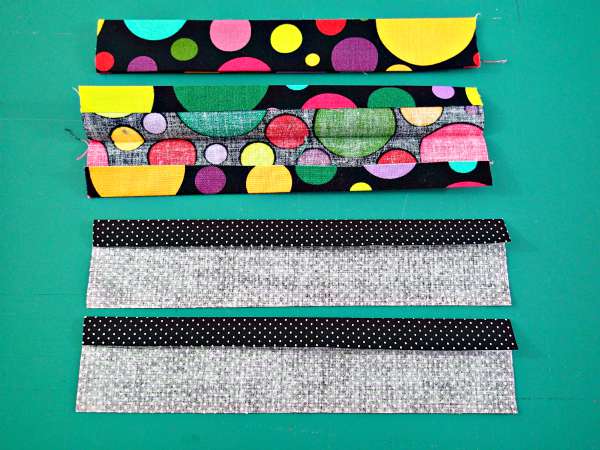
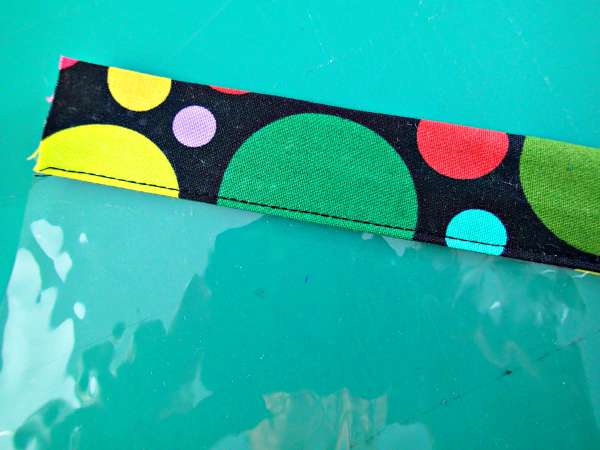
3. Your fabric strips for the top will need to be the same width as your vinyl, twice the height of the finished strip plus 1 inch. My top strips are 9 inches wide by 3.5 inches tall. Cut two.
4. Cut two strips of fabric for the bottom of the bag too. These will need to be the same width, and the height you want plus 1 inch. I made my lower strips 9 inches wide by 2.25 inches tall.
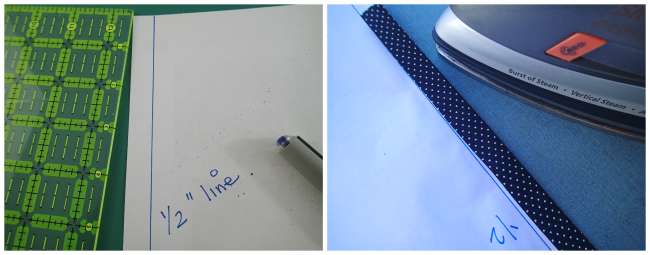
5. We need to fold some nice neat 1/2 inch seams. I find the quickest and easiest way to do this and avoid getting my fingers burned by the iron is to find a piece of sturdy paper or thin card and draw a line along the length at 1/2 inch from the edge. Now I can fold my fabric over the edge of the card until it hits than 1/2 inch line and press it. You can even fold it over with the tip of your iron and avoid getting your fingers in there altogether. Nice neat fold, and a straight 1/2 inch turned over – quick and easy.
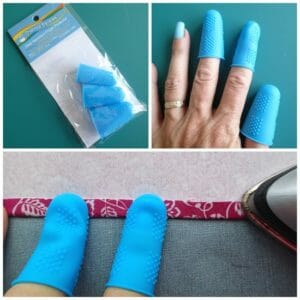
Always burning your fingers? Try out these thermal thimbles for turning and pressing narrow hems.
6. Fold in 1/2 inch both long edges of your top pieces and on one of the long edges on your bottom piece. Then fold the top piece in half, matching the folded edges.
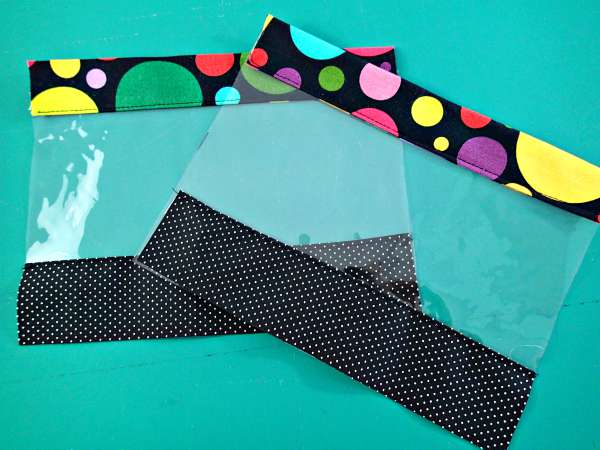
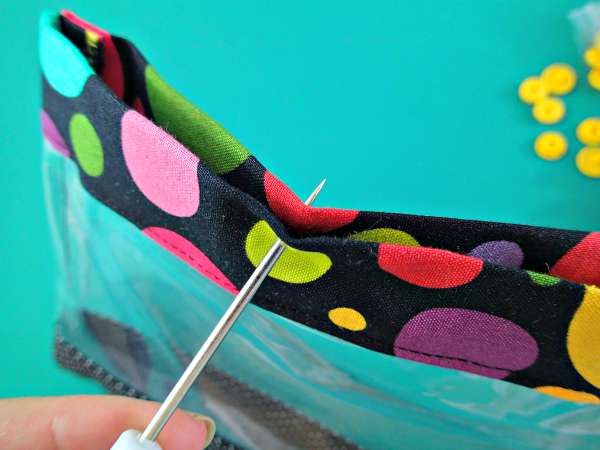
7. Open up the fold on one of the top pieces and place the vinyl between the layers of fabric, with the edge right up to the crease. Clip it in place to stop it shifting using Wonder Clips, paper clips or similar.
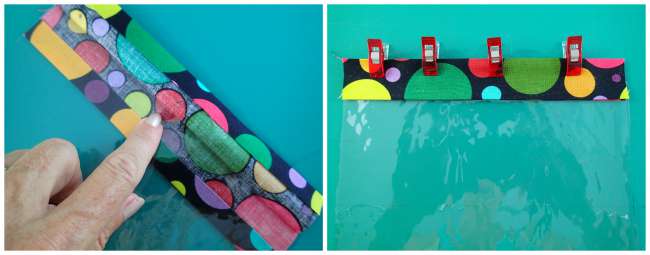
8. Sew through all layers close to the lower fold, catching the vinyl between the 2 layers of fabric. You will find that the vinyl likes to stick to the flat bed of your sewing machine so just lift it up as you guide the sewing through the feed dogs.
9. Place your lower piece of fabric on the bottom of the vinyl, matching the raw edges. Stitch it in place close to the top fold.

12. Repeat these steps for the other pieces of fabric and other vinyl piece so that you have two matched pieces.
13. Place your two pieces right sides together. You might not need to use any clips because the vinyl will stick to itself in the center. Match up the fabric bands top and bottom. Sew down the sides and across the bottom with a 1/2 inch seam allowance.
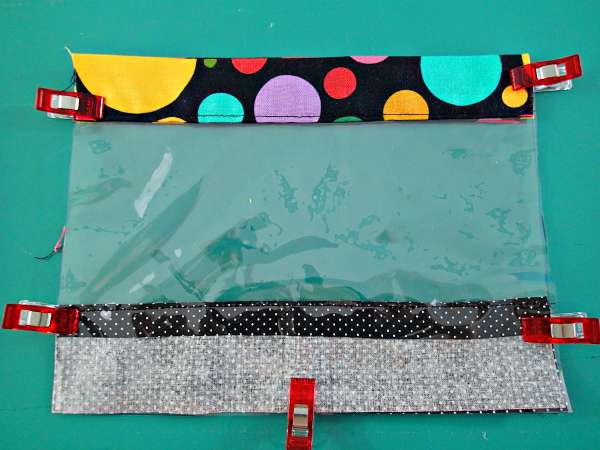
14. You might like to just neaten the edges of the fabric with a zig-zag or overcasting stitch over the edges. Or you can sew the bag with your serger to sew and neaten at the same time.
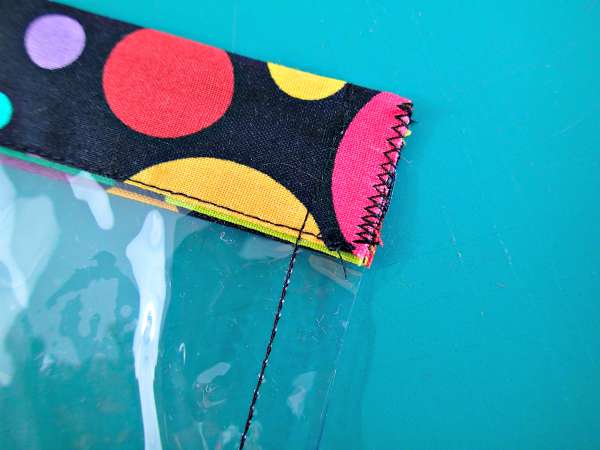
15. Trim off the corners in the bottom of your bag and neaten the fabric edges there if you want.
16. Turn your bag right sides out and decide how many snaps you want to add. On my small bags, 1 snap was enough but for a wider bag, you will want to think about adding a few more to keep the top closed.
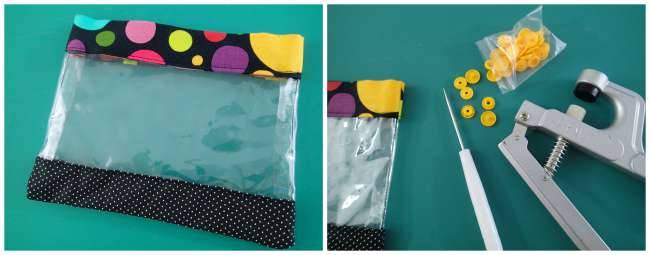
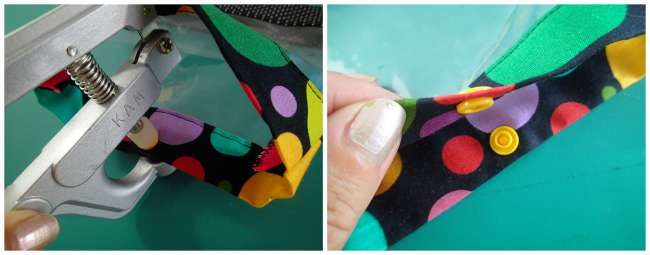
17. You will find it easier to make your placement hole through both layers at the same time to make sure that your snap lines up correctly. My pliers set came with this nice sharp pokey-tool. You can of course use sew-in snaps too, or even a small button.
18. Install your snap(s) in the top of the bag and you are done.
 These are quick and easy to sew and a nice way to use up from smaller piece of fabric too. Once you see how easy they are to put together, you'll be making them in all sorts of sizes. Kids love these too!
And you can quickly make these up with your serger too if you like.


NUMBERING GOES FROM 9 TO 12. MISSING 10& 11.
Hi, do you recommend using a leather needle for this kind of clear vinyl like in the post about sewing vinyl bags, or is a regular sharp needle better? Thanks!
Hi CJ, here’s a whole bunch of info on sewing with vinyl including the right needles to use: https://so-sew-easy.com/tips-for-sewing-with-vinyl/
If you wanted to be eco-friendly, you could use cotton mesh in the place of vinyl. That way you could still see what was inside but not use any plastic. Now you have me thinking. Thank you.
perfect little pouch — I made one for all my elastic for sewing! and using scraps is the best. thank you.
Great tutorial, I am in love with the material you use can you tell me the designer please.
The fabric is normal quilting cotton fabric from 2014.
I think a snap bag closure would be perfect for this project. Remember those snap bracelets? I use a inch wide measuring tape cut to make the closure. Before sewing the sides and bottom, slip in the metal measure tape and voila , a snap bag closure!
Sounds like a magnetic closure?
Looking forward to giving these a go, hoping to make some as Christmas pressies to go in the stockings I am making for everyone. Managed to get the vinyl yesterday.
Jennifer asked about adding a zipper instead of snaps. Check out any tutorial for a zipper pouch Or you could do it this easy way: Construct the pouch fr and bk pcs. as directed in this tutorial. Now add the zipper to the fr top & bk top pcs. ( If unsure how to do this: with zip RS up, place pouch front top edge over 1 side of zipper tape close to the teeth. Sew w/zipper foot. Stitch again about 1/3″ away from 1st stitching line to hold the zip tape down flat on under side. Repeat with back pouch top edge sewn to the other side of the zip). Important: Now OPEN the zip most of the way across (this is how you’ll turn the pouch to the rt side later). Fold pouch with right sides together, zip tape ends should be folded down, away from the zip top. Sew all 3 raw edges, neaten raw edges, turn RS out thru the zipper. Done!
Great for organisation with the clear vinyl. Featured today, Deby.
Thank you Deby ..going to make some of these to add to cosmetic bag for daughter.
I love all of your ideas, so nifty! Also you include items new to me, like the lovely snaps, and where to find them.
Thank you for sharing.
Thank you for sharing the tutorial. Great idea!
I love this a lot!
This is a fantastic tutorial! These would be great to make as gifts for the ladies in my beading group. The pouches are perfect for containing separate ongoing projects and supplies. I was wondering if the snaps can be set with anything other than the tool made specifically for them. I have another snap setting kit and would prefer to put my money into more snaps than another tool. Also, when using a zipper instead, how would that be added. I thought of trying velcro, but it is not a good idea around beading thread–gets messy. Thanks for any additional answers.
Hi Jennifer. These Kam snaps ideally need the proper tool I think to set them properly, although I admit I’ve not tried it without. I have another article coming up later on that will have a zipper version. It’s pretty adaptable and you can create a flat bag or one with some volume. Look out for that when I get a chance, soon.
Thanks, I’m looking forward to it!
I have my snaps, roller foot, clips, fabric – and finally some vinyl I bought 3 days ago, so I’m all ready to make myself some bags. Your tutorial came just in time for me to try them out as soon as I finish my current project – thanks 🙂
My local fabric store has vinyl in several gauges, though in her Craftsy course Annie Unrein recommends the 16-gauge for the pockets in her travel accessories.