


 The corset-theme is widely popular all over the world today, and it’s a pity that not everyone can attend my classes in person. And that is why I have created this website – the Corset Academy. Here you will receive the knowledge and skills required for the creation of wedding dresses, evening gowns and high class haute-couture dresses. These skills and know-how’s will enable you to stand out among others. But remember that you should not focus only on one particular technique of corset garment production. There are plenty of varying techniques for the creation of wedding and evening dresses and I commit myself to teach you to use them.
Please don’t forget that theory should be backed up by practice. Without the practice any knowledge soon tends to melt away. You can download my video tutorials to your computer or watch them any time on my public access YouTube channel. Trust me: creating garments like this is only difficult at the first glance. I will show you that sewing a corset is a simple thing! Check out my article next week for a complete step by step corset sewing lesson!
Here are some creations made by my students who had also come to the Corset Academy believing that haute couture garments could only be produced by the “chosen” – by very exceptional people with very special gifted hands. But having acquired the necessary skills and learnt to apply them they started creating their own masterpieces.

Let us get started. So, what is then a corset and how do we make its pattern?
I have found the following definition of a corset in Wikipedia.
Corset is a garment worn primarily by women; it is designed in the shape of a belt with sewn-in elastic plates tightly embracing the lower part of the chest and the stomach in order to shape the body in a desirable way – ensuring proud bearing and a slender waistline and providing soft support for the bust. A lacing is usually made from one side or from multiple sides. A corset is mostly used for creating a silhouette; it highlights body curves gracefully, narrows the waist, visually broadens the shoulders, supports the breast making it look fuller, and provides the desired posture.

How to make a pattern for a perfect corset after your own measurements?
Those who are not familiar with my technique yet are going to be surprised or perhaps even a little shocked. I urge all beginners not to use any calculated methods of construction for making patterns after individual measurements of a client or after their own measurements. No matter which exactly: the most popular, fashionable, precise or the least known.
In most cases the result will be poor especially if the measurements are far from the standard. You will have initially gone the wrong way! You will be designing a corset for an unshapely figure and will therefore end up with an unshapely corset! Afterwards you will have to start making changes and adjustments.
However there is also another aspect. Professional sewers are going to agree with me because they understand what it’s about; as for the beginners – I’ll make some explanations now. As funny as it may be, in our duty one first of all needs to learn to sew, to master various sewing techniques and to explore properties of fabric.
Only afterwards you can start making patterns. It is especially true for the sewing of corset garments. The thing is that during corset tailoring the parts that get sewn together undergo significant changes. Easing in, pressing flat, stretching, pressing open. With our hands and with the help of an iron we shape the parts that need to be sewn together as if we were sculptors.
You won’t be able to construct a quality pattern until you understand what and how you are joining together, and how a pattern piece is deformed during the sewing process. Beginners usually learn it the hard way. Failures in pattern construction stand in the way of making a good corset. This puts you off the further studying of the material. That’s where this myth comes from: the one about a wedding dress being impossible to sew yourself and almost beyond attainment! I show my students exactly the opposite – a corset is simple to make! To have a guaranteed good result you should just follow my recommendations, the ready-made sewing algorithm, the right sequence of movements and techniques. But this sounds like a vicious circle, doesn’t it? If you can’t sew – you can’t make patterns, but you need a perfect pattern if you want to start learning to sew. What shall we do? Where to find the pattern? Now I am going to explain you how to create your very first pattern.
Using these methods you can create quite a good working pattern but it won’t be perfect yet – you will need to improve it further. I created my first pattern resembling a corset using the draping method. A good quality pattern has been tried out for years. It isn’t constructed for every customer individually; it is made once and forever – only its proportions and shape need to be worked-off taking into account further deformation during the process of sewing and steam-pressing.
It often happens that a pattern looks rather decent on paper but it’s not the same when it comes to sewing – for example when I was quilting in the boning forming the dome-shape of the cups there would be some unexpected creases. I had to correct the pattern again, trim it, cover the 1-2mm gores at the crease spots and try again. At the end I got what I wanted!
I have worked my patterns through in such a way that I can now make a corset looking exactly what people want it to look like after sewing and stitching-on the bones, easing in here and stretching out there, and after some intense pressing to shape the garment.
I would like to mention another important detail. Suppose I have cut a corset after my own patterns, sewn it together and then undone it wanting to take a pattern of the unstitched pieces.
No such luck! If you decide to make such an experiment you will see how deformed the pieces will have become. You cannot take a pattern of a ready corset! During the second sewing the corset will be all curved awry.
The same way you couldn’t construct a pattern using calculation methods – no formulae can take account of fabric behavior during the further process of sewing. Those who have already had such a disappointing experience will agree with me, and if you haven’t tried it yet – just do it and you will be convinced.
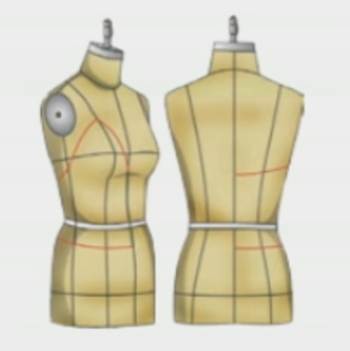
What’s the easiest way to construct a corset pattern? It will need to be improved further in any case, so let us at least save some time at the first stage. I suggest using the draping method to make the pattern. We need a dress-form that will be from now on used for working on our corset. It is a usual ex-display foam mannequin that I describe in the tutorial devoted to the equipment and all things necessary for corset tailoring.
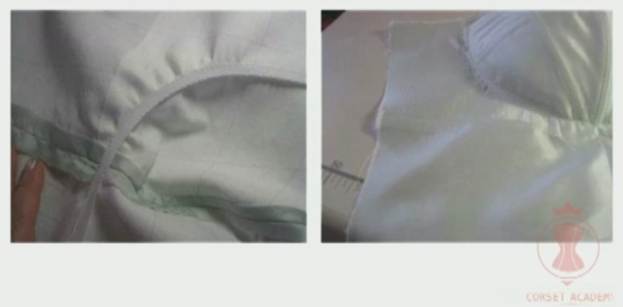
I draw a plain shape corset on the dress-form using a disappearing ink marking pen. I tie cords horizontally around the bust-line, the under-bust line, the waistline and the stomach at around 4.5-5 inch distance from the waist. Then I trace all these lines with the marking pen and remove the cords. I mark the middle of the front, back and side seams very carefully. Afterwards the location of the vertical curves of the corset can be marked.
Now I take 4-5 straps of polyethylene foil or overwrap regardless of how many pieces we need to make. The straps are around 8 inch wide and 17.5-19.5 inch long.
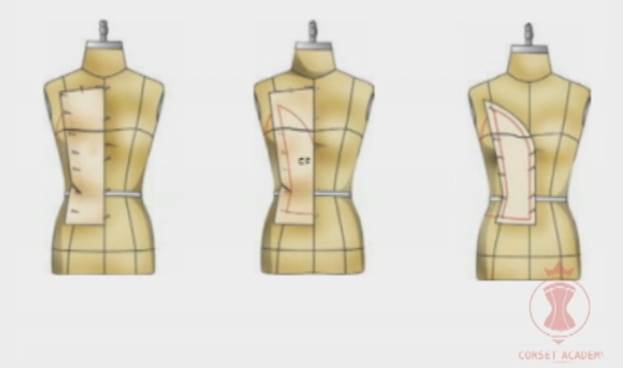
I take one of the straps and pin it: long side to the middle of the corset. I trace the seen-through central piece of the corset with the pen – from the crease to the curve.
Then I remove the strap with the drawn piece. I pin the next strap to the side of the corset and trace it as precisely as possible.

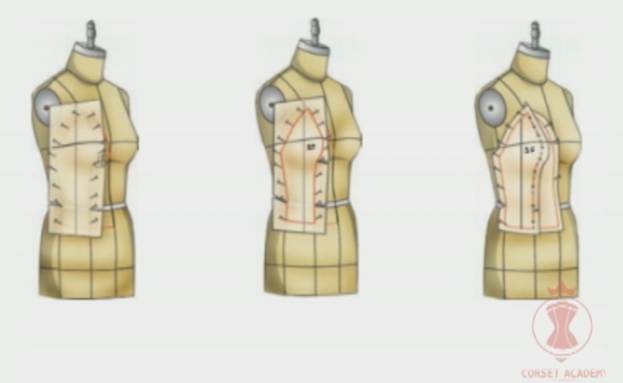
Then I do the same thing with the back pieces.
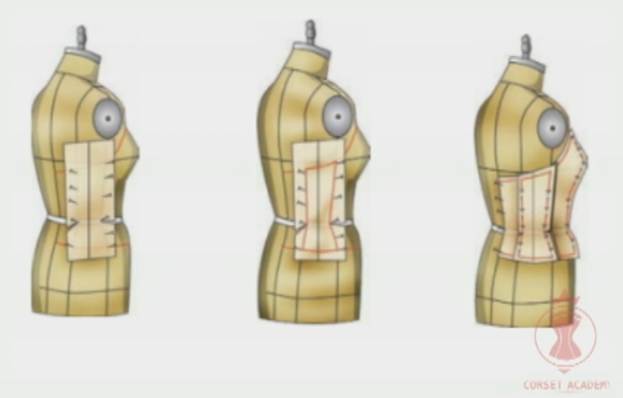
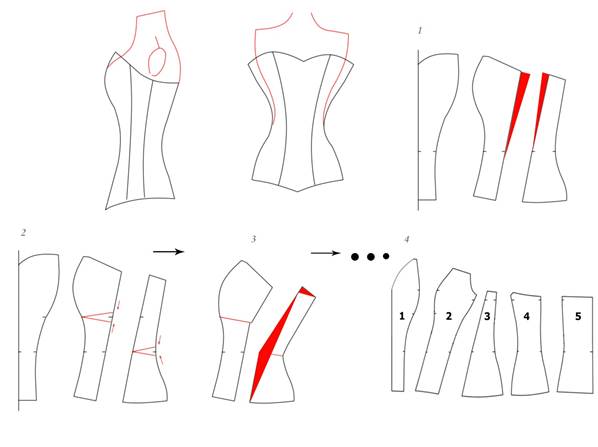
All the pieces have now been transferred from the dress-form.
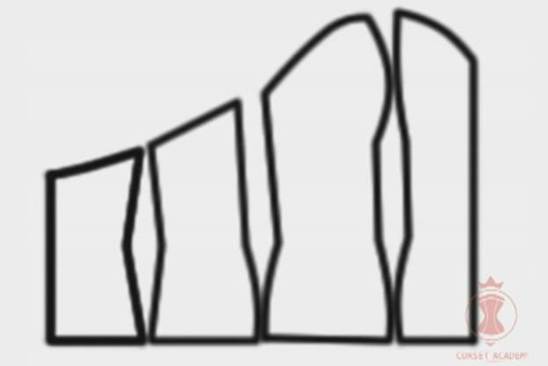
I compare the curve lines to make sure they are the same and interfit well. Then I add seam allowances to the patterns. Remember, one should cut a corset after patterns with all seam allowances for all sewn-together cuts accounted for. It is another of those tricks that significantly facilitate the work of a dress-maker. All cuts are going to fit together perfectly, the seams will be matched, the lines will be clear and flowing, and the cutting process will go faster and easier.
For the least patient ones who don’t want to waste any time on working their pattern off I could recommend getting acquainted with my paid-for materials. There I offer professional well-tried patterns – just take and sew, so to say. Watch the next 4-5 of my video tutorials: learn how to take measurements correctly, how to work with a ready pattern, and afterwards – you can make your choice.
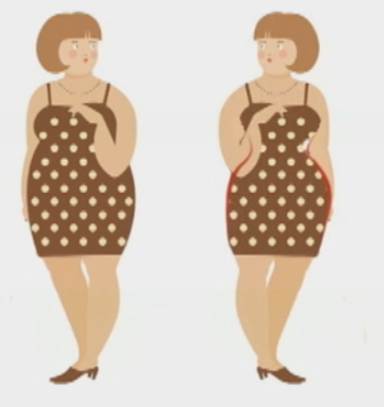
 I’m sure that some questions are now to follow: what size is this pattern we’ve got? The answer is – it doesn’t matter. You needn’t worry about it at all. Let us return to the definition of a corset. Corset is a garment worn primarily by women; it is designed in the shape of a belt with sewn-in elastic plates tightly embracing the lower part of the chest and the stomach in order to shape the body in a desirable way.
If you construct a pattern after measurements that are far from ideal, you will later have to take it in, restrict the waist, change the bust shape and you will nevertheless end up with no good result.
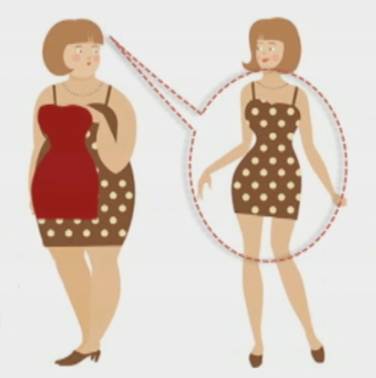
You should go the other way around. Suppose you have constructed a corset for a perfect slender figure of an unknown size, for example – for your mannequin. Now your task is – I apologize – to squash yourself into it.

Well the whole point of my theory is teaching how to take measurements correctly, how to calculate and expand patterns perfectly after a specific off-standard size preserving the proportions, the flow of lines and the shape. In this case your corset garment will have a beautiful shape regardless of the size.
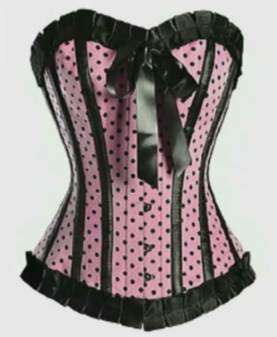
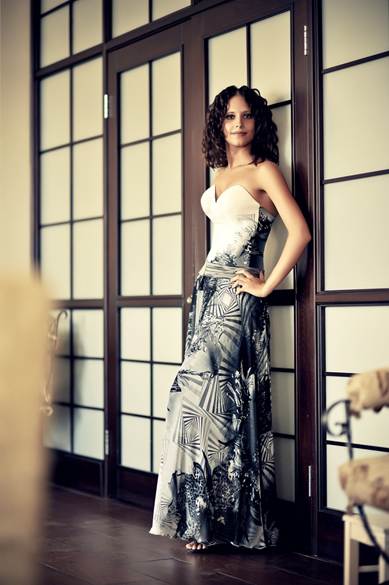
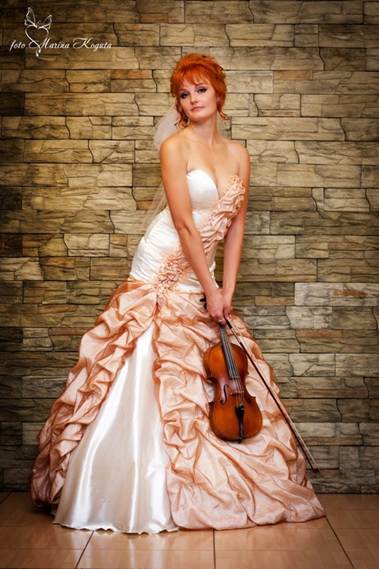
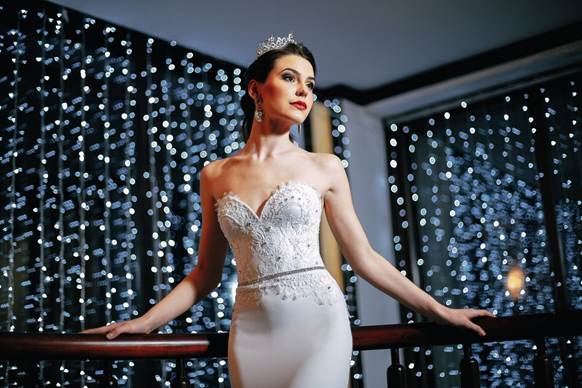
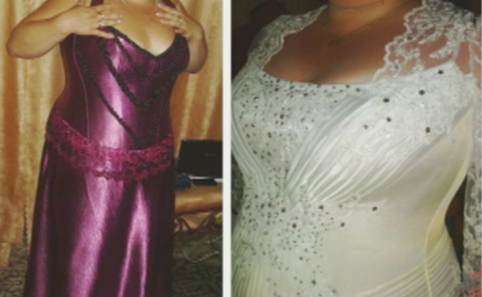
Take a look at these photos. They have been taken from our message board and show some works of a student of mine. For sewing these garments she used patterns with the following measurements: 34.5 inch chest, 26 inch waistline and 35.4 inch stomach. These measurements are really small but my student has adjusted them to the required size using my methods.
I shall say as an annotation to my methods that I use the principle of an expanding mannequin: I spin wheels to change the dimensions of the mannequin without changing its shape and proportions.

This is exactly how my methods work. Having created a form once you can expand it and re-shape off-standard figures with the corset.
In order to change the pattern you need to know the sizes of pattern pieces along the main lines – there, where you take measurements of your client (bust-line, under-bust, waistline, stomach and a couple other areas). I won’t focus on it now because it’s going to be explained in detail in the next tutorials.
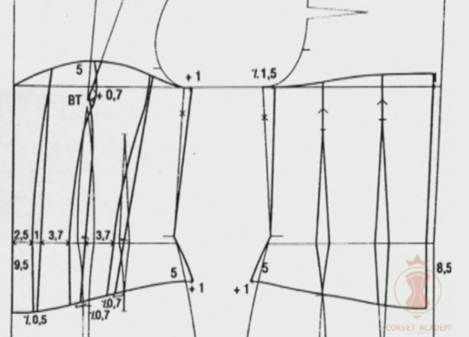
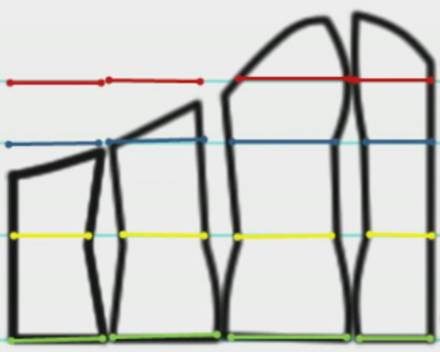
But how does one measure a pattern? It is very easy. The pattern pieces need to be laid out the way you can see now in the picture, and the length of the corresponding lines is then measured. The total of the seam allowances is taken away from it and thereby you get the semi-circumference of the corresponding measurement. It will be even more precise if you sew a sample, put it on the mannequin, trace the lines and measure them. All the changes are recorded in a table; we will discuss this as well in much more detail and in future lessons over on the Corset Academy.
That is all for today, you were learning with Tatyana Kozorovitsky. Good-bye for now!


