


 How to make a Duct Tape Dress Form – and how NOT to !
You might have seen these before. At some point or another, all sewers need to fit clothes so that they look flattering and are comfortable. But if there is just you, fitting and pinning alterations on yourself while you are wearing what needs adjustment is just plain difficult and sometimes near impossible. This is why all keen sewers love a dress-form – a mannequin with their own measurements (as near as possible) so that the clothes can be made on the model and fitted to the person who will be wearing them.
Sadly my budget does not extend to importing a dress-form so I decided to try to make my own body double using duct tape, newspaper and expanding foam.
How to make a duct tape dress form.
(Excuse the photos, they were only ever intended for personal use but this was so much fun I had to share!)
Here is how it started out. I first wore an old close-fitting t-shirt that I didn't mind cutting up. I extended at the bottom with a wrap of extra fabric around my hips and held it in place with some tape. I tied my hair up out of the way. Then we were ready to begin.

You will need a helper. Someone with whom you are quite close as this can be a very personal experience involving a lot of patting and smoothing of your personal areas! Start by applying the tape under the bust and in a cross-your-heart through the center to give individual definition rather than end up with a single uni-boob!
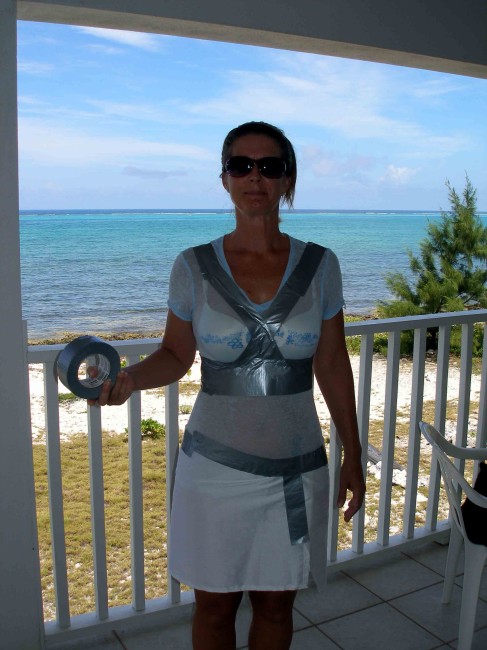
Now start to fill in. We decided to keep me cool and breathing easy in the Caribbean weather, we would start on the lower half first. Using long strips of duct tape, overlap them concentrating on one area at a time, placing the tape horizontally and smoothing in place without pulling tight and distorting the body shape.

Remember that this is supposed to be a duplicate of your own body, flaws and all. So don't pull tight around the waist or flatten your tummy to make it look better as tempting as that might be! Keep going with the tape in long pieces, front, sides and back. Continue down past the widest part of your hips, bottom and thighs so you can use it for fitting skirts and dresses too. End at the bottom with a line of tape as near horizontal as possible.
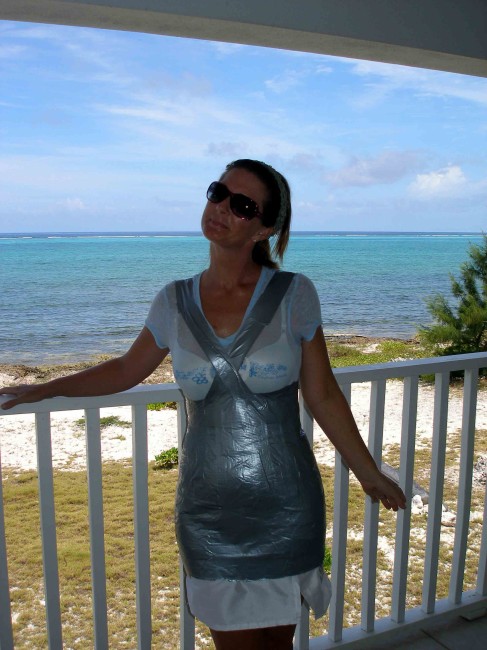
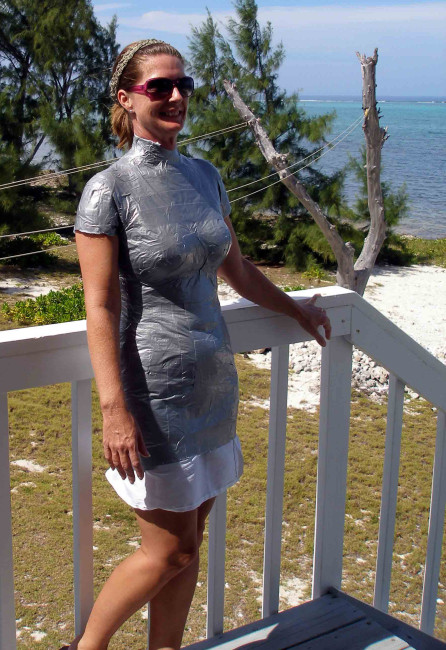
All done at the bottom? Let's start adding tape to the top section. Here shorter strips will be needed and will run in a more diagonal direction for a smoother finish rather than simple straight across. I had a v-neck t-shirt so added a piece of fabric around the neck and across the V so the tape didn't stick to my skin.

At this stage you might start to feel rather self-conscious as well as warm and constricted, and be keen to get this thing off you. But your helper has invested a good deal of time in patting and smoothing your tape and getting their fingers all sticky. So give them 5 minutes to enjoy laughing at you and taking silly photos while you melt in the very hot sunshine. It's only fair.
Now cut down the center back and through the back of the sleeves and remove. Go take a nice cool shower! Phew. Connect the cut edges of the hollow form without overlapping and tape them back together again. Cut some cardboard to top off the neck hole and the arm holes and tape these in place.
Then scrunch up lots of sheets of newspaper and start to stuff your body firmly but without distorting or stretching if you can. Make sure to keep turning it as you stuff to try to avoid too many voids and loose areas. Once its pretty well stuffed with the scrunched up newspaper, fill in the bottom with cardboard and tape in place. It will probably look something like this – still a little soft and baggy in places.
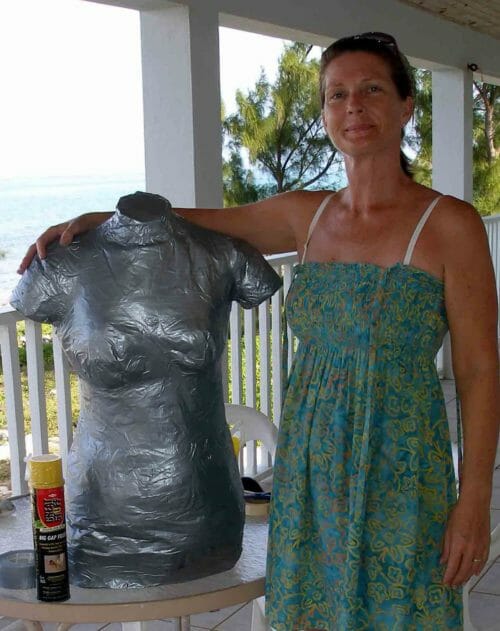
Spotted that can of expanding foam bottom left? This is where the magic comes in. Or in my case, the disaster! Using a very sharp knife cut small holes in the tape at the places where there are voids in the stuffing, typically the bust, bottom, tummy etc. Insert the nozzle and squeeze in a little foam. Notice I say a little! I underestimated how much this stuff expands and I filled in all of the voids at this stage until it was smooth and perfectly finished. Add a little tape over the cuts you just made.
At this point I thought myself finished, measured my body form and was delighted to see that it was almost spot on to a fraction of an inch, to my own body measurements. It looked so good, was light and easy to move about, and I was delighted with the finished result.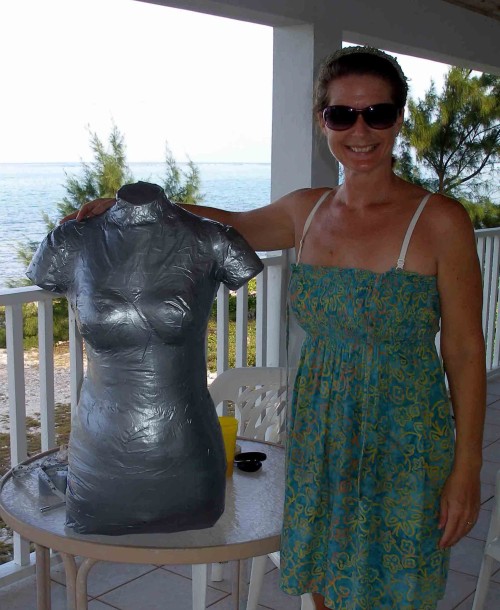
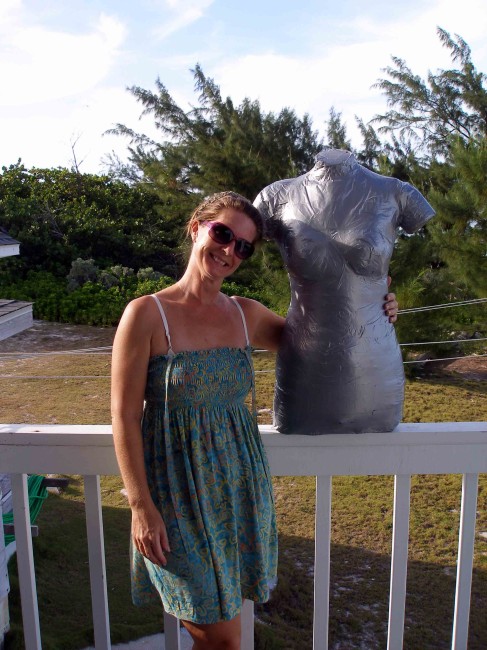
All that remained was to get my husband to make a basic stand, stick it on and it was done. Or so I thought.
But in the morning, I was greeted by a monster! The expanding foam had continued to slowly expand little by little overnight and because the form was already full, it had no where to go except to stretch and pull and stretch some more. I was not really enormous, but my body double was no longer my double, but some deformed monstrosity of lumps and bumps.
The foam was hard so there was nothing to be done to save it – we dressed it up in some old clothes and left it out the front of the house with the dustbins (trashcans if you are US). It was there a couple of days and must have given the passing tourists quite a shock!
So, can this be done? Absolutely. It was going perfectly well until I got overzealous with the expanding foam. If you want to make one of these, be sparing with the foam, leave it some hours to expand – you can always add a little more later, but you cannot remove your ugly lumps and bumps if it expands too far.
I do recommend this project – it really was a lot of fun. Anyone else out there had a go at making their own duct tape dress form?
Authored by: Deby at So Sew Easy


Is the duct tape dress form pinnable?
Yes it is, but the glue on the duct tape is really sticky and you might get sticky pins.
Thank you for this tutorial! I am so making one for myself. I just have to think of a more effective helper than my hubby. I’m sure all that smoothing and patting will take us anywhere but completing this project! Hahaha 🙂 I did want to see that monster, though, just for laughs. 🙂
Anne
Er, yes. When I mentioned it was a very HOT project, I meant in more ways than one. Good luck with it Anne.
I tried it once (never again) my sister was wrapping around me so strang I could hardly breave and almost fainted! At the end my double-me had no breast and my waist -10 cm …. so not very useful! But it was funny!
I’ll bet you had a lot of fun, but it certainly sounds like the tape was too tight! I think it’s better to work with small strips that are smoothed on, and not work from the roll in long pieces, or there is a tendency to pull it too tight – with uncomfortable results!
Thanks for such detailed directions! My husband looked at the pictures and said, “What an ugly dress!” We both got a good laugh from that! I’m going to have him make me a full body “form” because I rarely wear dresses and/or skirts. Most pants don’t fit me correctly because I have scoliosis. My own “body” form will enable me to make clothes that fit. Hooray! Hubby does woodworking, so he can make a stand for my form. I’ll be sure to take pictures to send to you. It probably won’t happen until summer – he’s a community college instructor and very busy. I like your idea of using the silver tape for the first layer and using decorative tape for the cover. Gives one all kinds of ideas as to how the decorative tape can best be used!
That really sounds like an excellent idea Kay and it should be the perfect way to get an exact replica of your own body shape. Just take care with the foam and don’t make the mistake I made by adding too much! I’ll be really keen to see the end result, hope it turns out well.
I’ve been wanting to make one of these for myself for years but didn’t know how. Thanks for answering my questions. Hubby is REALLY going to enjoy this. Only one minor problem…. I MUST loose 6 to 7 kg’s first. Wish me luck! Nola.
I just made one of these and your tutorial was so great! Thank you so much for posting it! My husband was my helper and he even admitted to having a good time helping me with it (maybe it was all that gratuitous “smoothing and patting”).
Er, yes, my husband felt the same way! It’s a fun project and we laughed so much. Hope it turned out perfect.
I have made 2 of these. The first one for a friend and we discovered by doing this that her fitting problems were caused by her hips being at different heights, made it hard to fit a dress but with the form much easier. The second was for life size emergency training dummy for our local hospital to do emergency preparedness because it did not have the extra weight so no one was likely to injure their backs. I used polyester batting for my filling.
That’s a great idea for the emergency training dummy.
I too wish you had included a picture of the lumpy monster. Are you sure you don’t have one tucked away someplace?
I only wish I had Sue. It was such an embarrassment. I actually never intended to show any of these on the site – it was just an after-thought which is why I look not terribly presentable!
Hi Debie, I love everything about your blog: fabulous project idea, the fact that you enjoyed the project and offer it including your photos, excellent writing style,the way you express your emotions using humor and how helpful you are in following up with everyone’s questions/comments. I just purchased on line a body form for $100+ and am awaiting delivery. I will follow your instructions and I think that I will return my original shipment.
Thank you!
Hi Melita and thanks for commenting on my dress form tutorial. What exciting news that you have a real one ordered and on the way. They have all these dials so that you should be able to adjust it to your body size. By all means make the duct tape form, it’s a lot of fun and can turn out well. But it is a lot of work, especially if you go on to add a cover, a stand etc. If you can afford a ‘real’ one, then I am sure you will find a use for this one too. It’s on my wish list for Christmas, maybe next year.
I’d have loved to see the monster versio as well. 🙂
I don’t know how I missed this post when you first posted it – it’s so funny and clever all at once! My daughter has made duct tape clothes for those “no clothes” parties that were popular for teens last year, so I thought the linky picture was for something like that. I have had similar results with that foam, only it was doing a home repair on a lose fitting A/C duct in the ceiling – what a mess! Thanks for sharing such a great idea and never being afraid to show us what works and what doesn’t. Saving us from the same fate!
Could you fill the entire form with foam instead of paper got a lot of the spray foam left over from a home repairs job and was wondering if it would work for this
In theory yes, but with so much foam you might end up with the problem that I did – the foam continued to very slowly expand over the coming hours until it expanded too much and made the form all out of shape. I think you would want to start with trying to support it somehow, then spraying the inside with the foam in a fairly thick layer and allowing it to expand into the body itself. Leave it plenty of time to thoroughly dry. Then spray another layer on the inside of that, allow to dry and so on, until you had everything filled. Good luck with it.
Thanks so much for sharing. I have always wanted a dress form but am unwilling to spend the kind of money it takes to get one. I am looking forward to making one for me.
I second the motion–you should have posted the monster which resulted! Great job, by the way! I’ve seen the instructions, but not with real-life pictures; only illustrations. Thanks a bunch! (Just found your site through craftsy.)
I love this idea!!!!! Thank you so much for being a sharing person.
An amazing project, even if it didn’t turn out quite right.
I had my best friend help me make one for my sewing room. (I’m 18, so we kinda messed around a lot. Without getting much done) it took about 50 mins. Only prob is I forgot to have her do the neck and sleeves. Oh well I guess I’ll put it back on and fix it!
What a great idea! You could definitely create some custom fit clothing for yourself using this!
Wow…what a creative and useful project! I’m trying to figure out some other excuses to make these. =)
Very clever and thanks for the funny write-up! Not sure I will ever do it but just to be able to see that it can be done is good to know!
Had no idea you could make one of these! So glad you linked up to Give Me The Goods Monday! Can’t wait to see what goods you bring next week! Hope you have a great weekend! Jenna @ Rain on a Tin Roof
The penny pincher in me can’t wait to make one! And the “monster lumps and bumps” comment made me lol for real!
Fabulous idea! So making this!
Love this! I featured you today! Thanks for linking up on Made in a Day!
Thank you so much for the feature Kim – you made my day!
cleaver!
great idea and tutorial, i hope you don’t mind i linked this tutorial to my blog christinafancypants.blogspot.com
saw this on pinterest and it’s on the to do list! thanks for your rundown . . so helpful!
I love the tutorial but I wish you’d shared a photo of the monster that you woke up to lol popping by from sew cute Tuesdays linky 🙂
Thank you for this tutorial on what to do and what not to do!
😉
Esther
Looks good! I’ve been meaning to make one of these. Thanks for the tutorial.
HaHa! Funny Post. I guess you have to let go of a lot of inhibitions to let your friend tape you up and then take pictures that you post! You are braver than me! 🙂
I’ve seen this before…you actually look good in your duct tape dress. =) I don’t think I want to attempt one though. =)
wow! So fun! Looks great :o) thanks for linking up to Tasteful Tuesdays at Nap-Time Creations… Winners for the giveaway will be announced Wed… Have you entered?
http://www.nap-timecreations.com
Thanks so much for sharing, Derby. If you haven’t already, I’d love to have you come link this up to our Teach Me Tuesday Linky. It’s still new and in need of creative contributions! http://www.somedayilllearn.com/2013/04/22/teach-me-tuesday-14/
Deby, I love your blog! Seriously, every time I see a link I like it turns out to be yours! Thank you for always sharing!
Get Your Crap Together
Hi Chelsea – thanks for the kind comment. You make my day! We should work together on something. I’ll email you….
Ha I love it! Those forms are pricy! Great idea! Thanks for linking up on Made in a Day!
Kim
Thanks for the tute. I am going to try this when I find a friend that has time to help. Found you on 30 handmade days.
I have been wanting to do this but I have been nervous that I would get Claustrophobia. I have been to your site so many times and have always been so impressed with the stuff that you link up. We are doing a Making for Mom series in May and I would love if you would join us by sharing your Pencil Skirt Sloper with our readers? E-mail me at shaffer dot sisters at gmail dot com if you are interested.
Dropping over to take a look at your site now – thanks for the invite.
I’ve had that on my to-do list for a couple of years. Been holding onto some instructions I found online. It was done a little differently. Don’t think they used expanding foam and they wore a plastic bag underneath. I’m waiting to experiment on my friend. She has been wanting to make one, we just haven’t gotten around to it. I think it’s a great idea and looks like fun.
Liz
Welllllll !!! Just one question – how long did this take. I think the idea is really very, very clever. How much duct tape did you use? I LOVE this idea. When we moved, I lost the base stand somewhere; just have the top, which I could never get to fit.
Thanks for being so clever. Any other neat ideas ????
Dodee
It took about 45 minutes to wrap up I think, and we used a roll and a half of tape. If you are slimmer, it would use less, a larger size would use more. If you have plenty of tape left over, you can always go around again if you aren’t too hot, to make the body thicker, stiffer and resistant to stretching out.
Why not try the regular silver for the first layer and then jazz it up with a second layer on top in one of the decorative duct tapes. Then you can see that everything is covered and it will give a nice finished look too.