


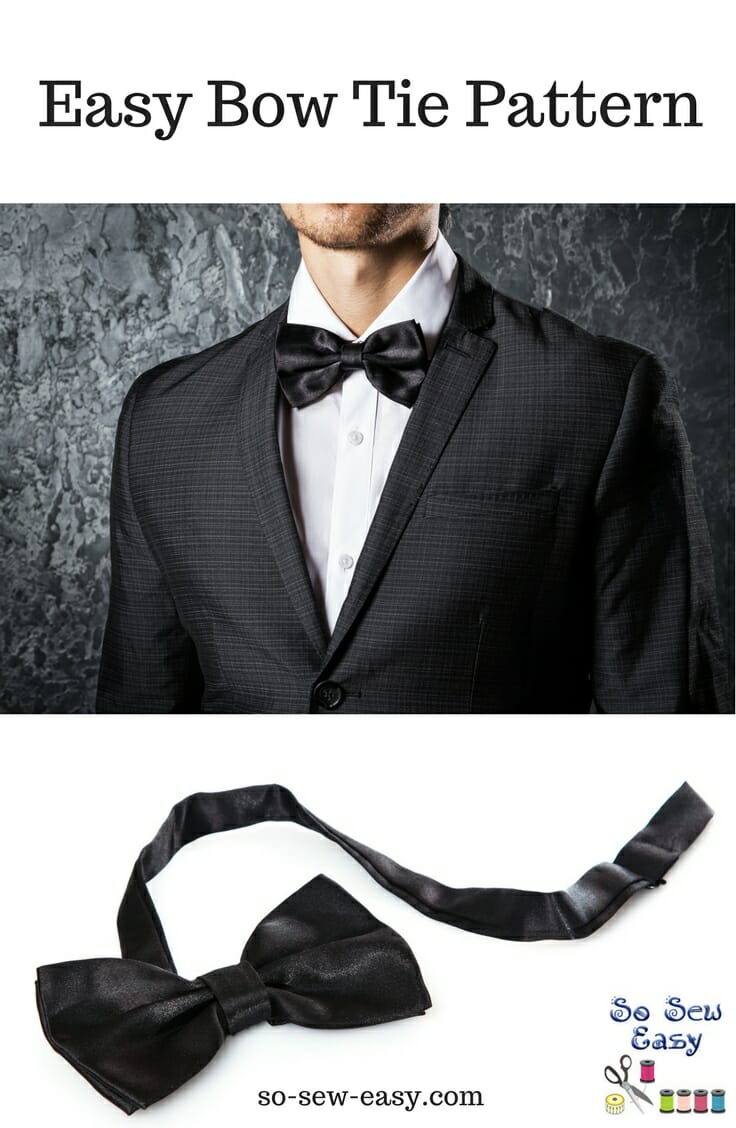
 This easy bow tie pattern is free and the tutorial is easy to follow and make. If you need to go “James Bond,” you can do it under an hour. The best part is that this free bow tie pattern is that when is all done and on your guy's bow tie looks as you actually tied it by hand.
The design uses two rectangles to compose the bow and a clip-on strap, making it easy, especially for young ones, to strap and go.
The first thing you will notice is the amount of fabric you need, which is not very much at all. With only 3/4 yard you will be able to make at least five bow ties. We will definitely put this one on our list of small sewing projects not requiring much fabric.
Materials:
- 3/4 yard of satin, cotton, or taffeta
- 1/4 yard of thing fusible interfacing
- Thread to match
- 1/2″ or 3/4″ bow tie hardware (sold in packages of five or more)
Tools:
- Sewing machine
- Scissors
- Ruler
- Pattern paper
Suggestions:
Pattern Download:
You really don't need to use this pattern. The shapes involved in the design are all symmetrical and I have written the tutorial in a way that you should be able to easily draft the pattern yourself. However, just to make sure that no one has any problems with the project, I decided to publish the pattern over on our sister site at Sewing4Free.com. Please feel free to download it if you like.
You can download the FREE template from our sister site at Sewing4Free.com. Just look for the download icon below the main image.
For help downloading and printing PDF patterns, please CLICK HERE.
Step One: Make your own easy bow tie pattern
You need to get your hardware first, then draft the pattern. The hardware typically comes in two sizes 1/2″ and 3/4″. The steps are the same for both except that the adjustable strap differs in width. Choose the instructions according to the size of your hardware.
This measurement is for a 15 -19 inches (38cm-48cm) neck size. If you need a bigger size add the amount now.
For 1/2″ hardware:
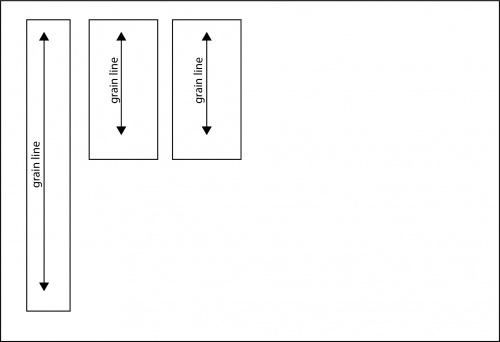
Draw the following three rectangles.
- 25″ X 1.5″ (64cm X 4cm) for strap
- 10.5″ X 5″ for bow
- 10.5″ X 5″ for bow
For 3/4″ hardware:
- 25″ X 2 1/8″
- 10.5″ X 5″
- 10.5″ X 5″
Step Two: Cutting the fabric
Cut the three rectangles according to the size hardware you have chosen. Make sure the rectangles follow the grain line of the fabric as per the illustration below.
Fuse interfacing to the narrow rectangle which is for the strap.
Step Three: Making the bow
You will be using the 10.5″ X 5″ rectangles for this step.
Cut two additional rectangles on fusible interfacing measuring 5″ X 2.5″ and fuse it in the middle of both 10.5″ X 5″ rectangles.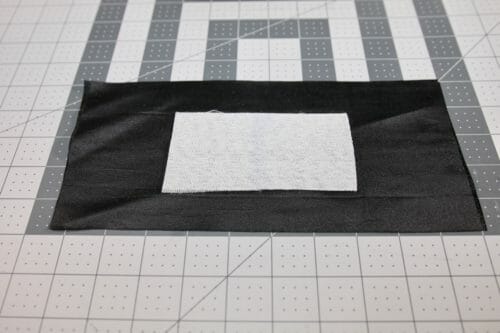 Fold the top 1 1/4″ down. Iron.
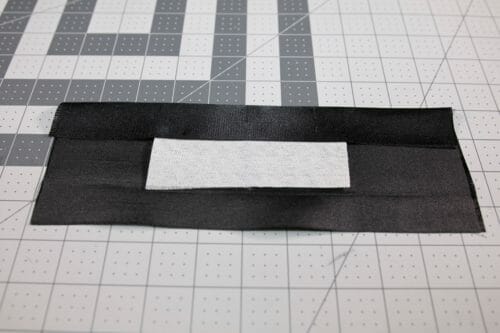 Fold the bottom 1 1/4″ up. Iron.
Fold the sides in.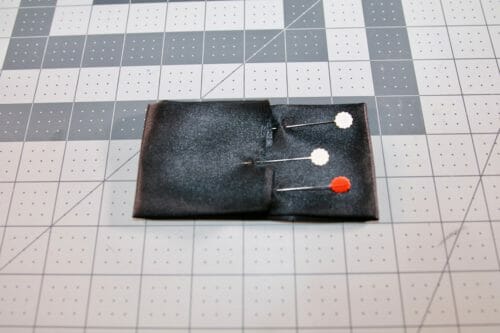
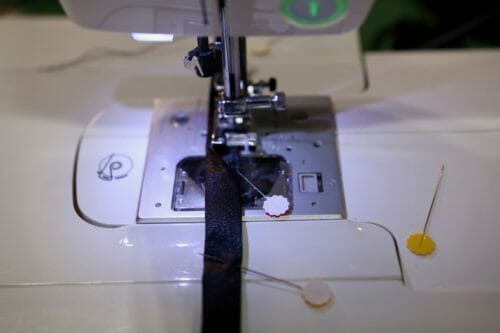
Stitch in the middle of the rectangle catching both sides in.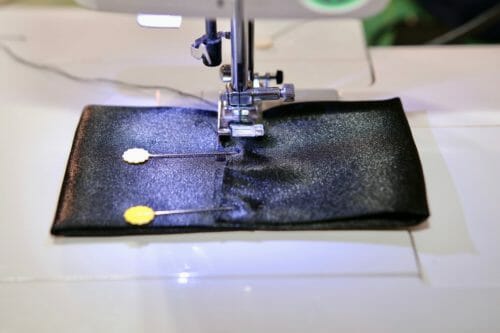 You will need to repeat the steps and make another rectangle, we need two to give the look of a conventional bow tie.
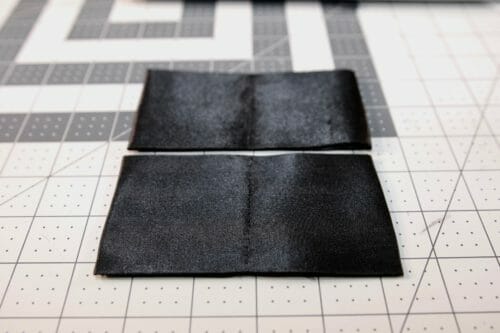
Step Four: Making the strap and the bow
These directions are for both 1/2″ and 3/4″ strap.
You will be working on the narrow rectangle that we already applied fusible interfacing to in Step Two. I am using 1/2″ hardware so my rectangle will measure 25″ X 1.5″. Fold the longer edges (top and bottom) of the rectangle at 1/4″ towards the center, then fold in half again. See picture below for clarification.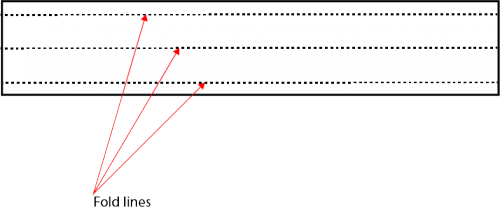 Iron and fold towards the center. You will end up with a strap that is 25 inches in length.
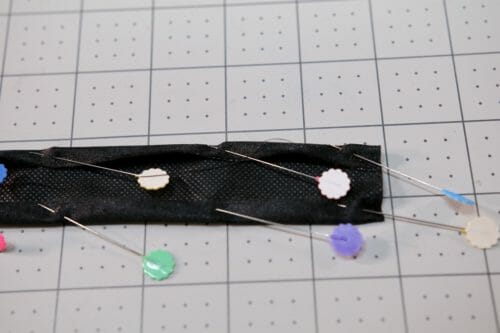 Sew the strap at 1/8″.
 The strap should now measure 25″ X 1/2″ or 25″ X 3/4″.
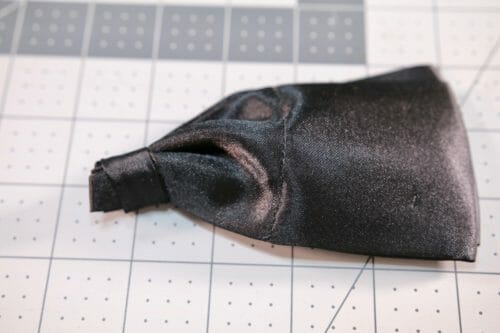
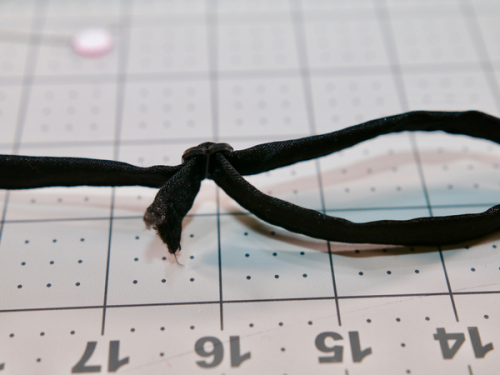
Cut off 3″ from the strap and put the rest aside for Step Five. We will use this small piece to make a loop. Fold this smaller strap in half and sew at 1/2″.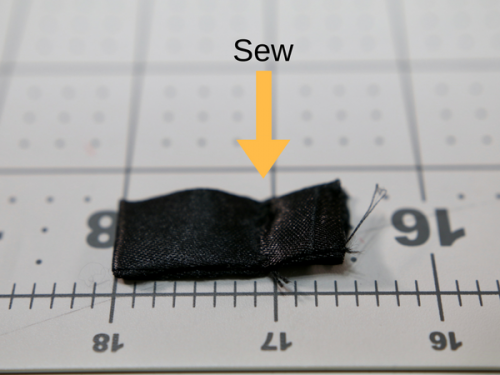 Turn the seam allowance inside. Now we are going to finish putting the bow together.
Now we are going to finish putting the bow together.
 Taking both rectangles together, one on top of the other, making sure the raw edges are facing each other, make an accordion with one of the ends and thread the rectangles through the loop.
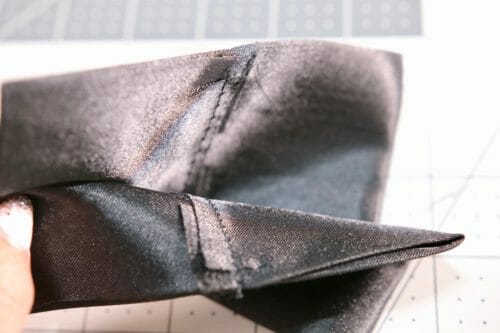
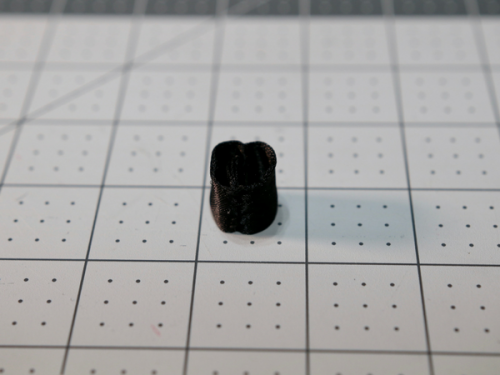
 Run the rectangle through the loop until the stitching in the middle is covered. I don't actually stitch this in place as the fabric loops holds things pretty tight. I imagine I could dissemble it if I needed to to iron or clean more easily that way.
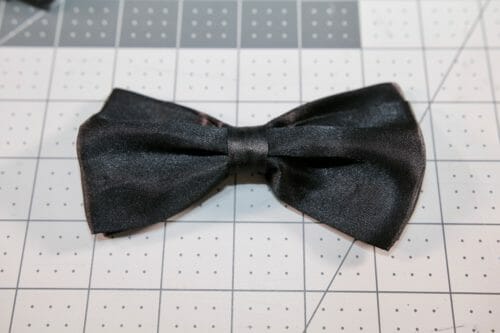
Step Five: Attaching the hardware to the strap
Thread one end of the straps through the bridge, up one hole over the bridge down the other hole. Fold a 1/4″ then 1/2″ and sew using a zipper foot to get close the slider.
Thread the other end of the strap on the top side of the female side of the clip. Fold the end 1/4″, then fold again at 1/2″.
 Sew using a zipper foot to get close to the edge.
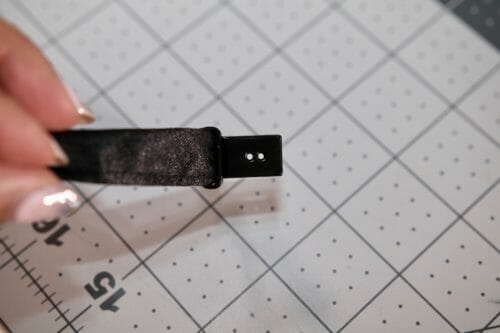 This is the underside of the clip, the folded edge should be on this side.
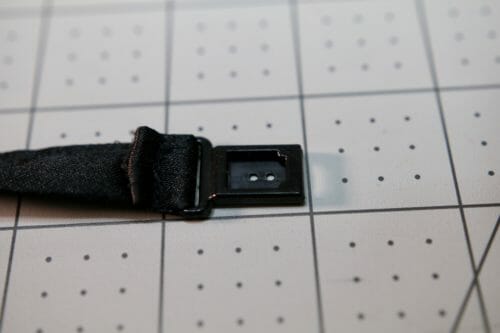 Thread the other end of the strap trough the bridge, up one hole over the bridge down the other hole. You know you have it right when you see the bridge and the underside of the clip on the same side of the strap.
 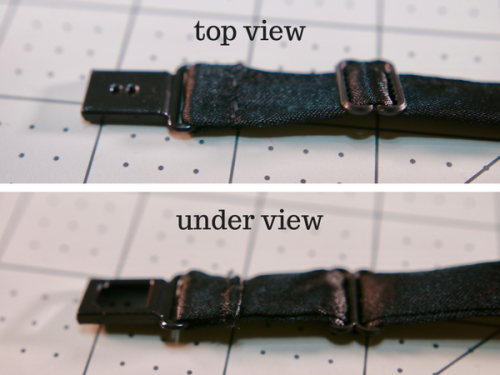 It is time to attach the other side of the clip. Pass the strap through the hole and pull the strap through.
 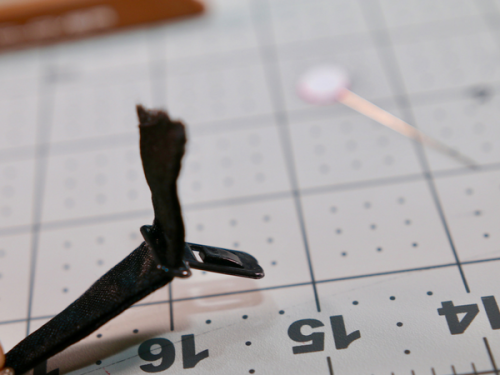 Taking the end of the strap, thread it through the bridge up the first hole, over the bridge and out the other hole of the slider.
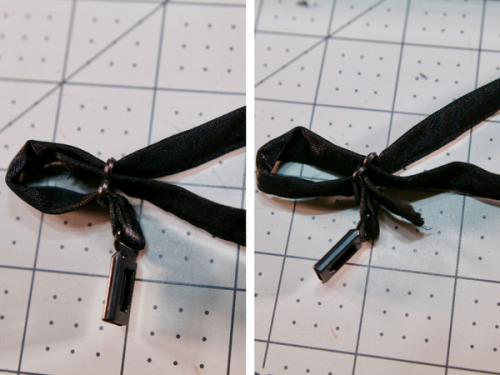
Fold the end of the strap 1/4″, then again in 1/2″.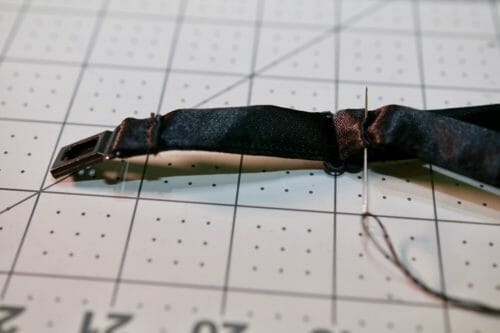
Finally, pass the strap through the loop and you now have your own bow tie with an adjustable clip.
I really hope you enjoyed this and that your “James Bond” will get some good use out of this sexy tie.


Thank you for an easy pattern and tutorial. I am making bow ties for my sons groomsmen. First time sewing with satin eek. I did a test run with cotton fabric first, I couldn’t believe how easy it is. I used a Rajah cloth to do the pressing bits on the satin fabric. Thank you.
I am trying to download the instructions, but nothing will work.
great! thanks
The instructions are clear until you reach the references to the “bridge”. It is also not helpful for the instruction picture to reference hardware that is different from that included in the instruction article.
The suggestions are for your reference only, the stores change their merchandize and this is beyond my control. The idea is the same, If you search for this type of hardwear you are bound to find many types and both in the internet and in your local shops. I would shop locally if you do not know how to buy what you need, you would be surprise how knowledgeable and wonderfully helpful sewing and fabric store attendants are.
Thanks I love the instruction with prom season I will have to try
When is prom season? is it long or short dresses this days?
Thank you for all your wonderful ideas and patterns. I enjoy reading them, not doing as much sewing as I used to do.
Hi Ginnie, thank you for taking the time to read, but tell me why aren’t you sewing? How can I help you get your mojo back?