


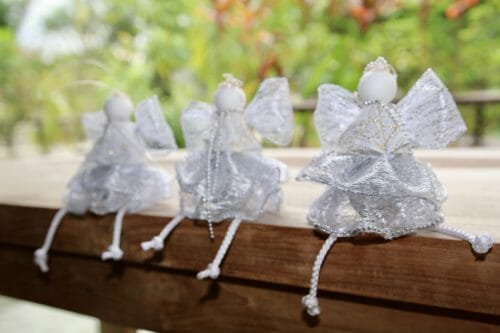
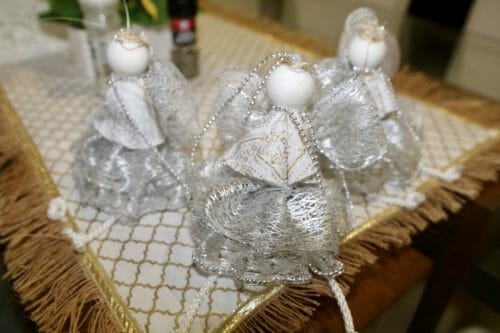
Making an easy Christmas decoration is a great way to get the kids involved in decorating the house for the holidays. One of my most happy Christmas memories is sitting down with my kids to make some decorations. Of course, I would have already done the stitching and some of the more complicated steps and left them to draw faces on the angels or glue parts of the bodies. As they grew older, they were happy to take more interesting tasks, like using the glue gun.
I have so many memories of all those years, sitting in the corner we had designated to doing crafting in the house. So here's one of my favorites because it is so easy to make. When you're finished, the kids will hang it on the tree and they'll feel so proud. Mine certainly did.
Materials you will need to make this easy Christmas decoration
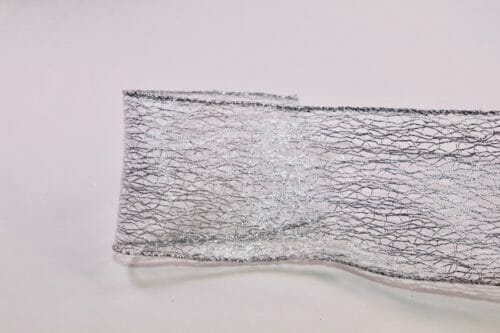
- 1 1/2″ yard of wired ribbon. This is usually sold in a roll of 10 yards or more but don't worry, it's great stuff and you'll find lots of uses for it.
- 1 Styrofoam ball 1″ in diameter
- 1 Styrofoam ball 2″ in diameter
- 1 Styrofoam egg-shaped ball 2″ tall
- A rectangle of quilting cotton of your taste 5 1/2″ x 2 1/2″ (this is to wrap the 2″ ball)
- Circle of quilting cotton 5″ in diameter
- Nylon thread, fishing line or fireline.
- Nylon rope or cord 1/8″ diameter
- 24″ 3mm Faux Pearl Plastic Beads on a String
Tools
- Low-temperature glue gun and glue sticks
- Large doll needle. Mine is 5″ long
- Scissors
- Ruler
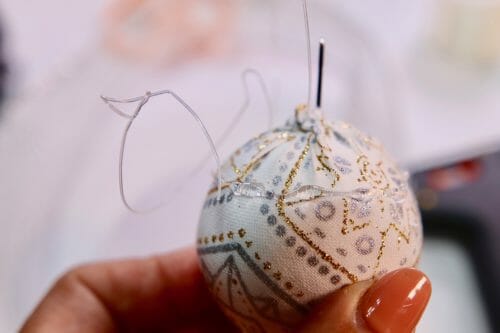
Step one: wrap the 2″ styrofoam ball
If you are familiar with the fabric covered beaded necklace then this step is known to you. If not, it might be useful to go back and review this tutorial. I made this necklace out of scraps of fabric, likewise, I have covered the ball in this tutorial from the leftover fabric from Stela the coin purse.
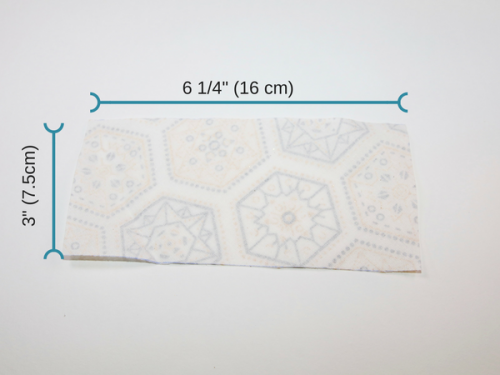
Cut a rectangle on a bias 6 1/4″ x 3″.
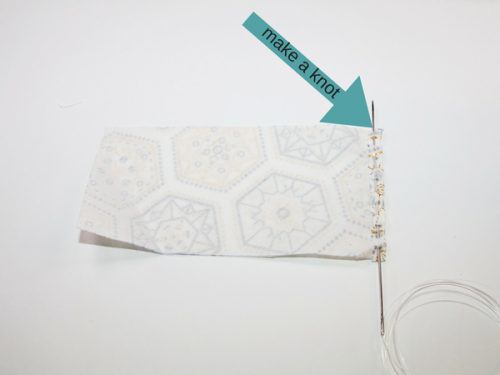
Working print side down, fold 1/4″ and using the doll needle and nylon thread, the hem on one side. Stitch the hem down starting at the bottom using a running stitch. Make a knot at the end of the side.

At 1/4″ from the edge, continue a running stitch along the top. Gather by half the size and make a knot at the end.
Continue the running stitch on the opposite side where you started. Make a knot at the end. Do not gather.
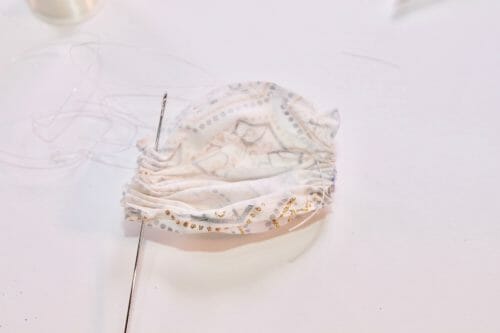
Continue at the bottom and pull gathering the fabric as you did before. The rectangle should look like a candy wrapper by now.

Sew the side of the ball and then the top and bottom.
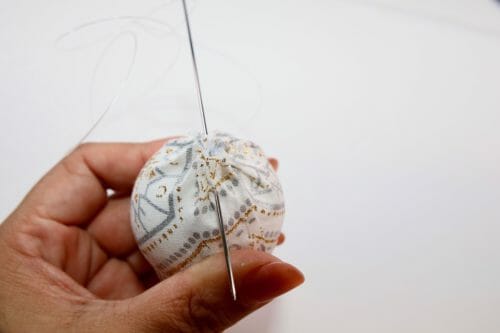
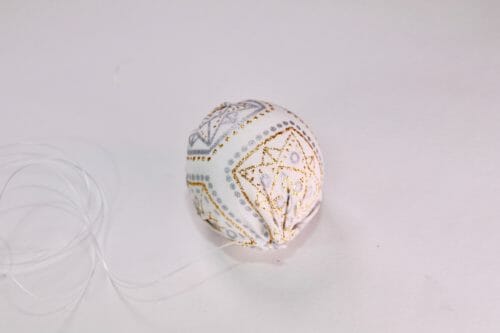
Insert the needle through the middle and put aside.
Step Two: making the skirt
The skirt is pleated and composed of two layers of wired ribbon. The pleats are easy to make because of the wire that runs along both sides of the ribbon. We will start from the bottom layer, then the top layer which we will make exactly the same way. Since the ribbon is sold by the spool, I recommend not to cut the ribbon until you have made enough pleats to go around the ball.
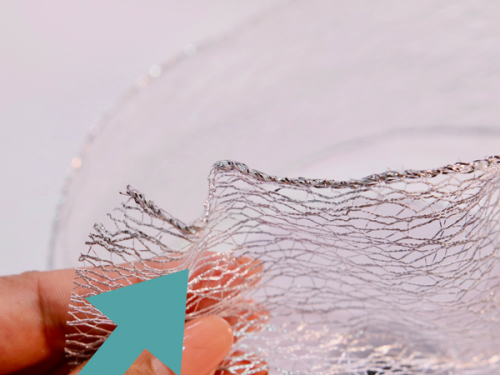
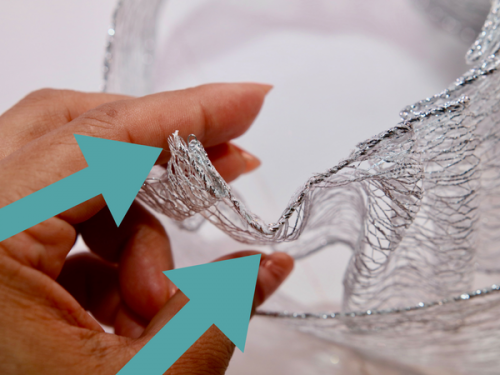
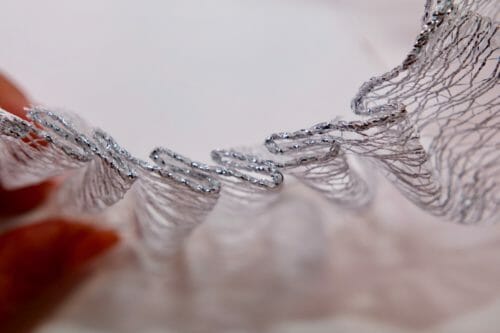
Fold the ribbon 1/2″ towards you and 1/2″ away from you creating a pleat. Fold again 1/2″ from the end of the pleat and repeat until you have enough to go around the fabric covered ball.
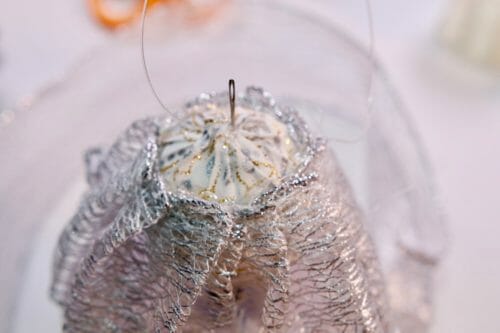
Apply glue to the ball end where the nylon thread is sticking out about 1/2″ from the top. Attach the skirt to the ball before the glue dries.
Step Three: attaching the egg-shaped ball to make the body
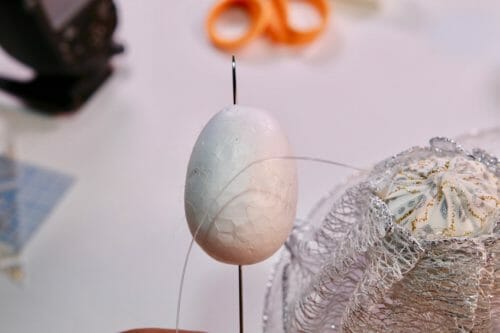
Thread the nylon thread from the fabric covered ball (use the last picture) and pass the needle and thread through the middle of the egg-shaped styrofoam ball. Apply glue on the top of the fabric covered ball and between the egg-shaped ball. Pull the thread.
Create the other layer of the skirt the same way you did the first skirt. This skirt is smaller because it will go around the space between the fabric covered ball and the egg-shaped ball. Apply more glue between the two balls and attach the second skirt.

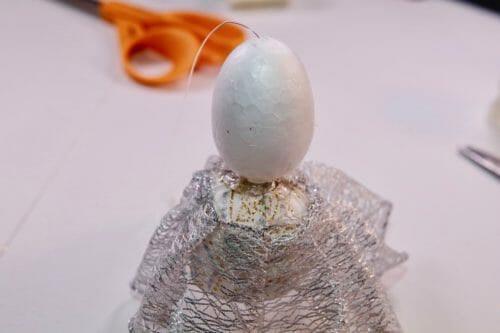
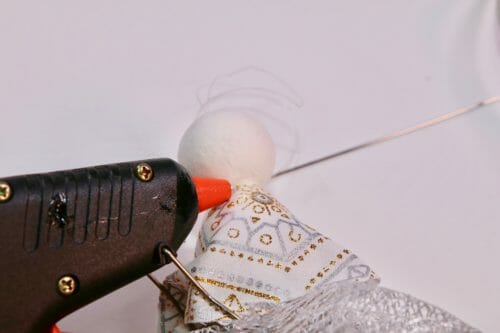
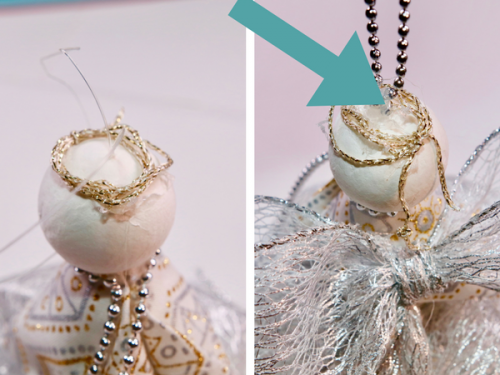
Step Four: attaching the head
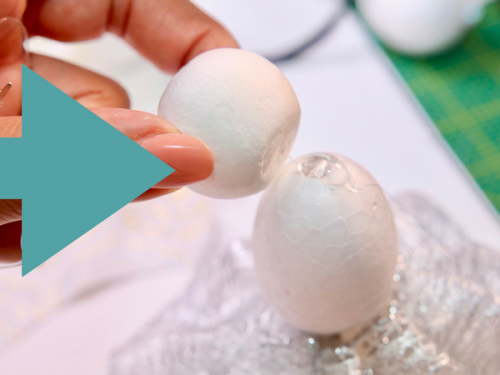
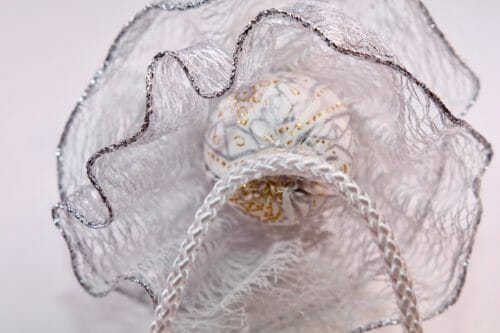
Pass the needle through the middle of the 1″ ball which will be the head of the angel. Apply glue on top of the egg-shaped ball and pull the thread to bring the 1″ ball and egg-shaped ball together.
Step Five: making the top
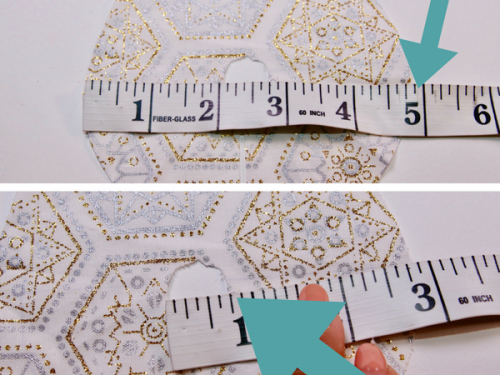
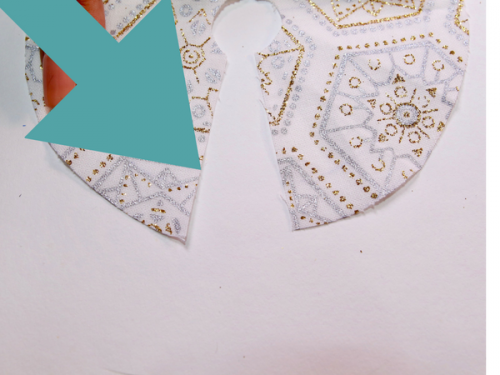
Cut a circle that is 5″ in diameter with a hole in the center that is 3/4″ in diameter. Slash the circle to the center.
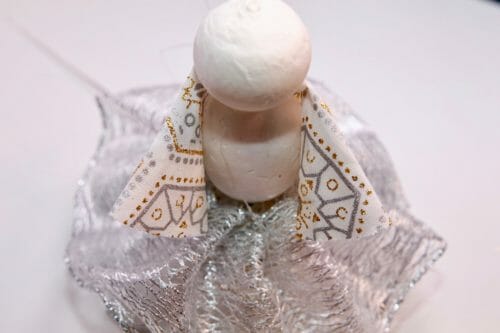
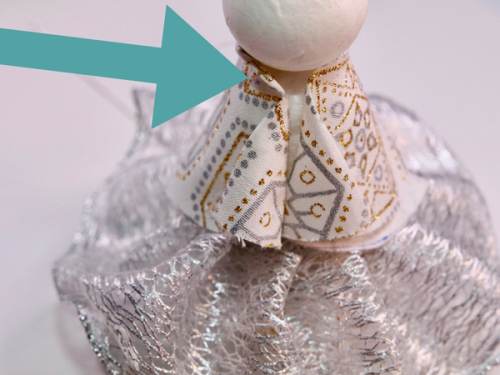
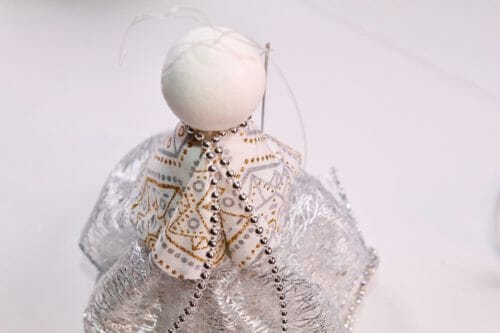
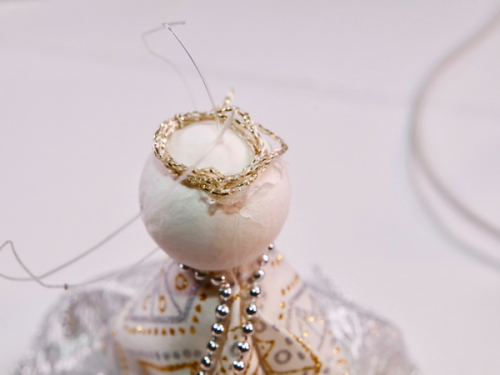
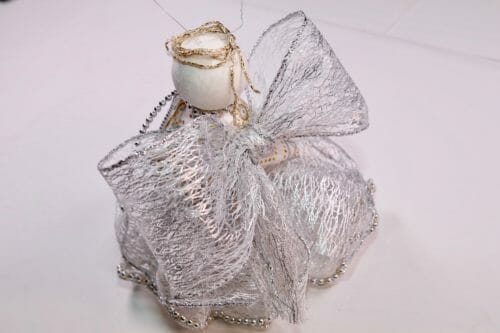
Take both sides of the opening and fold them until there is a space of 2″ in between them. Apply glue on the back of the egg-shaped ball and wrap the semi-circle around the ball. Glue the front and close the blouse of the angel. Cut 12″ the small pearl string. Put a small line of glue around the neck of the angel and attach the pearls. This makes a necklace for the angel. To make the crown of the angel, cut another 12″ of any golden thread and wrap it around two fingers to create three loops. Attach the loops with a bit of glue.
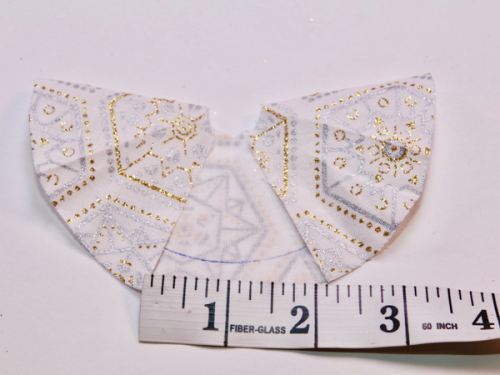
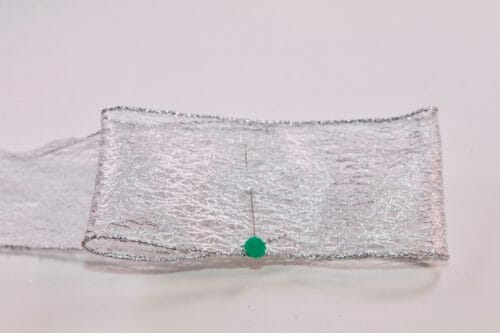
 Step Six: making the wing of the easy Christmas decoration
 Step Six: making the wing of the easy Christmas decoration
The wings are simply made with a bow of the wired ribbon. The wired edge of the ribbon makes it very easy to make. We will need approximately 1/2 yard of ribbon.
Take 7″ of ribbon and folded in half.
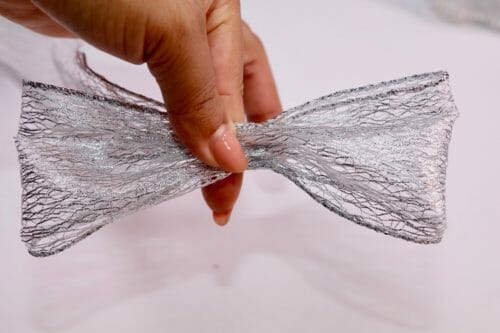
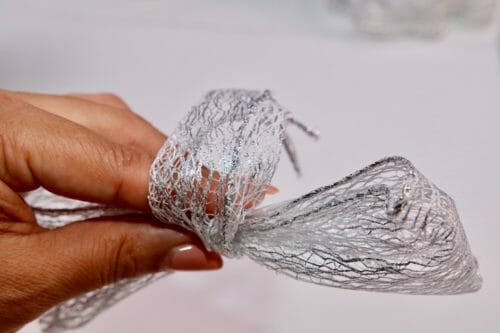
Take another 7″ fold them in half to create the other side of the ribbon. Pinch the middle of the ribbon with your fingers. Wrap the remaining ribbon around the center and over your finger, to create a loop. At this point, your finger is caught inside the loop. Replace your finger with the tail of the ribbon and tighten the knot.
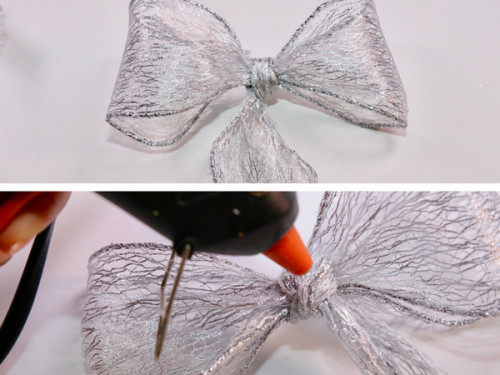
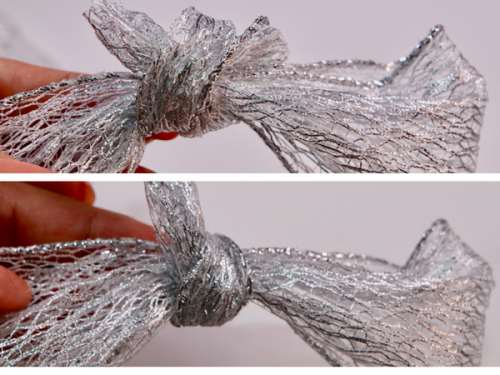
Shape the sides of the bow and apply glue to the back side to attach it to the back of the angel decoration.
Step Seven making the legs of the angel
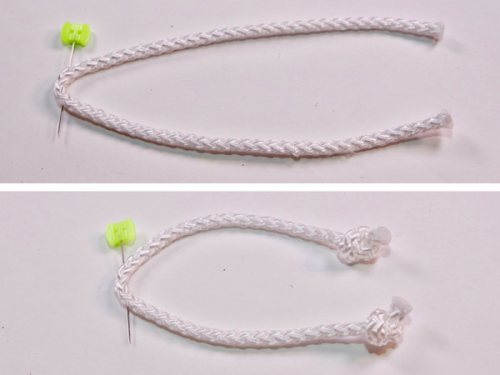
Cut 12″ of nylon rope or cord, fold it in half and mark it with a pin. Make a knot at each end of the cord. These knots represent the feet of the angel.
Replace the pin with glue and attach the cord to the bottom of the fabric covered ball. Apply more glue if necessary.
Finally cut a small string of pearls and attached them with the remaining nylon thread and a bit of glue and you are ready to hang this super easy angel decoration.
Making this easy Christmas decoration took care of a rainy cold afternoon for the kids. The use of a low-temperature gun gives them a chance to practice hand-eye coordination and since you are the one attaching the elements to the angel, the chance of burning their fingers is reduced. At the end, you are left with very happy kids whose work will be displayed for all to see.


The angel is beautiful ???? made angels ???? but not this one going to start after Thanksgiving.
I love this Angel. I love and make all different kinds of Angels. Thank you for sharing this one. Merry Christmas to you and yours.
I love these, years ago I found some at a local craft store and bought all they had. Over time I’ve found them several times. For the past 10 years or so my tree is decorated with nothing but angels and some gold and cream ribbon, mostly in neutral colors with a few angels clothed in deep red. Never thought I making my own…
Good ideas
I’ve got loads of grandchildren now (18 and counting) so I’ve decided to make an ornament every year for them..start a collection for when they have their own homes. I think this might be next year’s ornament! I’ll look for ribbon on sale after the holidays 🙂
so like this for our daughter loves Angels..going to try to make …sure hope it turns out as cute as yours …again thank you for sending this to me …i had to find it again on your web page for i lost it after downloading it …wow so glad i found it …again thank you very much…beautiful…
I am sure it will!