


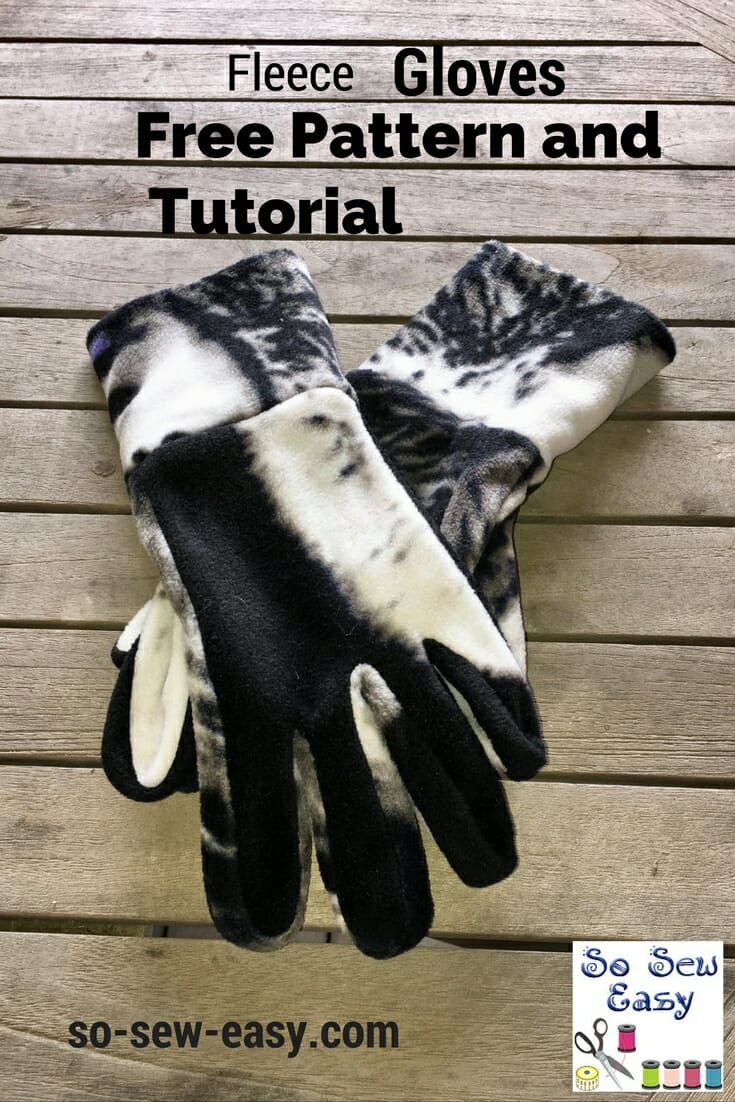
Making a pair of fleece winter gloves is not just a matter of tracing your hand on a piece of paper or drawing straight onto the fabric. Believe me, I have actually tried this before and it makes for very uncomfortable gloves… To save you this exercise in trial and error, here's an easy gloves pattern and tutorial for a pair of fleece gloves that can be made as a last-minute present or for yourself.
The bit you must be careful with is cutting the fabric the right way. I suggest that you fold the fabric in half so you have the right sides for each hand. (I was watching a movie while making the first pair of these gloves and it wasn't until I was about to start sewing that I realized my mistakes. Fleece does indeed have a right and wrong side, so avoid this below….)
The smaller size of the gloves will fit an average woman or a teenager. The M/L and XL are suitable for most men.
Tools and Materials:
- 1/4 to 1/2 yard of polar fleece (see recommendations below)
- Thread to match
- Jersey needle size 10
- Sewing machine
Easy Gloves Pattern Layout
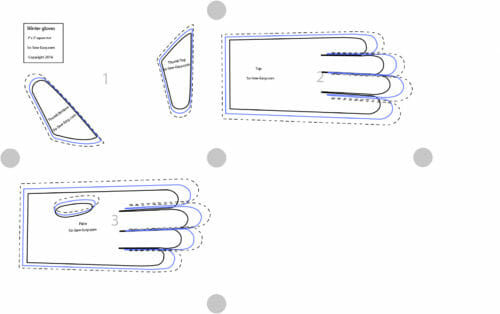
Easy Gloves Pattern Download
Our patterns are still free, but now you now have the option of making a small contribution if you like our work! We'd really appreciate it and it will help is keep going with new and fun designs like this. Even a dollar or two really goes a long way.
Thanks so much in advance for helping us out. You can use any credit card and you don't need a Paypal account, although you can use one if you have one.
Download the FREE Pattern HERE
Fabric Recommendations
How to Make Your Winter Gloves
The seam allowance is 1/8″ for all sizes using a small-sized zigzag and straight stitch.
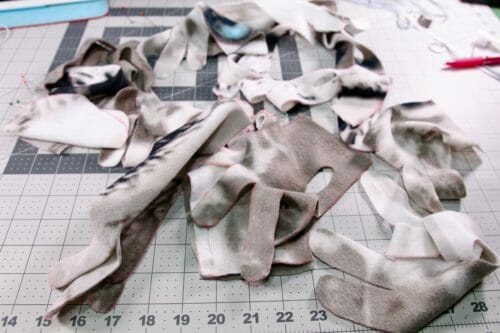
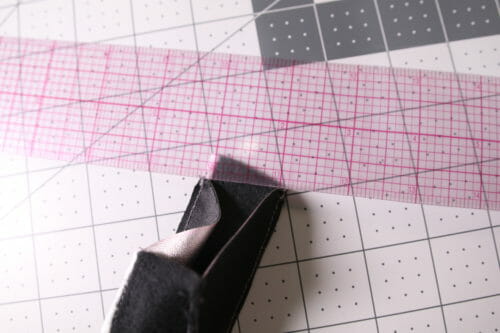
Print and cut the pattern following the grain of the fabric. You want the grain to run parallel to the fingers and thumbs so that the stretch is horizontal or across the hands. Please remember there is a right and left side and up and palm side.
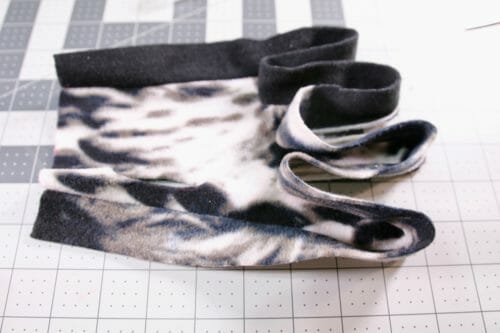
You will need a total of 7 pieces cut per glove. There are three pieces for the hand (two pieces from the pattern and one strip for the fingers), and three pieces for the thumb (two pieces from the pattern and one strip) and one piece for the ribbing tube or cuff.
For the first part of this tutorial, keep in mind that you are assembling these gloves inside out or with the wrong side of the fleece outward. We will turn the gloves as we finish them which hides the stitching and puts the right side of the fabric outside.
Basically what we are doing is joining the pieces of fleece that you cut out with the pattern pieces with these fleece strips that form the sides of the fingers and thumb. You will then attach this assembly to the ribbing or cuff.
Cutting the Strips and Ribbing
Cut the strips of fleece horizontally to the selvage or with the grain and following the sizes below.
Strips for the fingers:
- S: 34 1/2″ x 1″ (88 cm x 2.5 cm)
- M/L: 38 3/4″x 1″ (98.5 x 2.5 cm)
- XL: 41 3/4″ x 1″ (106 x 2.5 cm)
Strips of the thumb:
- S: 7 1/2″ x 1″ (19 x 2.5 cm)
- M/L: 8 1/2″ x 1″ (21.6 x 2.5 cm)
- XL: 9 1/2″ x 1″ (24 x 2.5 cm)
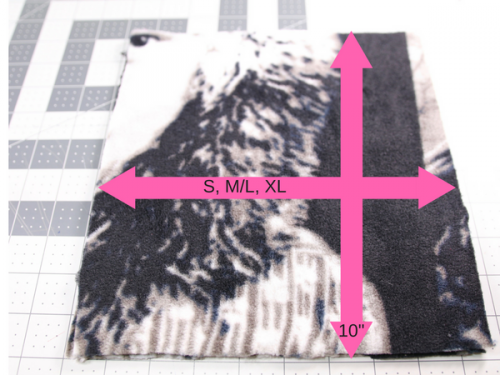
Ribbing tube (for the cuffs)
- S 6 1/2″ x 10″ (16.5 x 25.5cm)
- M/L 7 1/4″ x 10 (18.5 x 25.5cm
- XL 8″ x 10″ (20.5cm x 25.5 )cm

Tip: If you have never worked with fleece before and have trouble sewing rounded edges, use a small zigzag to attach the pieces, then sew again using a normal stitch.
I have many years of experience sewing and I still use the small zigzag to work difficult pattern pieces.

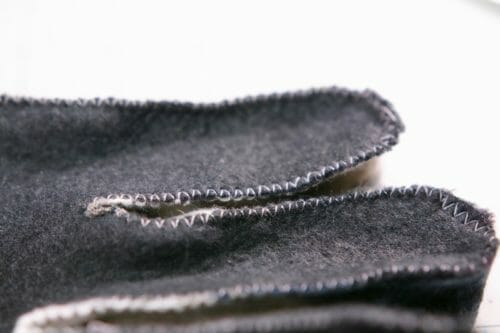
Starting on the outer side of the hand and using a very small size zigzag, sew the strip of fleece around the fingers.
Sewing the Thumb
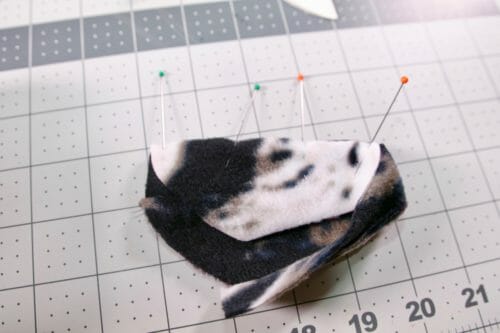
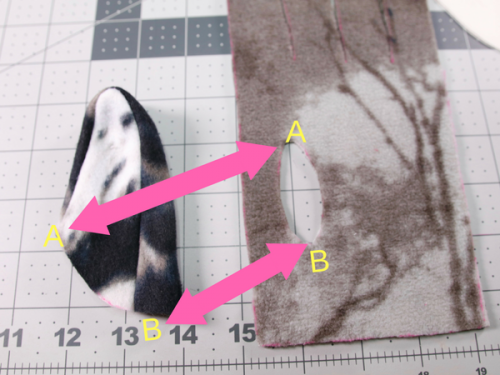
The thumb is made with three pieces. The larger thumb piece is the top, the smaller piece the bottom and the strip joins them together. Starting at the corner, pin the strip of fabric all around the thumb and sew at 1/8″. (You'll notice wasn't following my own advice and I didn't use a small zigzag first which I really should have done.) Pin the other side of the thumb.

Trim the corner so the thumb so it fits into the hole of the palm piece.
Pin the thumb to the hole of the palm, aligning the longer side (B) with the lower part of the hole (B).
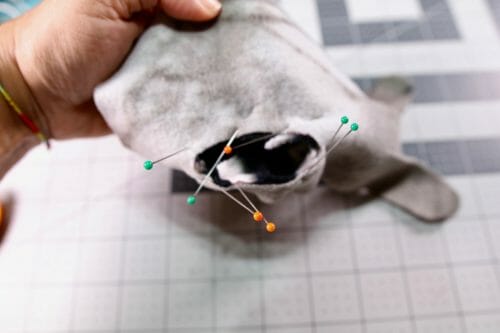
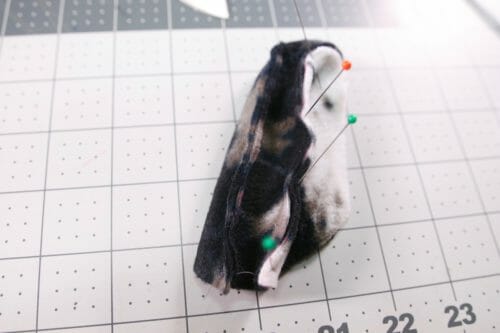
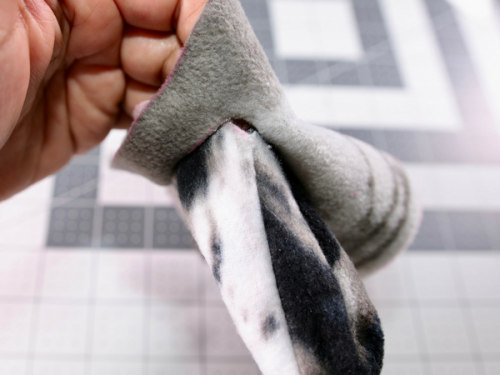
Zigzag the edges and sew at 1/8″.
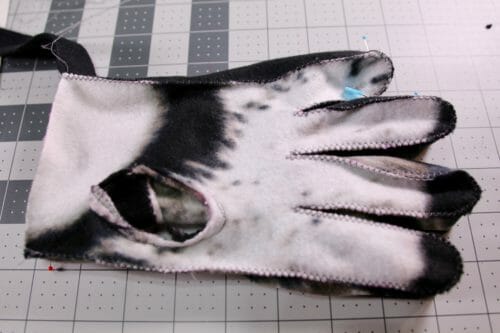
Pin the other side of the glove and zigzag before you sew. This is a very important part so the fingers do not get twisted.
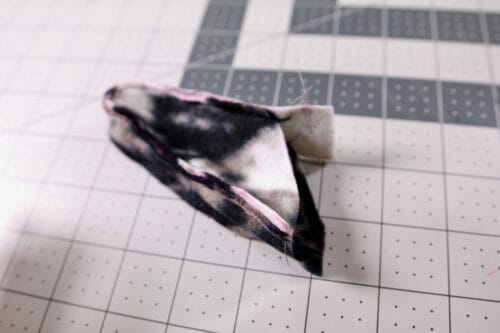
TIP: For thicker gloves repeat all the steps above so you have two gloves per hand. Insert one glove with the seams showing inside the other gloves. You should have wrong sides together and seams are not showing.
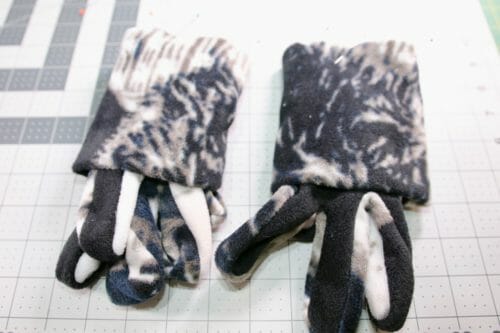
After zigzagging then you should sew at 1/8″. Turn the glove right side out. We are going to work on the ribbing for the glove or what is basically the cuff, but for clarification purposes, I will call it the ribbing tube.
Making the Ribbing Tube
Use the following measurements according to the size you are making. Keep the stretch of the fabric horizontally. This part you can always substitute with actual ribbing fabric.
- S 6 1/2″ x 10″ (16.5 x 25.5cm)
- M/L 7 1/4″ x 10 (18.5 x 25.5cm
- XL 8″ x 10″ (20.5cm x 25.5 )cm
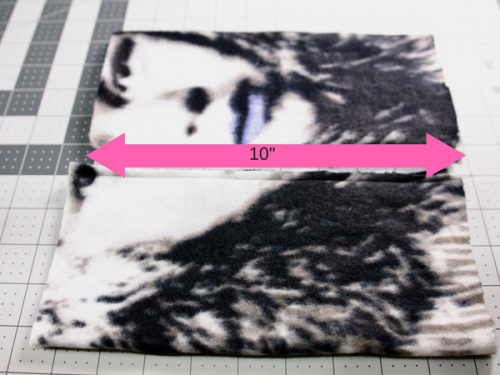
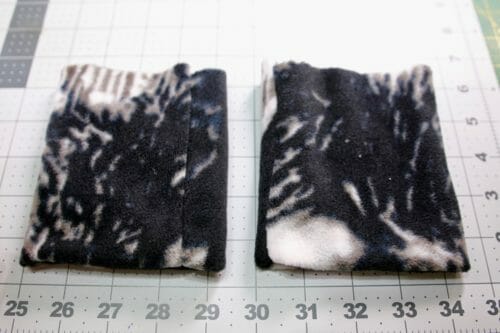
Fold the rectangle from left to right. This means you will have a tube that is 10″ in length. Fold the tube in half. This means the seam allowances are inside and can not be seen. Insert the gloves inside the tubes right sides out and pin. Sew at 1/4″. Pull the ribbing back up and voila!
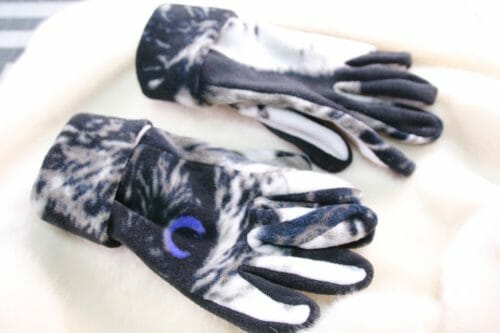
It's that simple to have a new pair of fleece winter gloves. This is a very easy last-minute gift for anyone. It can take you only one hour to make. Not to put pressure on you, but Saint Valentine's is around the corner. If you need a hat to go with these gloves, check out this super easy tutorial on how to make a winter hat from an old sweater.
Stay tuned as we will be making a scarf to go with this ensemble.
Until next time! And Happy Sewing!


Grateful
Hi Mayra,
My 8 year old has 4 fingers on one hand, and so I need to learn how to make a custom glove for her right hand. I’ll practice the larger pattern till I get the stitching down. But for children sizes, do you foresee any other issues? I tried googling for this information for some time. Thanks! 🙂
Hey is the seam allowens included in the pattern or does one have to add it? I don’t wanna mess anything up by assuming!
So happy to find a pattern for gloves. I’ve been wanting to embroidery on gloves and this will make it so much easier to get it placed on my machine to do it., Thank you.
I love this because I have unusual shaped hands and have a very hard time fitting gloves. I can see that I will be able to easily adjust for my finger length. AND
If this works for me, I am going to try making some gardening gloves like this our of some deerhide I have.
Would love to see your gardening gloves…
When you are doing a demo you might want to consider the color of the fabric you use.
your gloves look lovely but it is very difficult to actually make out how they are sew n together because of the fabric.
That also applies to the jewelry pouch.
Just saying.
Are strips cut parallel or perpendicular to the selvage? What a great pattern! Thanks!
I had made a sweater _coat with a hood from fleece
Hello. Do you have a video tutorial of this?
Not at the moment. close to October I will.
Hey thanks! I customized your pattern to make three fingered waterproof/insulated bicycle touring over-gloves.
Sounds interesting, i took a look at your artwork, it is simply stunning!
The cuff instructions are not easy
Very true, this is not a pattern for beginners. I need to make the video to help you better.
This is a great tutorial but I must confess that I did my cuff slightly differently, I think. I enclosed my seam so that I had no exposed seam at the cuff. Great glove, fits really well. My first attempt at any gloves. Thanks again.
I’ve been looking for a glove pattern that’s not western style. THANK YOU! I’m thinking about short fur (faux) lined leather. What do you think?
Perfect! love to see the finished product.
I’m not able to print the tutorial. Every time I try and press print, part of each page blanks out. I find it hard to work from a monitor, so I need a hard copy for guidance. I’m using Windows10 as operating system. I really would like to make these gloves. Can you help me?
I am also having problems figuring out how to do the cuff from your instructions? Please help. Thanks!
I will add a bit of elastic to the cuff to allow it to “hug” my wrist a bit.