


Elizabeth – The lucky blouse for your classic wardrobe; believe me, this is true, it brings good luck to all who wear it. This classic blouse pattern is sure to become a permanent feature of your wardrobe, so stick it out to the end!
This classic blouse pattern is a wrap blouse designed to be for woven fabrics.
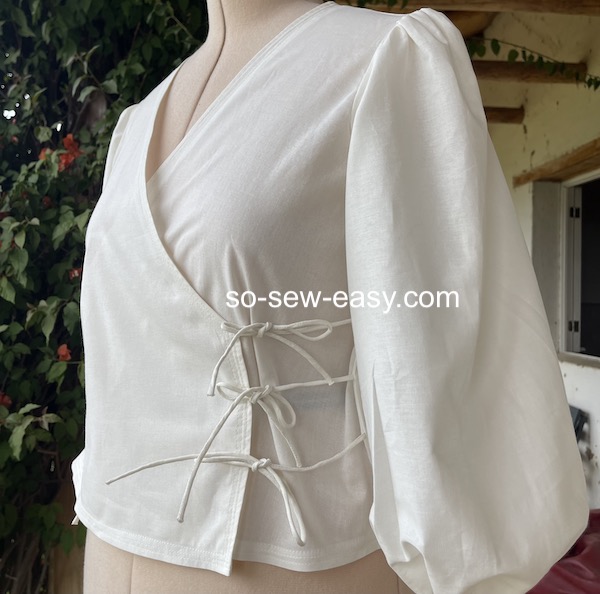
I have made the blouse with ties around the waist instead of buttons.
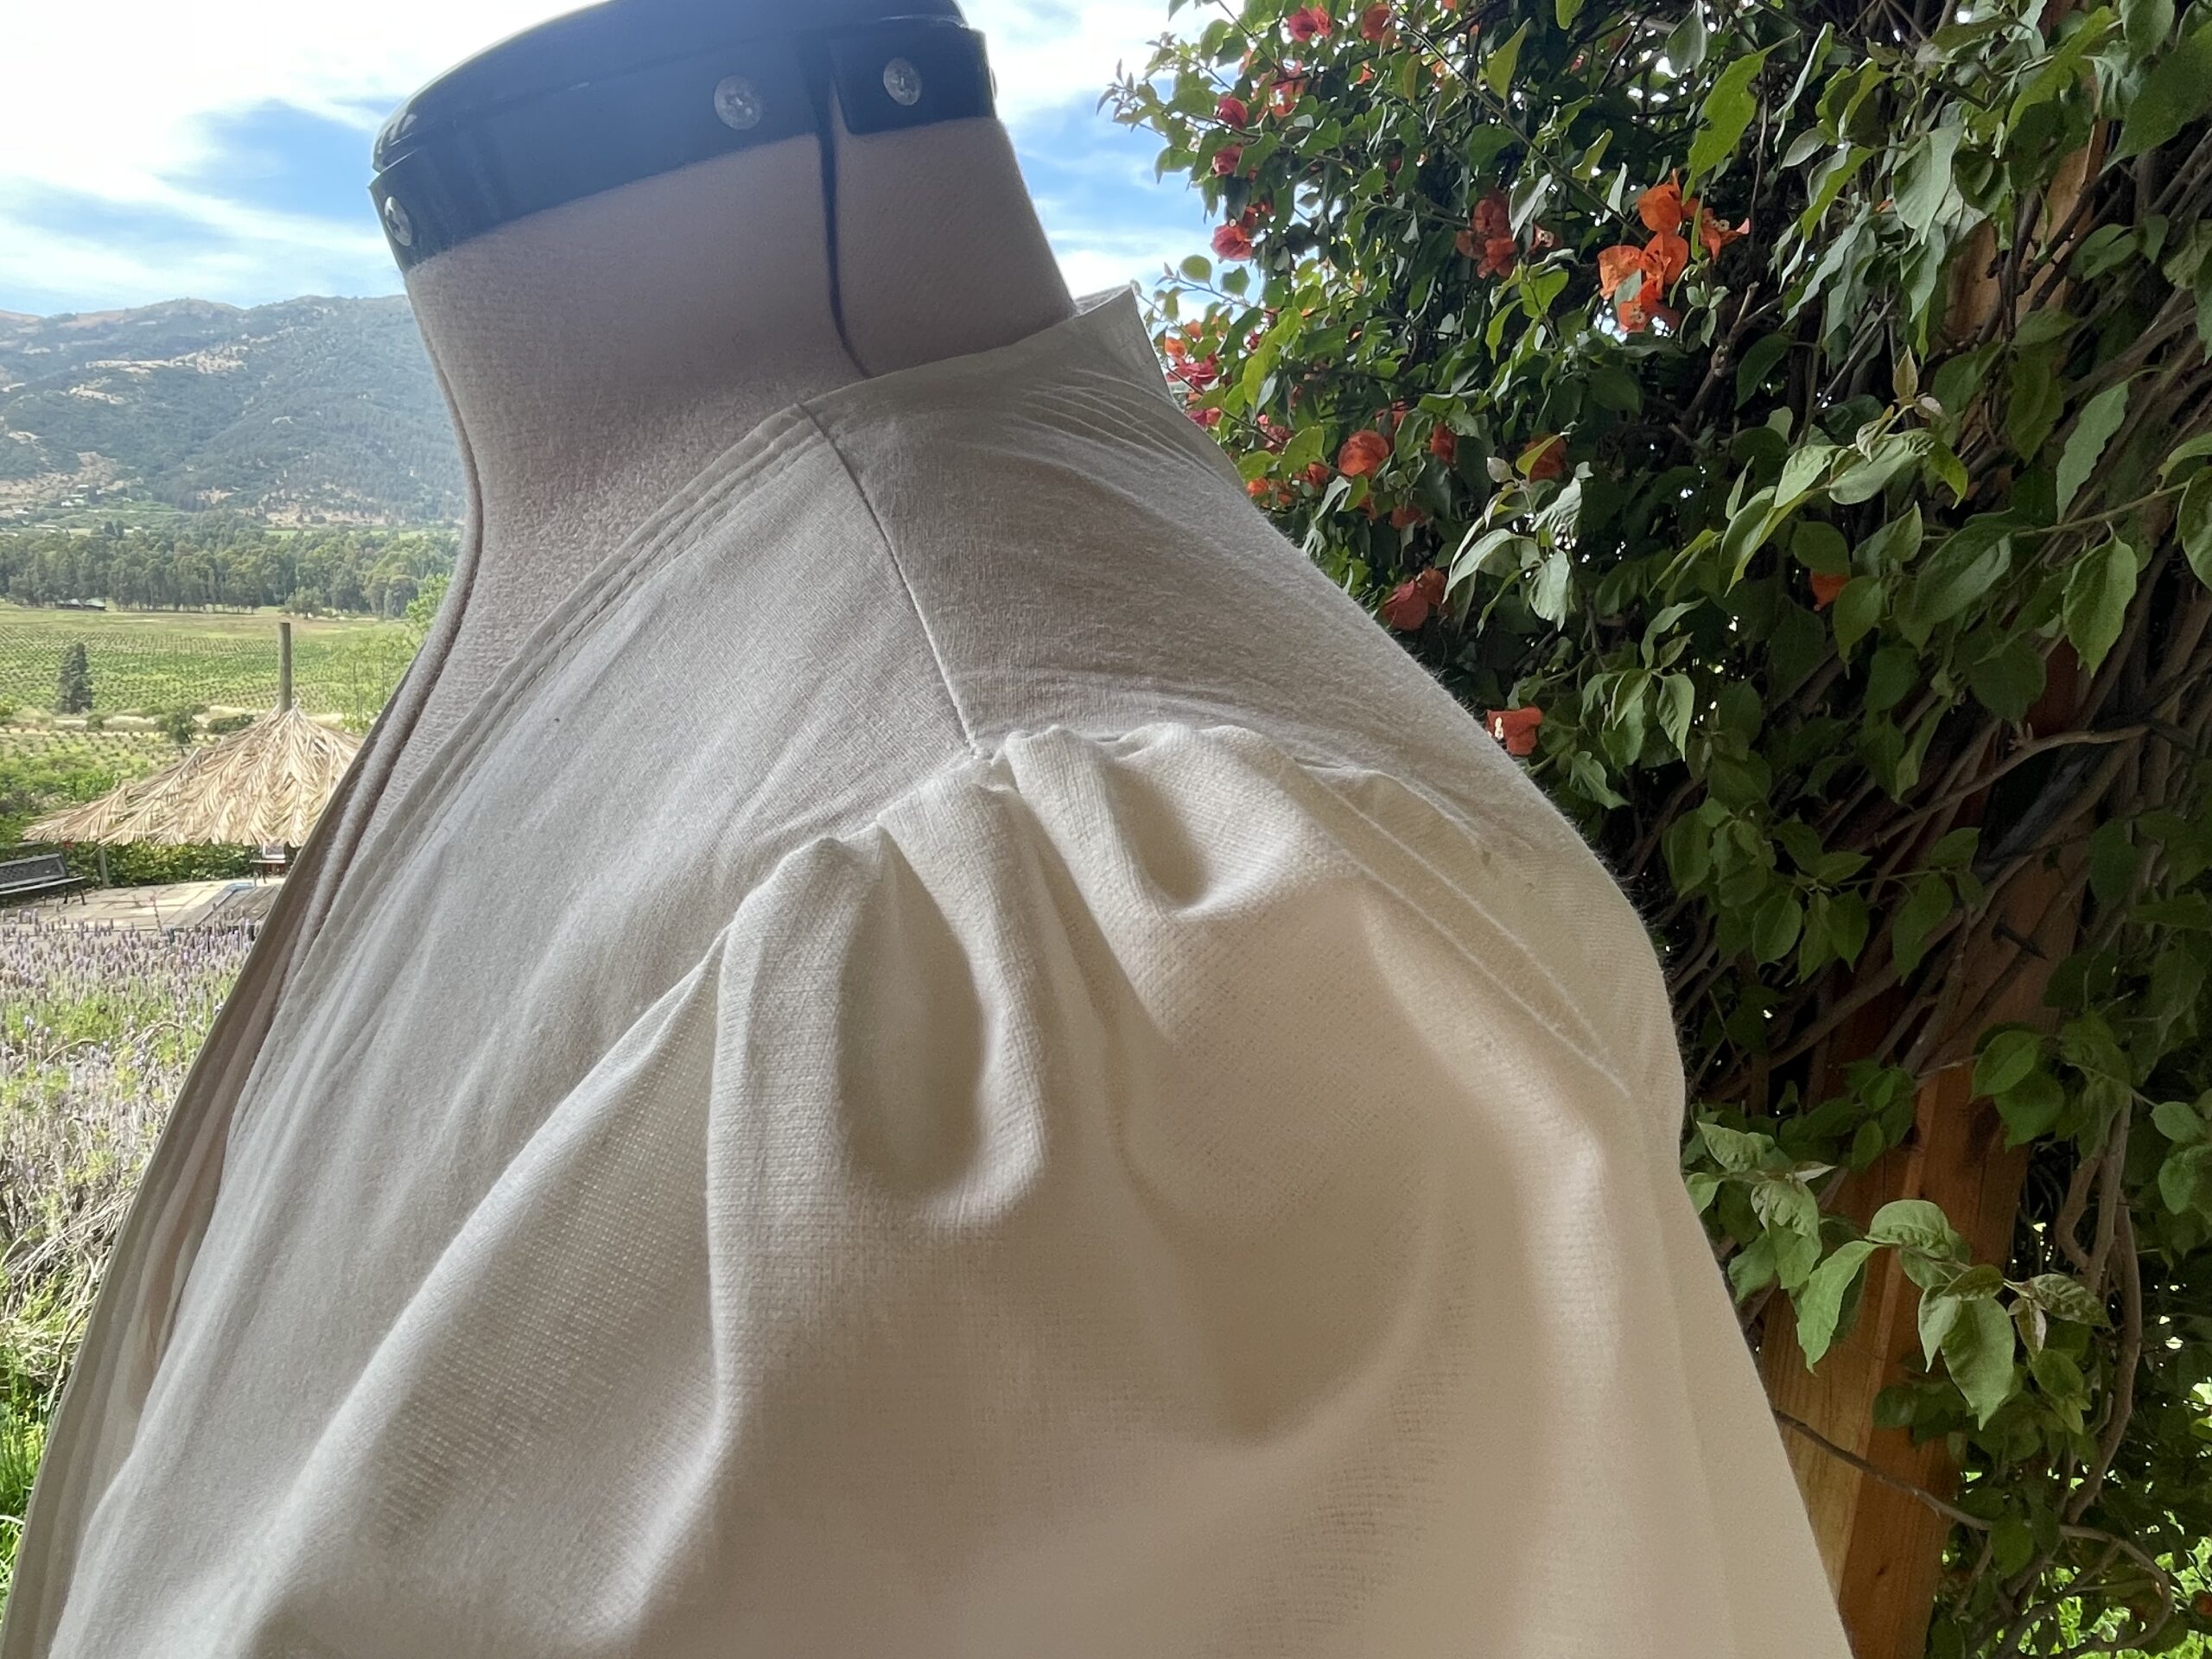
Gathers at the top of the shoulder
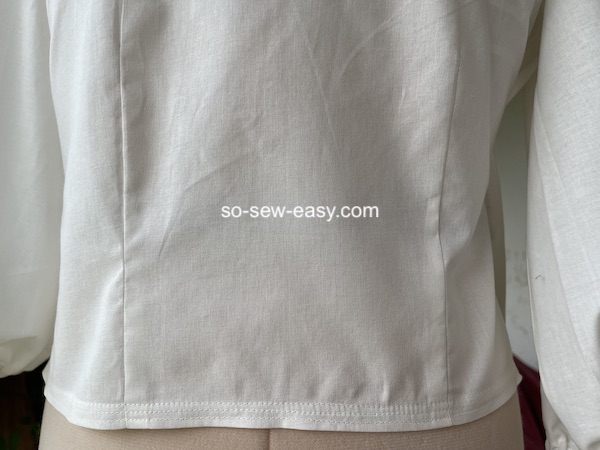
and darts at the front and back to allow you to fit the pattern to your body.
Many years ago when I was living in Panama, I was roommates with three girls all called Elizabeth. Elizabeth the first was a newly graduated accountant. To go to her first big job interview she borrowed my special blouse and a pair of pants. She managed to get the job and started the chain of coincidences involving these three and my special, now lucky, blouse.
Elizabeth the second was an exchange student from Hong Kong who was learning Spanish in Panama. Her real name was Yuh Line, but like many East Asian people living abroad adopted an English name. She ended up borrowing my lucky blouse to go to a wedding. At the wedding, she met the person who'd become her future spouse, and today they own a dental clinic together.
The third person who borrowed my blouse was the only one not named Elizabeth. Her name was Gisela and she also borrowed my blouse for a big interview. This time it was for getting a scholarship to Cornell University, which she succeeded in getting.
By now the reputation of my lucky blouse was well established, which is where the third Elizabeth comes in. Elizabeth III was the best friend of the owner of the apartment. She was an enigma to me, she did not work, nor study, but always managed to look great and well-dressed. Many times I would come home and find her dressed up all sharp and beautiful on her way out to some sort of fancy social occasion. However, she did have the annoying habit of going through my clothes and borrowing them without my permission, and this really started to cause some friction between the group.
One particular evening I'd laid out my lucky blouse in preparation for a big job interview I had the tomorrow morning. I left the apartment for an hour or so, and upon returning I found my lucky blouse was missing. Later that night I answered the front door finding Elizabeth III bringing home and a male friend to the apartment (which was already against our rules). As I opened the door I did not see him at first, instead noticing that she was wearing my lucky blouse.
“Why are you wearing my blouse? I was going to wear it tomorrow for my interview.” I asked in a not-so-friendly tone. This incident happened to end my stay in the apartment, as according to Elizabeth III I'd embarrassed her in front of who she later called “the man I was going to marry”. Well, I washed the blouse that night and wore it the next day. I did end up getting the job but I had to sleep on my brother's couch until I could make other arrangements.
Anyways, I hope this little story helps explain why I think the classic blouse pattern, Elizabeth, might bring you luck too.
Materials
- 1.6 to 2.2 yards of 56″ Cotton Sateen, linen, silk taffeta
- Thread to match
- Lightweight fusible interfacing
- Seven strings, deco flat elastic, cord, or deco woven tape.
Tools
- Sewing ruler
- Tape measure
- Erasable ink pen or tailor's chalk
- Paper for pattern making
Fabric Recommendations
Sewing Skill: Intermediate
I do not recommend this blouse as your first project if you have never done a blouse before. Below are the skills necessary to be able to finish the blouse.
- Tracing and making a facing
- Understanding a facing
- Grainline direction and how it affects a garment
- Making a cord for button loops
- Fitting
Body Measurements
There is a 3-inch ease on this pattern.
| Size | S | M | L | XL | 2XL |
| Bust | 31 | 33 | 36 | 39 1/2 | 43 1/2 |
| Waist | 24 | 26 | 32 | 34 | 36 |
| Hips | 33 | 35 | 37 | 41 1/2 | 45 1/2 |
How To Download Your Lucky Blouse Pattern
We will continue using the new Payhip web store to distribute our patterns.
Our patterns are still free, but now you have the option of making a small contribution if you like our work! We'd appreciate it, and it will help us keep going with new and fun designs like this. Even a dollar or two goes a long way.
Thanks so much in advance for helping us out. You can use any credit card, and you don't need a Paypal account, although you can use one if you have one.
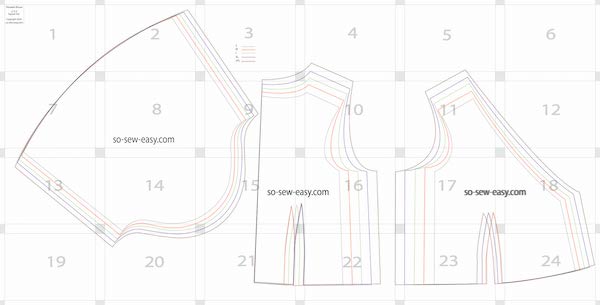
Elizabeth The Lucky Blouse Pattern Layout
How To Make Your Perfect Blouse
There is a 5/8″ seam allowance in the pattern.
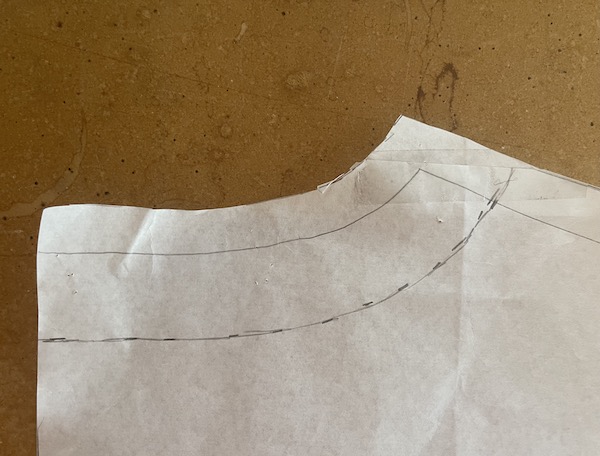
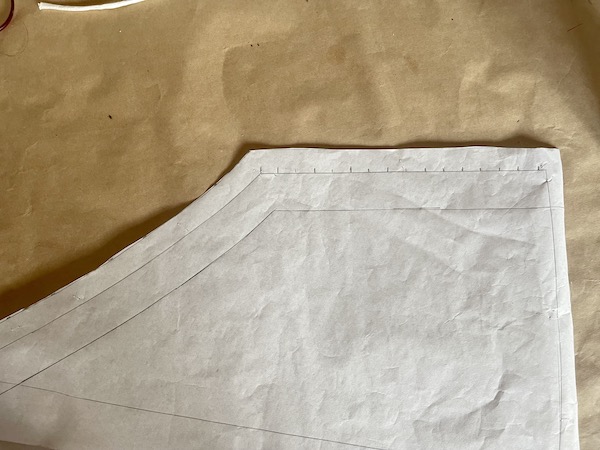
Step One: Making And Tracing The Facings
Have you ever heard the phrase “do as I say not as I do”? Unfortunately, that applies to this part of the project as I am not using fusible interfacing in the facing, which is not ideal. If you read my post last week you would know that I have moved and all my sewing things are in a container, so I have to make do with what I have.
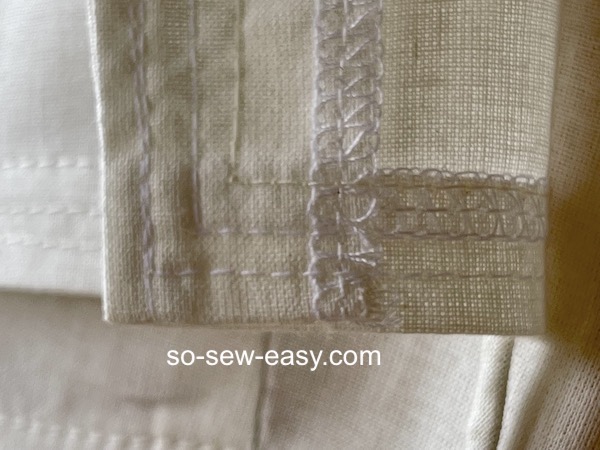
You may notice in the pictures that I have opted for stitching rows at the front to give this part of the blouse some rigidity. You can do the same or use bias tape instead of a facing. In fact, these would make it much easier, but I only just thought about that once I finished the blouse.
Apply fusible interfacing to the fabric from which you will cut the facings. This is a better system than fusing the interfacing after cutting because you avoid shrinkage and deformation of the facing.
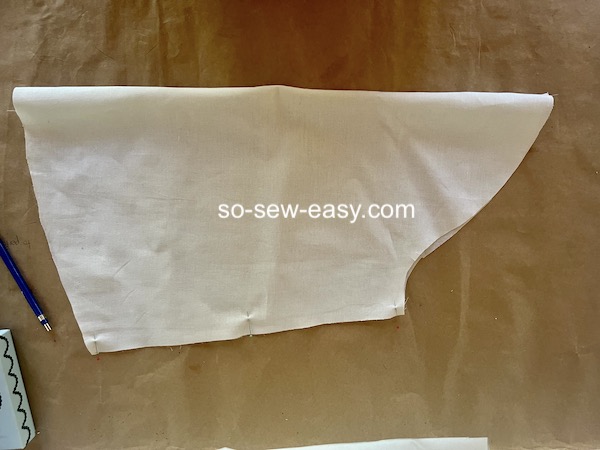
Trace the facing neck and front. Sew at 5/8″. Put aside.
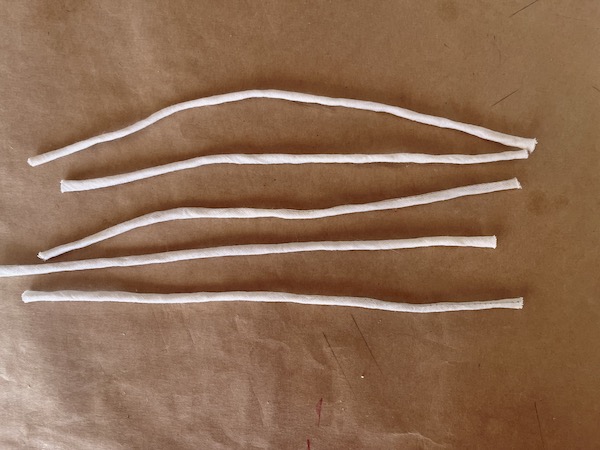
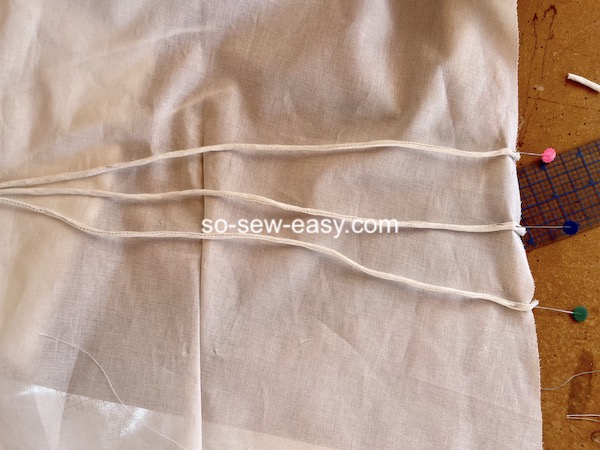
Step Two: Making The Cords
Here again, you can use deco tape, and it will save you at least two hours of work. You will need ten pieces 8″ long.
Cut a bias tape 24″ in length and 1″ in width this will make three pieces of cords. You will need 10 pieces.
Fold the bias strip in half, and sew at 1/4″ from the fold.
Use a loop turner to turn the loop.
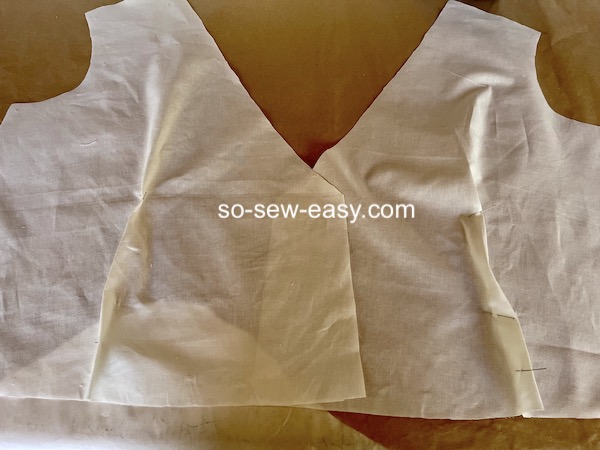
Step Three: Sewing The Darts
Sew the front and back darts of the blouse. Press the darts.
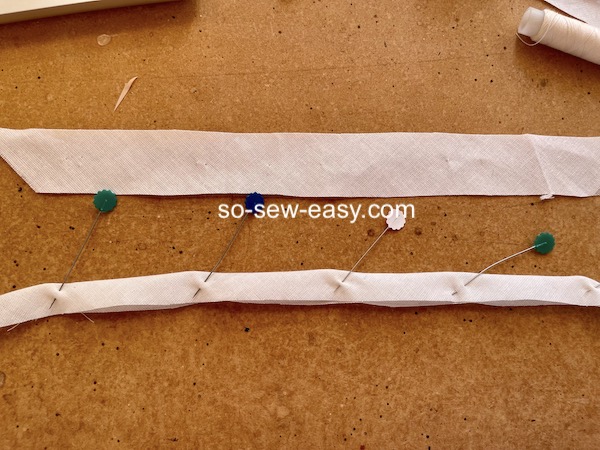
Step Four: Pinning The Cords
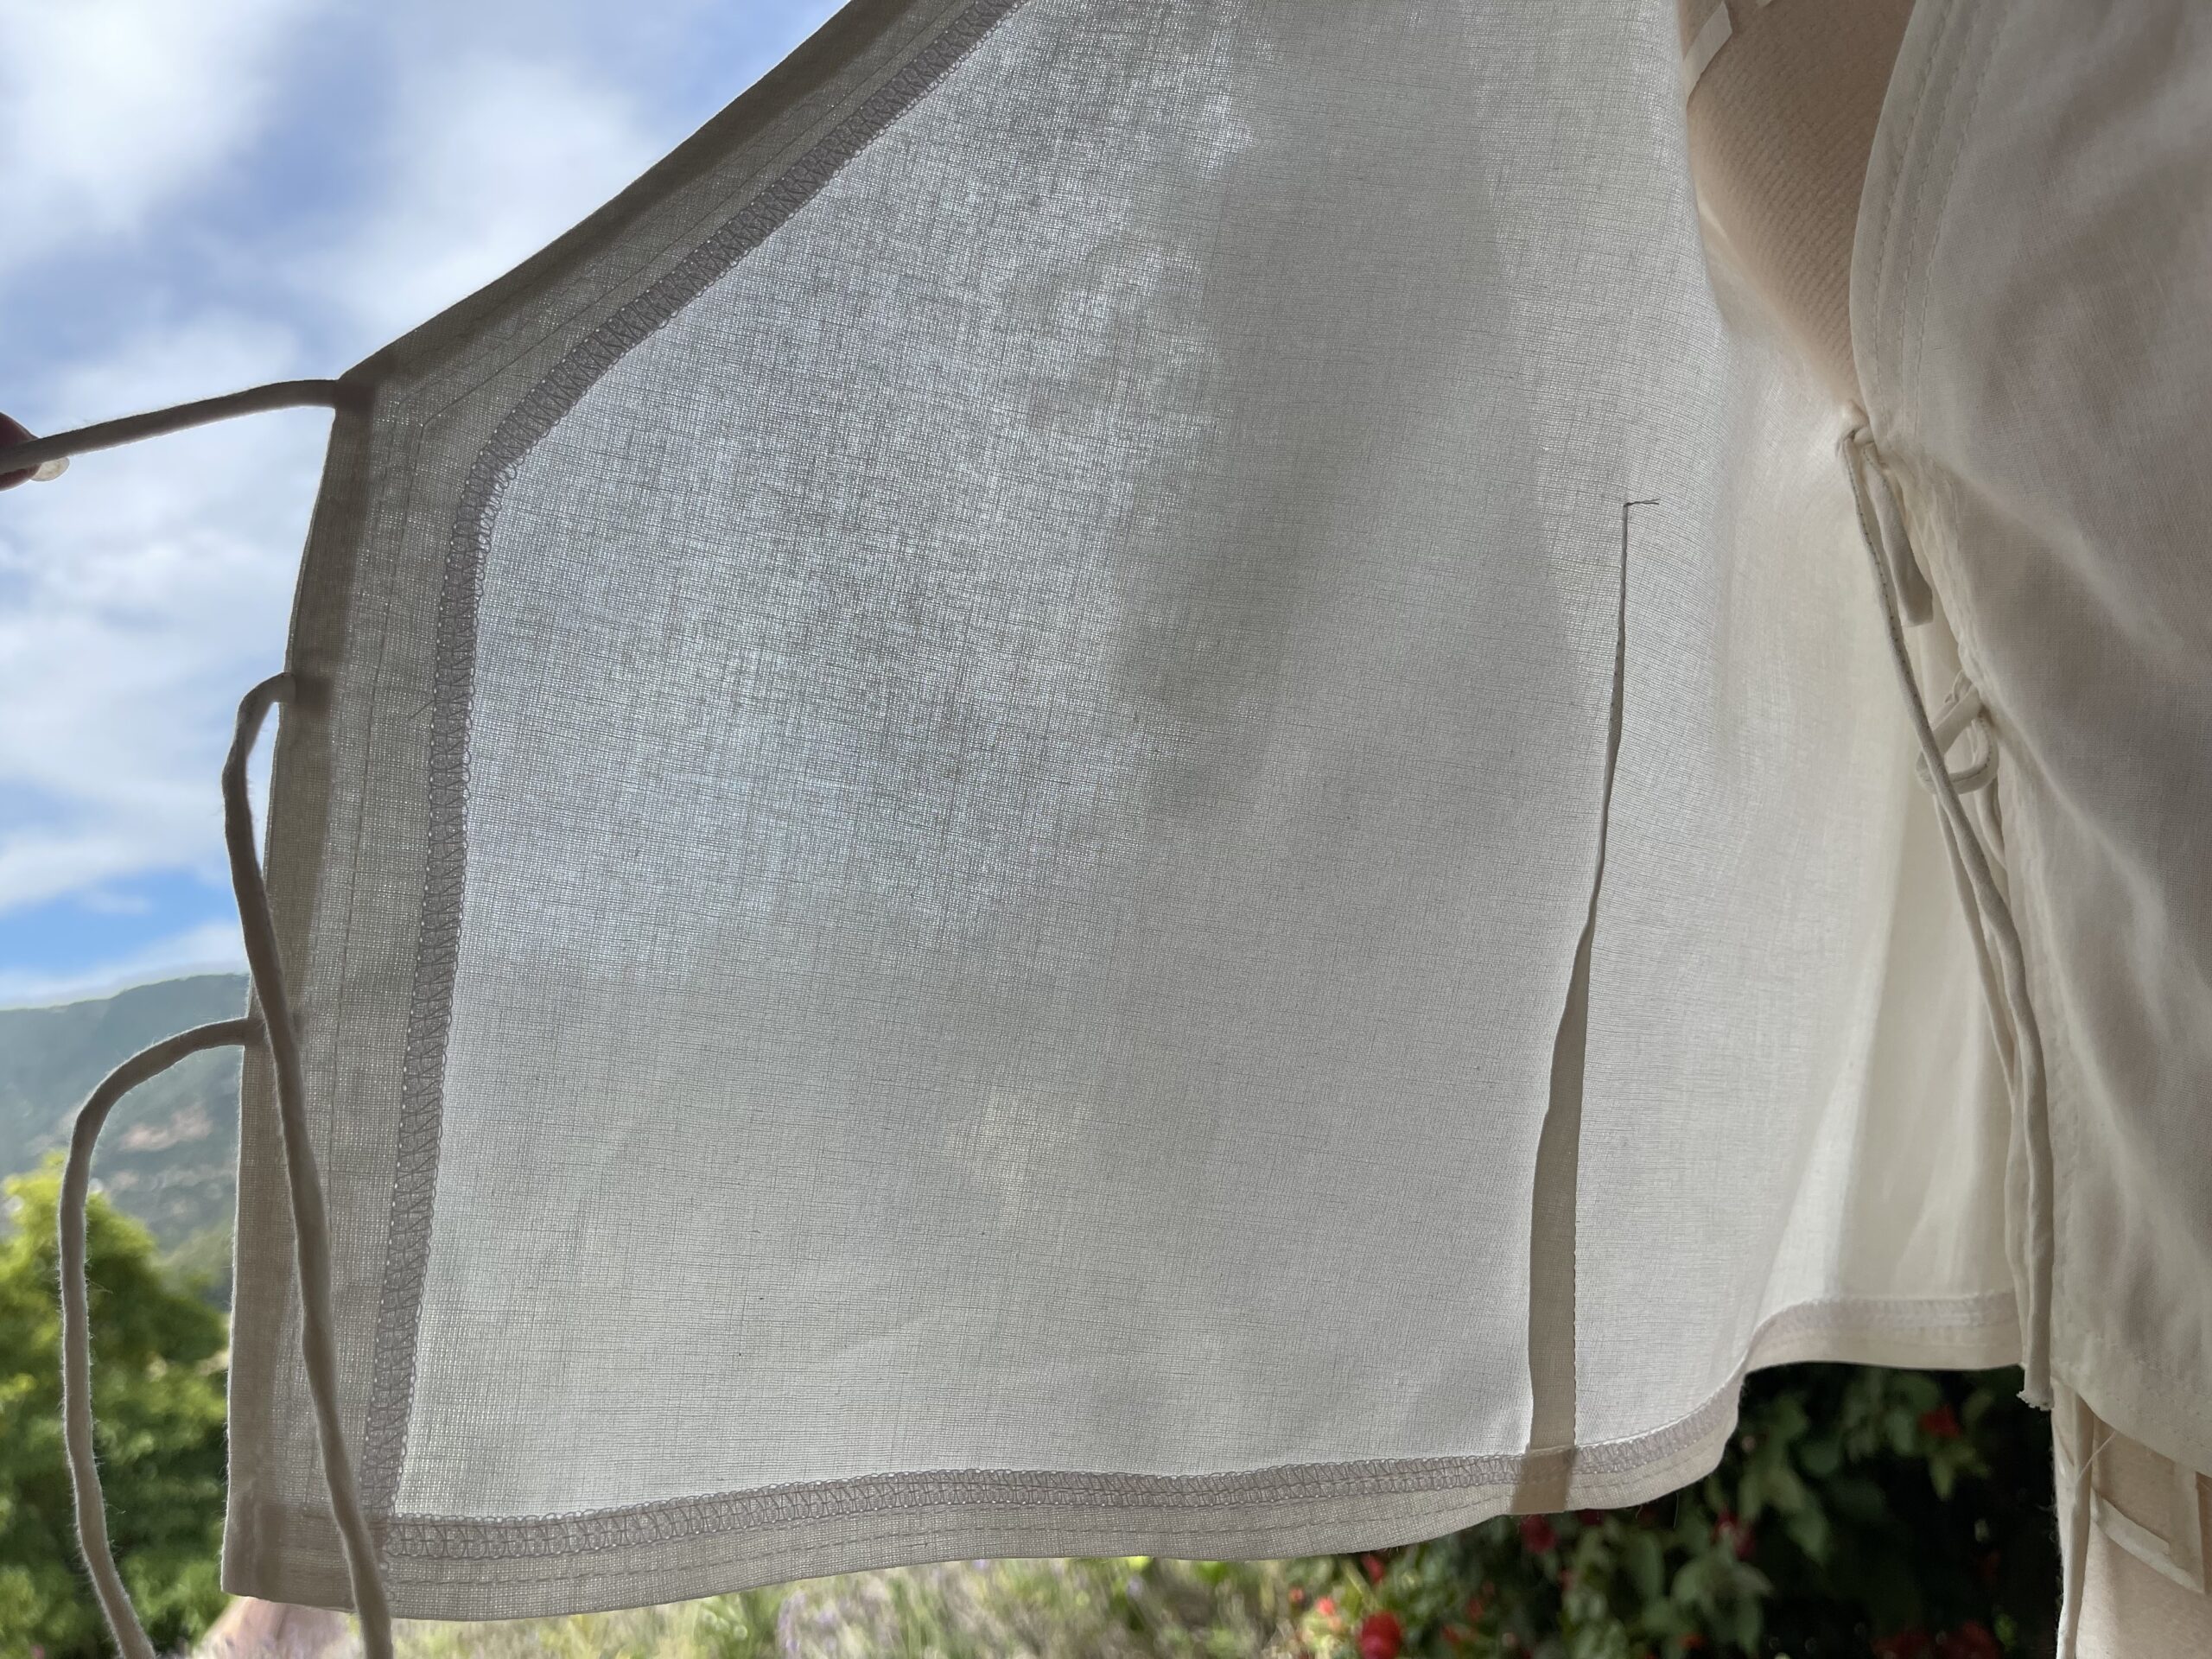
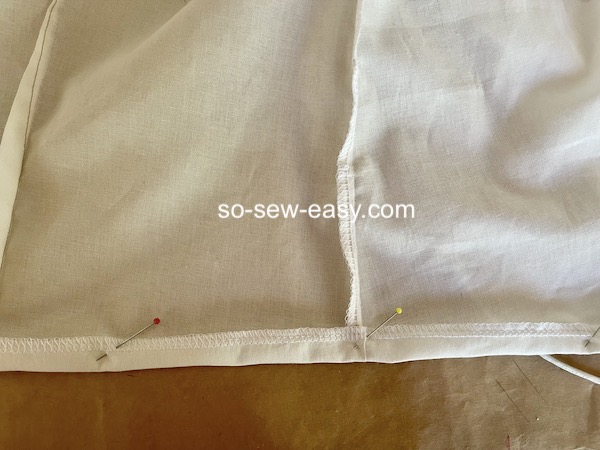
You will need to place the cords before you put the blouse together. I have to warn you here, I will be talking about the sides of the body as supposed to what you see in the picture. This is a wrap blouse, the right side will be on top, and you will see the ties on the left side of the body.
Pin three cords separated by two inches on the right side of the body.
On the same side, but on the inside, pin two cords.
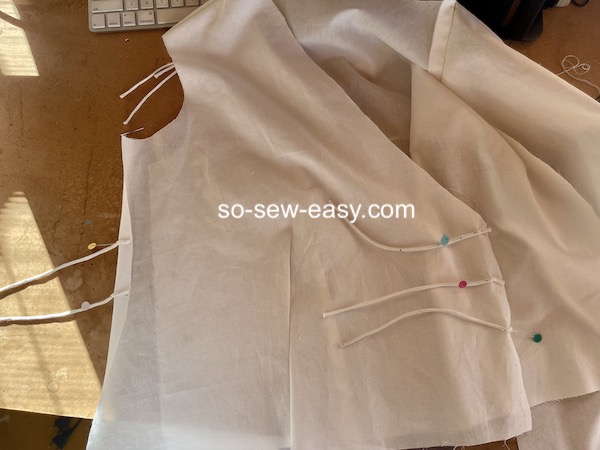
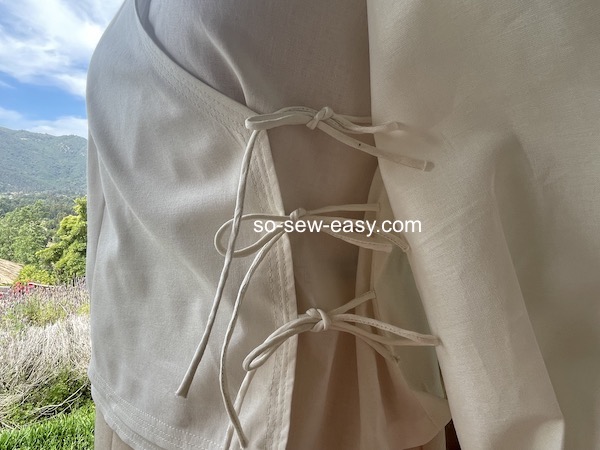
Do the opposite on the left side two cords on the top and three on the inside, with the exception that the three cords need to be left on the outside of the blouse so you can tie them up.
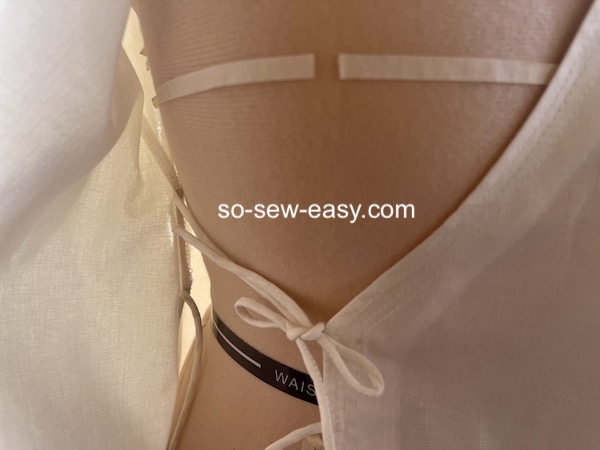
NOTE: You know you have done it well when you match two cords in the inside tied together as in the picture above and three cords on top matching three cords on the side.
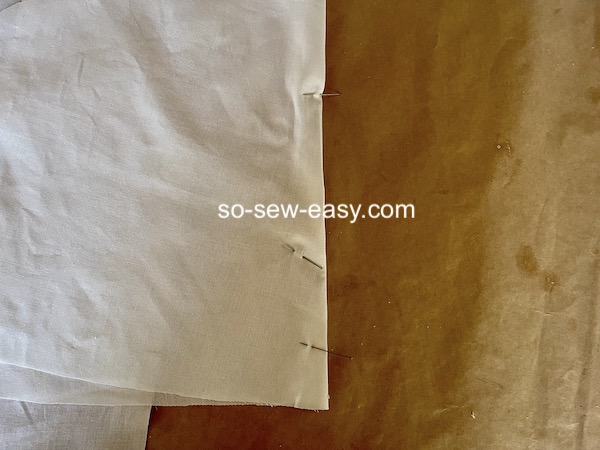
Step Five: Attaching The Front And Back Of The Blouse
Sew the shoulder seams, serge the seam allowance and press the seams open.
Sew the side seams, and be careful that the ties remain horizontal. Serger and press the seams.
Step Six: Attaching The Facing
Pin the facing to the blouse right sides facing each other at the shoulder seams, and pin the facing all over the front. Sew at 5/8″.

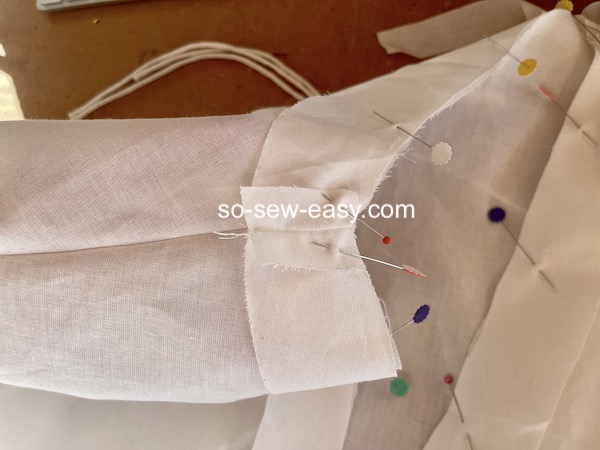
Cut the facing side, and reduce it by half. Press towards the facing, fold and understitch.
Serge the edge of the facing and iron the facing.
It will be helpful for beginners to read this article.
Step Seven: Adding The Sleeves
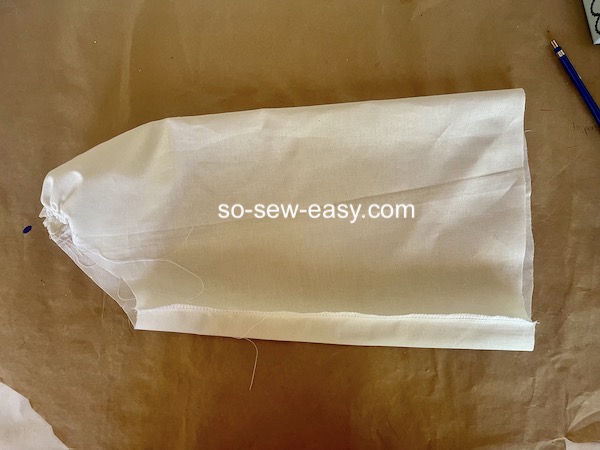
Sew along the arm of the sleeve, serge and iron the seam.
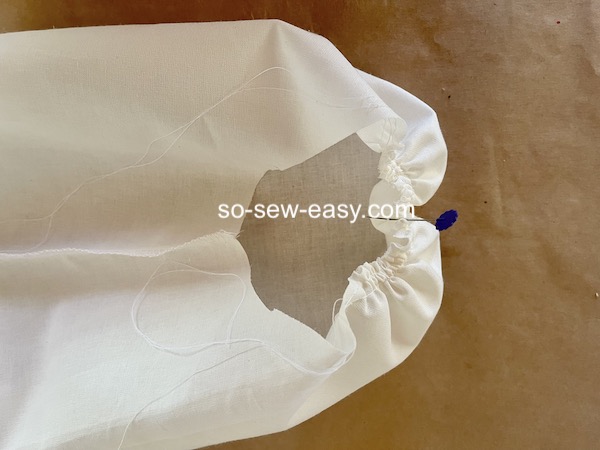
Gather the cup of the sleeve.
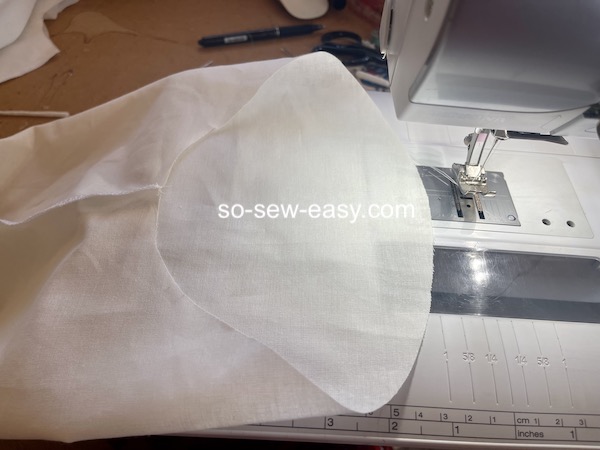
Pin the centre of the sleeve to the seam allowance; remember, the two notches indicate the sleeves' back.
Sew the sleeves to the arm holes.
Step Eight: Hemming The Blouse
Serge the bottom edge of the blouse. Fold the facing and the hem 5/8 and sew using a medium stitch.
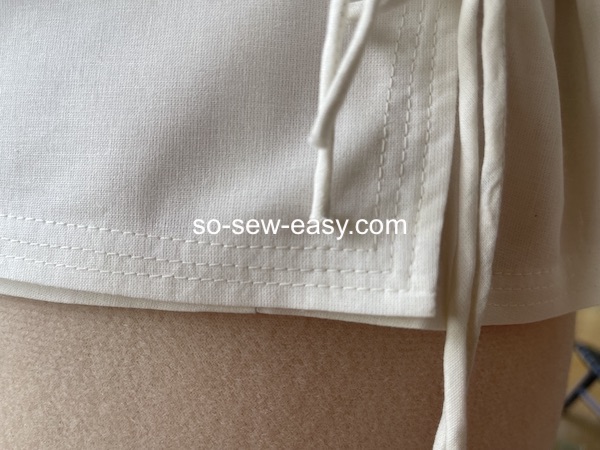
The original blouse has button loops instead of ties and has one button inside on the right side of the body at the tip of the bust dart. The blouse also had embroidered cuffs and a very large belt. Let me know in the comments below if this is something you would like to explore.
I was voted out of the apartment and landed on my brother's couch for a few weeks until I moved to Europe. (another story for another day), I do not know if there is good or bad luck. I believe that when we wear something that makes us look good and feel confident, things tend to turn how we want. It is all on our mind; if we know the product and the companies and look and feel confident, the possibilities of things going our way are high. As Louis Pasteur said, “Chance favors the prepared mind”.
Did you ever have a roommate who abused your wardrobe? Let me know in the comments below if you believe a piece of your wardrobe has brought you good luck.
Until next time! Let's keep the world together one stitch at a time.


I love that you called her out in front of her date. Invading your space and going through your things was beyond entitled. I was afraid you were going to say she came back with a horrible stain, or maybe snagged some of your wardrobe before you left.
I have been forever convinced that someone who stayed with us many years ago stole one of my favorite shirts, and I’ve never found another one off the rack that was cut so perfectly for my shape.
I can relate; it is terrible to have a suspicion but no proof. Do you remember what the shirt looks like?
This is Donna again. I saw the answer to my question about hemming the sleeves with elastic, so please disregard my previous question. Thanks!
No worries, Donna, thanks for your taking the time to write.
Thank you for this beautiful pattern! How did you finish the hem of the sleeves? The photo looks like you might have used elastic.
Hi…I so enjoyed your story behind this blouse. I’m something if a writer and currently writing a novel about sisters. Although I have three of my own and plenty of experiences to draw upon, I had forgotten the clothes sharing incidents.
My sister ( two years younger but the same size then) once wore my favourite dress without asking. I was one of six children, money was tight, mum had bought me this dress on weekly terms from her catalogue as a present My sister hadn’t asked me and I hadn’t noticed. Mum hadn’t either and was aghast when she realised She didn’t want me to know, to avoid us sisters fighting. She rinsed it in secret, spun dry it to hang out while I was at school the next day. Unfortunately the spin dryer ( it was a twin tub, so a washer with a separate spin dryer beside it) didn’t work well with only one item in it. On finishing, mum removed the dress to find that it had somehow been flung over the top of the drum, got caught and was ripped beyond repair. Of course, the whole story had to come out. I was angry and mortified. The dress had been an end-of-line reduction so couldn’t be replaced. I recently saw a page from the catalogue on Google, there was my lovely dress
Fifty years later, I grieved all over again!
Anyway, I’ve used a few of your patterns for free but will send you a donation for this one. Thank you for sharing your patterns, videos and expertise and for helping me ( a novice until a couple of years ago) make dresses for my granddaughter that are cherished.
The page from the catalogue is attached ( I hope)
Hi Val, I hope you finish your book; if I could help promote it in this blog, let me know. I love your story too. I hope everyone reads this comment. I love the dress…shall we make it?
I love the story about your lucky blouse. I had a roommate , one time who would take my underwear and wear them. It used to make me sooooo mad. You just don’t borrow someone else’s underwear! Wash your own out in the sink if you have to. That was just gross.
Indeed, really gross!!!
Love the pattern! Just wondering about how you would finish the bottom edge of each sleeve? Thank you!
I added an elastic, turn the sleeve 5/8″
Great blouse. I’ll probably download it, but I’d like to have the instructions for the button option, if possible.
Depends, The only way I would share it is via a video since it takes me between 30 to 50 hours of work to make a video I need many people to interested.
I’d like the button option too.
Hi Joice, Noted!
I’m interested.
Hi Cynthia, Noted!
HI: I don’t have a story, but I did enjoy yours. The pattern is lovely. Thank you for sharing.
My pleasure Velora.
Really darling blouse, but I don’t think it was too lucky for you as you got booted from your apartment. But I bet you did great in the long run!
I did not think then; however, it was a good thing in the long tun.
Oh my! A new twist to a blouse! Has a taste of Rennaissance to it and it’s on my TBD list for early next year!
Indeed, I will hope you share a picture with me. Enjoy!
The style of your “lucky blouse ” would be flattering on many woman. Loved hearing the history of the blouse.
Indeed, Audrey, this is one of those styles that are ageless.
What a lovely blouse & a fun story! I would very much love to see the button, embroidered sleeve & wide belt version of the lucky blouse! I hope you’ll post pictures of the original blouse, if you still have it, or a copy you make as close to the original blouse as possible! Your description makes it sound so beautiful! Thanks for sharing!
My Pleasure will do!
I love this! How would I go about making it a bit longer?
Very Easy, https://so-sew-easy.com/lengthen-sewing-pattern/
Also, can you comment on how wide you made the facings? The instructions were not clear on that.
Mine are 1 3/4″. This includes the seam allowance.
Did I miss it? From the picture, it looks like the sleeves are finished with encased elastic, right? Such a lovely blouse and I greatly enjoyed the story behind it.
Yes, they are. I forgot to mention how to finish the sleeves.
Good Morning. Under Measurements, what does the third row indicate? Finished measurements? Thank you.
Hi Christine, it is Hips, thanks for letting me know that was missing.
I’m liking the style of this blouse. I would like to know how you finished the sleeves at the wrist. Did you make a casing and thread a piece of elastic through it?
Thanks so much for making free patterns for us. It’s very helpful to those of us living on tiny Social Security checks in the US.
Hi Kathy, I believe we should all pay it forward; I get donations from people who can spare a few dollars while others can use the patterns for clothing or make an item and sell them to improve their financial hurdles. I hope your situation improves. Thank you for your appreciation. I whish I could do more…Kind Regards,
I love the pattern, looks easy enough after the pattern is made. Wearing a side opening is very slimming.
Hi Phyllis, I agree with you 100%