
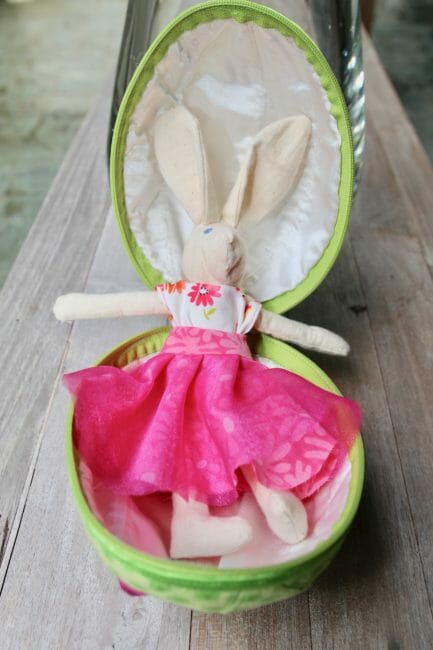
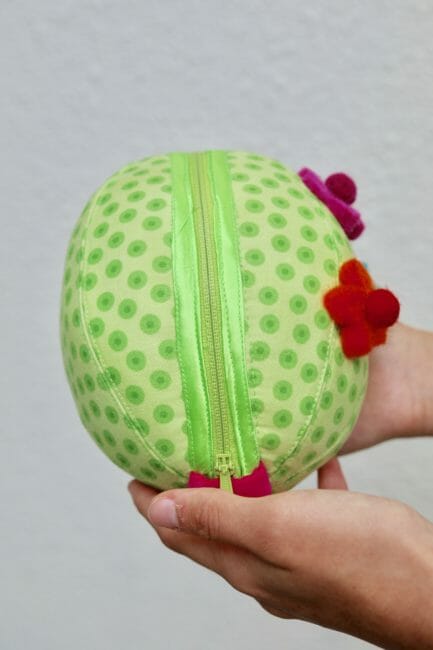
You'll love this tutorial if you're looking for something different for this Easter. It's a kind of Fabric Easter Egg made with fabric scraps and it has a zipper, so you can put a surprise toy inside.
This is a wonderful project for beginners but it would also be fun for more advanced sewists. It allows you to use up some of your fabric scraps while affording an opportunity to practice skills like installing zippers, bias tape application, and pattern drafting in a low-stress and inexpensive project. The end product will make a fantastic, and hopefully cherished, gift for your child or grandchild.

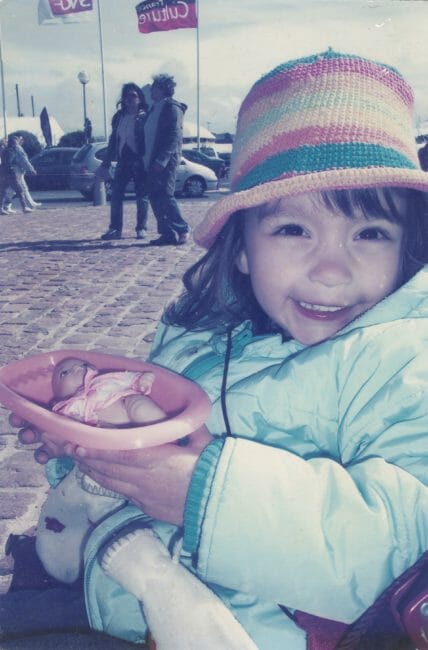

Here's the backstory for where this idea came from. When my daughter was a little girl, she carried with her a small bathtub with a little baby inside. I know it sounds strange, but we had purchased it at the Marche aux Puces in Paris for about 2 Euros or 2 US Dollars and my daughter just refused to part with “baby” and tub for any reason. This undoubtedly generated lots of looks and comments in snooty Parisian cafes as you can imagine.
One day before Easter, I had the idea of replacing the bathtub with a large egg made of paper mache. I covered the egg with a pretty fabric, made a bunny with a fantastic tutu and a bow that doubled as wings and a pillow. I hid it in the garden for the Easter egg hunt. When my daughter found it, she instantly latched on to it.
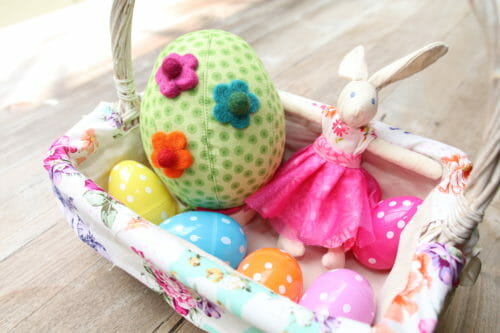

Soon this egg became a year-round companion for my daughter and replaced the old bathtub. Eventually, there were dresses, small tutus and tops to dress the little bunny. Time passed and the egg became dirty and tattered. Back then, I so wished that I had made the egg completely out of fabric so I could wash it easily to return to some sense of hygiene.
As happens with kids, my daughter eventually lost track of that egg. I am sure if I gather enough courage to make it to the back of our storage closet, I will find that egg and bunny somewhere. I think it would make for an interesting photo.
So this is the fabric Easter egg I wish I had made way back then. I thought in case you have a small child who would love an egg hunt and becomes attached to it, make it out of fabric so you can wash it. The bunny and wardrobe will be a separate tutorial in the near future.

Materials:
I encourage you to dig into your scraps of fabric, recycle from an old project or better, reuse an unfinished project. You really only need a small amount of fabric for this project and the pieces can be relatively small.
- quilting fabric 1/2 fat quarter (9″x 22) (23cm x 56cm) you can make 2 eggs per fat quarter
- lining (9″x 22)
- fusible fleece (9″x 22″)
- sewable interfacing (9″x 22″)
- interfacing for lining (9″x 22″)
- 1 yard bias tape to match the fabric and zippers
- 1 nylon zippers 20″ long
- strip of ribbon 10″ long x 1.5″ wide

Tools
- sewing machine (optional)
- quilting needle or size 14 needle
- iron. (I got this new “smartiron” recently and it is just fantastic. You may want to check it out.)
- zipper foot
- walking foot
- seam ripper. (Here's a review of what I think it the best seam ripper around.)
- scissors
- water soluble pen
Video Tutorial
Subscribe to the YouTube channel:
Pattern Download


You can download the pattern for this Fabric Easter Egg from our account at Payhip.
For help downloading and printing PDF patterns, please CLICK HERE.
Step One: Fusing the Fabrics
Fuse all fabrics before cutting. Place the quilting fabric right side down. Place the fusible fleece on top with the glue side facing down. Iron to fuse.
Fuse the thin fusible interfacing to the lining.
Step Two: Cutting the Fabrics
Mark the little notches on the fabric following the pattern then cut the fabric. Don't forget to do this or you will have a hard time piecing the pieces together. Make your marks indicating which way is up and down. Place main fabric, lining and interfacing wrong side together so will have 2 sides for the eggs.
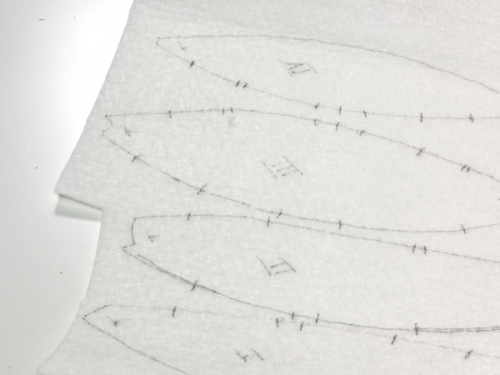

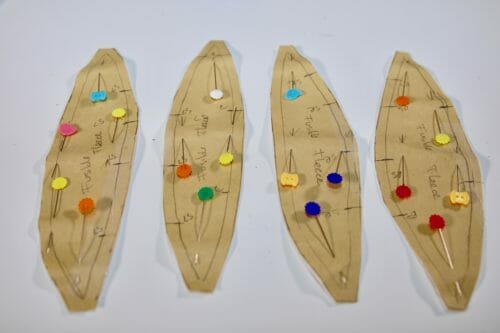

Trace the pattern onto the sewable interfacing and label each piece then cut.
Step Two: Sewing Your Fabric Easter Egg
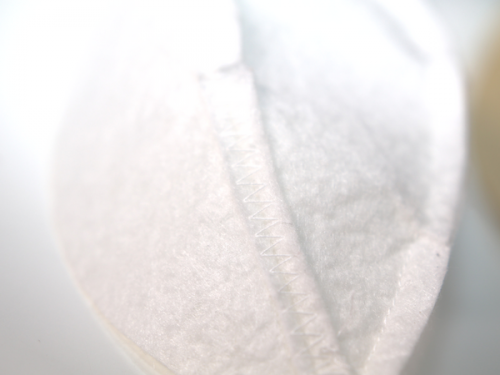

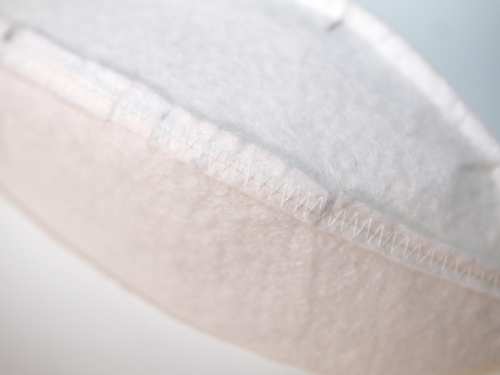

Start by sewing the sewable interfacing using a 1/4″ seam allowance. Open the seam and use a large zigzag to keep the seams open.
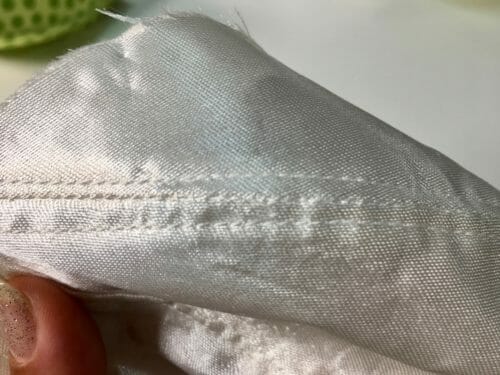

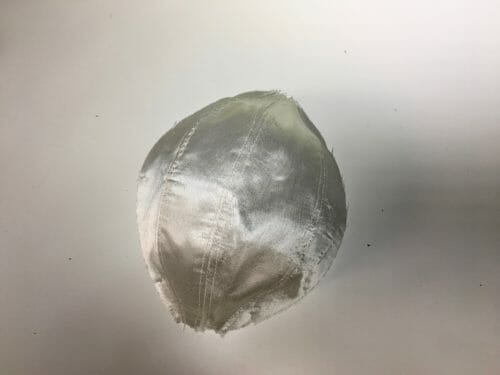

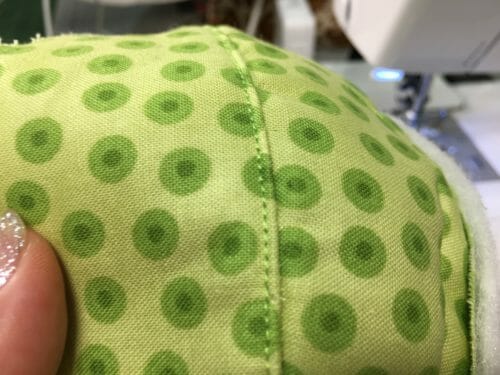

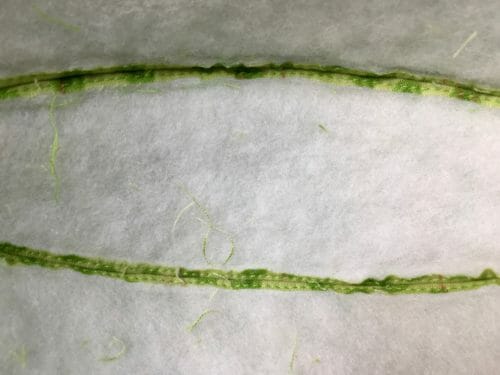

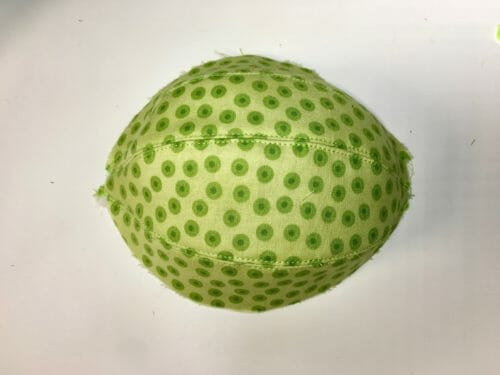

Use the same procedure to sew the lining, but instead of using a zigzag, topstitch on the side of the seams so the seam allowance lays flat. Stop the topstitch 3/8″ before the edge. The reason will become clearer on the step below.Repeat on the main fabric. Remember to stop 3/8″ before the edge.After topstitching, cut off the seam allowance to reduce bulk and give the fabric Easter egg a more smooth appearance.
Step Three: Building up Your Fabric Easter Egg
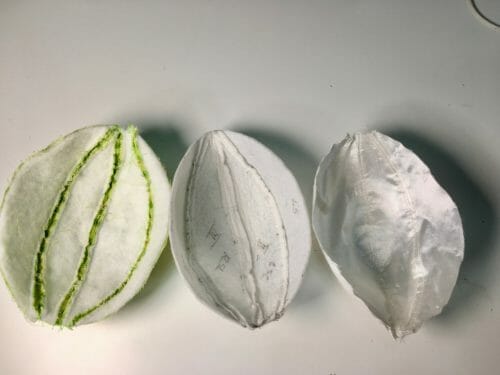

You should have three layers to accomplish this step –fabric, interfacting, and lining. There are two halves of the egg with three layers each.
Place the sewable interfacing layer on the table and cover it with the lining layer.
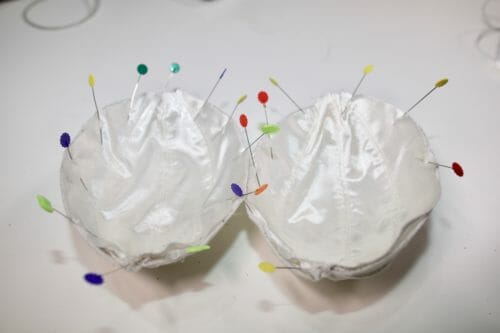

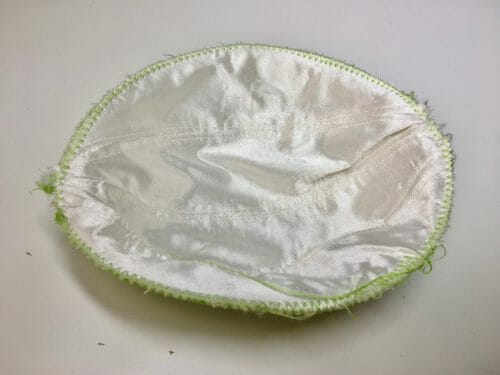

Take the lining and sewable interfacing and stack it onto the main fabric layer. Zigzag (very large zigzag) the edges to catch all the layers.
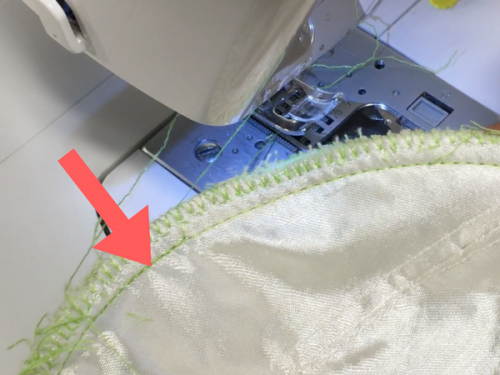

Make a stitching line under the zigzag at 3/8″.
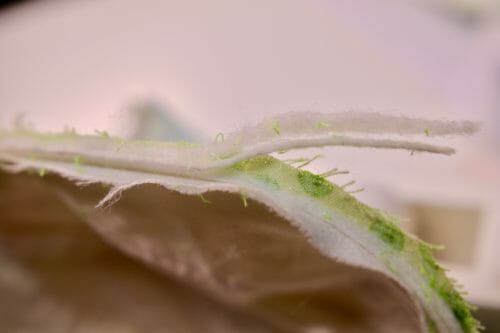

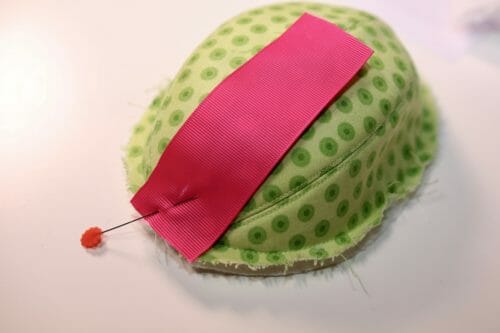

Using a seam ripper, take out the the zigzag. Yes, I know this is a pain and a dreaded word for all, but this was the best way I could find to reduce the bulk to be able to attach the bias tape. Cut the interfacing and the fleece without cutting the lining and the fabric. I tried cutting before zigzagging and you are welcome to try, but that just did not work for me. I had a hard time aligning the pieces.Pin a strip of ribbon 3″ long at the bottom of the egg. Line up the strip at the center and fold in half. There will be three strips of ribbon attached to the end of the egg. Two inside and one outside. These will be sewn when we attach the bias tape in the next step.
Step Four: Attaching the Bias Tape
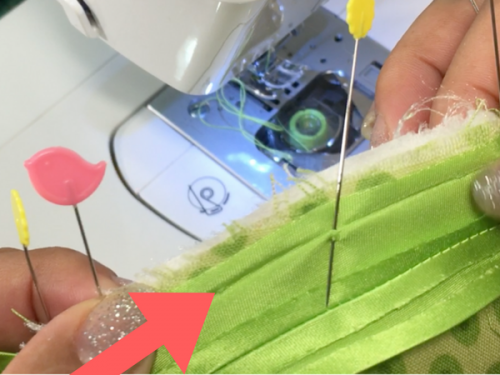

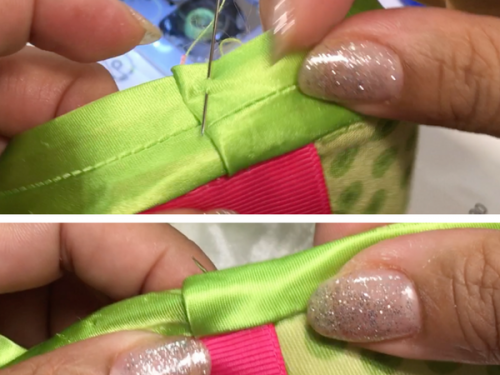

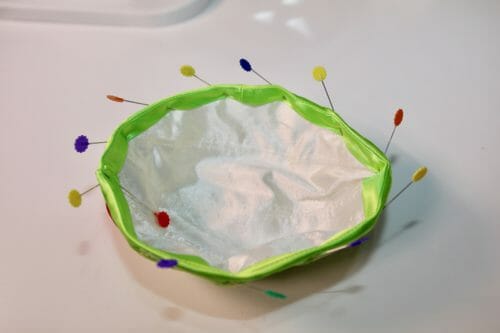

Pin the bias tape starting on top of the ribbon. Place the crease of the bias tape at 3/8″ from the edge. Use the stitching line you have previously made as a guide. Sew the bias tape at 3/8″. Join the ends together, fold in, and pin. Continue pinning the bias tape around the edge of the egg. You'll be doing this on both halves of the egg. Place a 3″ strip of ribbon (if you have a print on the ribbon, place it print side down) exactly opposite the strip you have placed on the outside before.
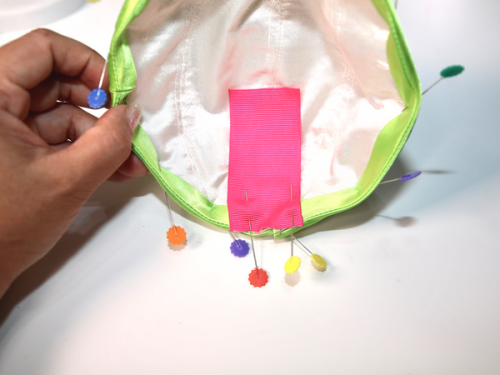

Fold the strip of ribbon in half pin and sew the bias tape.
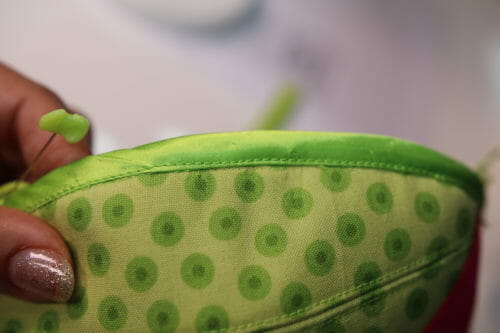

On the right side of the fabric, sew the bias tape. Use “stitch-in-the-ditch” method or just sew right on the edge like I did. Looking back, stitch-in-the-ditch would have been a better method for aesthetic reasons.Repeat the exact procedure on the other side of the fabric easter egg.
Step Five: Attaching the Zipper and Finishing the Fabric Easter Egg
There are a few patterns around for a fabric easter egg, but this is one affords you the ability to carry it as a toy storage. The zipper is what allows you do do that. You might think it is hard for a child to open a zipper, but it is a wonderful way to teach hand-eye coordination.
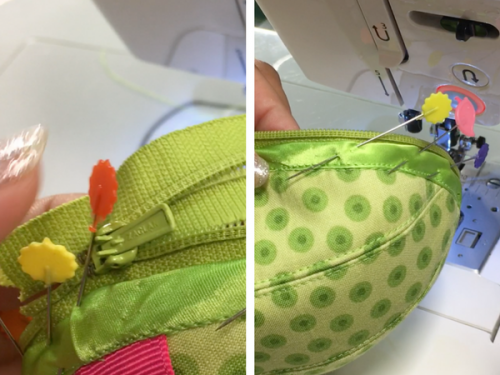

I had a hard time coming up with a way to attach the zipper to the fabric easter egg. So I did it this way to make it easier for a beginner to follow. Pin the end of the zipper exactly at the middle of the ribbon and continue pinning the zipper around the edge.Sew using your zipper foot leaving a 1/8″ gap between the teeth and bias tape.
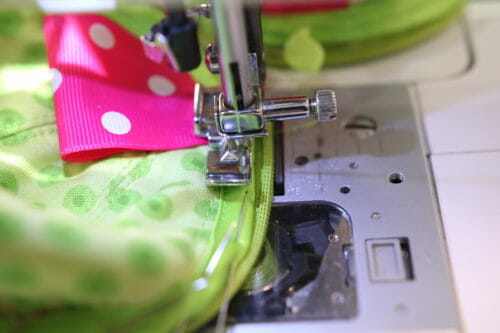

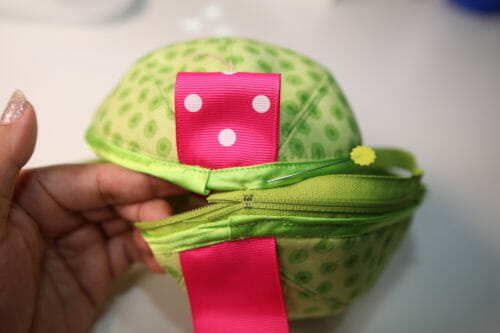

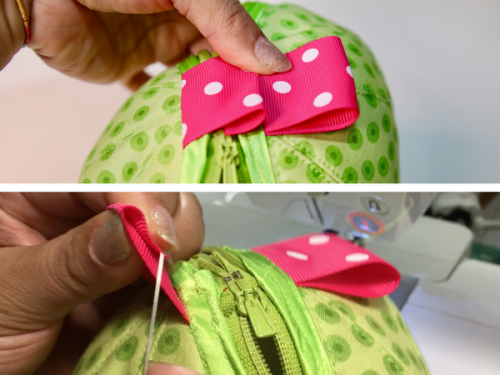

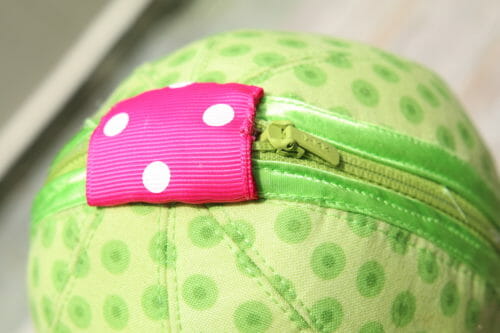
One side of the zipper will be sewn to one side of the egg, while the other will be sewn to the other side as shown in the picture below. Attach another strip of ribbon ( 3″) on the other side but do not fold, leave it as a single layer. Sew the other side of the zipper. I would like to point out that it does not matter what side has the folded ribbon, as long as one side has a folded ribbon and the other does not. This ribbon serves to hide the zipper and also acts as the “hinge” for the egg, so it has to be a few layers thick.Bring the unfolded piece of ribbon to the bottom of the folded one and sew it down using a hand needle and matching thread.
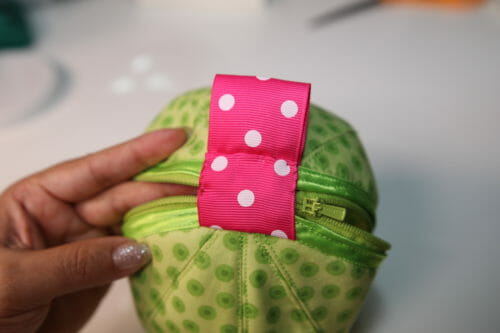

Bring the folded ribbon on top of the one you just sewed and sew it down with the hand needle. I'm using a very bright pink ribbon so you can see clearly. I would have preferred to use a green ribbon instead but I think the pink looks OK anyway.
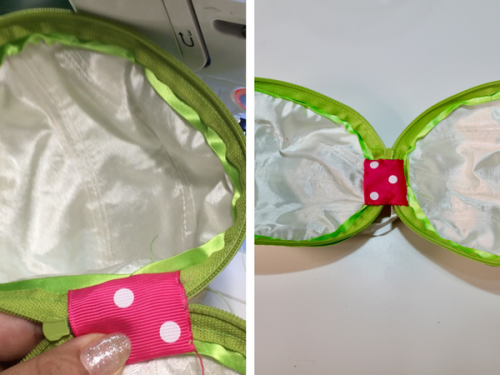

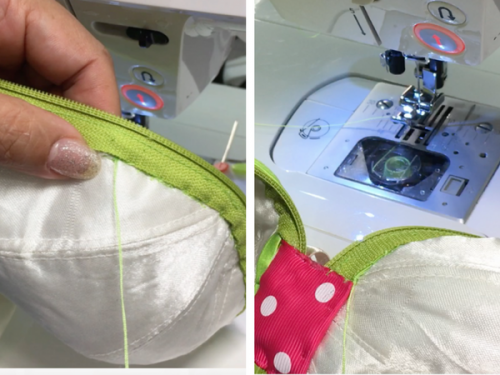

Lastly, tuck the bias tape under the zipper and hand sew around both halves of the egg.Now you are ready to stuff your fabric easter egg with chocolates, or a bunny. I hope your child enjoys it as much as mine did.
Until next time when we will be making a top to stay in tune with the current trends.


What a fantastic idea! I wish I’d actually checked my email before Easter, but there’s always next year. I’m going to do a little experimenting with this pattern in the meantime. 😉
What a delightful pattern – I can’t wait to make one. Thank you for sharing your tale. I found the video to be very informative.
Adorable!
I love this! Your backstory completely charms me. We have a similar story, but with a little lamb that spoke “Baa Baa, Happy Easter” when you squeezed it. To this day it’s a family joke about…. “What does the sheep say?”
Cute pattern. Could you iron on the fusible interfacing to the lining fabric and then sew that to the exterior fabric?
All I have is Iron on.
Yes, you can that would save you a lot of time.
It was necessary to to take a slightly wider seam on the lining so it was smaller than the outer shell.
HI Carol, yes it is if your pellon is thick, very good point thanks for sharing.
Hi! Thanks for the adorable Easter egg pattern! I’m trying to understand if it includes seam allowance but I can’t find it anywhere. Does it include seam allowance?
Yes seam allowances are included. Enjoy!
Please check list of materials as a 20 inch nylon zipper is shown on this web page but instructions when printed read 2 10 inch zippers-ask me how I know!!
[…] you read my last post on how to make an Easter egg that doubles as a bag from fabric scraps then you will want to make this little toy and place it inside the egg to hide in the garden or in […]
I have been sewing/tailoring for nearly 60 years and just cannot figure out the sequence of these pieces. I have carefully labeled top/bottom, etc. How do they go together to make the egg halves? Surely, I cannot be that dense…..can anyone help here?
The written and video tutorials were wonderful. I looked at the video after going through the written instructions and found that it cleared up all the “questions” I had. This is a welcome addition to your repertoire. It all seems like a lot of work and more time than I have but it was enjoyable and will be worth it for those with small children.
My grandson will get it with felt Legos on the outside and a small Lego kit on the inside.
I wish you would also include the sewing instructions with your patterns. It would be an easier download rather than having to go to two different places to get everything needed to start a project.
I used to Mary, until I found 8 people selling my pattern in different places including Etsy charging money for it. Until, I have not resolve this issue. Soon I hope.
Adorable! Thank You for the pattern!!
I can see making this in more “boyish” colors and putting something inside that a boy would like. e.g. A stuffed dinosaur or dragon.
Muriel, I was thinking that my grandsons would enjoy an egg with a super hero inside. They love to wear their hero costumes.
I have a question about the strips. Your instructions say there s/b two inside strips and one outside. The pictures look like there is one inside and two outside. The outside fabric is dots and the inside is white so the picture shows it as I stated. Am I wrong?
Hi Mayra, where did you get the cute felt flowers? Did you cut them out, needle felt them or buy them? I’ve been looking for some for another project. Thanks!
Hi Joy, I bought them at a store, they come pre made or you can buy the set to make them from the Clover company. Under needle felting appliqué mold for USD 6.50.
Thank you. Very cute and fun pattern.
Where do you find 20″ zippers? All I found were 22.
I did not, had to use what I had a 24″. You can use 22 and cut it as I did on the video.
Mayra, thank you for the cute bunny pattern. I had a cloth bunny many many years ago & it is “lost”, so I would like to make this one. I am having issues printing to size,
I have an EpsonC88+. I clicked off the reduce/enlarge setting, hoping to print actual size, but the test square came out 1 1/2″ X 1 1/2″ not 2 x 2…any suggestions?
Thank you
Hi Bijoux, you need to print using the latest version of Adobe Reader. Send me an email if you are still having troubles. mayra@so-sew-easy.com
I try to have a baby quilt on hand at all times in case a need arises. I think I will make bunnies and eggs to have on hand as well.
Hi. Thank you for sharing your wonderful idea. I have started making my egg but I have ended up with 2 outside pieces numbered 1-4 from right to left and my lining pieces number 1-4 from left to right so when I put the outside and the lining together number 1 on the lining matches to number 4 on the outside piece. Is this a problem? Have I cut my shapes out incorrectly? Thank you
No Dawn it is not a problem as long as you have to half and you know what way is up, once you attach the bias tape and zipper it will take a nice shape.
Is the bias binding supposed to be 1/2 inch or 1 inch?
Also, the printed download pattern states to buy 2 10″ zippers, but the tutorial says a 20″ zipper. Looks like I need a 20″ instead of 2 10″ zippers.
yes there is a typo. One zipper 20″ long, 1″ bias tape. It was late 3:45 am when I finished this tutorial.
I’m a bit frustrated – went to download the pattern for the Fabric Easter Egg and it isn’t available, although the instructions and illustrations with same are available. Then I went to print pattern and instructions for the bunny. I was able to print the pattern but there doesn’t seem to be any instructions for assembling them. Help! I love the patterns – and my 6 yr old granddaughter would too, if I was able to produce it!
Hi Alma, our site was overloaded today due to the popularity of this pattern. I should be mostly back to normal now. Please try again now.
Hi Alma, I no longer put the instructions on Craftsy, because there is no way to answer any questions if you need any help, so I make you come to the site and ask the questions. when I am satisfied the instructions are good enough then I will leave them as a pdf for you to download.
I have clicked on the link several times to download the easter egg and it come back as “not found”. Is there another link that works?
Hi Tammy, we experienced a huge traffic yesterday. it should be working fine now.
Did the pattern download move? I keep getting sent to “page not found” when I click the icon.
No it has not, we had a huge amount of traffic yesterday. Not sure why the server is very fast.
I love it, also looking for the bunny pattern and clothes, my Granddaughter would love it
It is coming out soon, stay tuned.
Did you know that none of the down links work for the Easter bunny patter
Hi Bert, our site was overloaded today due to the popularity of this pattern. I should be mostly back to normal now. Please try again.
looks good hope i can get two or more made before Easter…thank you!
Absolutely clever! Thank for the pattern!!
You are welcome Susan, Enjoy!
Love your story brings back child hood story’s from my kids thank you and thank you for the pattern. Can I make these for a charity and can they sell them on the stall.
Hi Cathy, yes if it is for charity of course, glad to help out..Could I ask for a photo to add to the article? Thanks in advance.
Yes your sure can.
This is really cute but I’m confused about the bias tape. It looks like you stitched a couple pieces together on the long side but I don’t think you mention that in the instructions.
Thank you Kathleen! I did that because I did not have enough for a continuous bias strip. I used scraps of what i had laying around, and was looking for the closest thing to match the zipper.
This Easter egg is adorable, Mayra! Thank you for sharing the tutorial. My birthday is in April, and several times in my life has actually fallen on Easter. I would have loved to receive this egg (and that beautiful bunny!) as a gift!
Hi Kimberly, Happy birthday in advance!
Thank you for a wonderful pattern. So glad you will be including the bunny. I love little things like this that I can make up and give away as gifts or surprises to children.
Yes it will come very soon I am just tidying things up to make it the easiest way possible.
thank you so much for this great pattern, I am about to make it.
I have a question, how wide is the bias tape you used.
thanks
Hi Anne, 1 1/2″ is what I used, but you will only need a 1/2″ wide.
So cute! I love your story, thank you!
Looks wonderful! Do you have a pattern for the bunny doll too?
Hi Gail, that will be coming in a separate tutorial to be released shortly. Please keep an eye out.
I found it worked better to use a slightly bigger seam on the lining so it was a tiny but smaller than the outer egg.
Adorable! Thank you for the pattern.
You are welcome Juanita.