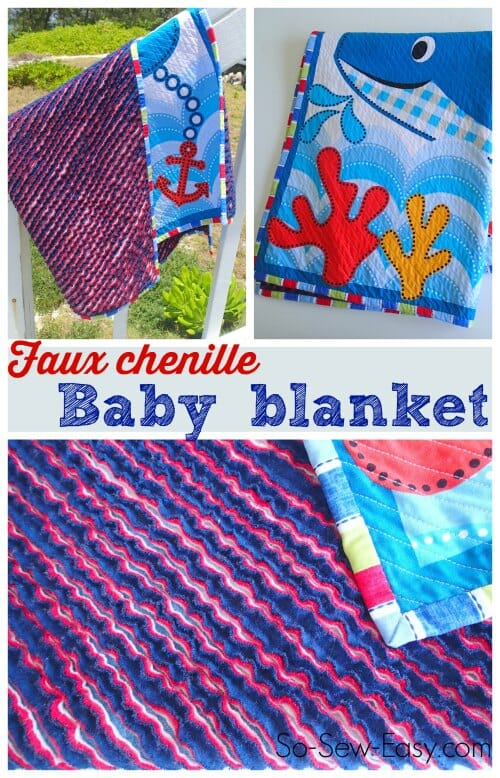
After my recent attempt at quilting and all the adventures, failures, and very steep learning curve that went into making a baby quilt, I decided for my next expectant friend, a different approach was in order. Pinterest to the rescue for inspiration and I came across this tutorial for a faux chenille baby blanket. Although the end result is lovely, it didn't look easy and even the writer had plenty of problems along the way. Never to be daunted, I gathered my materials and got to work.
Materials needed:
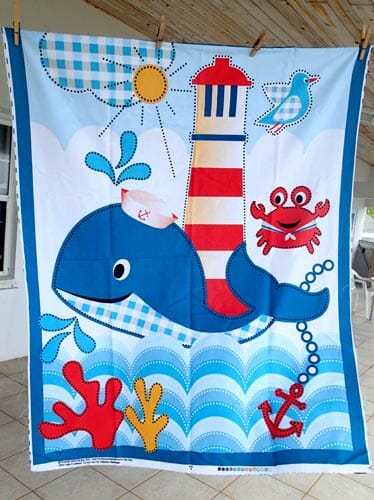

- Top layer – I used this cotton panel above. Any good quality non-stretch fabric should work. (See HERE for other cute panels to use.)
- Quilt binding, or make your own
- Underneath – shaggy layers, I used 3 pieces of flannel. Try with 3 or 4 layers.
- Basting spray
- Patience – lots of it
I wish I'd used a lighter color blue flannel on mine, but my choice was limited to what I could get, and I could only get this dark navy. Be aware that the color you have on the uppermost layer will very much dominate what it looks like when finished.
Making those layers stick!
Dana had a lot of problems caused by her layers shifting while she sewed. She had a busy print to hide any mistakes but with my printed panel, mistakes would be obvious so I HAD to make sure those layers stuck together and didn't shift. I wasn't so worried about the flannel so I stuck those 3 together with a light spray basting.
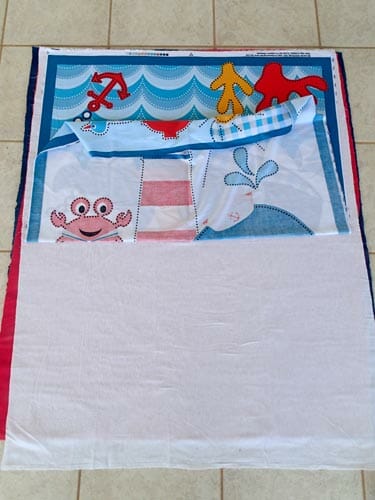

I did half at a time, smoothing from the center out towards the edges.
Always work outside with basting spray. No matter what you do, it will drift around onto the surrounding floor and some come with warnings about breathing in the fumes, etc. I laid mine all out on the patio.
When it came to adding the top panel, I gave it a good spray all over, let it dry a little so it was a bit tacky, and then completely overdid it and sprayed it again. I thought at the time this was a solid idea and would prevent shifting, but I should have thought through the whole process first! Still, look how smooth it is. Perfect.


The quilting
With everything (very) securely basted together, it was time to quilt. The layers have to be cut and sewn on the bias so I drew in a single line across the center at 45 degrees using a disappearing fabric marker. I made this my first line of stitches and then used a quilting guide set up with my walking foot to sew lines of equally spaced stitches about 1/2 inch apart. I used a white thread on the top and a navy underneath.
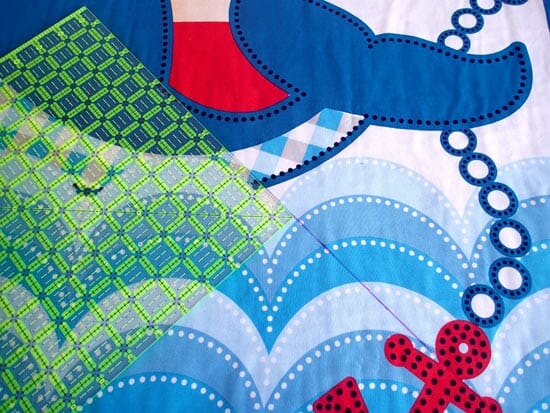

Now, let me tell you, I love to sew, but sewing and stitching are two different matters. This took a LONG time and it was not interesting. I had to take several ‘I'm going mad' breaks to get me through it. Listen to an audiobook or something. Anything to stop your brain from turning off and making wavy stitches – it can happen! Also, don't do this in very hot weather because sewing for hours with a thick blanket on your lap is hot. Yep, it's over 100 degrees here and I'm wearing a blanket.
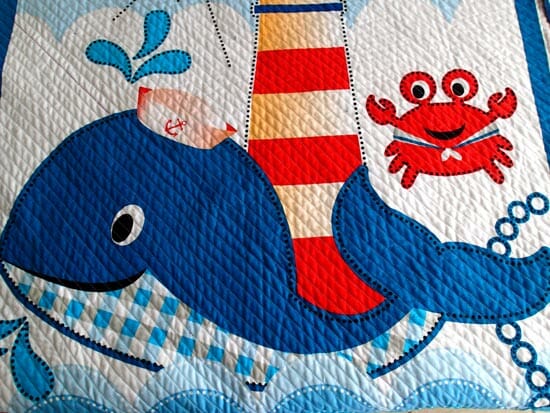

Anyway, once it was done, I was happy. That top panel, in fact, none of the layers shifted even the tiniest bit and I managed to sew the whole thing perfectly without even the tiniest pucker. Hooray for the basting spray.
The cutting
What did I just say? Hooray for the basting spray? Er – NO! There's nothing wrong with the product, its amazing. But my over-liberal use solved one problem with the shifting, but now had caused me another. Totally my own fault.
The next step involved cutting down through all those sewn channels, cutting through carefully just the layers of flannel, and leaving the cotton panel undamaged. Now that might have been easy if the two weren't glued together so tightly it was like they had been nailed. I persevered for about 90 minutes, gently using my scissors to prise the flannel away from the cotton, make a little snip, separate the layers, snip, and so on. It was painstaking.
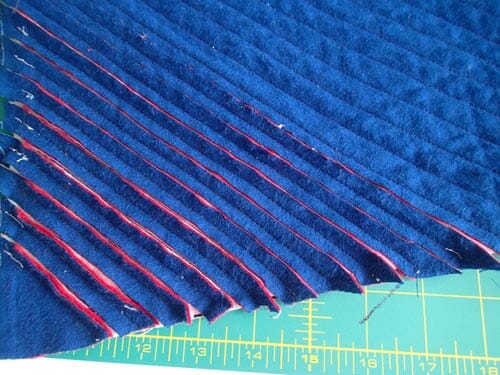

In 90 minutes I had managed to snip my way through one small corner and my nerves were shot from trying to avoid poking my scissors through that front panel. There was only one answer – wash out all the damned basting spray. It's totally water soluble and intended to be washed out after use, so with all the quilting in place, I got myself a very big bucket and I hand washed the lot until it was nice and soft and I hoped most of the spray had dissolved away.
Relief at last. Yes, there were a few sticky patches left here and there, but mostly my scissors just slipped easily between the cotton and the flannel and it was easy to cut more confidently down those channels. Here's what it looks like cut – not too interesting so far.
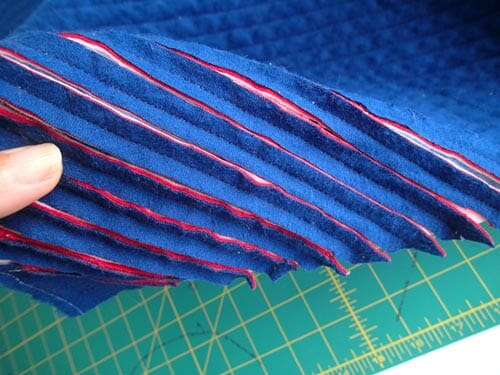
If you have a go at this project, I really recommend hand washing after quilting to remove the basting spray and make it easier to cut those channels. Or, just use less spray in the first place!
Trimming and squaring up
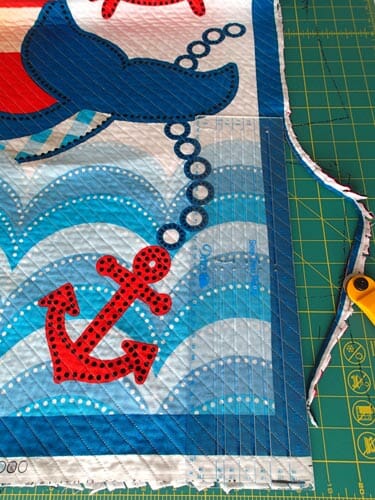
It's interesting how if you buy 4 yards of fabric, all of which are said to be 44 inches wide, just how much variation you get in both width and length. My panel had a blue border printed around the outside of the print, but actually, at the top the entire blue border was printed on the selvage where all the little holes are in the edge of the fabric, and I had to trim that off. Hopefully, no one will notice when the blanket is completed.
I trimmed off all the rough edges with a rotary cutter. The design on the panel made this easy to do.

Binding the blanket
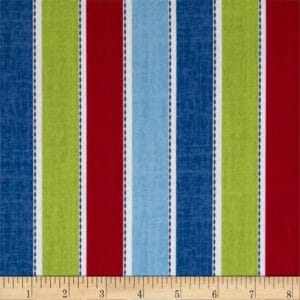
I bought a quarter yard in this fun stripe which matches the panel because it should look good with the stripes going across the binding. I cut my strips 3 inches wide and had plenty with some leftover.
However, with part of the quilt cut and then hand washed earlier in the process, part of the flannel was now already all fluffy and wavy. Sigh. So applying the binding wasn't quite as easy as I would have liked. I had to carefully use the tip of my iron to press out all that flannel flat again around the edges.
I sewed on the binding with the flannel facing up so I could keep it nice and flat as I sewed, then I turned over and hand-stitched to the front panel. I think it looks nice and neat.


The magic happens
NOW, at last, the blanket is ready for the magic. I already had a sneak peek when I washed it earlier, but was so excited to see how this would come out. I threw it in the washer for a delicates cycle – I admit I was worried the flannel would all fall apart and I'd open the lid to find a piece of cotton and binding and a load of fluff everywhere. Thank goodness, after all that work – it came out beautifully.
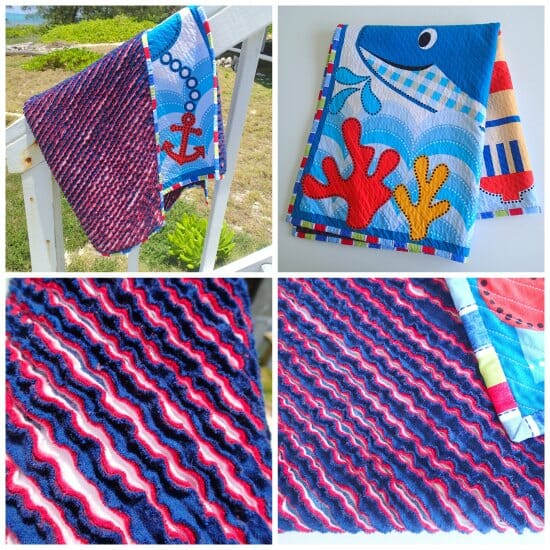

I really do wish I'd had a lighter blue for the backing, but I'm still delighted with it. I hope that the Mom To Be likes it as much as I do. My husband loves it and wants me to sew us a big-sized one for the bedroom. I'm not sure I have the patience for that. That would work out maybe 6 times as big. 6 times as much sewing straight lines, 6 times as much cutting those little channels. It would give us 6 times as much snuggly goodness… It just might be worth it.




This blanket looks great
There is a rotary cutter specifically for cutting through the layers of fabric to create chenille…..
I made a baby blanket like this but used layers of solid and printed flannel. It turned out adorable.
But I had a cutter that was made to cut those channels between the rows!
It’s made by Olfa (of rotary cutter fame) and is called “Chenille Cutter”. No more scissor anxiety!
As for the binding, would hand washing and then cutting around the panel have solved the problem of applying the binding. Or could we apply binding, wash then cut?
Love this idea but am a little worried about how heavy this little baby quilt/blanket will be? Thanks for the great tute and hints.
Thank you for sharing your process!
Definitely not something I’m ever going to attempt. But if you make one for you and hubby, could you make it in sections and join just like quilt as you go?
I have just prewashed the flannel I plan to use for this project. Will it still work and turn into chenille when I cut the lines?
This is GORGEOUS! I’m quittin’ knittin’ and moving onto sewing instead.
Hi Michelle, welcome to sewing! Please sign up to the newsletter so you get all the latest updates. Kind regards, Mayra
Oh and I love the panel! I’ll have to try that next!!
I’m working on my right now and the sewing is taking forever but I am doing the lines much closer. I wish I knew to do 1/2 instead of 1/4. Oh well. I didn’t pin or spray mine and I only have one spot thst has been a little lumpy. Otherwise it all kinda stuck in its own. I just smooth everything out as I sew. I have a 6 month old baby so it’s hard to spend a lot of time in it and it’s so repetitive I get tired quickly! I’ve been working on it for 2 months and am probably 3/4ths done with the sewing. But I don’t sew everyday either. It’s slowly coming together!
I can’t see the design after it is turned to the beautifully soft chenille. I have not washed it in the washer yet, will that make it more apparent?
Hi Betty, it is hard to tell without seeing it but washing should open up the pattern a bit more. Let me know how it goes.
Clover makes a “slash cutter” specifically to make the slits for the chenille blankets. It is a rotary cutter with a plastic guide that you insert into the channels and slide down to easily cut the flannel.
For getting the bias right, does the fabric have to be square? Does it matter if the panel is longer then wide?
No, it doesn’t have to be square, although that makes it easier to draw and sew the first line because you know its directly between the two points. You can make it in a rectangle, so long as you sew at a 45 degree angle rather than from corner to corner.
This is such a great idea for all the fabric panels I have in my stash from years ago when they were abundant. I am thinking of taking some of my christmas panels and doing this techique. They’ll be both decorative and functional during the holiday season! I am also a fan of the chenille rotary cutter made by Clover. You rock Deby!
OOh yes, holiday ones would be lovely and snuggly.
Deby go to Olfaproducts.com and you can see all the chenille cutters they have. They look like rotary cutters with a big point on the bottom. They are cheap and easy to use. When you try one you’ll only be able to complain about the sewing!!
I did see them, I think about $15 but I thought I was only going to use it once so that seemed like a lot of money and I wasn’t really sure it would cut through all the layers. Its the sort of thing I would want to try before investing in it. But if I went on to make some more, or a much bigger one, I’d probably get one.
In a former time of popularity of faux chenille in the late ’90’s I got a book called “Variations in Chenille” by Nannette Holmberg published by That Patchwork Place. Don’t know if it’s available in any used book venues, but is a wealth of information on the technique. At the time there were a multitude of tools marketed for cutting the channels. Maybe on EBay now?
So much for easier quilting, huh? You did a great job and It looks great though. It looks similar to the rag quilts I’ve seen on Favequilts. I live in southern Oregon and there are way too many small stickers (eye bright being one of them) and this would be a magnet for them!
I make my grandson a quilt and used fleece for the backing and batting all in one and did a stippling pattern on it. It was fast and easy!
Oh Deby, I have made these, I used a pattern from a Blog. Your’s is gorgeous but you added way to much work!! I will find the Blog I made mine from and send you the Link. You’ll see no spray is needed and you keep it all together all the time with a few quilting pins. All a one shot deal, yes the cutting of the layers is time consuming but these always turn out Gorgeous!!
Huggs, Nancy
I was worried about using the pins because, well for one, I don’t have any, and I was worried about getting puckers and tucks on the front panel. I’m so new to quilting I played it safe, and yes, over did it with the spray completely!
I don’t know which is more boring, the stitching or the cutting – worth it though, it is beautiful!
Chenille blanket looks very nice. Baby’s eyes are attracted to the colors red, white and black, and I think the dark blue is a close enough to black to stimulate baby’s visual sensory receptors! Good job. Also, FYI: there is a rotary cutter made to cut through chenille channels, and it makes the job OH so easy! When I first learned about this rotary cutter, I thought “there is no way that this tool will work”. I was so wrong! Tool is made by Olfa and Clover, and perhaps other companies, too.
This iis adoreable I’ve made several, and can say every one of them are loved.
I like the dark blue! This looks awesome! Tell your husband if he wants one, he’s going to have to cut the channels! That looks like a lot of work. I’m envious of your weather. It’s all of 14C here in Ontario, Canada today.
I think for a larger blanket we’ll have to take it in turns, or do it over several evenings. But its so nice when its finished, all the hard work is forgotten. I’m already working on another baby sized one for another mom-to-be and now I know what to look out for, hopefully it will all go smoothly this time.
Your faux chenille blanket is beautiful. I have made several of these and know the cutting channels part takes a lot of time. Take several breaks before your hands cramp. Or, get a Cordless Electronic Cutter. My husband got me one after watching the struggle.This device makes channel cutting quick work, 3-4 times as fast and a very good thing especially if planning to make more than one blanket.
OOh, I never knew such a thing existed? I’ll check it out. I have just ordered some spring loaded scissors used for rag quilting and think these might cut down on half of the effort.
I love it! Congratulations!
I must have been hiding under a rock, as I have never seen a faux chenille baby blanket. What a lot of work, but oh, so effective. Good luck if you do a full size blanket.
Your new quilt looks so cuddly. I’m sure new baby will think so, too. It is 78 here with 100% humidity (not raining). Can’t imagine sewing in 100 with chenille quilt on my lap. Good job!
That’s really, really cute!
Tell him you’ll do it if HE does the channel cutting! 🙂
The 2nd time around will be a little easier. You now know to only spray baste once, and to wash BEFORE the channel cutting starts.