


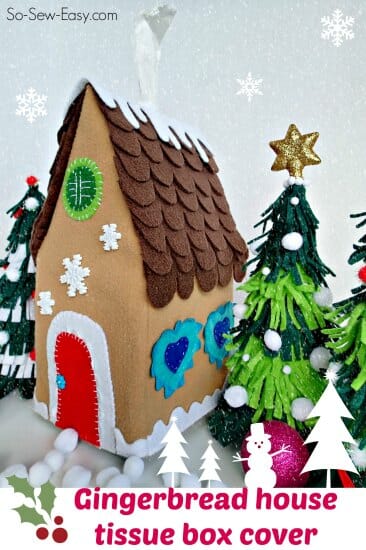
I was so inspired by the Modern Christmas Tissue Box Cover, that I felt I had to make the opposite. Nothing sleek and modern about this design – its all kitcsh and traditional. I love the felt gingerbread house idea anyway – here is one from the Seasonal Sewing Series from last year. This one is designed for play, its all soft and squishy with windows and doors to add and play with. Of course the real gingerbread house is all covered in icing and candy and will make your hips expand and your teeth fall out.
Here is a calorie-free alternative, that will still be looking good this time next year too.

I've designed this as a removable tissue box cover, but there is no reason you can't decide to add a felt bottom and stuff this instead. Or just use empty tissue boxes as the frame and create a whole gingerbread house village.
How to sew a Felt Gingerbread House tissue box cover
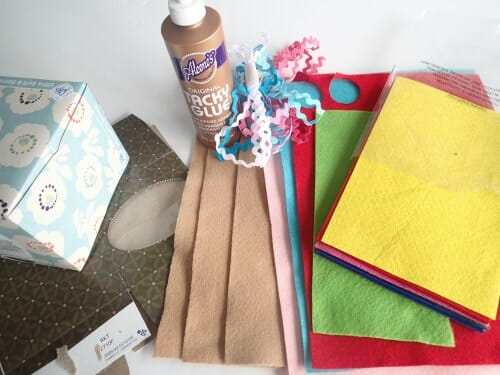
Materials:
- Craft Felt in light brown, white, dark brown and other colors of your choice
- Sewing threads and embroidery floss to match
- Ric rac in assorted colors
- An old square tissue box
- Scissors, tape, craft glue (I used Arleen's Tacky Glue)
- Optional – Buttons to decorate (I used these cute snowflake buttons)
- The shapes template – or draw your own
You can download the basic hand-drawn templates I used for this project from my design account at Payhip. Keep on your computer or in your pattern library and sew at your leisure. Enjoy!
Making the top cardboard roof frame
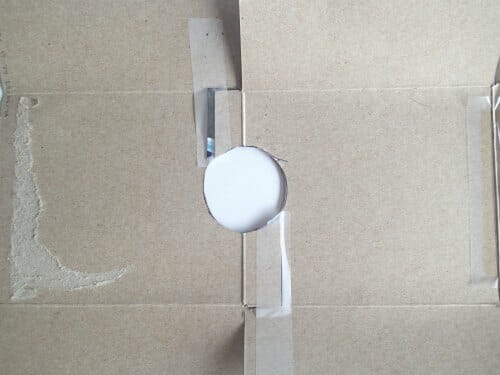
You'll use an empty tissue box the same to create the roof frame. Open out all the glued seams until your tissue box looks like this. Allow a small tab down either side of that bottom panel and cut away the parts shaded here.
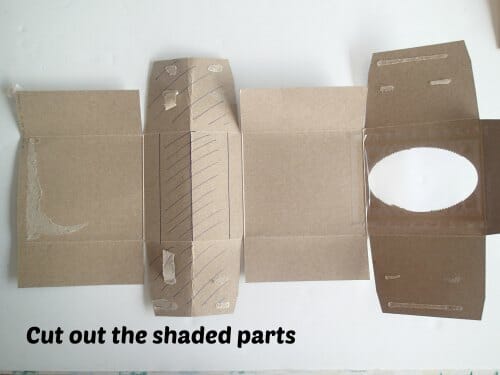
Then your cardboard pieces will look like this.
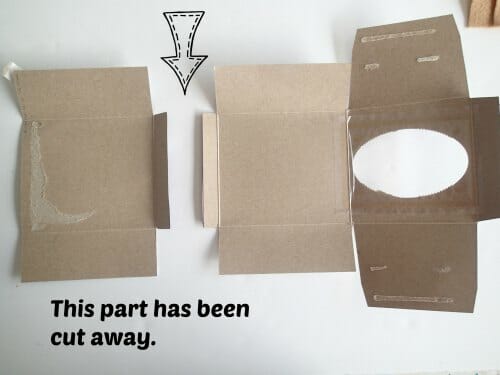
We need to cut a circle in the top of the roof for the tissues to come out, so I drew around my roll of tape and cut out half of the circle on each side. (Skip this part if you won't be using it for tissues.)
Then the two pieces are joined together at the tabs you left to form the apex of the roof. Glue, tape or both, inside and out. The part of the box where the tissues originally came out then folds under and is reattached to form the base. Like this. Now you have a triangle shape.
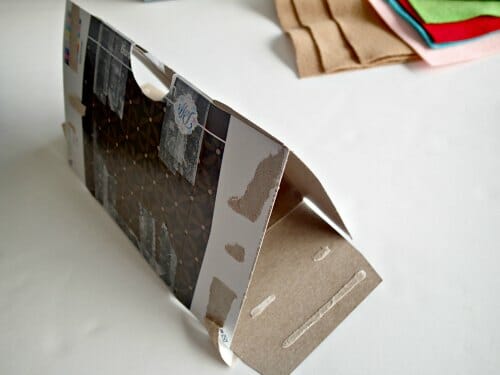
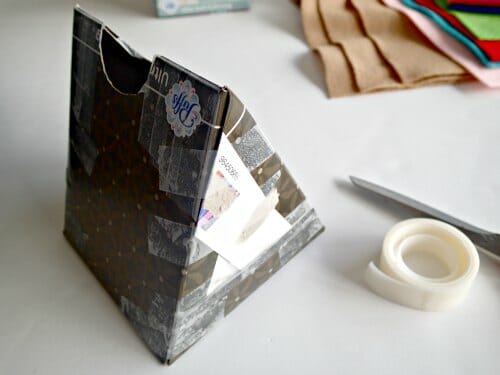
Fold in the ends, cut off the excess. Fold up the bottom and cut off what you don't need. Glue or tape everything together and your roof frame is completed.
How to sew our felt roof
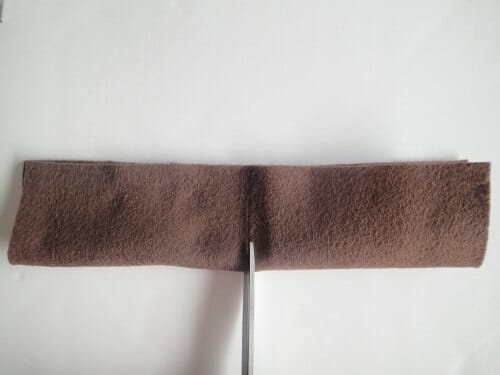
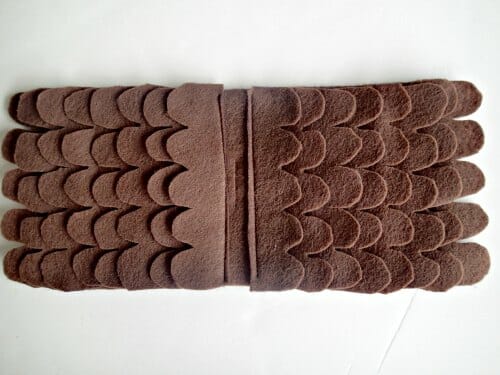
Cut a piece of dark brown felt 5 inches wide and 10.5 inches long. Fold it in half length-ways and make a small snip through the exact center to create a gap for the tissues. (Omit if just creating the house and not using it for tissues.)
Use the template or free-hand some tiles for the roof. I cut mine 5 inches wide by 1.5 inches deep and cut 5 tiles on each one. I made a total of 16 of these.
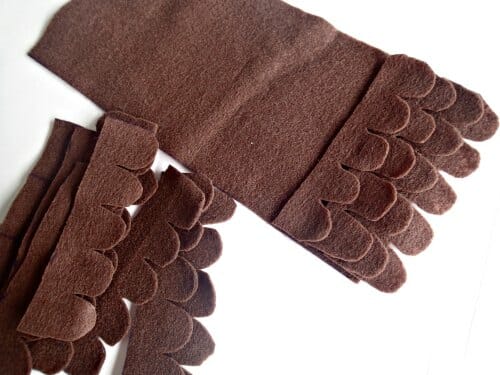
Sew on the first one at the base of the roof, overhanging the edge. Sew close to the straight edge. Then layer up the tiles fairly evenly as you go up, stopping just short of the center.
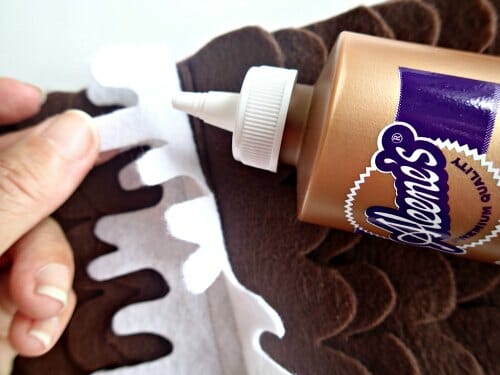
Cut yourself some snow from white felt. I folded a piece in half and then cut a random curving shape to represent the snow (or icing) dripping down the roof. Sew this on with white thread, just either side of the center opening. Snip through the white felt at the center to match the snip in the brown felt underneath.
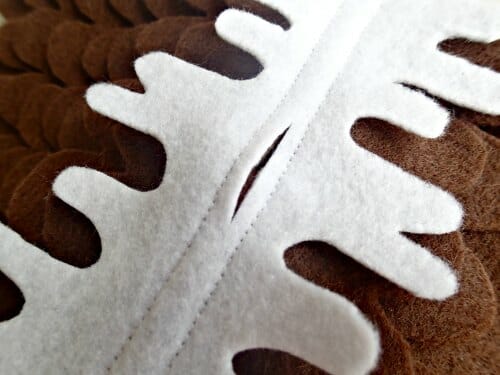
I found it looked best if I glued the snow down in either side too, to keep it lying flat to the tiles. You could also stitch it by hand around the edges if you preferred.
Set the roof aside for the glue to dry.
Making the walls of our felt gingerbread house
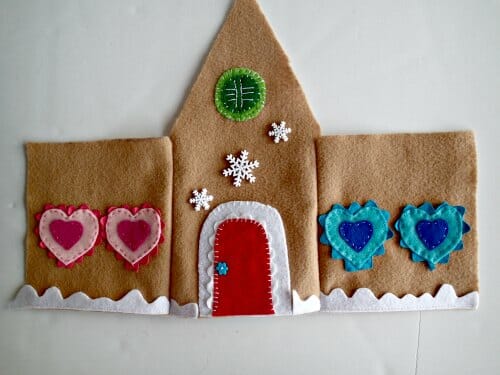
Either use my templates or cut your own by lying down your tissue box and the roof and drawing around them with a small seam allowance. You will need a front and back with the peak and two smaller sides.
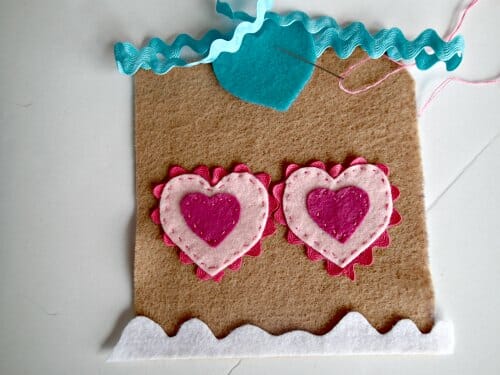
Decorate your side panels with windows. I used two hearts and a line of ric-rac behind, different colors for each side of the house. I added a small snowline along the bottom. Decorate yours however you like. Buttons look great, or even try sequins and beads too.
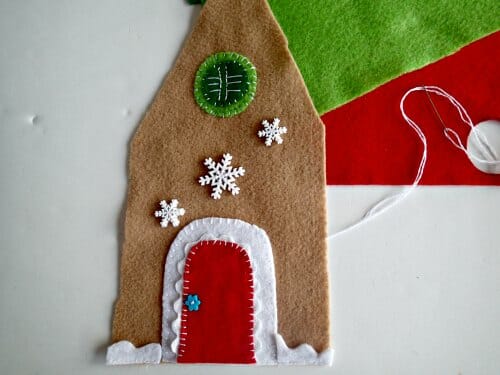
Add a front door, a round window, and some of those cute snowflake buttons to the front. Add designs of your choice to the back. Perhaps another window and a Christmas Tree?
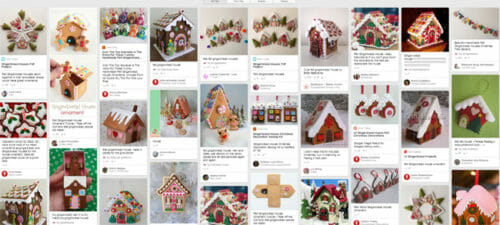
Let your imagination run wild. You can get lots of inspiration from Pinterest. There are some truly breathtaking examples out there to give you some ideas.
Sew all 4 sides together, right sides together. I used my machine, but you could hand sew if you prefer that look. Or stitch by machine then add a decorative hand stitch on the outside corners – that would look nice too. Check the fit of the sleeve over your tissue box.
Attaching it all together
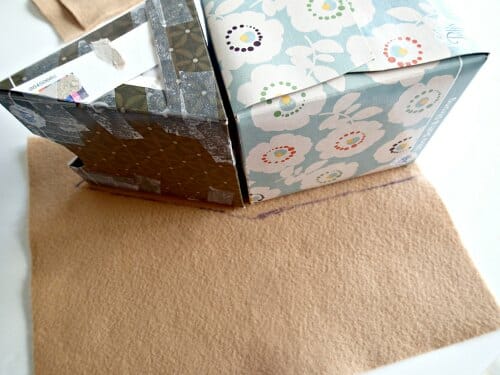
Pop the roof frame on top of your tissue box and slide the felt sleeve over the top. Line up the corners of the house with the corners of the tissue box. Line up the bottom edge flat with the table and then glue the edges of the walls onto the roof frame at the edges.
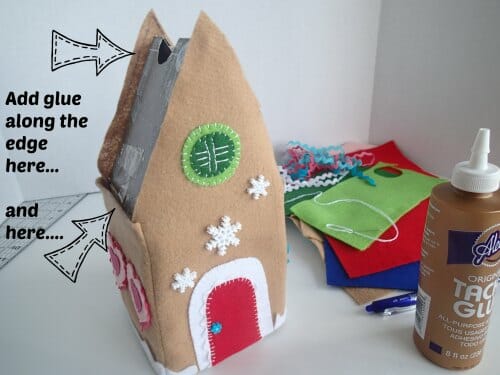
I'm using a little tape to hold it all in place while the glue dries, then I'll peel that back off afterwards. If you wanted, you could also stitch through the cardboard to make sure that felt is going to stay in place. Use a pointy tool to create holes first and stitch those edges in place at the top of the pointy section and the top of the side walls.
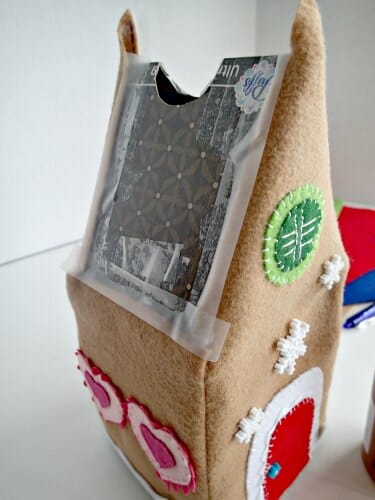
Once the glue is dry, add a generous layer of glue all over the roof section including the felt edges. Line up your roof making sure it's centered and press it down into the glue. You should have a small overhang all round. Leave it plenty of time to dry.
Once it's dry, you can simply pick up the roof and cover as one, and move it onto your full box of tissues. Take the top tissue, pull it up through into the roof and then out of the top of the snip at the center to look like smoke. Maybe you could even make a little chimney pot! That would look fab.
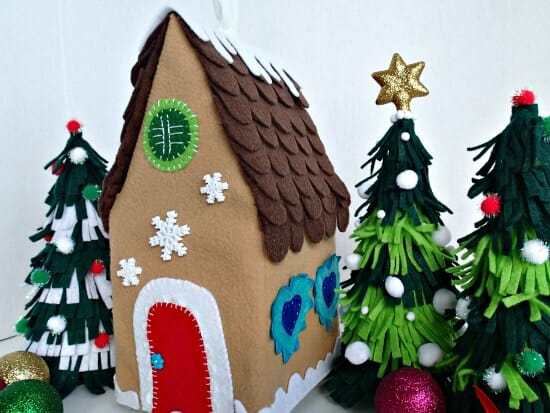
I've take the photos with the little felt Christmas trees I made. I'll certainly try to find the time to make more of each, the trees and the house. They'll be a nice table display for my Christmas buffet table.

You can download the basic hand-drawn templates I used for this project from my design account at Payhip. Keep on your computer or in your pattern library and sew at your leisure. Enjoy!


Such a fun idea, Deby and one that the kids would love to help with.
I really love this Deby! Would be a great project for the kids to help with too!
Deby, this is just the cutest project! Thank you so much for creating such a clear and detailed tutorial!
So cute, I love that it’s felt too!
Love it! It would make a great little play “doll”house with some toy gingerbread men! My daughter would love to play with it.
I love it!!! I’ve got a post scheduled for this evening that links to your tutorial:
http://sewing.craftgossip.com/tutorial-felt-gingerbread-house-tissue-cover-or-softie/2014/12/02/
–Anne
Thanks so much Anne – you are so kind to pick out my projects from all those you receive.