


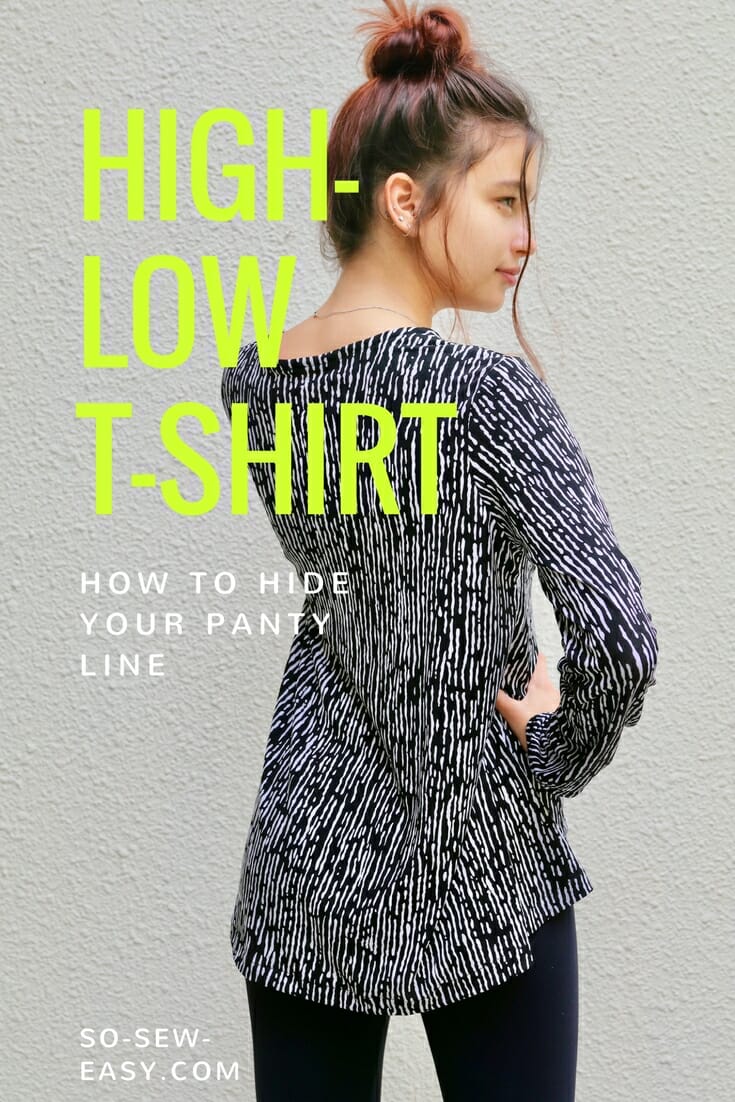
The High-Low T-shirt is the perfect item to hide your panty line. Let's face it, girls, sometimes depending on the mood and “time of the month,” we feel like wearing an underwear that leaves us with the dreaded panty line. We're not always in the mood for a tiny g-string, a sports undergarment, or a sexy lacy number. There's nothing good about a panty line, but sometimes you just don't care.
I've recently taken up Pilates and I'm determined to tone my Gluteus maximus aka my butt. Not for the reasons you might think, but simply because this muscle helps us keep a straight posture. In other words, no more back pain. If that isn't reason enough, this is simply a great high-low t-shirt that is easily made and transformed into a great top.
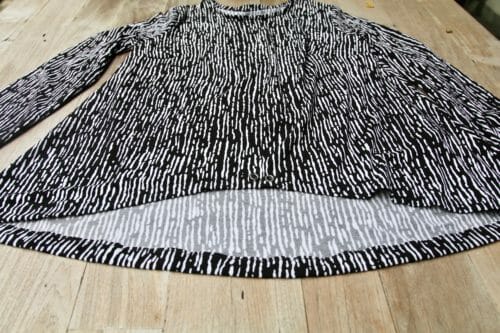
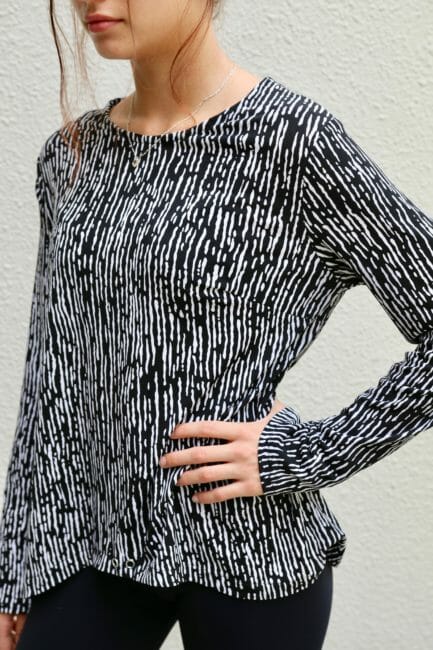
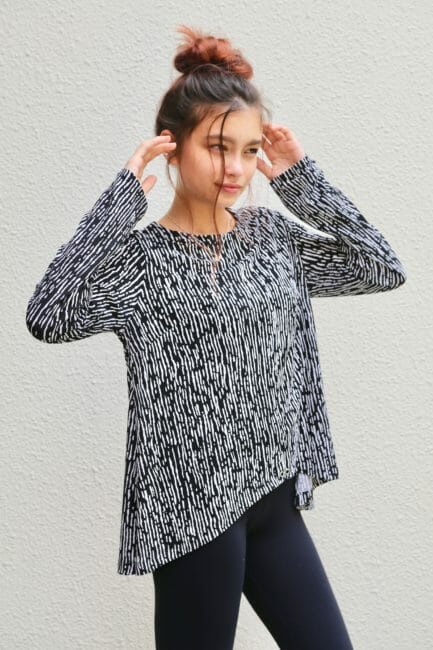
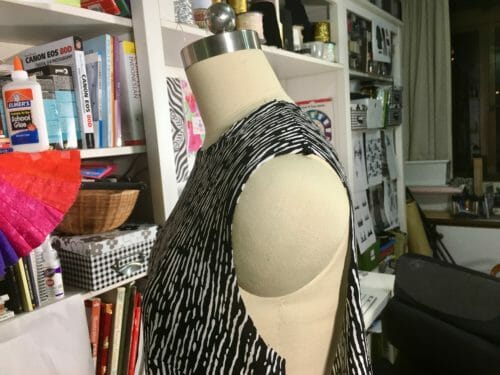
With this top, the back is 4″ longer than the front. The ease of the high-low t-shirt is fairly minimal at the shoulders because it's A-line and semi-fitted above the bust point. It will be loose around the hips and closer to your body at the shoulders. Perfect for the ladies who want to hide some extra pounds around the waistline and are looking for an easy-going, comfortable top to walk around in.
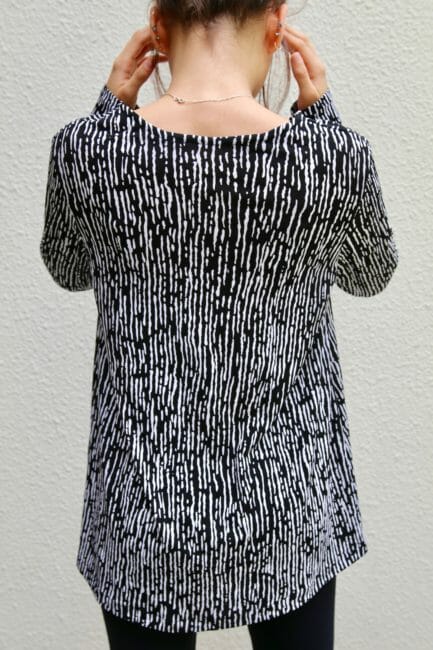
If used for Pilates or Yoga, this high-low t-shirt has a string at the bottom where you can tighten it so you will not have to worry about the t-shirt curling up your back when you bend over. But, of course, this feature is optional.
This pattern is suitable for two-way stretch knits or jersey knits only. I know what you are thinking, why is she using that fabric since this is supposed to be a t-shirt after all. Well, I just like to exercise in style..
If you do not have a serger and are using jersey knits, zigzag the seam allowances to prevent raveling. If using an ITY knit, there is no need for a serger since this type of fabric doesn't ravel.
Skills required to make this t-shirt
- This is an easy top to make, but if this is your first time working with knits do not attempt this top until you have read all the instructions thoroughly
- Good knowledge of your sewing machine
- Ability using a ball point needle or a walking foot
- Experience in cutting and sewing with knits
- Knowledge on assembling and printing a PDF pattern
Materials
- 1 1/4 to 2 yards of jersey knit or ITY knit, 60″ wide
- Jersey needle size 70
- Thread to match
- 1″ Stay tape or stretchable fusible interfacing
- Two grommets 5mm in diameter (optional)
- Grommet tool (optional)
- 2 to 2 1/2 yards of thin cord or ribbon (optional)
- French ruler (optional)
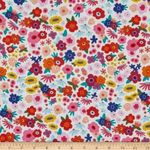
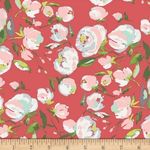
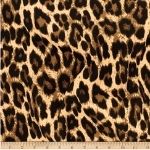
Fabric Suggestions From Fabric.com
 |
 |
 |
 |
 |
Pattern Download
You can download the pattern for this High-Low T-Shirt from our account at Payhip.
For help downloading and printing PDF patterns, please CLICK HERE.
Finished Measurements
To convert the measurements to centimeters accurately use this site.
| Size | Chest | Waist | Hem | Front Length | Back Length |
| Small | 36″ | 40″ | 54″ | 24″ | 28″ |
| Medium | 38 1/2″ | 42 1/2″ | 56 1/2″ | 24 1/2″ | 28 1/2″ |
| Large | 42 1/2″ | 46 1/2″ | 60 1/2″ | 25 1/2″ | 29 1/2″ |
| XL | 46 1/2″ | 50 1/2″ | 64 1/2″ | 26 1/2″ | 30 1/2″ |
| XXL | 50 1/2″ | 54 1/2″ | 68 1/2″ | 27 1/2″ | 31 1/2″ |
Pattern Layout
Print on landscape, in actual size, and using the latest version of the free Adobe Acrobat Reader.
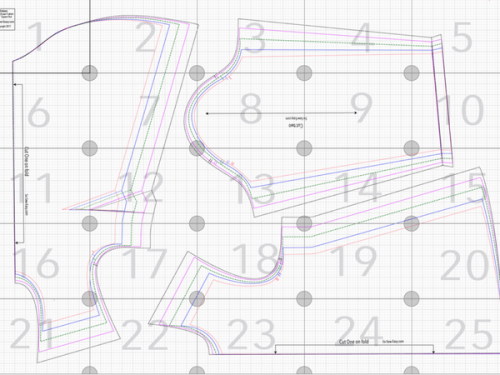
Step One: Cut the fabric
The amount of fabric required will vary a bit depending on the size you choose to make. So the best thing you can do is to print the size you need and work it out with the fabric you have in mind. Do take into consideration when buying online that you can usually only ask for a whole number amount. Few companies will sell you half yards especially when on sale. As always, I recommend you to look in your fabric stash for the appropriate fabric.
Cut front and back on the fold. Apply stay tape or stretchable fusible interfacing on the shoulders, neckline and at the hem.
Step Two: Sew the dart and shoulder seam.
Sew the darts. Try to finish the dart without creating a bubble at the end. If you need some help, here's a complete tutorial on How to Sew Darts.
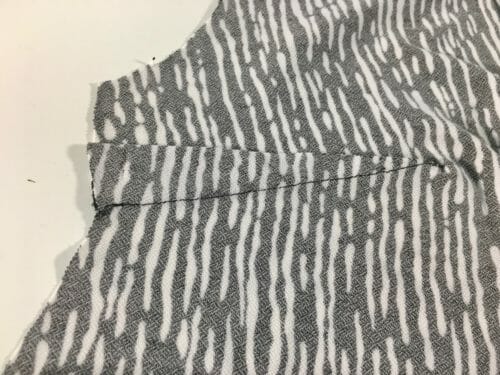
Sew the shoulders and zigzag or use your serger.

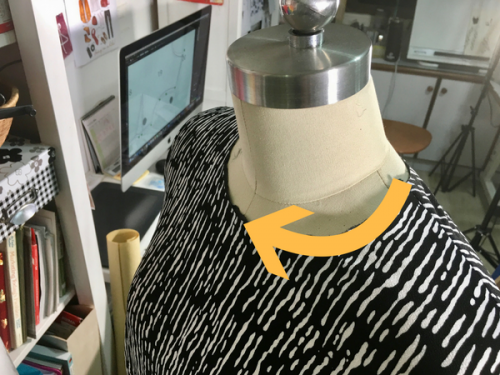
Fitting tip: Taking in consideration that you will have a 3/8″ seam allowance, put on the top and check whether the neckline is too high. Increase or decrease using a French ruler according to your taste. Once you are happy, apply 1/2″ Stay Tape or stretchable fusible interfacing to the neckline.
Step Three: Drafting and sewing the neck facing
The neck facing is not included in the pattern. You will have to measure the neckline and cut a rectangle with that measurement by 1 1/2″. When sewing this neck facing to the neckline use a 1/2″ seam allowance. For the rest of the high-low t-shirt use a 3/8″ seam allowance and a 1/2″ hem.
Measure the neckline.
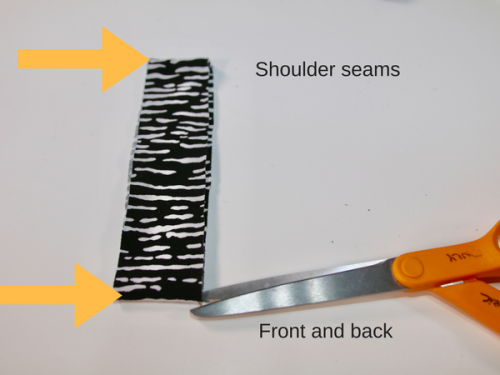
Cut a strip of fabric across the horizontal stretch of the fabric. Use this exact measurement to cut the facing. Right sides facing each other, sew the sides at 1/2″ to make a loop. Use small notches to divide the loop into four equal parts indicating the front, back
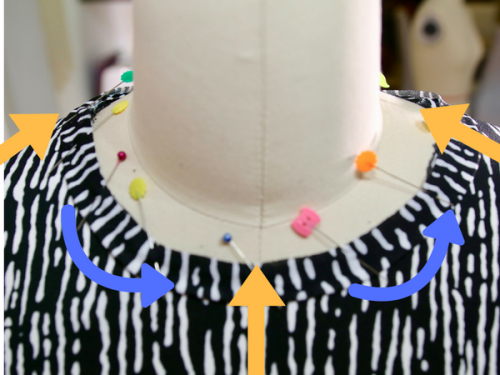
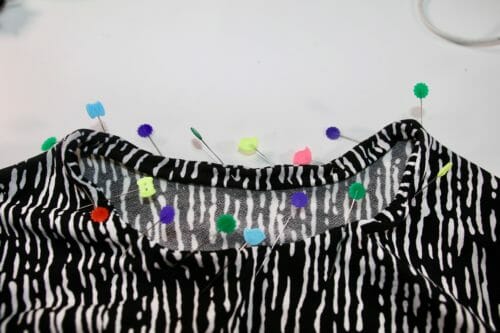
Working on the right side of the fabric, pin the seam of the band to one of the shoulder seams and match the other notches to the center front, center back and the other shoulder seam. Sew at 1/2″ seam allowance.
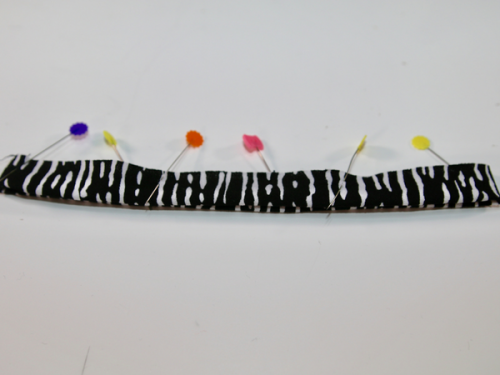
Pin and stretch between the four points.
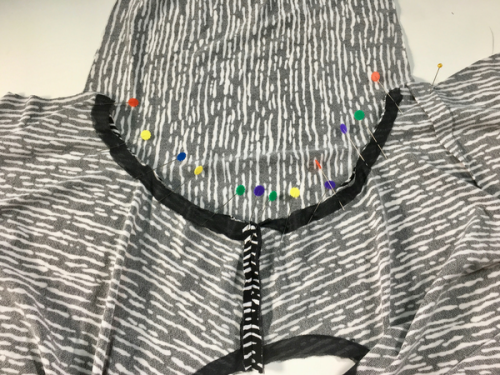
Sew the facing at 3/8″. Iron.
Step Four: Sewing the sleeves and the sides
Match the notches on your sleeves.
One notch is the front of the sleeve. Two notches indicate the back of the sleeve.
Sew the sleeves using a 3/8″ seam allowance and continue to sew the sides.
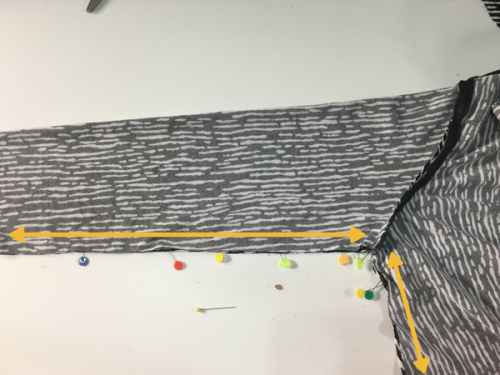
Fold the sleeves hem 1/2″ and sew. Iron the sleeves.
Step Five: Hemming and finishing the high-low t-shirt
Place the grommets at the bottom in the center of the t-shirt. (optional)
Attach the grommets following the package instructions.

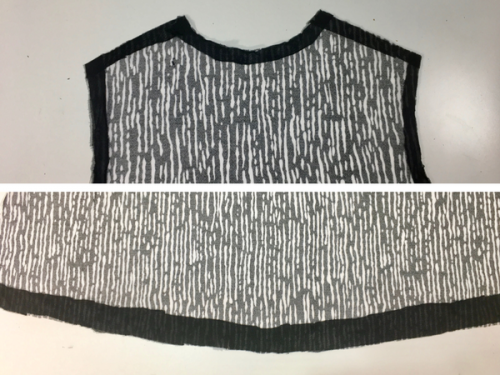
Serge the bottom without stretching the fabric. Fold 1/2″ and sew at 1/8″ from the serged edge. Iron and your high-low t-shirt
This was my mock up and I like how it fits. Now I'm going to look for an actual t-shirt fabric to make it, one in white to go with my yoga pants, and one in gray to wear while walking the dog.
Need to make this T-shirt longer? Try this easy tutorial on how to lengthen a top.
Want to change to change the look of the T-shirt into a blouse? Try the bell sleeves transformation using the pattern you already have.


I made this in a floaty cotton fabric just to see what it would come out like. I had to cut the sleeve the next size bigger to the body and add a little gather at the top of sleeve arm hole. For example medium body large sleeve. It has come out a lovely. You could wear over a costume or bikini on the beach in the summer. I am going to make it again in a jersey fabric. A beautiful pattern. You could stick to the same sleeve size as the body and just make the top of the arm a bit bigger to fit the armhole, just by a few cm. I chose to do a bigger sleeve so its more floaty, the gather at the top of the arm doesn’t look out of place.
Great pattern adjustments, congratulations!
Hi. Just wondering if the pattern includes the seam allowance or do I need to account for that myself. Thanks very much
HI Carrie, the seam allowance is included, and it is 3/8″.
I am sewing this up today as part of the #sewfrugal22 IG challenge. I have to say the pattern does not match the shirt in the photos. The neckline is much narrower than in the photos, and the back bodice piece is cut more like what I would expect from a racerback tank top. I will alter the neckline before sewing, I should end up with a wearable garment, even if I have to turn it into a sleeveless racerback tee. I would suggest only starting with printing and assembling the back piece, and seeing where the armscye hits you, before deciding if this is a garment for you.
How much ease is designed into the bust and the upper bust? I usually need to do an FBA. This information will help me.Thanks.
I made this and had a couple of notes that might help others. I basted the neck facing on and it was way too loose. I cut two inches off of it and rebasted it and it was perfect. Most advice I’ve seen says to cut it 15%-20% shorter than the neckline measurement. And the arm at the bicep was fitted on me and I have a very small arm. If your arm is chunkier, I’d allow a little more room for that.
I looked up ITY fabric it said it has a silky feel. Is it a blend ? What % would I be looking for that silky drape feel?
Thank you Gail Rogers
I made this in a XXL. It fits well from the bust down, but it is far too small where the armscye for some reason just scoops in on both front and back. How do I fix it?
Why the grommets. What is the purpose? I love the look of this top and will be making a few but I don’t understand the grommets! Could you please explain to me. Thank you!
Did you read this part? : “If used for Pilates or Yoga, this high-low t-shirt has a string at the bottom where you can tighten it so you will not have to worry about the t-shirt curling up your back when you bend over. But, of course, this feature is optional.” That should explain the grommets.
I’m using the popular clothing line Lularoe. I’ve gone from a 3x to a women’s medium. I still love the patterns of my larger shirts and want to make them smaller.
Is this pattern conducive to this plan?
Thankyou for the lovely pattern. I’m teaching myself so your tips are invaluable. Can you please explain the fusible taping, how it works and how to apply. Apologies for my lack of brain cells.
[…] The High-Low T-Shirt: How to Hide Your Panty Line.. […]
[…] The High-Low T-Shirt: How to hide your panty line.., by So Sew Easy […]
[…] Full tutorial here. […]
I hope I am not too late to ask a question. I have had this pattern on my computer for a while. Is there a pattern layout to place the pattern one the fabric? Or do I just do it as economically as possible, keeping everything going in the right direction?
Hi Lesley, Indeed that is the way to do it. Since the picture would have to change depending on the size and width of the pattern.
Make sure the length of the pattern runs along the length of the fabric for best results.
You say this pattern is suitable for 2-way stretch and jersey stretch. Does that mean that I can use both 2-way stretch and 4-way stretch fabrics?
Yes, you can use both. Just make sure the biggest stretch is horizintally.
[…] The High-Low T-Shirt: How to Hide Your Panty Line.. […]
[…] Full tutorial here. […]
Once the facing is attached the shirt; Is it folded under and stitched 3/8″ to the shirt or does it stand?
Folded, please.
It’s a nice shirt. Thanks for the pattern. Is it right, that the seam allowance 3/8″ ist already included in the pattern?
yes it is!
I have a question thank you so much for this pattern I looked at the ease that you put on your web site, and realize that the small would be plenty for me plenty! I cut out the pattern the sleeve doesn’t even fit around my arm I know I’m working with knits but I need at least 3 inches for it to touch that’s just the paper pattern I want to add some to the pattern do I add a couple inches all the way around I’ve never altered a pattern. will it be OK with the rest of the pattern if I alter the sleeve
Hi deise when altering a pattern you need to compare your body with the finished measurements. Are you using the right kind of fabric? what size are you using? if you prefer you can send me an email and discuss further.
Ok tried to find contact email? I used a Jersey knit I wear small.. Not even the largest size on the sleeve would fit around my arm. can you please verify? Thank you wasted my fabric :0(
The only way this happened is if you have scaled the pattern somehow, the person in the picture is wearing a small size.
You talk about making a muslin and I was wondering how you woulad account for the difference in the fabric stretch? I am just getting back into sewing and have a bunch of knits I would like to make up but I am hesitant because I wanty them to fit well.
Hmmm I see what you mean, I was using the term as “make a try garment” when making a “muslin” I dont mean use the muslin cloth but rather make a garment in a similar but much cheaper knit such as anything with polyester. Cut a small strip of your knits and if they burn like plastic there is polyester in them and you should be able to use them as muslin. Knits with Rayon, bamboo, silk, cotton, linen and wool or any combination of them should be preserve for when you achieve the right fit since price will be much more higher than polyester.
I know I am YEARS late in seeing this, but for anybody that has just downloaded this pattern …
I invariably check the sheet/linen section of the thrift stores for knit/jersey sheets to repurpose into t-shirts and turtlenecks. Makes the fabric very inexpensive (compared to fabric stores).
I also look for flannel sheets and turn them into lounge/dorm pants.
Hi, Thank you for your feedback! it is never late to make a comment! so thank you for taking the time!
Thank you so very much for the pattern
I am not very experienced and know very little about fabrics. What should I know about sewing knits?
Hi Pam we have a few articles on the subject I encourage you to read them and jump right in. Knits are more forgiving than you think. If you have anyone in your area that can teach you please approach them. people who sew and create love the company therefore they will be delighted to help you. But if this is not the case the article are a great beginning. I will add to purchase a ballpoint needle this will make your sewing a lot easier. There is another way of strechingthe fabric as you sew with a regular needle but that take someone to show you how. Purchase a none expensive 4 way stretch material and jump right in.
https://so-sew-easy.com/sewing-stretchy-knits/
https://so-sew-easy.com/learning-to-sew-with-knits/
https://so-sew-easy.com/introduction-sewing-sweater-knits/
What changes would I make to make a lovely cotton t-shirt?
I would shorten both at the hem and at the sleeves.
What an adorable model! ?
Great top pattern
Thank you for the great pattern – I’m looking forward to making this!
Question… do you fold the neck facing in half before sewing to the shirt? It looks like it in photos, but it’s not mentioned in your directions.
yes Bonie that it what you do. I should get better pictures.
Oh! Thank you so much!!! I lucked into some lovely rayon knits at Joann yesterday because I had in mind a couple of easy but very loose-fitting tops! This pattern is just perfect!!! Love the high-low style here! Can’t wait to start.