


The Hong Kong finish is my favorite way to finish a seam. I discovered it when I was 13 years old on a garment my grandmother wore…a corset. My sewing machine could only do a straight stitch and an ugly zigzag. So I took to using the Hong Kong finish like a duck to water. But I always wondered why it had that name?
The answer was given to me in 1999 by one of the oldest living tailors in Singapore. After all, this type of seam finish has been a favorite of Haute Couture throughout the 19th century and is still used today, although it is not called that way, but rather a bias-bound seam finish.
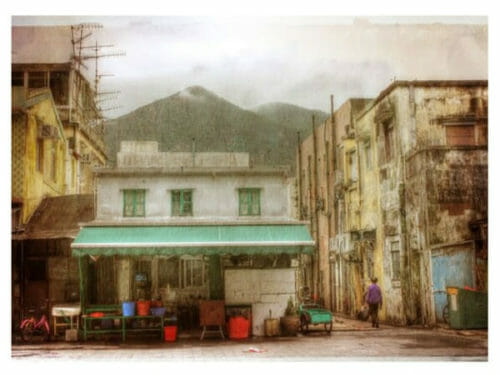
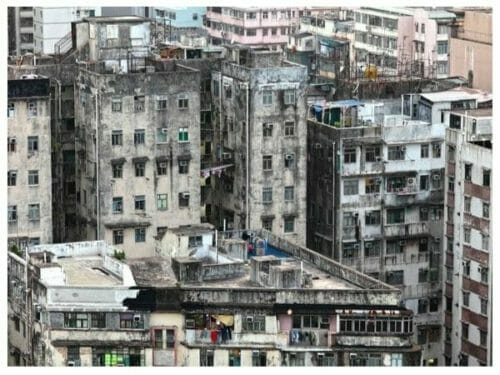
Most people don't realize that this stitch represents one of the reasons Hong Kong got to be as rich as it is today. Many types of manufacturing, including garment manufacturing, shaped the economy of Hong Kong from small fishing villages to ugly overpopulated slums, and finally to dense rows of high-rise buildings.

Banking and real estate did the rest…
After the war, European, and American manufacturing of ready-to-wear garments began to use the factories in Hong Kong for the production of their most labor-intensive garments. High-fashion labels found the scarcity of skilled workers and high wages difficult to keep up with the demands of the market. A market that had a ravenous taste for dresses, pantsuits, and jackets made at much cheaper prices than hand-made tailored garments.
Hong Kong manufacturing offered the answers to these companies due to the flow line production process, otherwise known as mass production, which cuts downtime and costs increasing the number of goods that can be manufactured. Summer jackets, pants, and suits for once were able to be worn without the lining, reducing the cost of the garment and the comfortability of the wearer.
The Hong Kong finish became the go-to seam finish for high and mid-market fashion for unlined mass-produced tailored garments. This prompted the growth of many small sewing shops throughout the island specializing in piece work; before sleeves were sewn in the garment or the waist of trouser put in they were sent to be sewn binding the seam allowance with bias tape, hence its name.
How To Make The Hong Kong Finish
There are two ways to do it, buy your own bias tape or make your own. Both have advantages and disadvantages but the main thing you need to remember is to match the bias tape material to the garment. If you have washed the fabric (natural fiber fabric) and are using satin polyester as your fabric this should be ok.
The best fabric to make the Hong Kong finish is cotton batiste, spray starch onto the fabric before cutting and you will end up with a very crisp and easy to work with bias tape.
Using Store-Bought Bias Tape
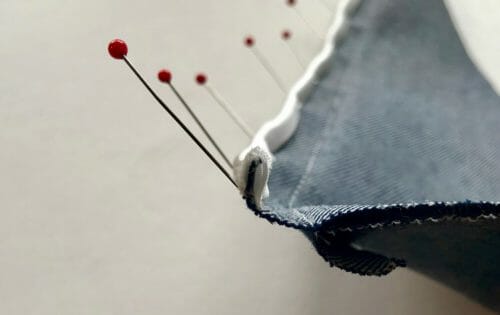
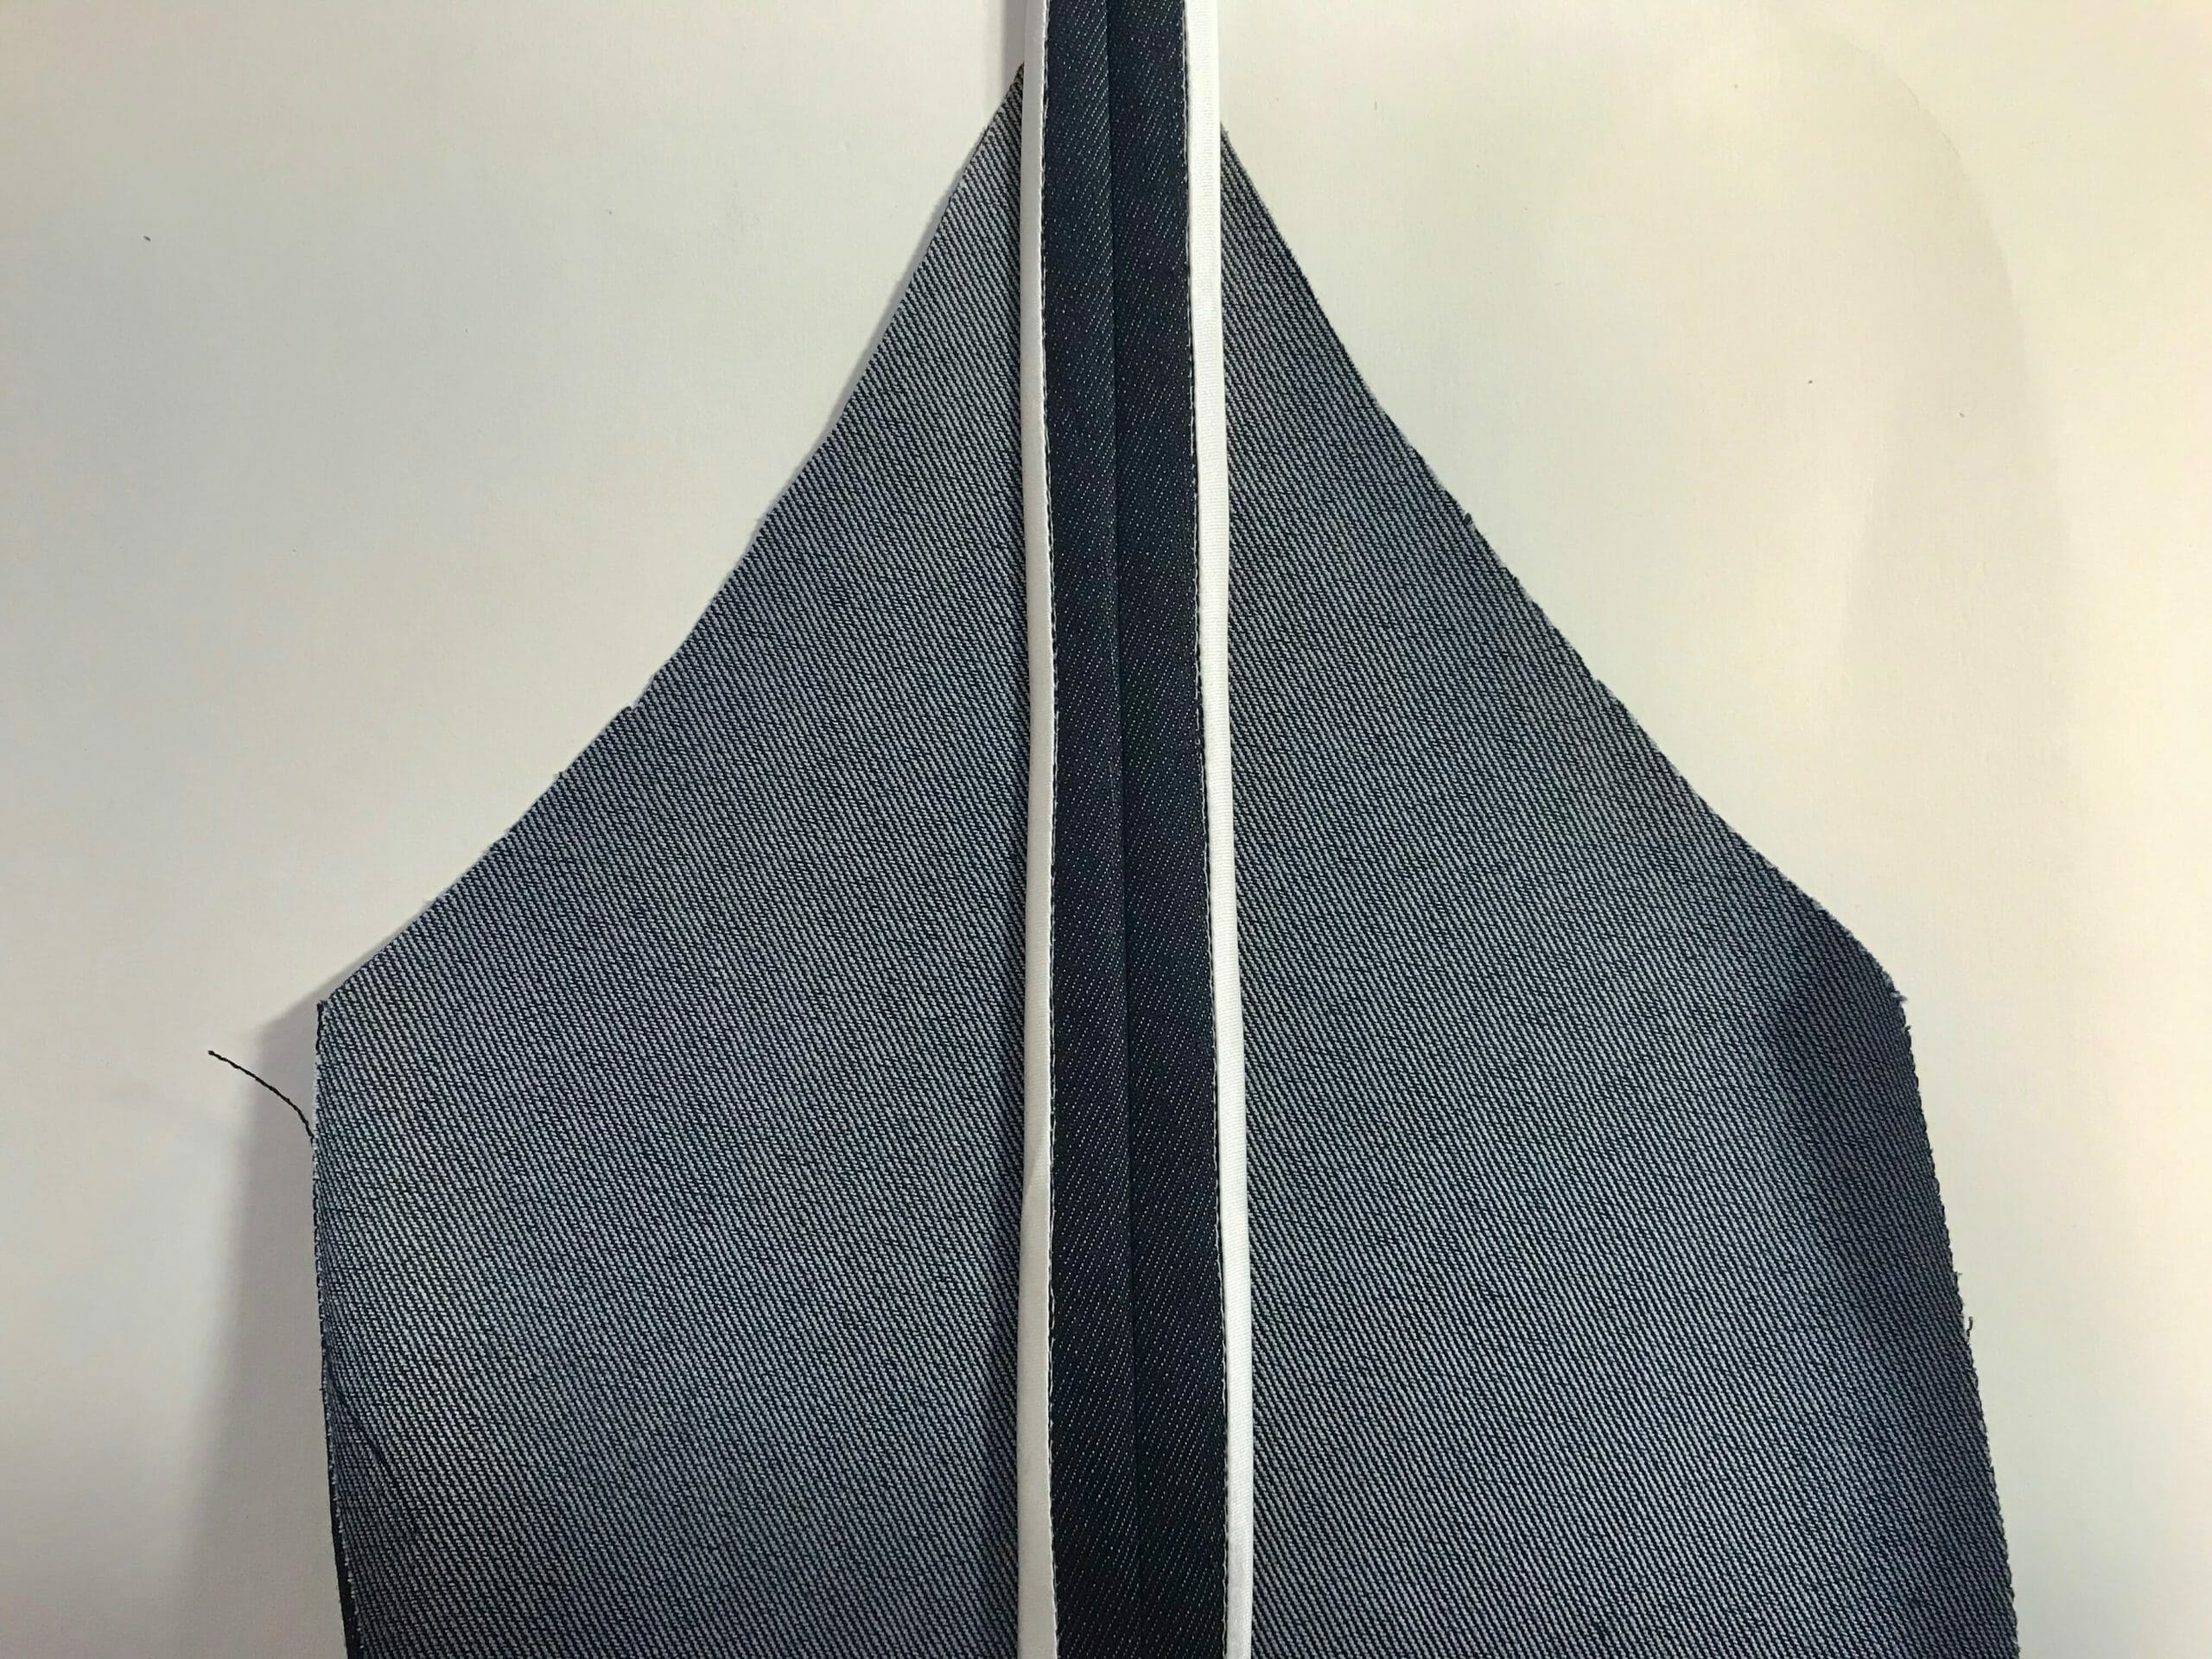
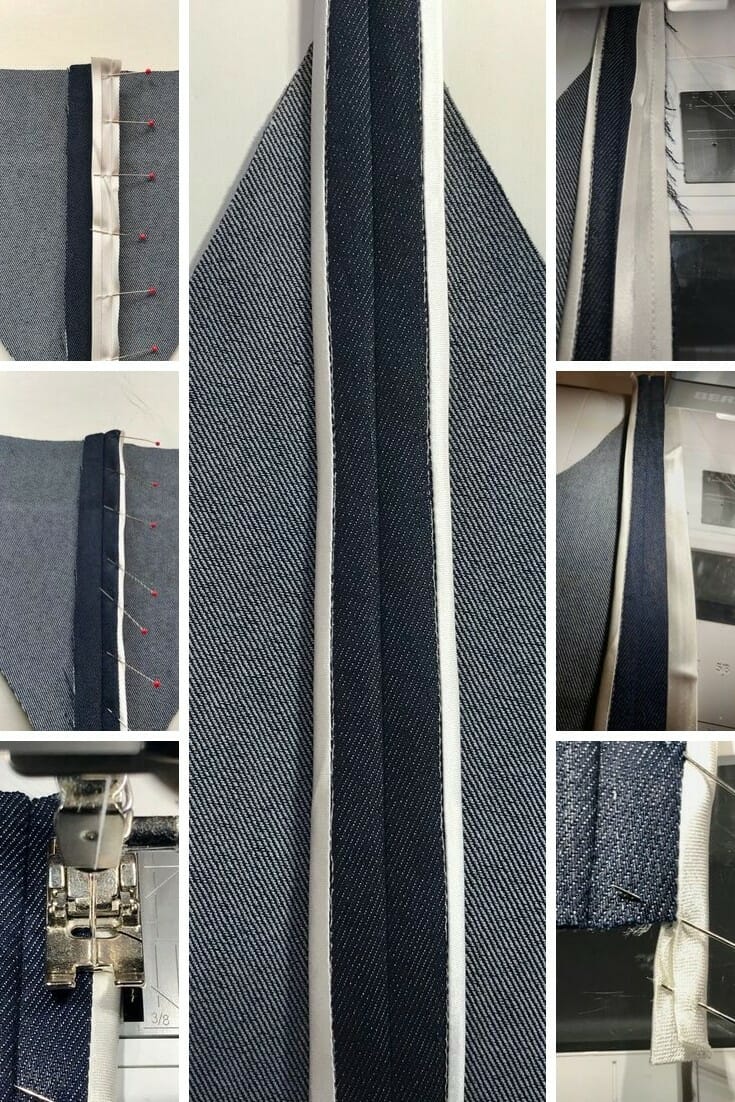
Step One: Iron or finger press the seam open, this makes it easier to work with.
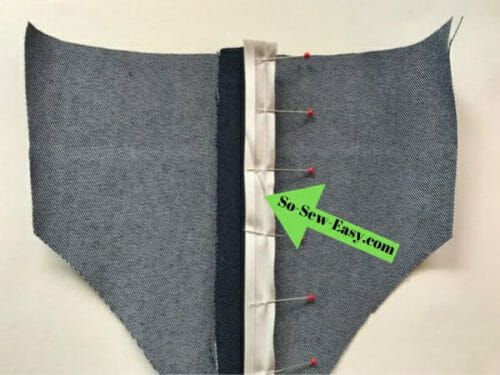
Open the bias tape and place the slimmer side of the tape right side down

matching the raw edges of both the bias tape and the seam allowance. Sew right on the first crease at 1/4″ from the edge.
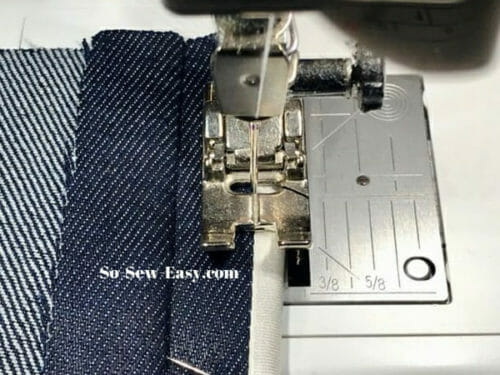
Sew on the first crease at 1/4″ from the edge.
Turn the bias tape over the raw edge of the seam allowance, notice how one side is longer than the other? This is so you can stitch the tape on the right side catching perfectly the underside.

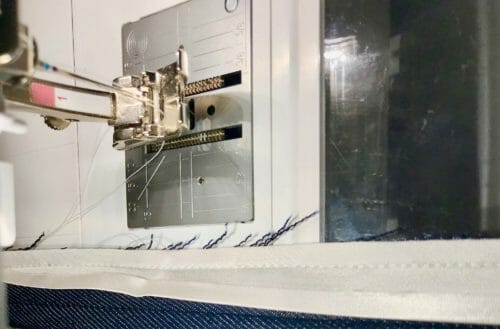
Stitch the bias tape using the stitch on the ditch technique. This is not my best stitch, it requires great concentration and my mind tends to wander.
Repeat on the other side.


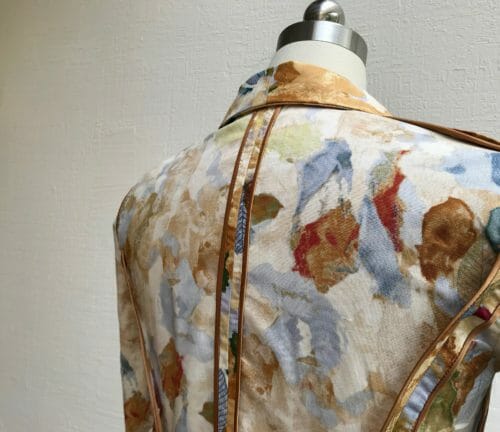
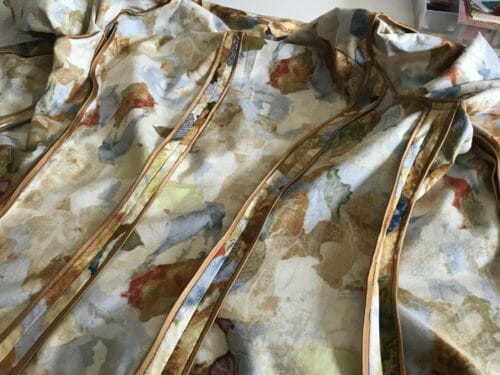
Here is what the Hong Kong finish looks like in an actual garment. My unlined jacket in reverse.
This type of finished has its origins in the handmade garments of the early 19th century where bias strips were cut to bind the seam allowances of the corsets, rendering them much more durable because it protected the fabric (often silk) from raveling.
Its origins were born out of the necessity to make a garment last longer in times when it took weeks to make one. Now its become the trademark finish in an Island where time and speed became their most valuable currency. Small sweatshops have moved away from Hong Kong to be replaced by high-tech garment industries manned mostly by computerized machines, just as it did decades before in Europe. Still, garment manufacturing remains one of the biggest employers of people in Hong Kong today.
The high price of real estate and high wages has forced the factories to invest in the latest technology to replace the labor-intensive part of the production. Technology has made the small sewing shop become more efficient. Today all that remains of those slums are the murals on the walls for tourists and passersby to admire.
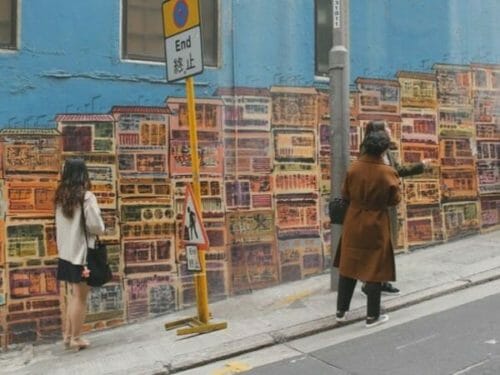
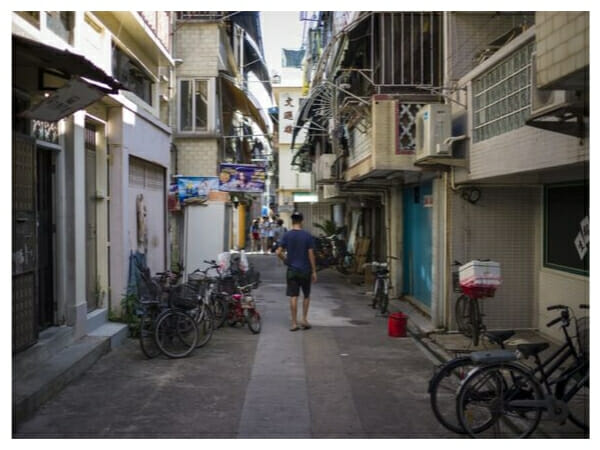
The state of our culture is written in our walls, I can't help to observe in wonder the strong similarities between these two pictures every single square houses a story of hope.


What story is being sewn in Hong Kong today? Will Hong Kong or the finish be the one to remain in the seams of the island's history?
If you find yourselves in Hong Kong do not miss the following places off the beaten track.

Find the Office Hours Blouse project next Sunday, the perfect place where you can practice the Hong Kong Finish seam.
Need another seam finish? Why not try the flat fell seam, perfect for winter fabrics.
Leave in the comments section below if you like this type of seam, have you used it or have ever lived or visited Hong Kong. I am always happy to read your comments, it is my favorite part of writing in this blog.
Kind Regards to all, Happy Sewing!


I have always thought this is such a beautiful finish. However, it also seems the thickness of the bias tape would show through. I still may have to try this as I also love such fiddly stuff.
Cotton batiste and organza will reduce the bulk and you will end up with a lovely garment inside and out.
Thanks for the tip. I have sewn a long time but never learned of this seam finishing method. Can’t wait to use it!
My pleasure Martha, it is time-consuming, but your garment will last for generations.
I alter men’s slacks and came across the Hong Kong finish, very labor intense but very neat, thanks for sharing the history. If I use it on my sewing I will sew binding on before joining the seams.
Indeed it is in man slacks we can see this technique. I find it hard to apply before joining the seams.
Very interesting article. I can’t help but wonder why not just Serge? Seems a lot of bother to go to but I guess it’s aiming for a more tailored finish?
Indeed! it gives the garment an upscale finish in the olden days with no serger; it was a way to add longevity to the garment.
Thank you for sharing the Hong Kong pictures & the Hong Kong finish!
My pleasure Barbara; thanks for taking the time to read!
When I learned to do this seam finish we were taught to quickly press the bias tape open and then proceed. The creases are in the memory of the tape and it refolded easily. My favourite seam finish.
Another great read! Thank you!
OMG! Thank you! The jacket I am rehabbing uses this seam. I took in the seam to fit, and bought bias tape to refinish it but I had no clue how to do it. This is just in time !!
No suggestion on using a serger to do this? If you have a cover stitch machine or combo, this could quickly be accomplished with the double or single fold bias binder foot and strips of bias cut fabric. It is easier to put the binding on before you sew the seam together.
No, not at the moment, I have to buy the pieces myself to be able to show how to do it.
Wonderfully written and extremely interesting! I’ve never been to Hong Kong, but it’s one place I’ve always wanted to visit. So sad to hear of all the troubles there now.
As for this wonderful tutorial, I do have questions? I’m a new sewer, started making masks for virus protection and once I realized that I CAN sew a straight seam, I just can’t get enough fabric, thread, and machine experience! My questions… I’ve actually done this method on a muslin I worked up for a top. I did it the way you showed, but wondered then as I do now… can you simply finish the edges and THEN seam? It seems like that would be easier? My second question is… can this seam finishing style be used with any article of clothing? Like pants? It seems like it might be too thick, add to much padding to the crotch area? Asking now so that when I get ready to attempt to make something other than pajama bottoms and pillows I’ll know what I’m doing!
Lastly, I can thank you enough for a great tutorial. I’m learning to sew using my computer as my teacher, and if it wasn’t for seamstress queens like you, sharing their knowledge freely, I’d never have a chance to learn this art form! (Yes, to me, being able to make my own clothes is an art form!) You rule!
Dear Charlene, first of all welcome to the wonderful happy world of sewing. This blog is exactly for people like you who have the willingness to learn the ancient artform of sewing, yes it is an art and one that is self actualising the best medicine in the world in my opinion. The Hong Kong finish is to be used anywhere you want to protect the seam allowance. Tailored pants and very expensive clothing as in Haute Couture utilises this finish because it prolongs the garment life and price yet it is time consuming. There are many ways to finish a seam if you do not have a serger one of my favourites is the turn under seam, best to use a 5/8″ seam allowance when you use it. Here is the post so you can learn how to do it. https://wp.me/p2WfGc-2qf Do send me an update of your journey, questions or any tutorial I often loose the beginners perspective. You will help me help you a win win situation. Kind Regards,MC
I have some lovely linen fabric and found some old bias tape makers (assuming they are what I think they are) Can’t wait to give this a try for a summer jacket. Thanks for addressing curved areas – wider bias should work. Wondering about doing this on princess seams on thinner fabric – like silk with silk bias? wonder how weird it would look.
For silk I prefer to use the french seam finish, and use the bias bound technique around the shoulders.
With thinner fabrics the extra bulk might show, especially on a curved seam which is often more prominently placed in the garment, such as near the bust.
Wonderful information! I’ll be trying this for sure. I assume homemade bias tape won’t be the same, i.e. one side slightly wider. Is that correct? I have several bias tape makers and don’t recall them working that way and so wonder if it would work as well.
Store bought is one side wider than the other, but if you make your own you can still sew one side thinner and the other slightly wider. I will have to address this on a video since words along can not explain what I mean. But, I can assure you it is not as hard as it looks.
Thank you for sharing this and reminding me about this method, not to mention the interesting history! . I live in a warm climate and have been wanting to make some jackets for woork but don’t want to line them. This will be perfect.
Indeed Nancy this is the best method for your jackets, they will look like RTW straight from the catwalk.
What is the size of the bias tape for these seams? If you make your own what size would you make your strips before folding?
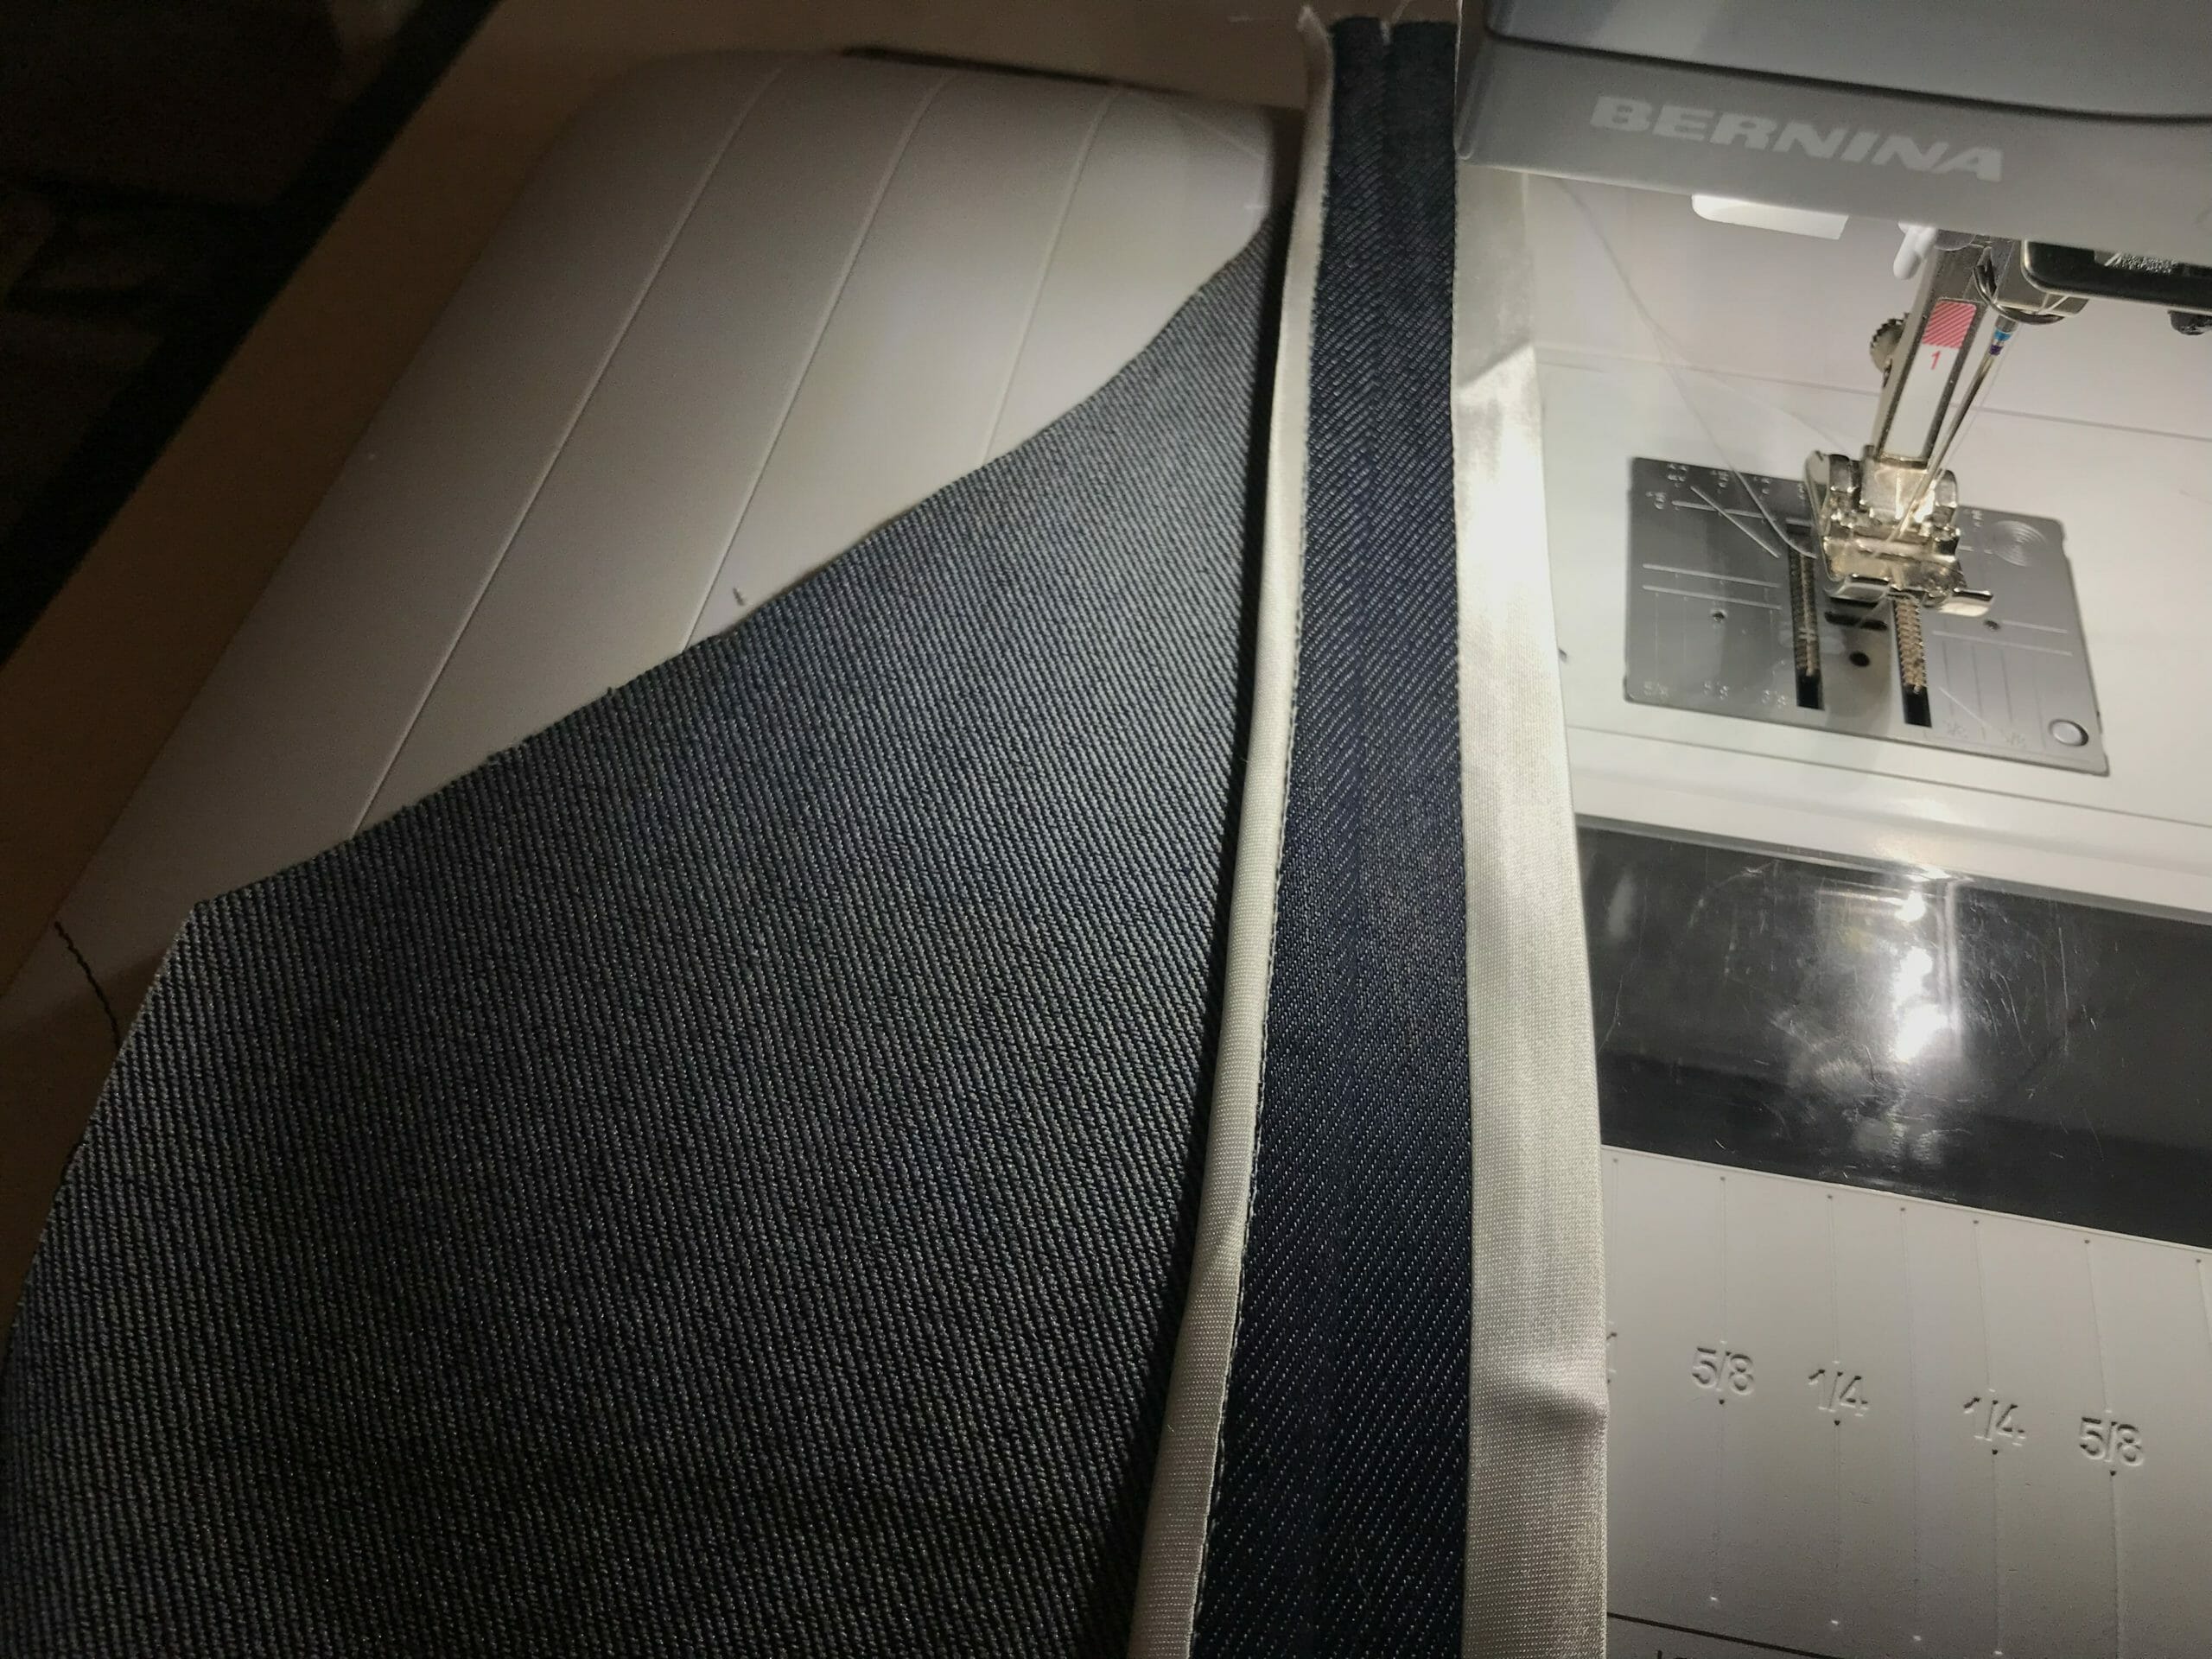
I like to make a 3/4″ to 7/8″ tape for thin fabrics and 1″ tape for thicker ones such as jeans.
I have known what a Hong Kong seam was for several years but have never attempted one. However, I have bought some denim to make an unlined 3/4 coat and jntend to use the HK method instead of lining. I have had conversations about it with many sewers who did not know of it. Thank you for the history behind the name. I’m definitely going to do it over this winter when I have a moment. We visited Hong Kong in 1994 just before it was given back to the Chinese by the British. (My husband and I are Brits who now live in Spain) and we went to Hong Kong last year. We stayed in the Wan Chai district and it was great and we are very sorry to see the difficulties there just now.
What a great experience to have seen HK then and now. yes it is painful to see what is happening there. I guess we can only wait and see. Love Spain, and often go there for vacation since it is quiet affordable and I love the food. Gracias por leer los artículos, si tienes algo que quieres ver o algun patron en especial solo me mandas un email, y listo cuenta con eso. Saludos desde Chile.
I’m interested in seeing how you did the sleeve insert seam in a thick fabric
I quilted the fabric chambray thin thin waddling a muslin backing then cut out jacket. Did Hong Kong seams throughout. But the thickness of the inserted sleeves and from n back needs to be pressed the same way. Please advise on what you did and what you think I should do
Hi JO, no I did not, I bound the sleeve using a bias tape wider than the one I used in the rest of the seams. I will share this tip when I share the jacket pattern stay tuned and you will be able to see close up pictures of the sleeve part.
Beautiful garments! I read about this finish when I first started sewing. I bought a couple of summer jackets with this beautiful finish inside.
Yes any summer jacket worth keeping will have this finish inside.
I enjoyed the history of this type o finish only did it once, it’s a lot of work but beautiful at the end. I would like to hear more about the small sewing shops, how they are surviving, any history on sewing. Thank you
Working on it, as I write this, in fact I was planning a trip to HK when all the trouble started so I am afraid many will fail with the lack of tourists. Will let you know as soon as I can.
Thank you for the history behind this technique. Being warm natured I prefer unlined jackets. I am curious – what about sleeves? Guess I could just serge those – maybe with a soft decorative thread.
That is an idea or you could bind it with a widder piece of bias tape which is what i prefer, it makes for such a high-end looking garment.
Thanks!!!
Thank you. I have heard of this method but, Had not heard it called the Hong Kong method. Very nice.
It is one of the two types of bias bound seam finish. The name is derived from the machine that is used to produce such a seam.
Please explain the second method of bias bound seam finish.
I will in a separate tutorial, stay tuned.
Growing up I had an old Bernina that only could strain stitch and do zigzag. And I also learned this finishing technique as a child from my mom but I NEVER knew the name for it! Thanks for sharing this piece of history ?
Thank you for taking the time to read it, and congratulations on your Bernina, it should be worth a pretty penny today. I would love to have such a machine, what a piece of history that would be. I can only imagine what beautiful and great quality wardrobe your mother had.
Mayra, thank you for sharing the history about this seem. I have some garments, mostly jackets made that way and never knew why. Love ready your articles and that you share so much with us.
Hi Bijoux, it is such a pleasure to read your comments this is your 14th, and yes I do keep track. I read them all, and this blog would not exist if people such as yourselves don’t take the time to read, so in the end, it is I who must say thank you!
I thought this was a bias tape finish. As far as I understand the Hong Kong finish also uses bias tape and is constructed very similarly, but the bias tape is open and the excess is trimmed from the back of the seam. Ron Collins has a video on YouTube about it. Could you confirm please?
Both are right, his technique is how the seam has evolved over time and how the industrial machine design for this purpose does it in one step.
I enjoyed reading about the history of this technique and Hong Kong. I’ve never heard of the Hong Kong Finish, but I will Have try it one day.
What a great article! An interesting piece of history and a wonderful way to finish seams! I can’t wait to try it. The inside of your jacket looks beautiful enough to wear it that way… wouldn’t sewing a jacket with the seams on the outside be a fun thing to try?
Yes, I was thinking the same thing. Maybe a denim jacket with a wild print or solid color of bias HK finish on the outside.. I think I would make the seam allowance more narrow than the traditional 5/8 inch. I think I would have a 1/4 inch bias trim. What are your thoughts?
Thanks for the story behind the seam. I love historical backgrounds supporting new information.
I love hearing the history. I have done the Hong Kong finish once in a jacket. I will revisit doing it again! Thank you for sharing!
Fascinating! I had never heard of this seaming method but have been to Hong Kong. We loved gong to the markets to see the rows and rows of bolts of fabric. People would take your measurements one day and have a complete suit made the following day!
I, too, have used this technique for finishing seams in the past but didn’t know it had a name. Thank you for your explanation and history. It’s always nice to learn more about how certain techniques came to be!
Muchas gracias por este post. Nos hace ver como la tecnología ayuda a avanzar y al mismo tiempo puede hacer desaparecer una parte tan importante de la cultura. El confeccionar se las propias prendas (sea costura o tejido) se considera una tontería ante los precios de las prendas ya confeccionadas y la “necesidad” de obtener las cosas casi instantáneamente.
This was an interesting bit of history to go with the sewing lesson, thank you. I knew how to do this seam but never use it because it seems like more work than just actually lining something. If I just need a nonraveling seam that is stronger than a serged edge, I use a flat felled or a French seam.
I have seen these types of seams before but didn’t know the name or the history. Very interesting. Thank you. I can see if you took the time to make a beautiful garment, this would be the seam finish to use.
Love the history behind this finish – it really is a great finish and thank you for sharing it with us.
I love this , have lined seams before, but didn’t realise the procedure had a proper name.
This is great explanation. This seam make jackets very classy.
Thank you Mayra for always delight us with your travels. Some of us will never see these places and it so much fun having you weaving your tales and wonderful finds with sewing. Keep traveling and giving us a smile.
Very interesting post! I had never been to Hong Kong. I did see a show recently watched video about Hong Kong and how overcrowded it is because only about 3% of it is allowed by the government to be developed and that all land is owned by the government and leased to investors and developers through auctions for 50 years. It indicated that is why real estate is expensive and at a premium and some landlords have divided up living spaces so small that they are called “Coffin” rooms as they are not much larger than one.
I seen or heard of this type of seam finish before so learned something new:).
I am totally shocked that you are using a regular foot for sewing the last row of stitching, actually all of the stitching. I don’t know your brand of machine but the Bernina has a #10 foot also called, Edge Joining foot. Babylock and Brother has a foot that does the same thing. If you have a blind hem foot for your machine take a look at the BLADE in the middle of the foot. This is similar in looks to the Edge Joining foot. Both have a BLADE in the middle, the difference is the blade on EDGE JOINING Foot does not go into the area where the needle goes, allowing you to stitch in the center needle position. The BLADE on the foot is put exactly in the seam allowance and you simply watch where to keep the BLADE. If you want to move the needle one way or another you can achieve a perfect top stitch on the edge of a garment like on the edge of a mans dress shirt cuffs and pocket. Simply guide the fabric on the edge of the Blade and move your needle to the position you want the stitch to be located.
This foot was primarily designed to join to pieces of fabric, or lace together using the smallest zig zag possible and still join both pieces together by placing on on each side of the blade. I hope this helps you.
Mayra may be one of the lucky ones that can sew a straight & even line without other feet!!! 🙂 Seems to work for her!
Ordinarily I would agree but according to what she said herself in this article she had a bit of a time at least once. That is why I responded. Sorry if I gave the impression I did not think she knew what she was doing. Much to the contrary, she absolutely does know. I was merely trying to make her sewing experience easier.
I like the Hong Kong finish for seams also. Even if no one sees the inside of my garment, I know it is there and that I achieved it for myself. A good feeling.
Loved the history of this seam and haute coutour and mass sewing production. Please do more articles like this one. Your shots of your jacket were fabulous! – Pam… Illinois
Thank you for this lesson and information. I had not heard of this finish…it is a beautiful finish. I will have to give this a go. I have heard of flat fell seams and French seams. I like French seams. I like making my inside look as nice as my outside of a garment. I do understand these techniques strengthen the seams too. Thank you for the history lesson too.
It’s a popular finish but only called a Hong Kong finish in ‘home sewing’ circles. If you used the term in a Parisian or London haute couture atelier they wouldn’t know what you were talking about. It is one of those terms that have spread via we home sewists on the internet but is not used in the couture industry. Thank you for your posts btw, really enjoy your site.
Indeed you are right about Haute Couture Atelier where the term would be own as “couture liée” and in English it is known as a bias bound seam. This is why neither home sewing nor haute couture atelier this would be own. Term was born out of the need of RTW labels making cheaper garments.