


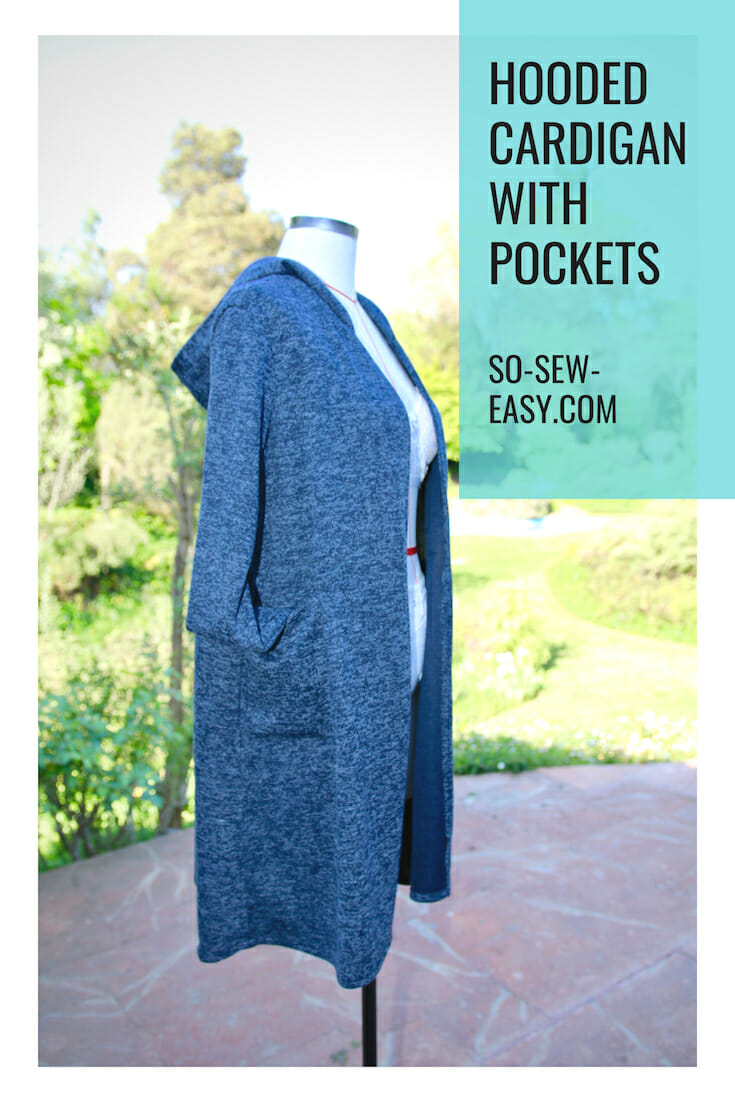
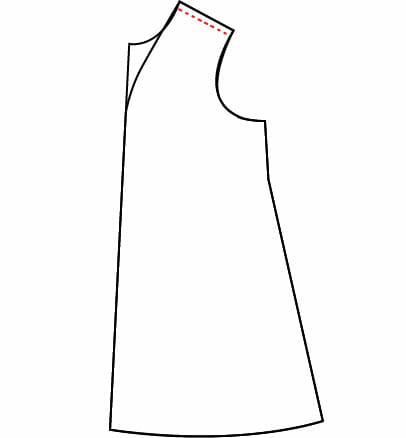
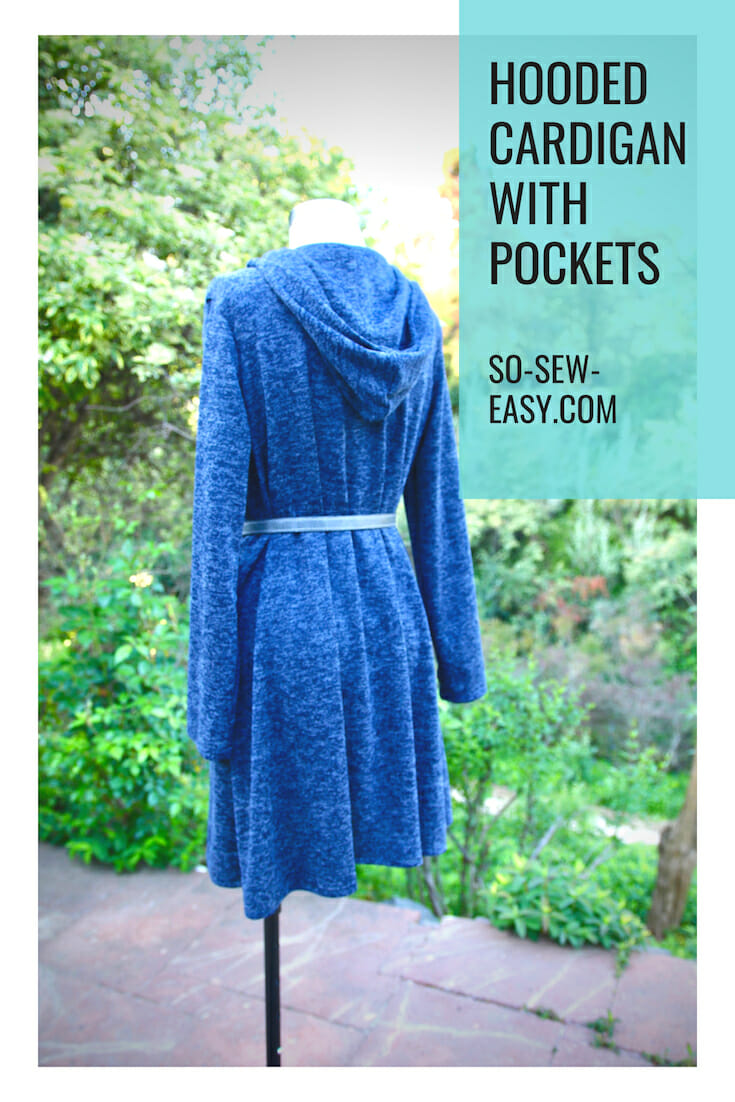
This weekend we are going to make a hooded cardigan with pockets. This is part two of the Proteus cardigan series where we are using the same pattern to make a few different looks. Previously I had shared with you the Proteus cardigan with bishop sleeves. The body of the cardigan is the same as before, however, the sleeves, hood, and pocket are new. This is a new and complete pattern in itself but also represents an evolution of the style we worked on in Part 1, so don't forget to check it out before we move on.
I am also using a slightly heavier fabric than part one, a 4-way stretch knit perfect for the project. Check out the fabric suggestions if you want the same look. So if you have already downloaded the first part, all you have to print now is the hood and the sleeves.
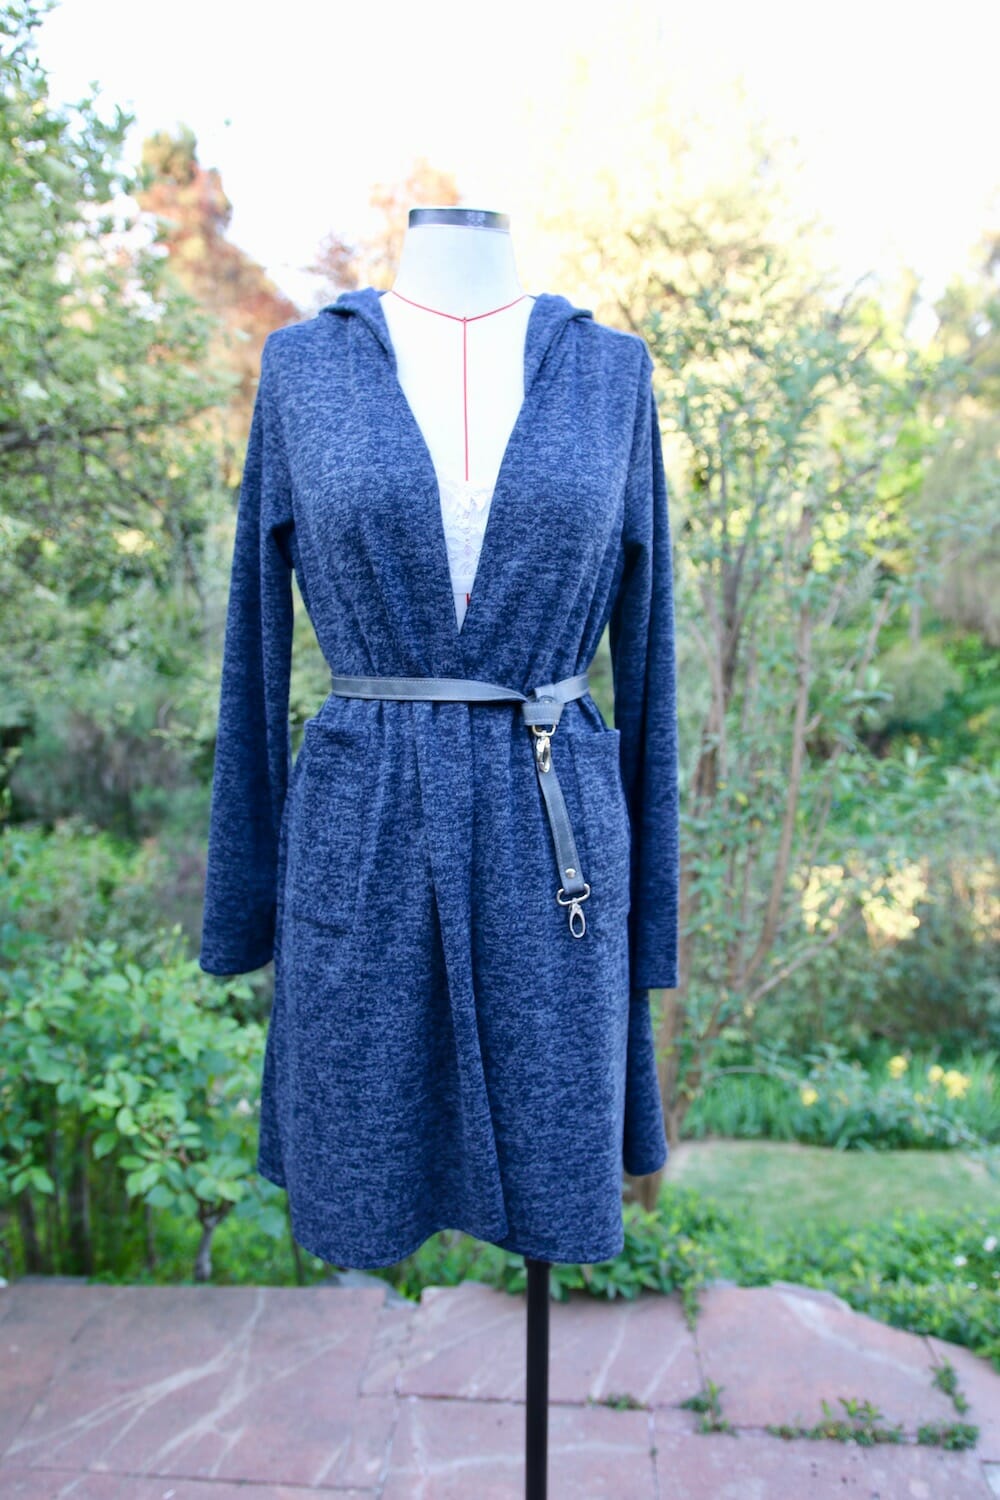
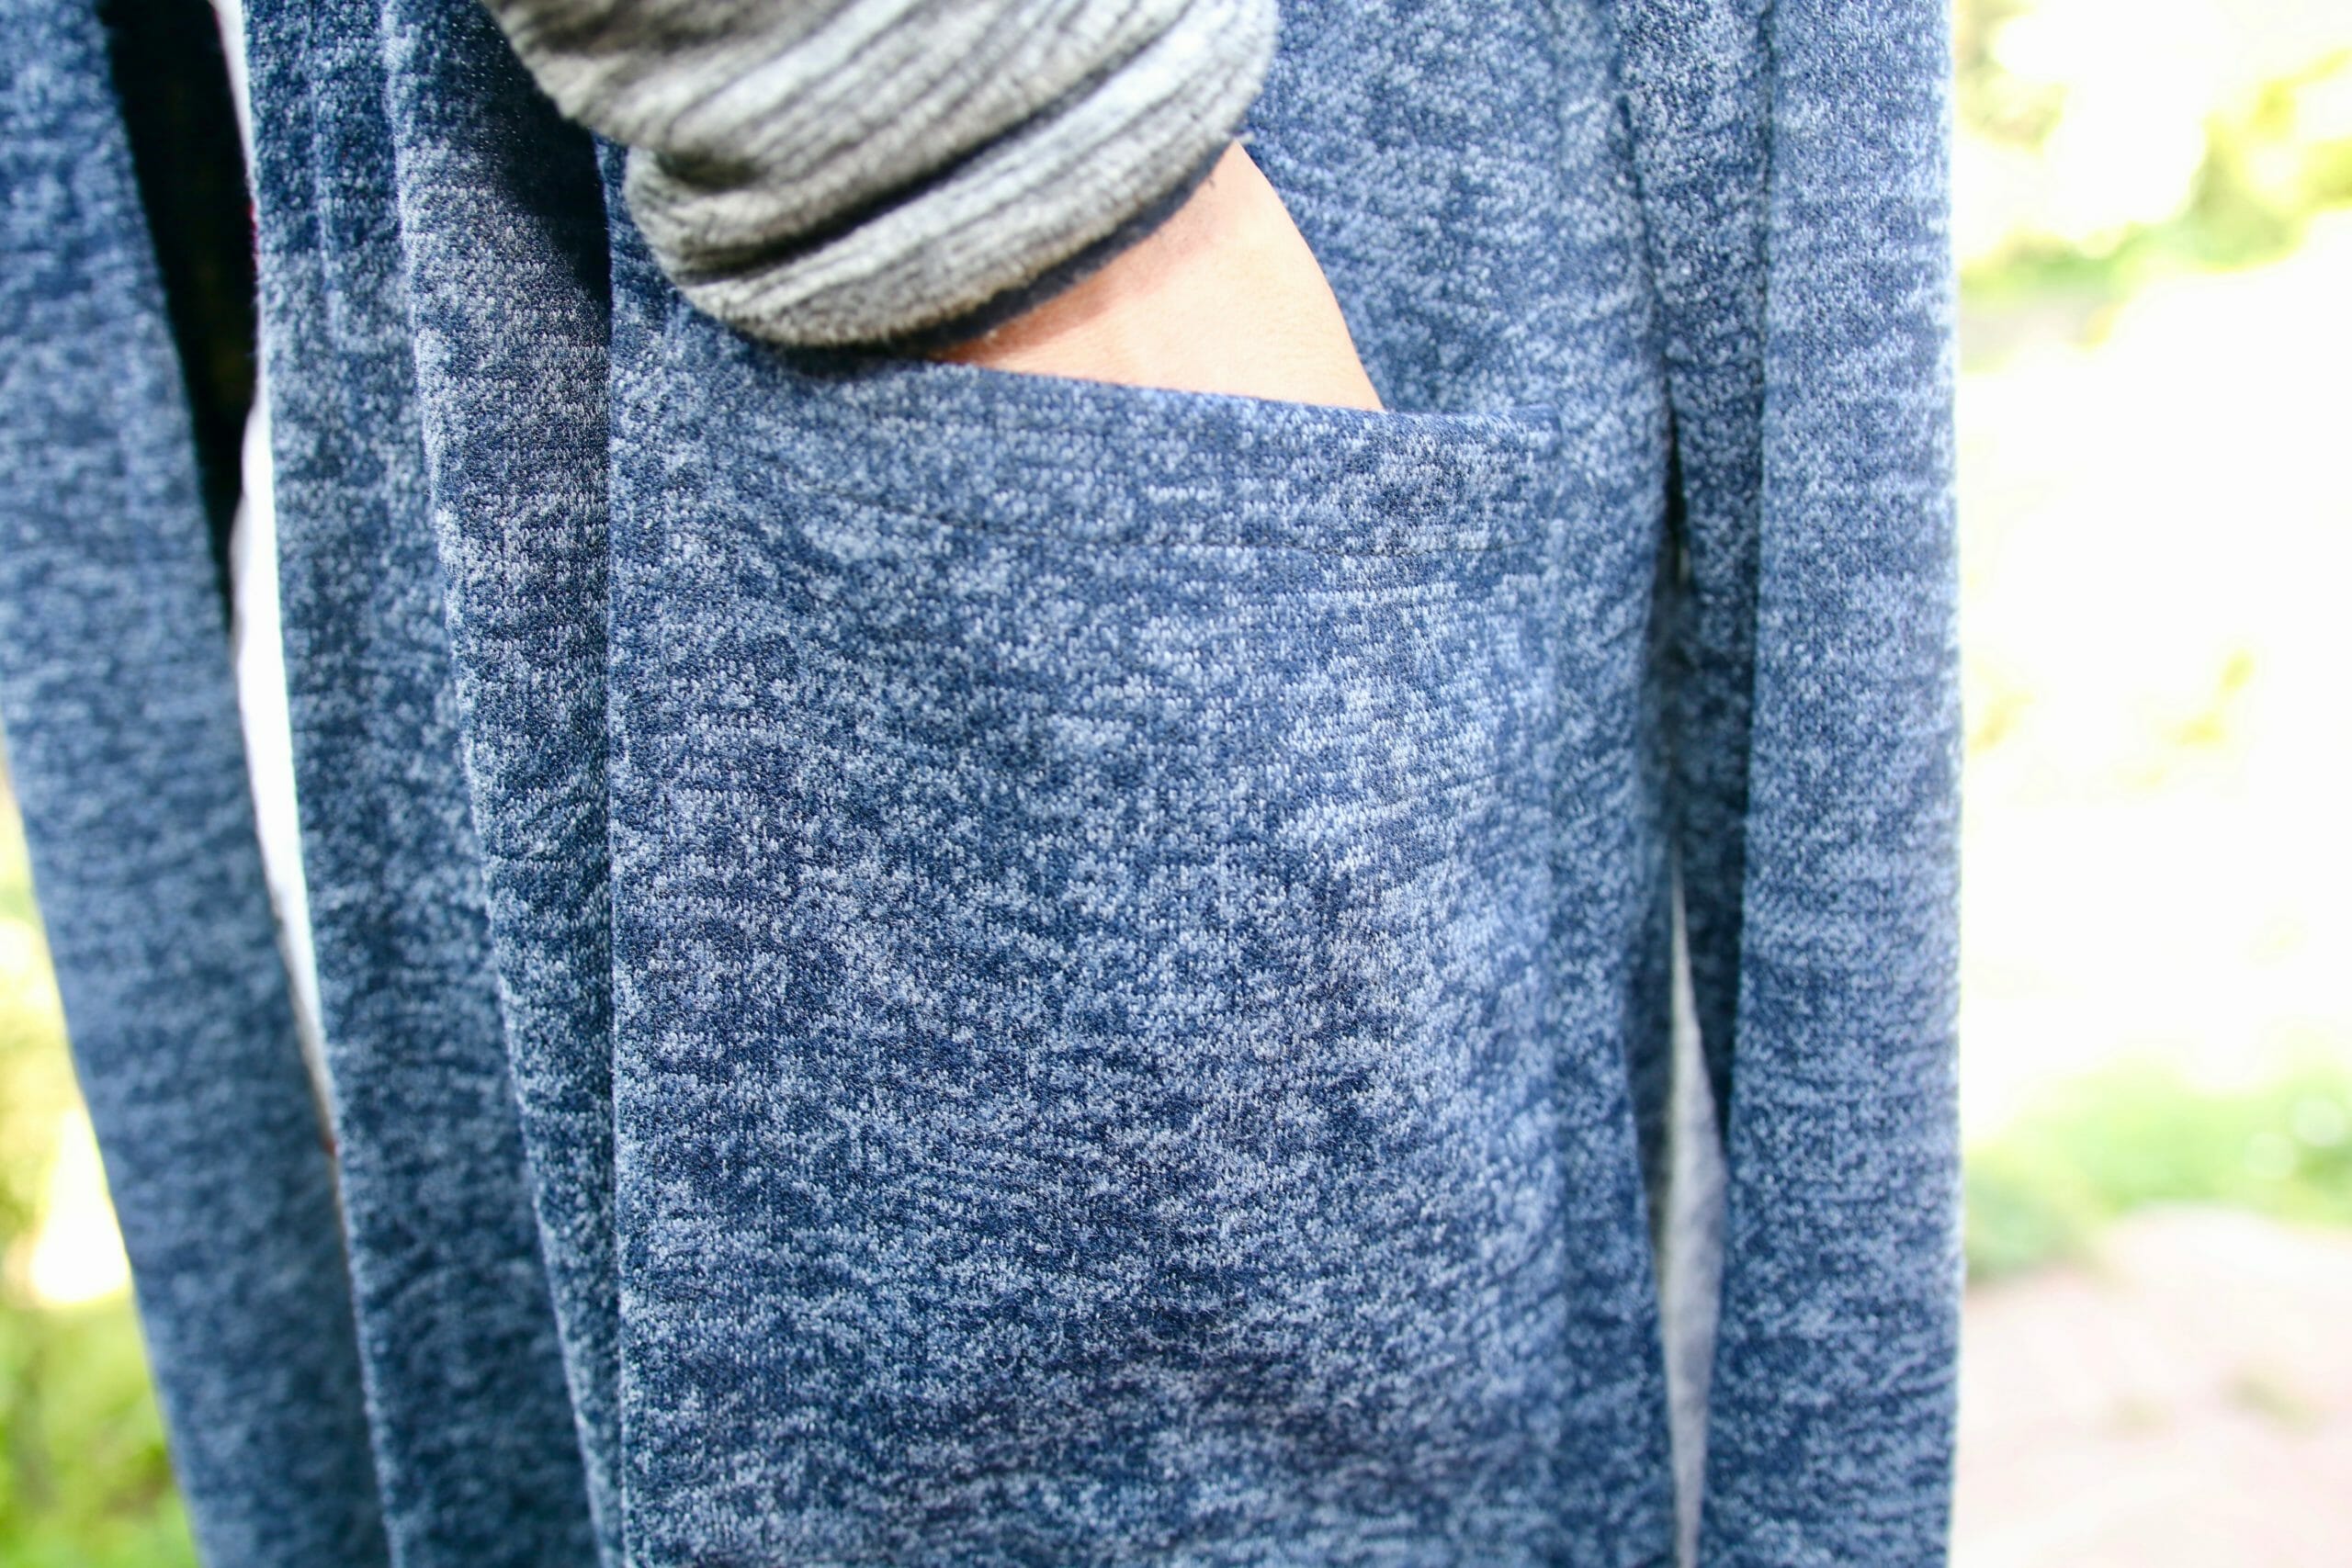
I am loving this hooded cardigan for its versatility, can be worn open for a casual look or belted for an hourglass more sophisticated look. The hood is handy for the pesky sun or the cold wind in the late afternoon Autumn/Spring day.
Pockets on the side to keep your hands warm.
This project is for an advanced beginner and will require the ability to follow instructions and previous experience with working with knits.
This hooded cardigan is best suited for the hourglass figure however other shapes can wear it successfully if proportions according to the body shape are kept.
Materials
- 2 1/2 yards of 60″ wide 4-way sweater knit fabric
- Thread to match
Tools
- Jersey needle
- Rotary cutter (optional)
- Cutting mat (optional)
- Overlocker (optional)
Fabric Recommendations from Fabric.com
Pattern Layout
Pattern Download
You can download the pattern for this Hooded Cardigan with Pockets Pattern from our account at Payhip.
For help downloading and printing PDF patterns, please CLICK HERE.
How to Print your hooded cardigan with pockets
Please use the latest version of Adobe Reader which is completely free. Print on Actual Size and Landscape Mode. I do not ask you to download any other program in order to print this pattern.
Finished Measurements
| S | M | L | XL | 2XL | |
| Bust | 33″ | 37″ | 41″ | 44″ | 48″ |
| Waist | 39″ | 43″ | 47″ | 51″ | 55″ |
| Hem Width | 63″ | 67″ | 71″ | 73″ | 77″ |
How To Sew Your Hooded Cardigan With Pockets
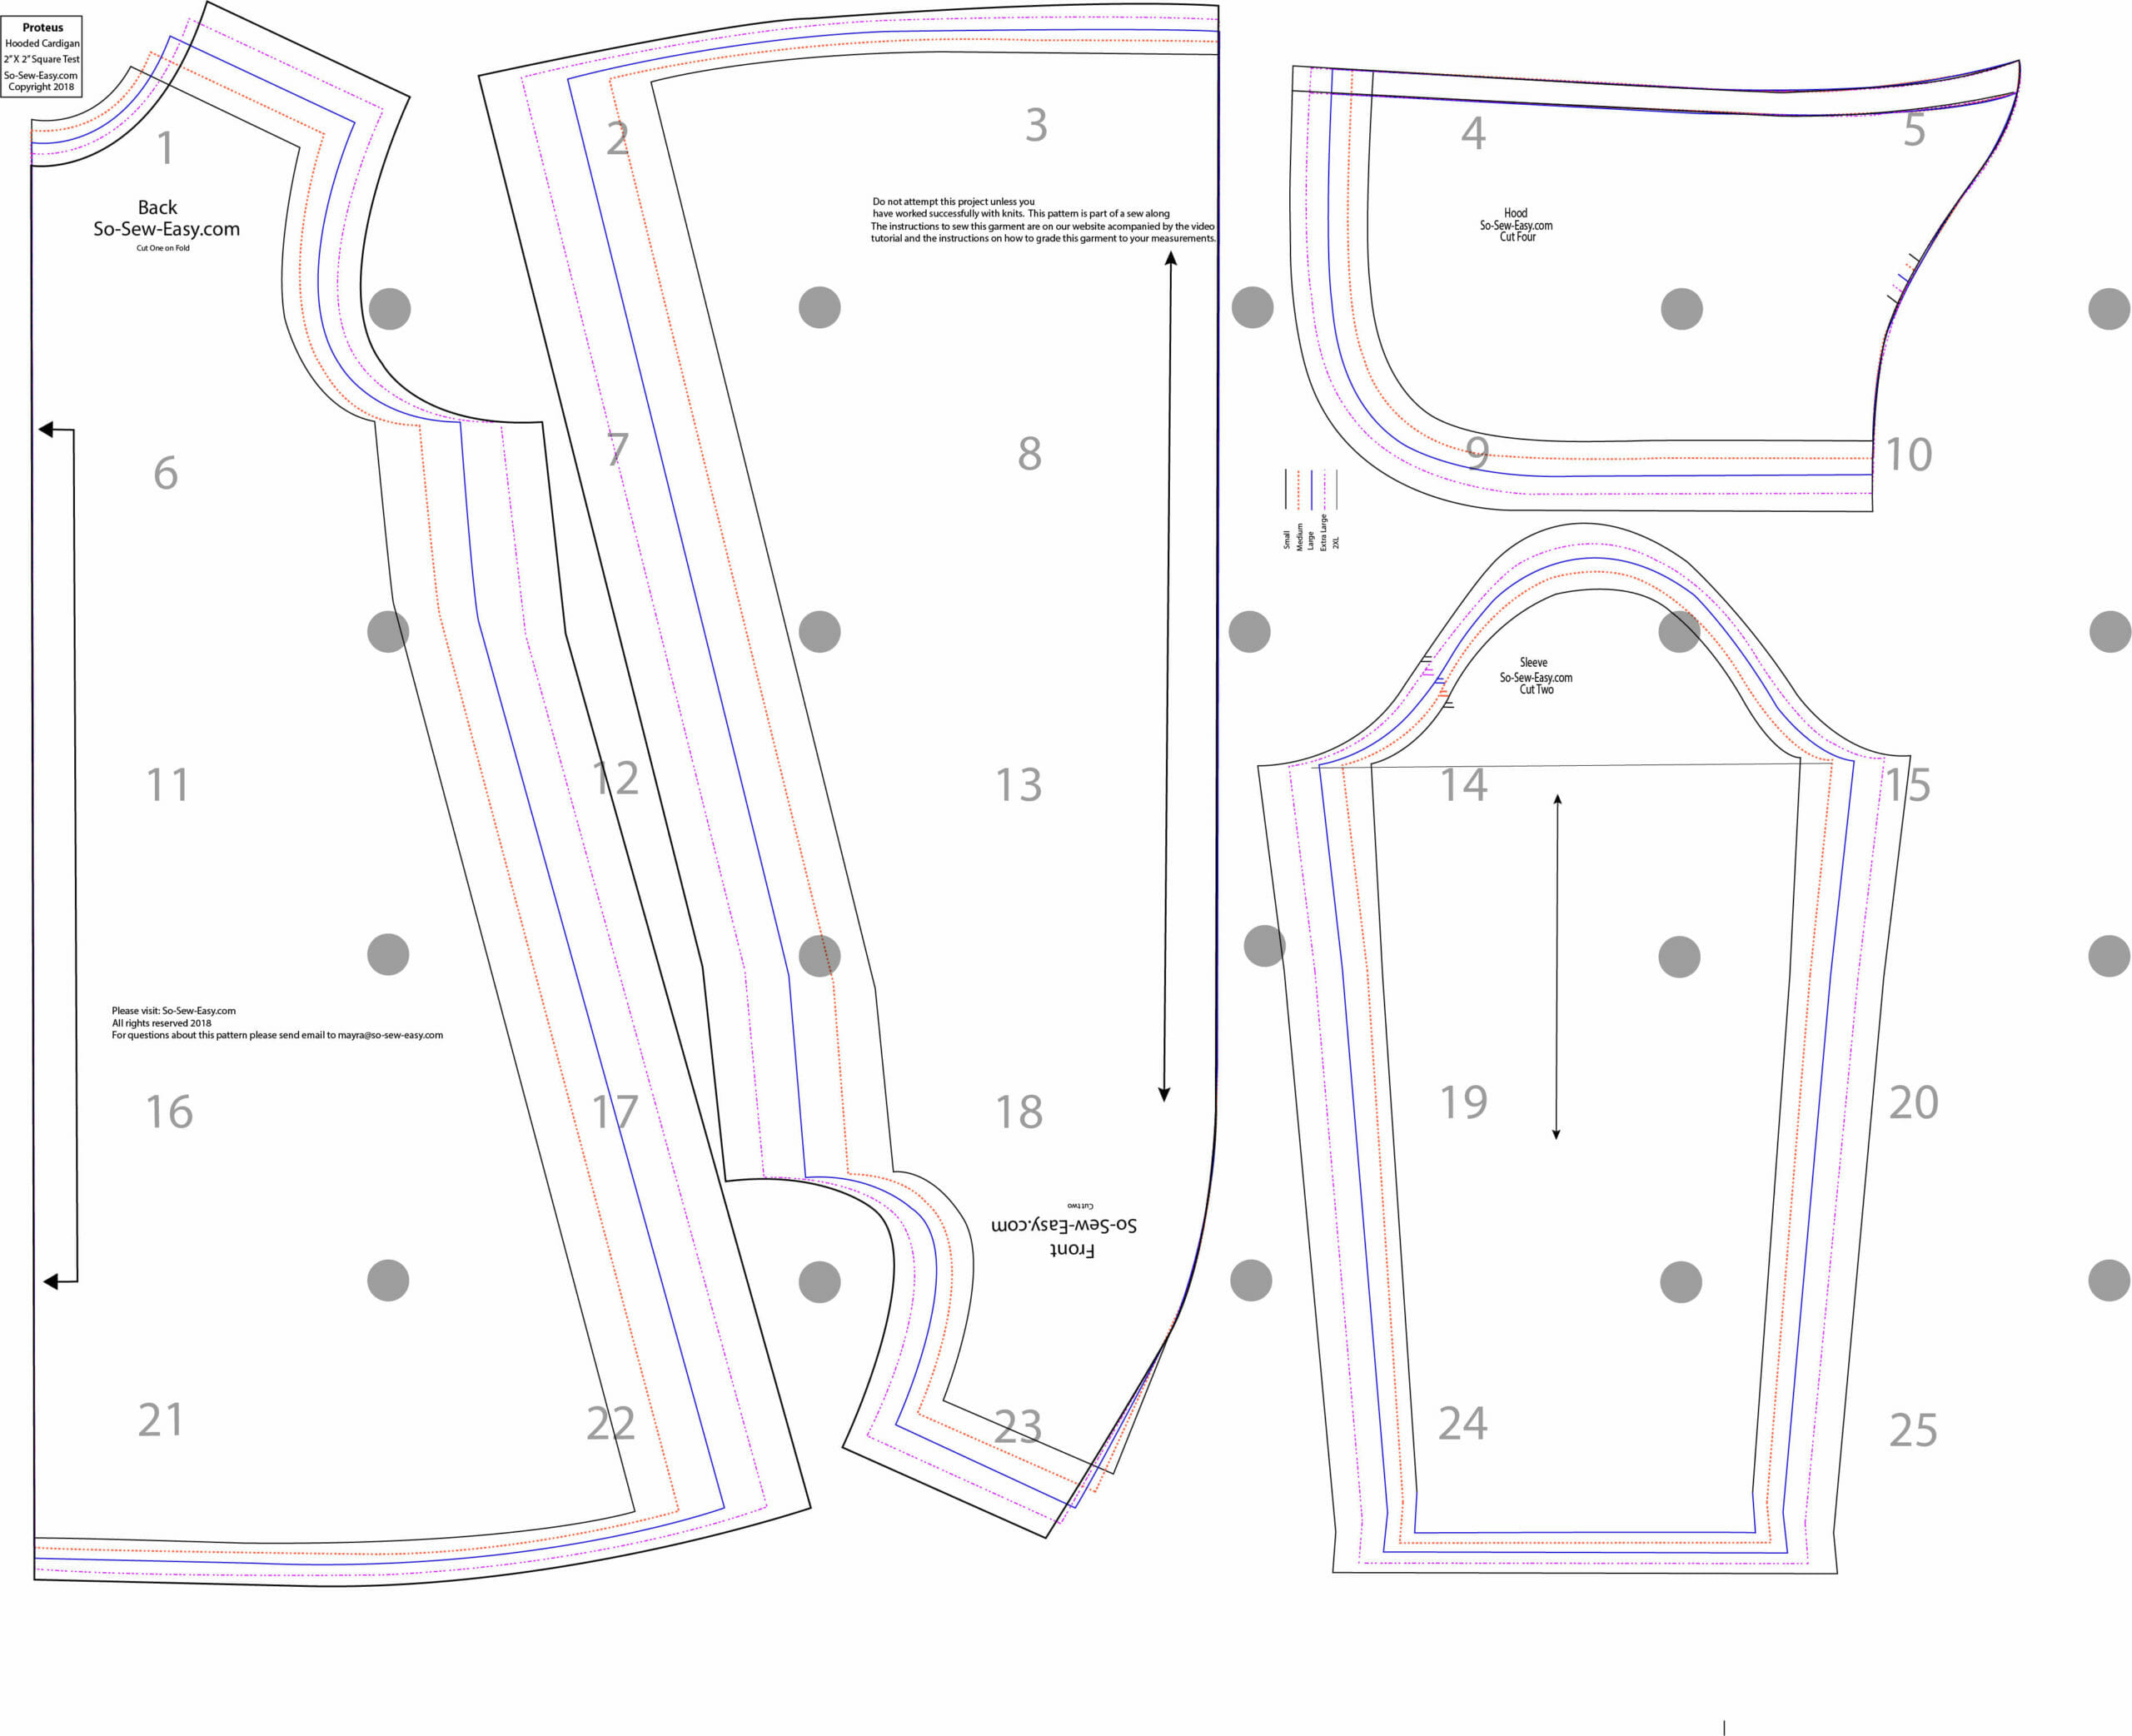
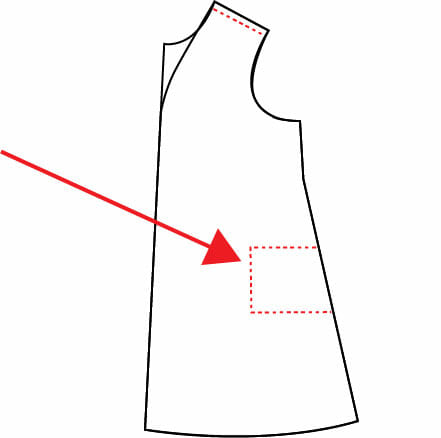
The sewing is the same as in the first one, but of course, since we have an additional hood finishing. You will need to trace two rectangles 9″ X 8″ for the pockets and two strips of fabric 1″ X the length from the center front to the hem plus 2″. Both pockets and strip will have the grain-line running lengthwise.
Note: Use your selvage to cut the strips of fabric, the selvage does not ravel therefore you will not have to use the overlocker nor zigzag in that area.
How To Draft Your Pocket
Make a rectangle that is 9″ Long by 8″ wide. Add 5/8″ to one of the sides at the bottom. Re-trace the side. It looks like a funny shape now but it will be clear to you once you pin the pockets to the cardigan. Overlock or zigzag the top of the pockets. Fold 1″, stitch and iron and put aside.
Step One
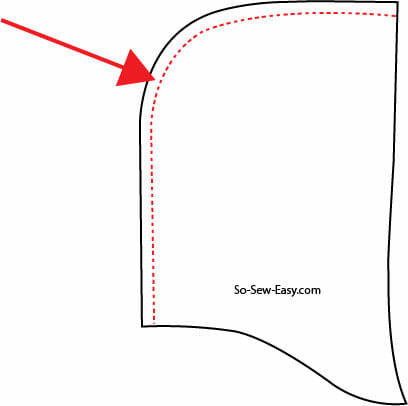
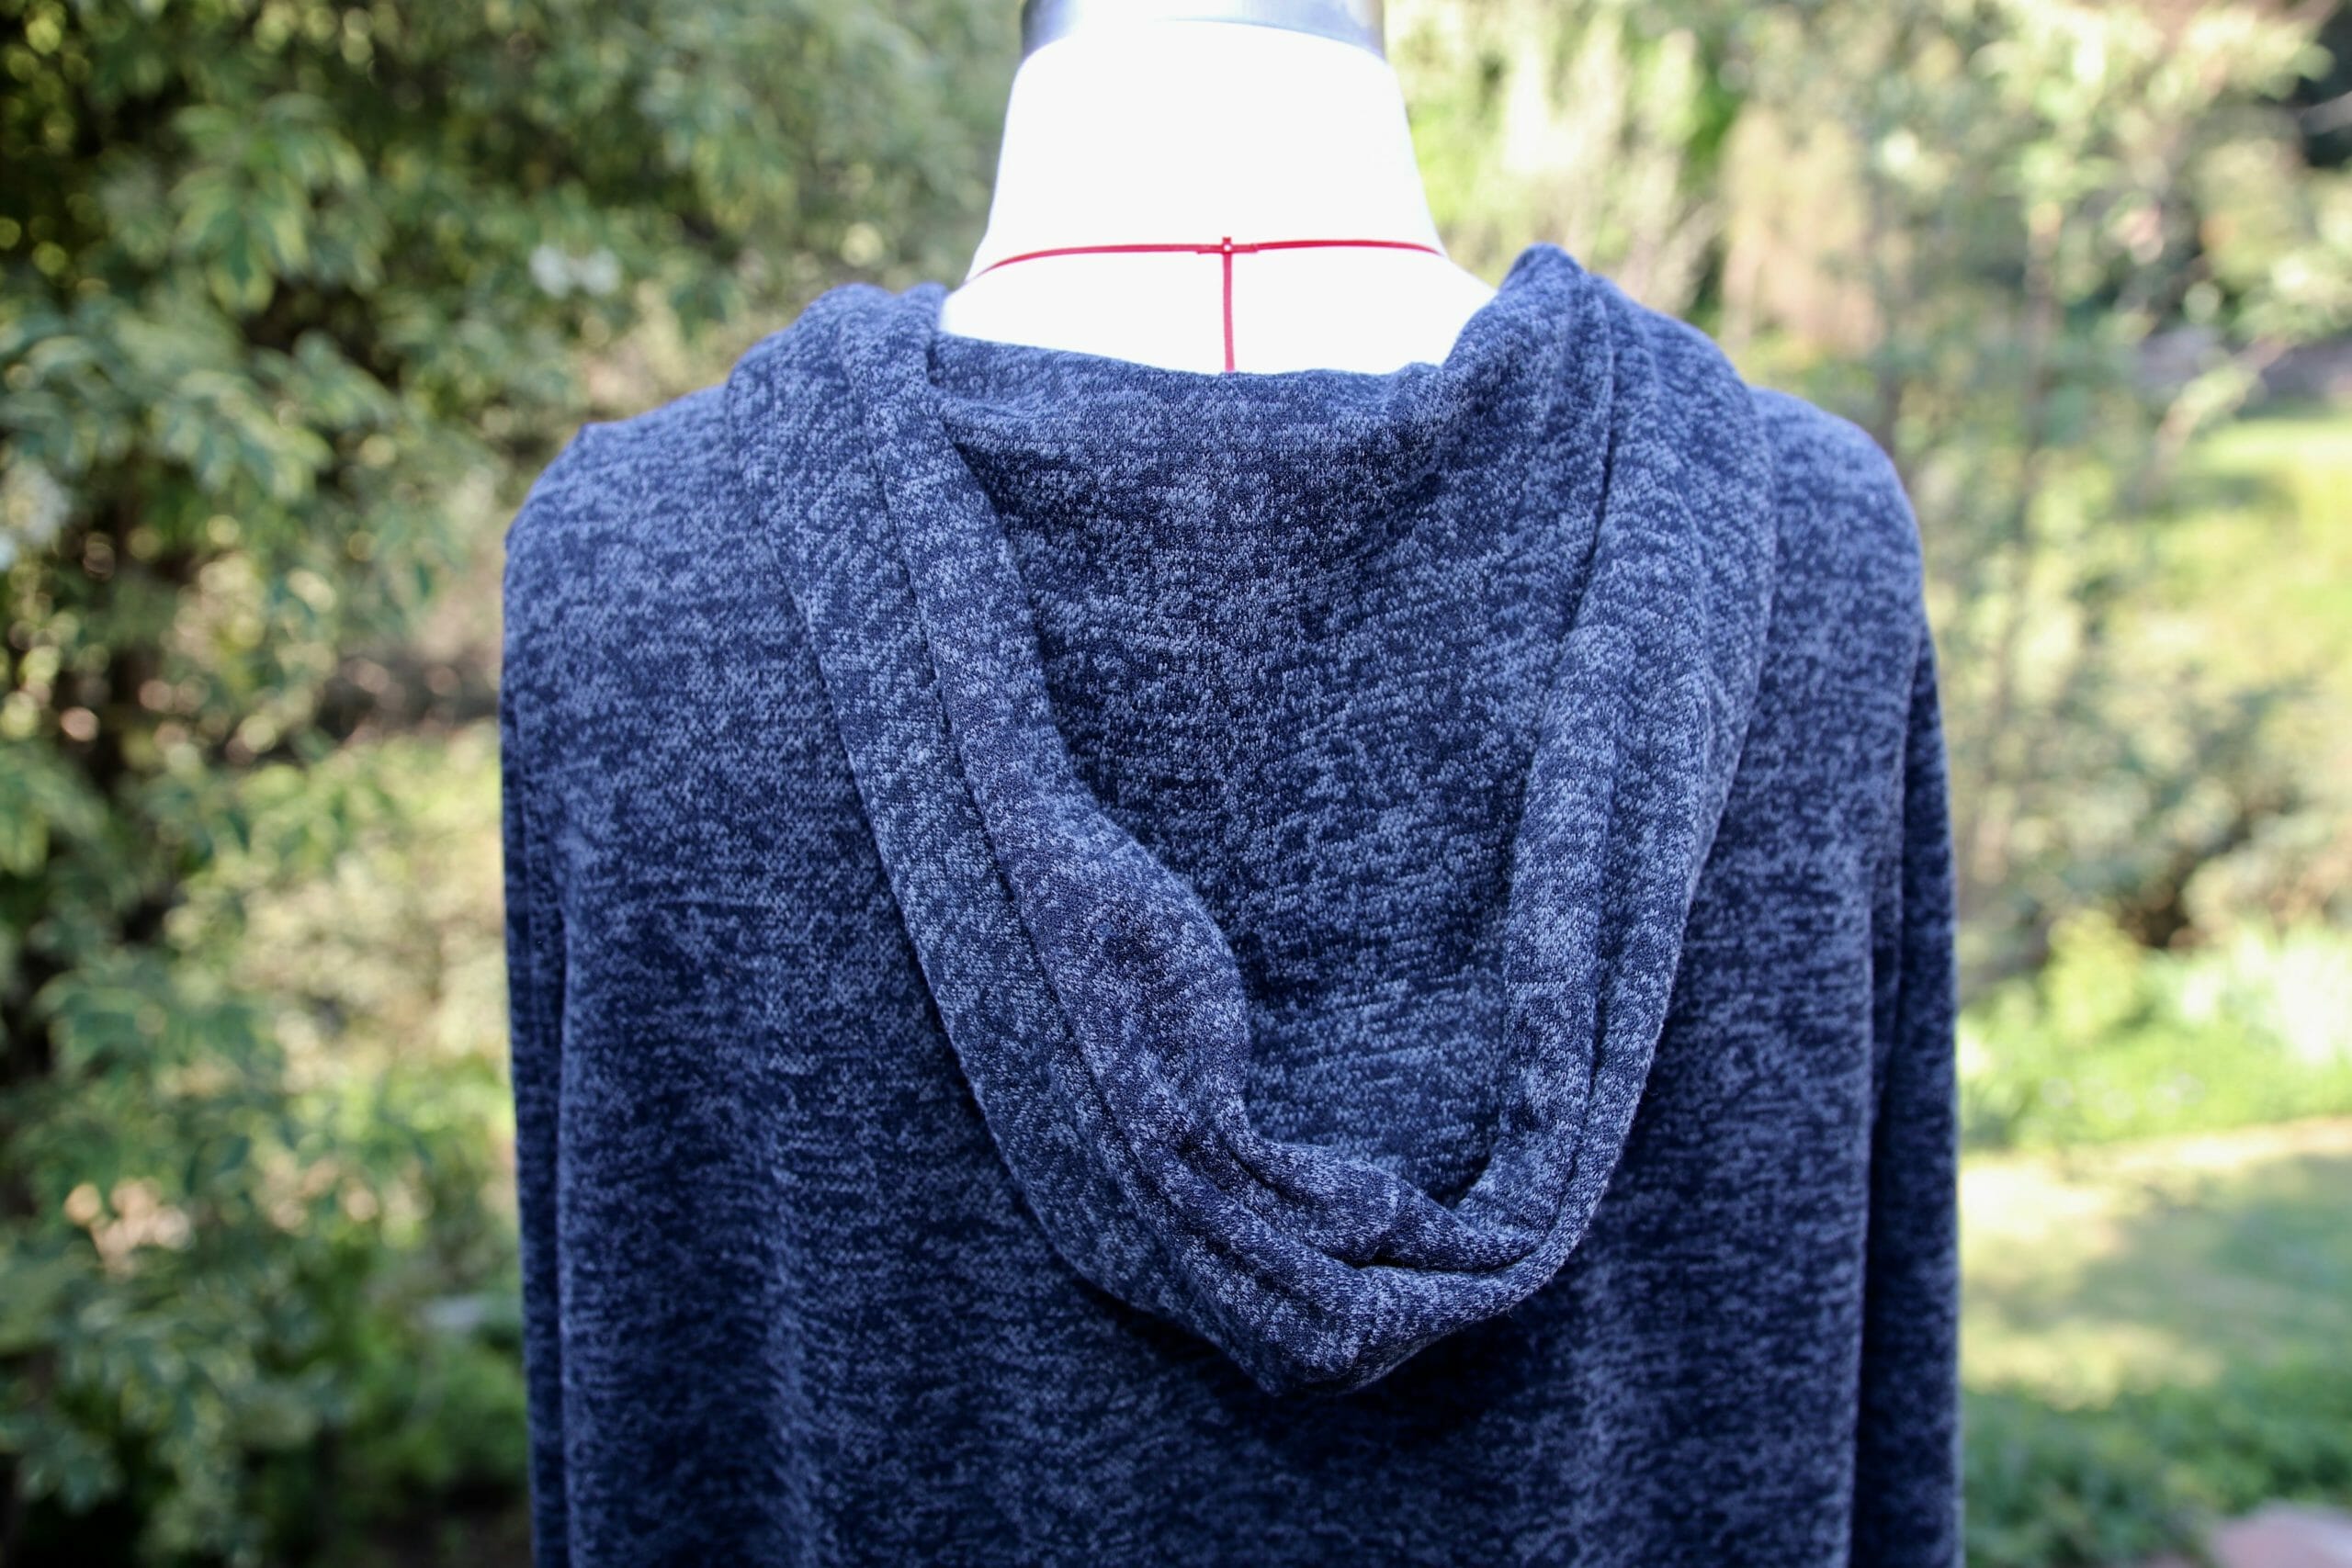
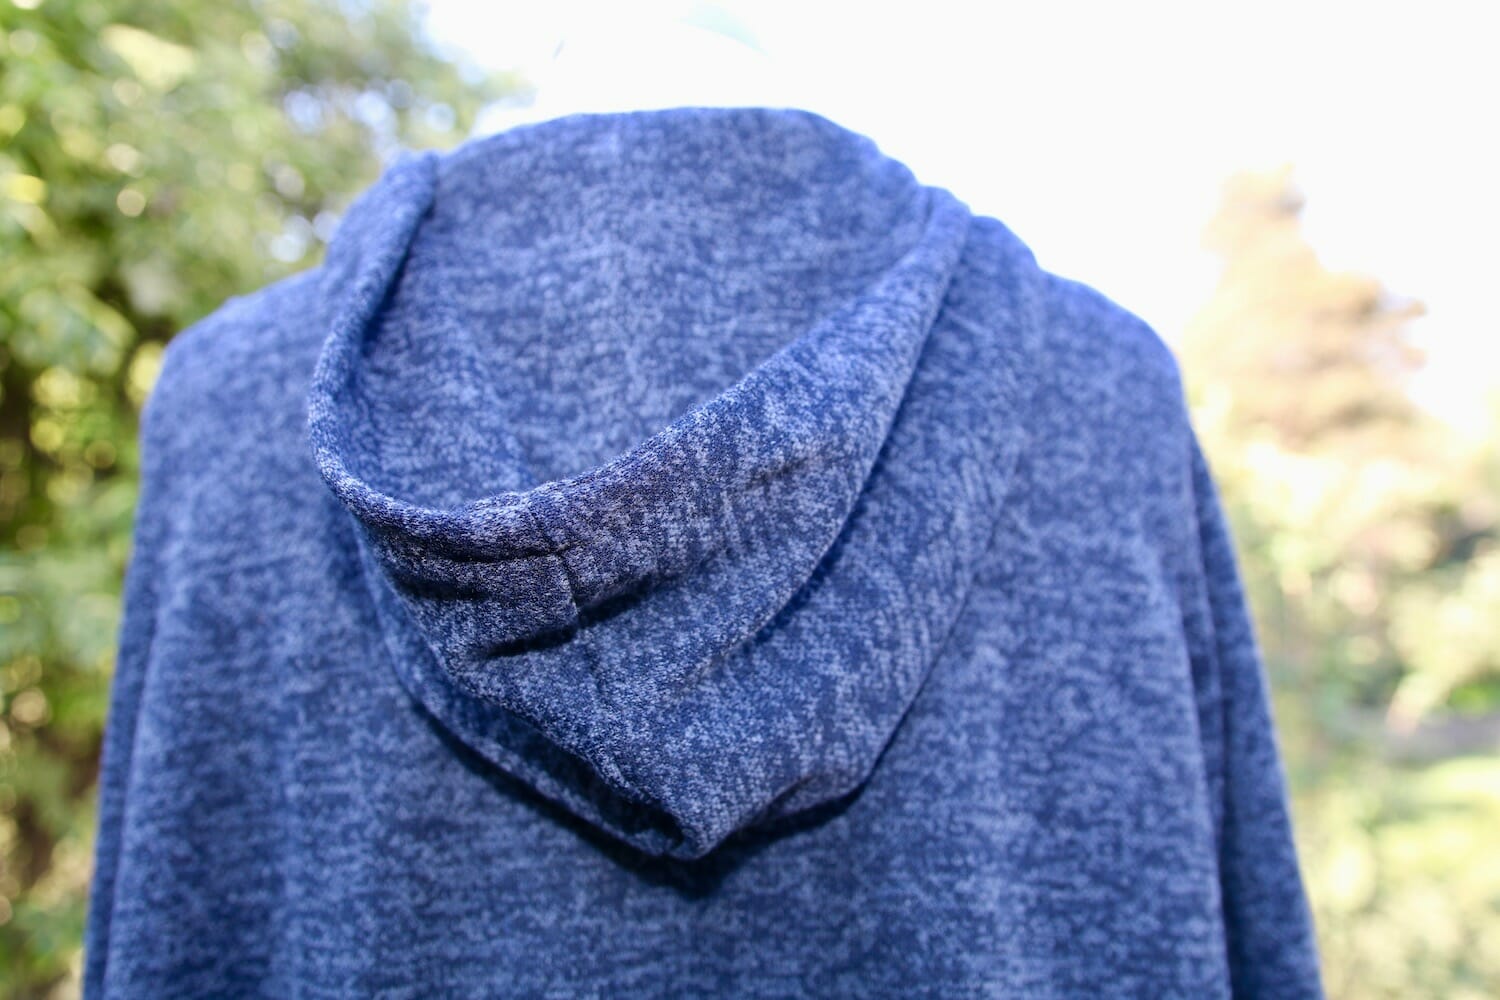
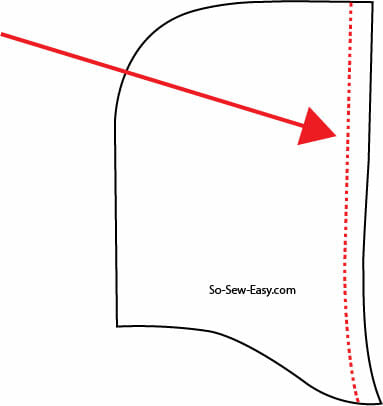
There are 4 pieces for the hood but just one pattern piece. This means you need to sew two pieces together to make one inside of the hood and another two pieces to make the outside of the hood. There will be a center seam on each side. Sew the curved side right sides together. Repeat with the other two pieces.
We will join both sides by sewing the opening or the area that frames the face of the hood. Right sides together sew. Turn and stitch 5/8″ from the edge.
Iron and leave aside for now.
Step Two
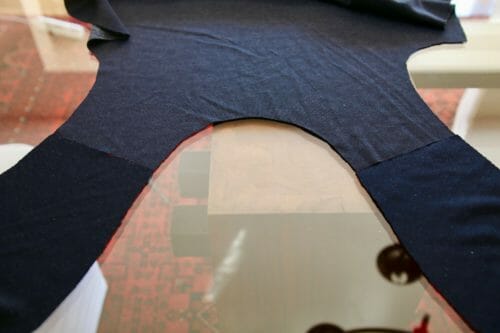
Right sides together, sew the shoulders and use your overlocker or zigzag to clean the seam and stop the fabric from raveling.
Step Three
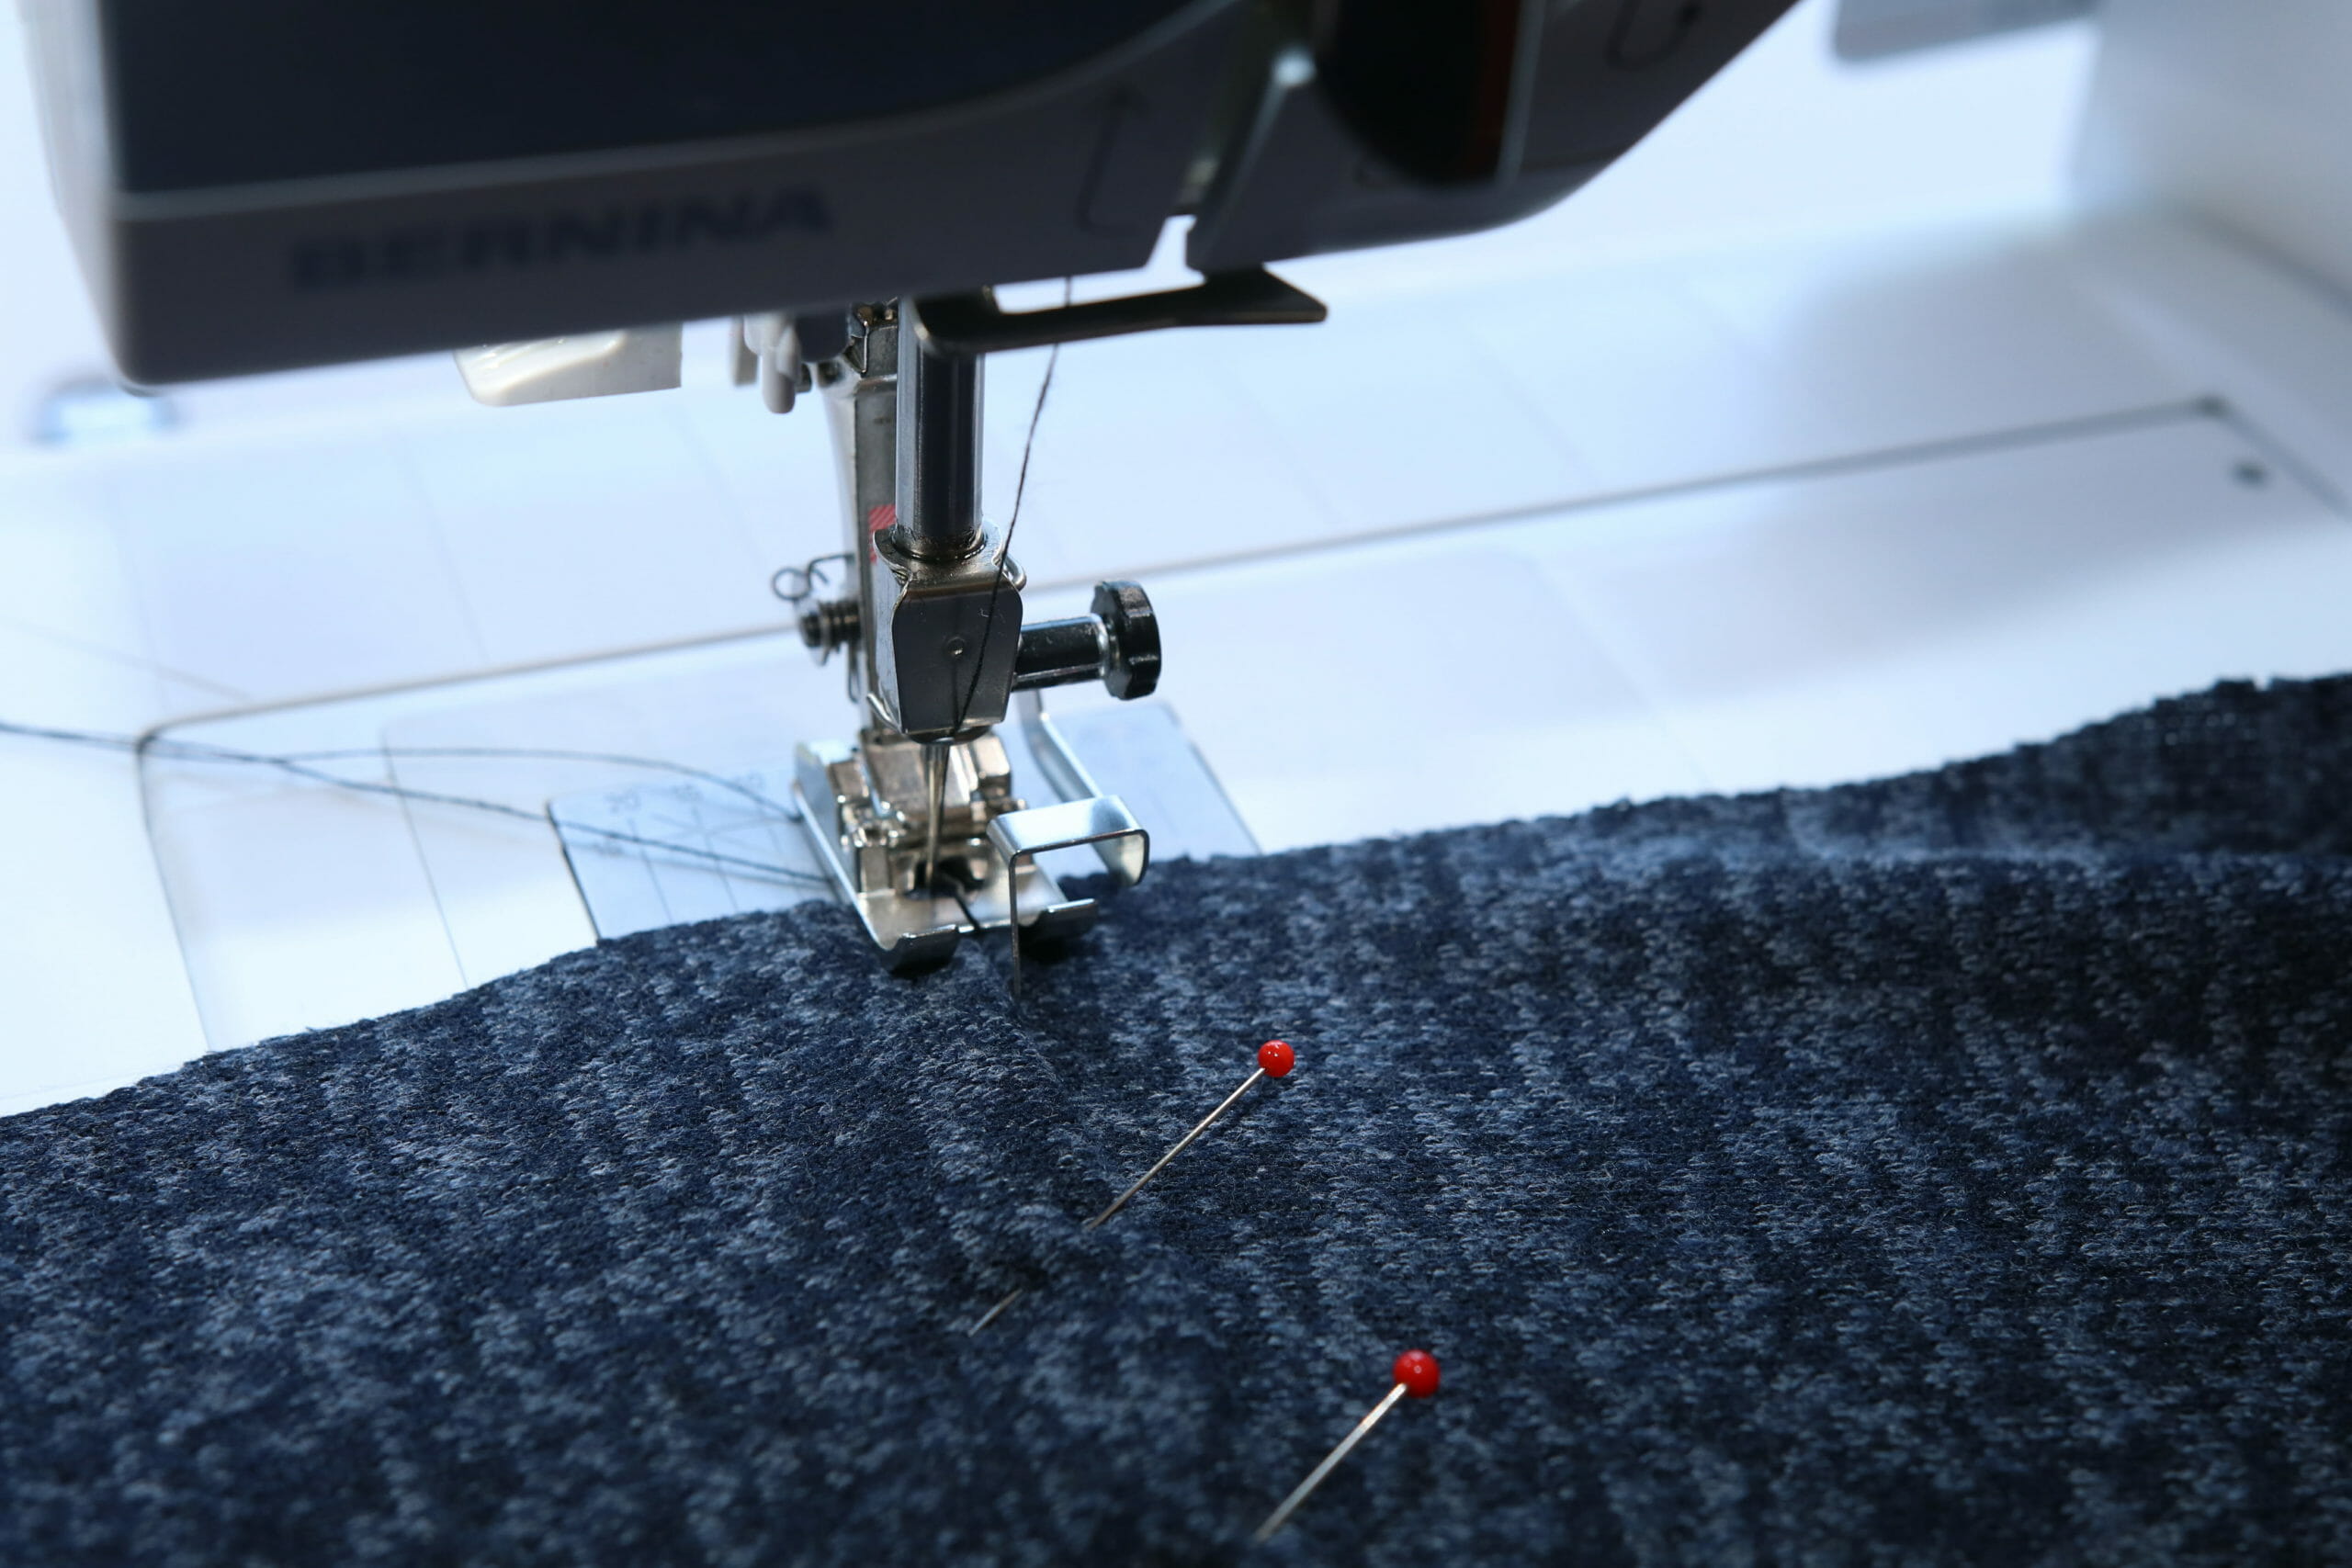
Hang the cardigan on your shoulders and decide how high your pockets are going to be. Pin the pockets placing the slanted side to the at the side seams of the cardigan. Once we sew the cardigan we will also be sewing the side of the pocket.
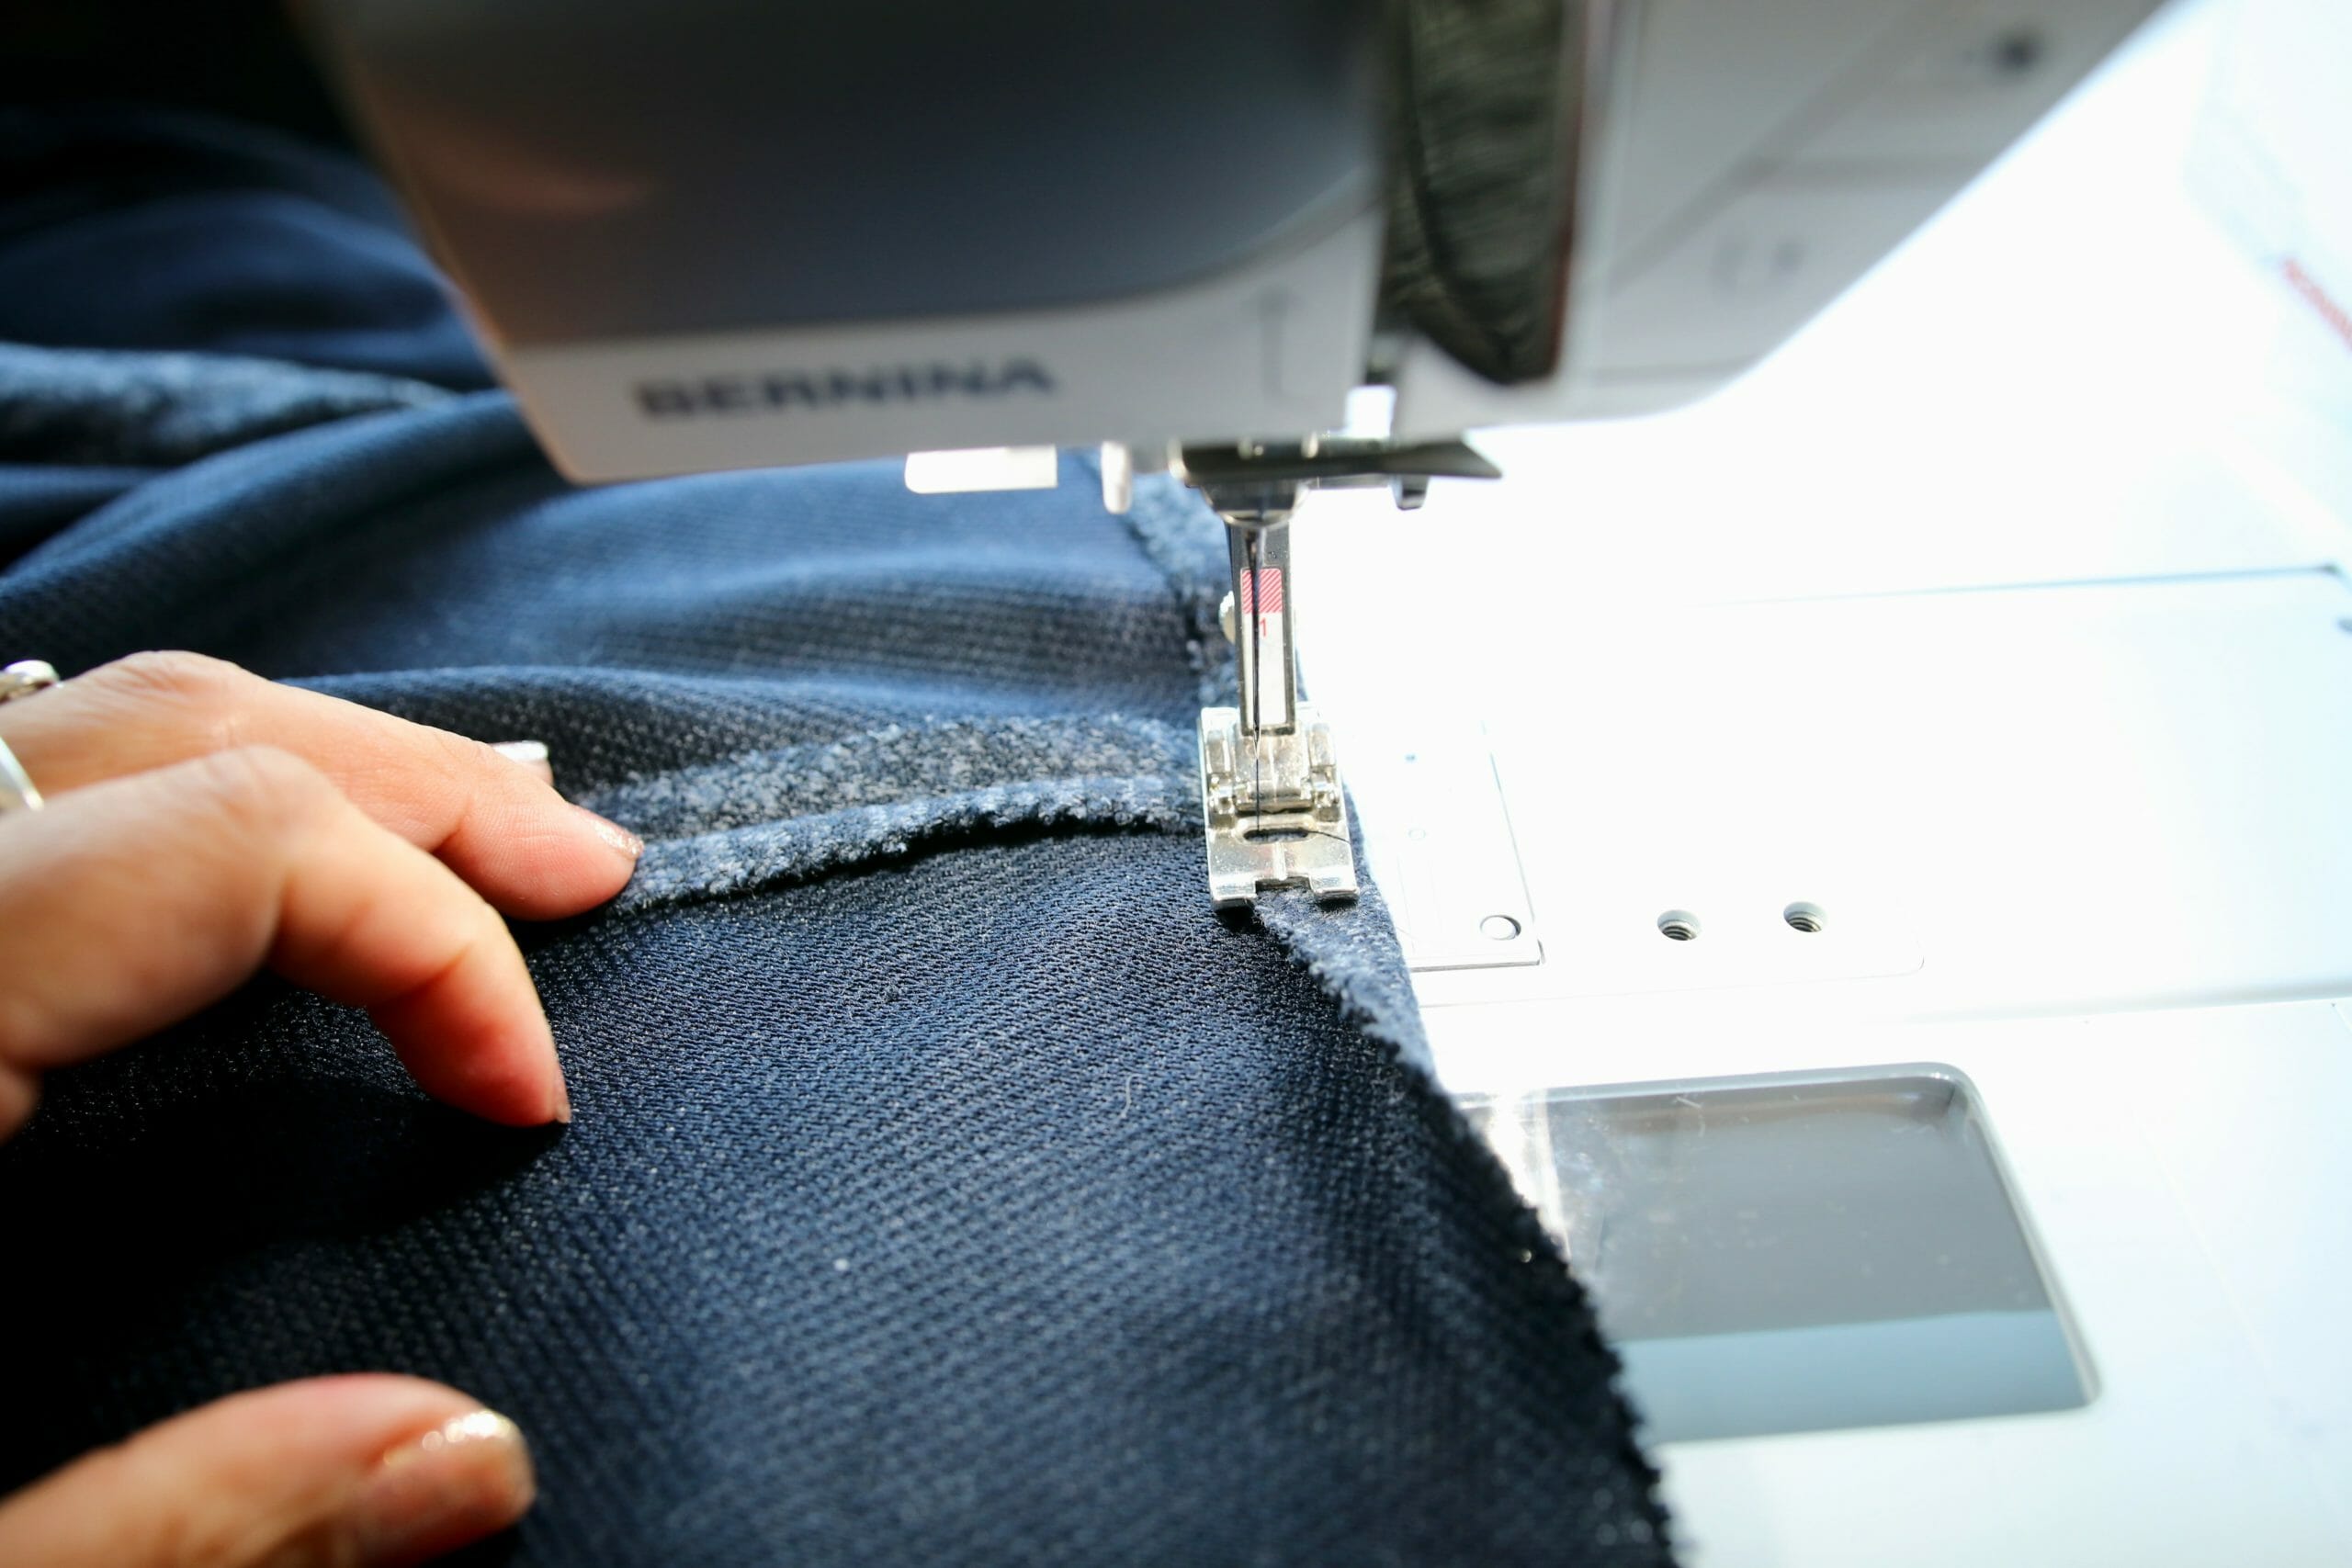
Sew the pocket using a very small stitch, I used a 2.5 on my Bernina 350 PE (fellow fans of Bernina sewing machines, click here). I have put the side seam of the cardigan together to make sure the pockets are at the same height. Hope you do not get confused here.
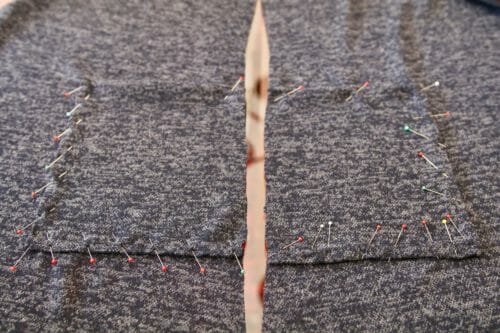
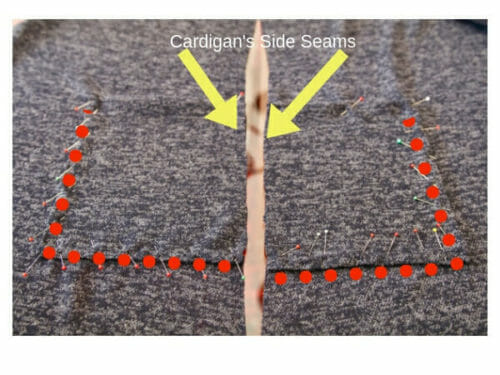
Sew on the sides towards the center front and bottom only. The other side of the pocket will be sewn when we join the front and back of the cardigan. Sew very close to the edge of the pocket, this stitch will almost not be visible. If you prefer a more casual look you can do a double stitch using a twin needle.
Step Four
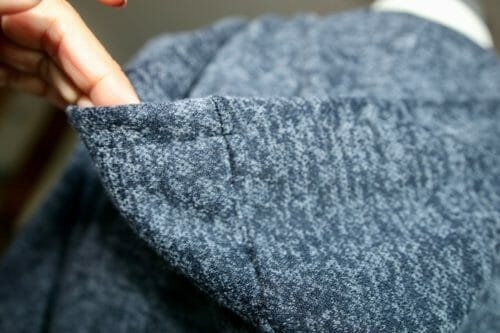
Pin the center seam of the hood to the center of the neckline.
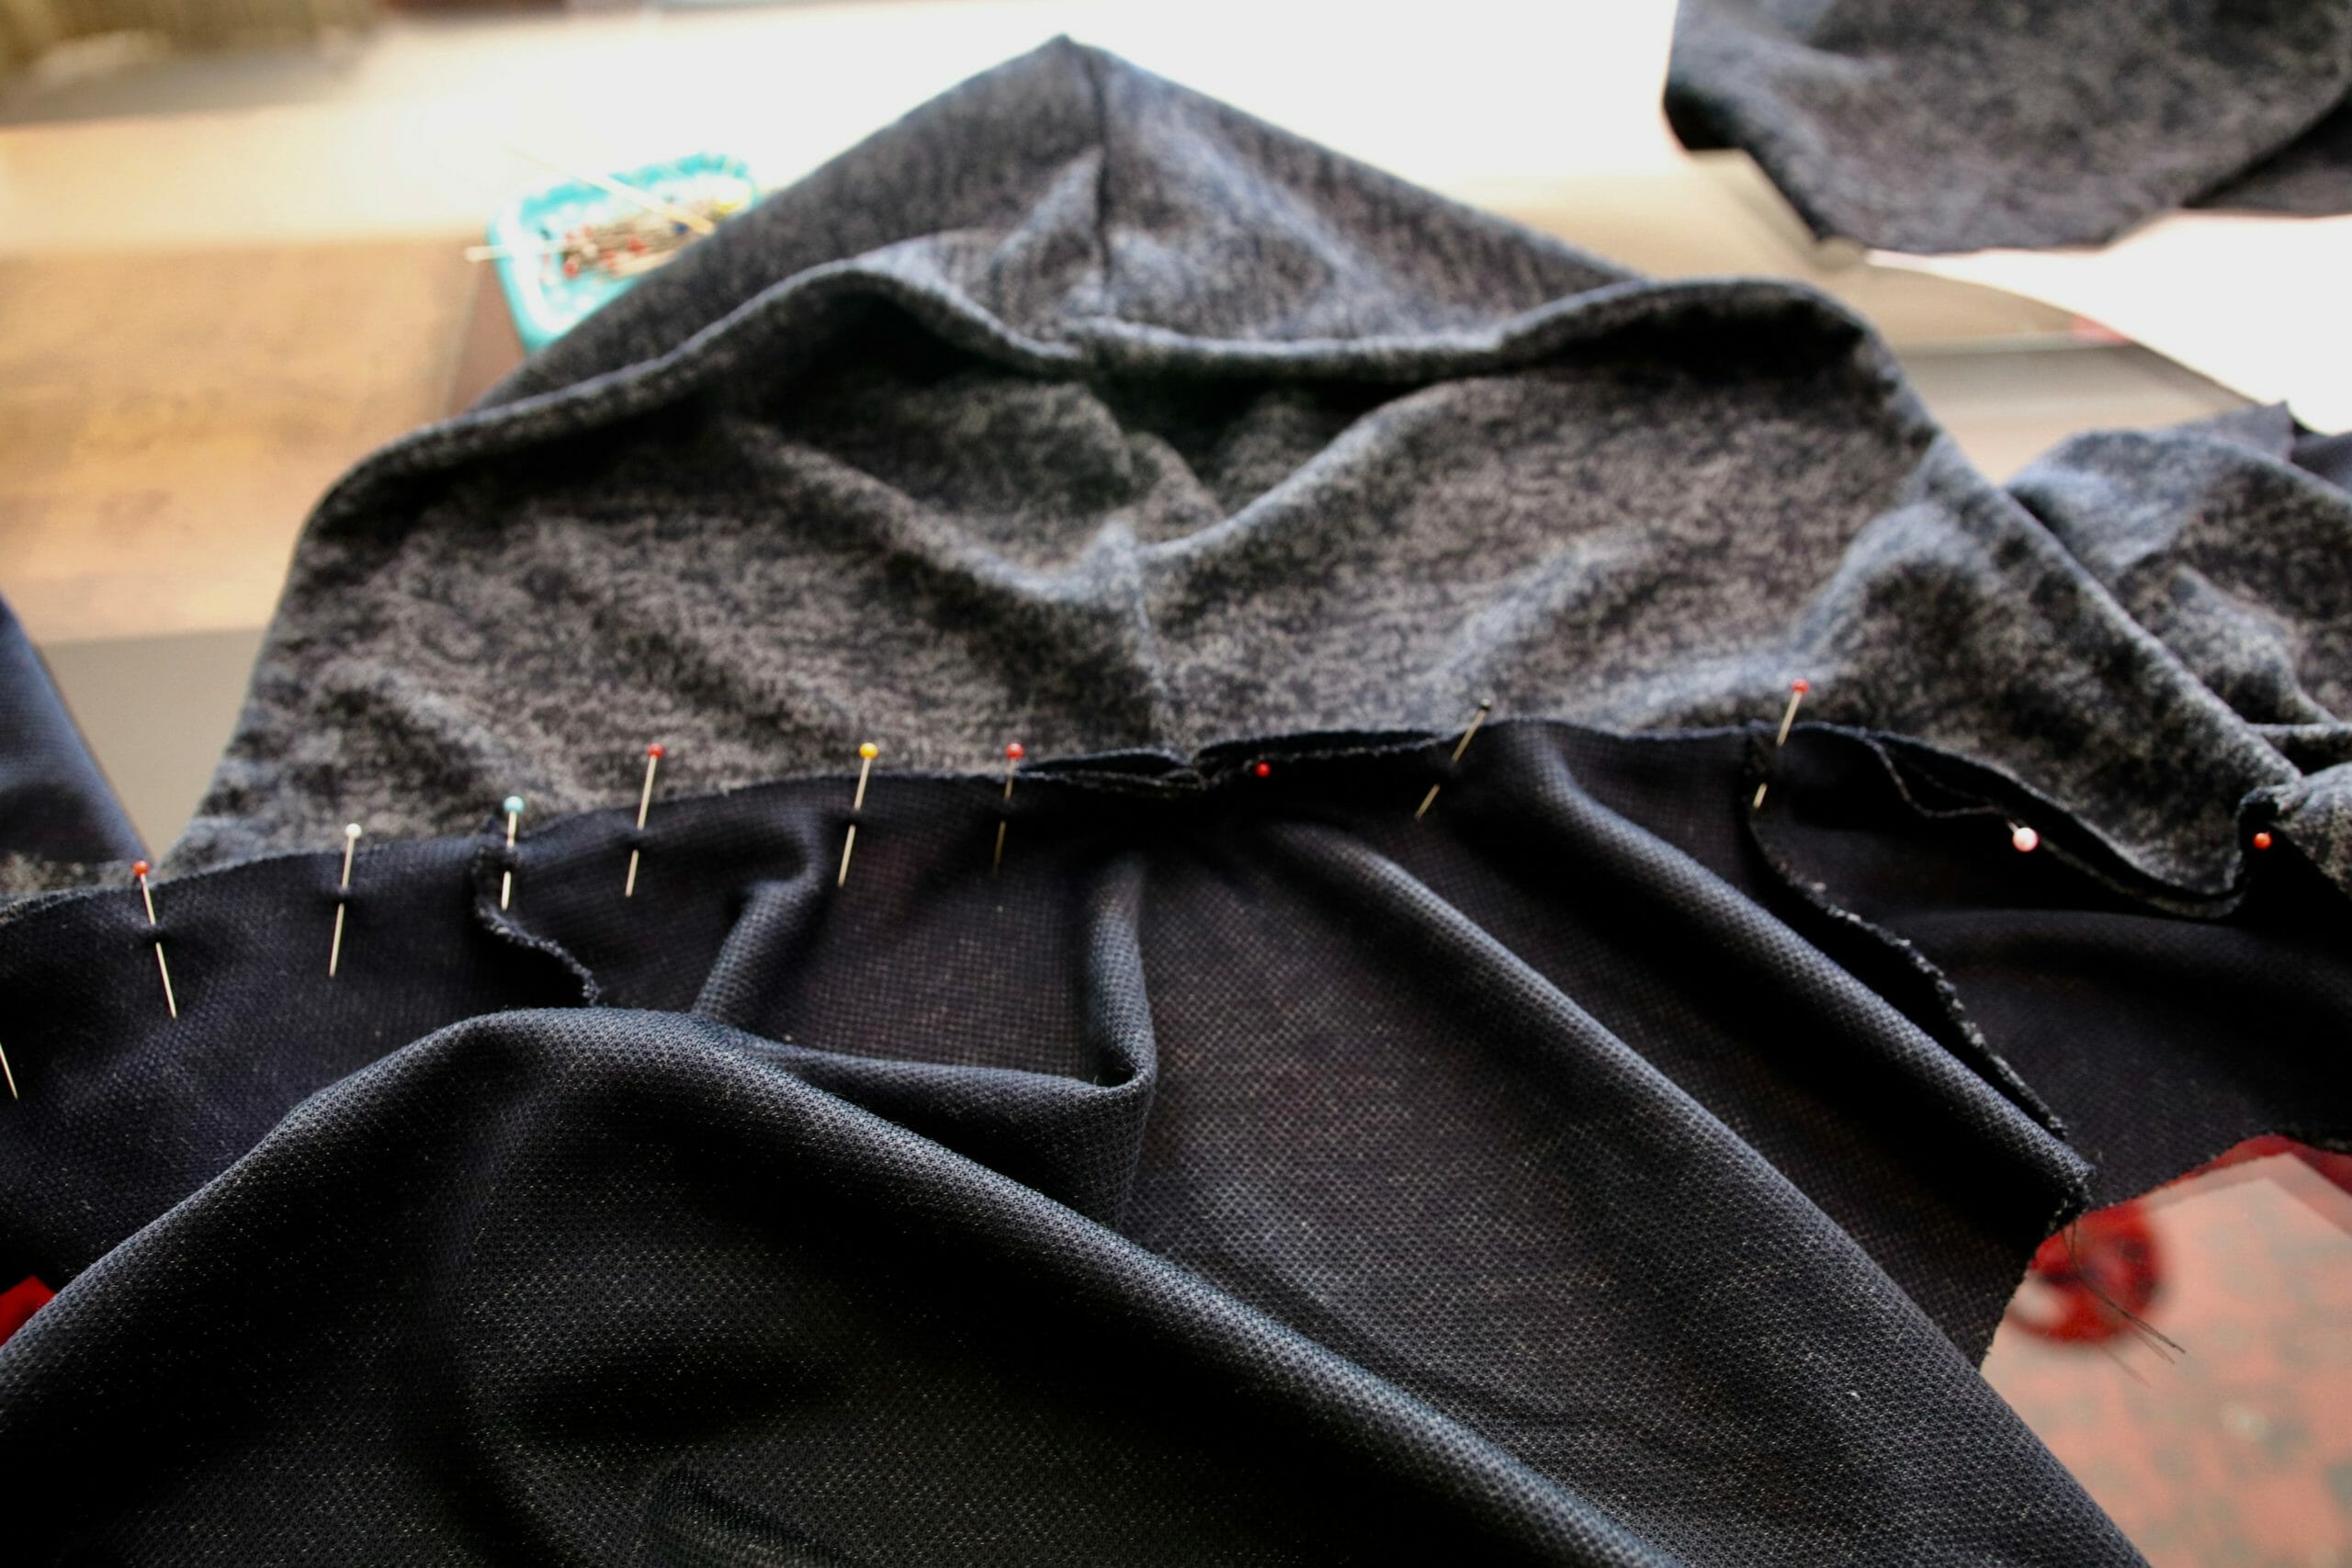
Pin the strip of fabric on top of the hood. I have joined the two strips together and I am aligning the seam of the strip with the seams of the hood.
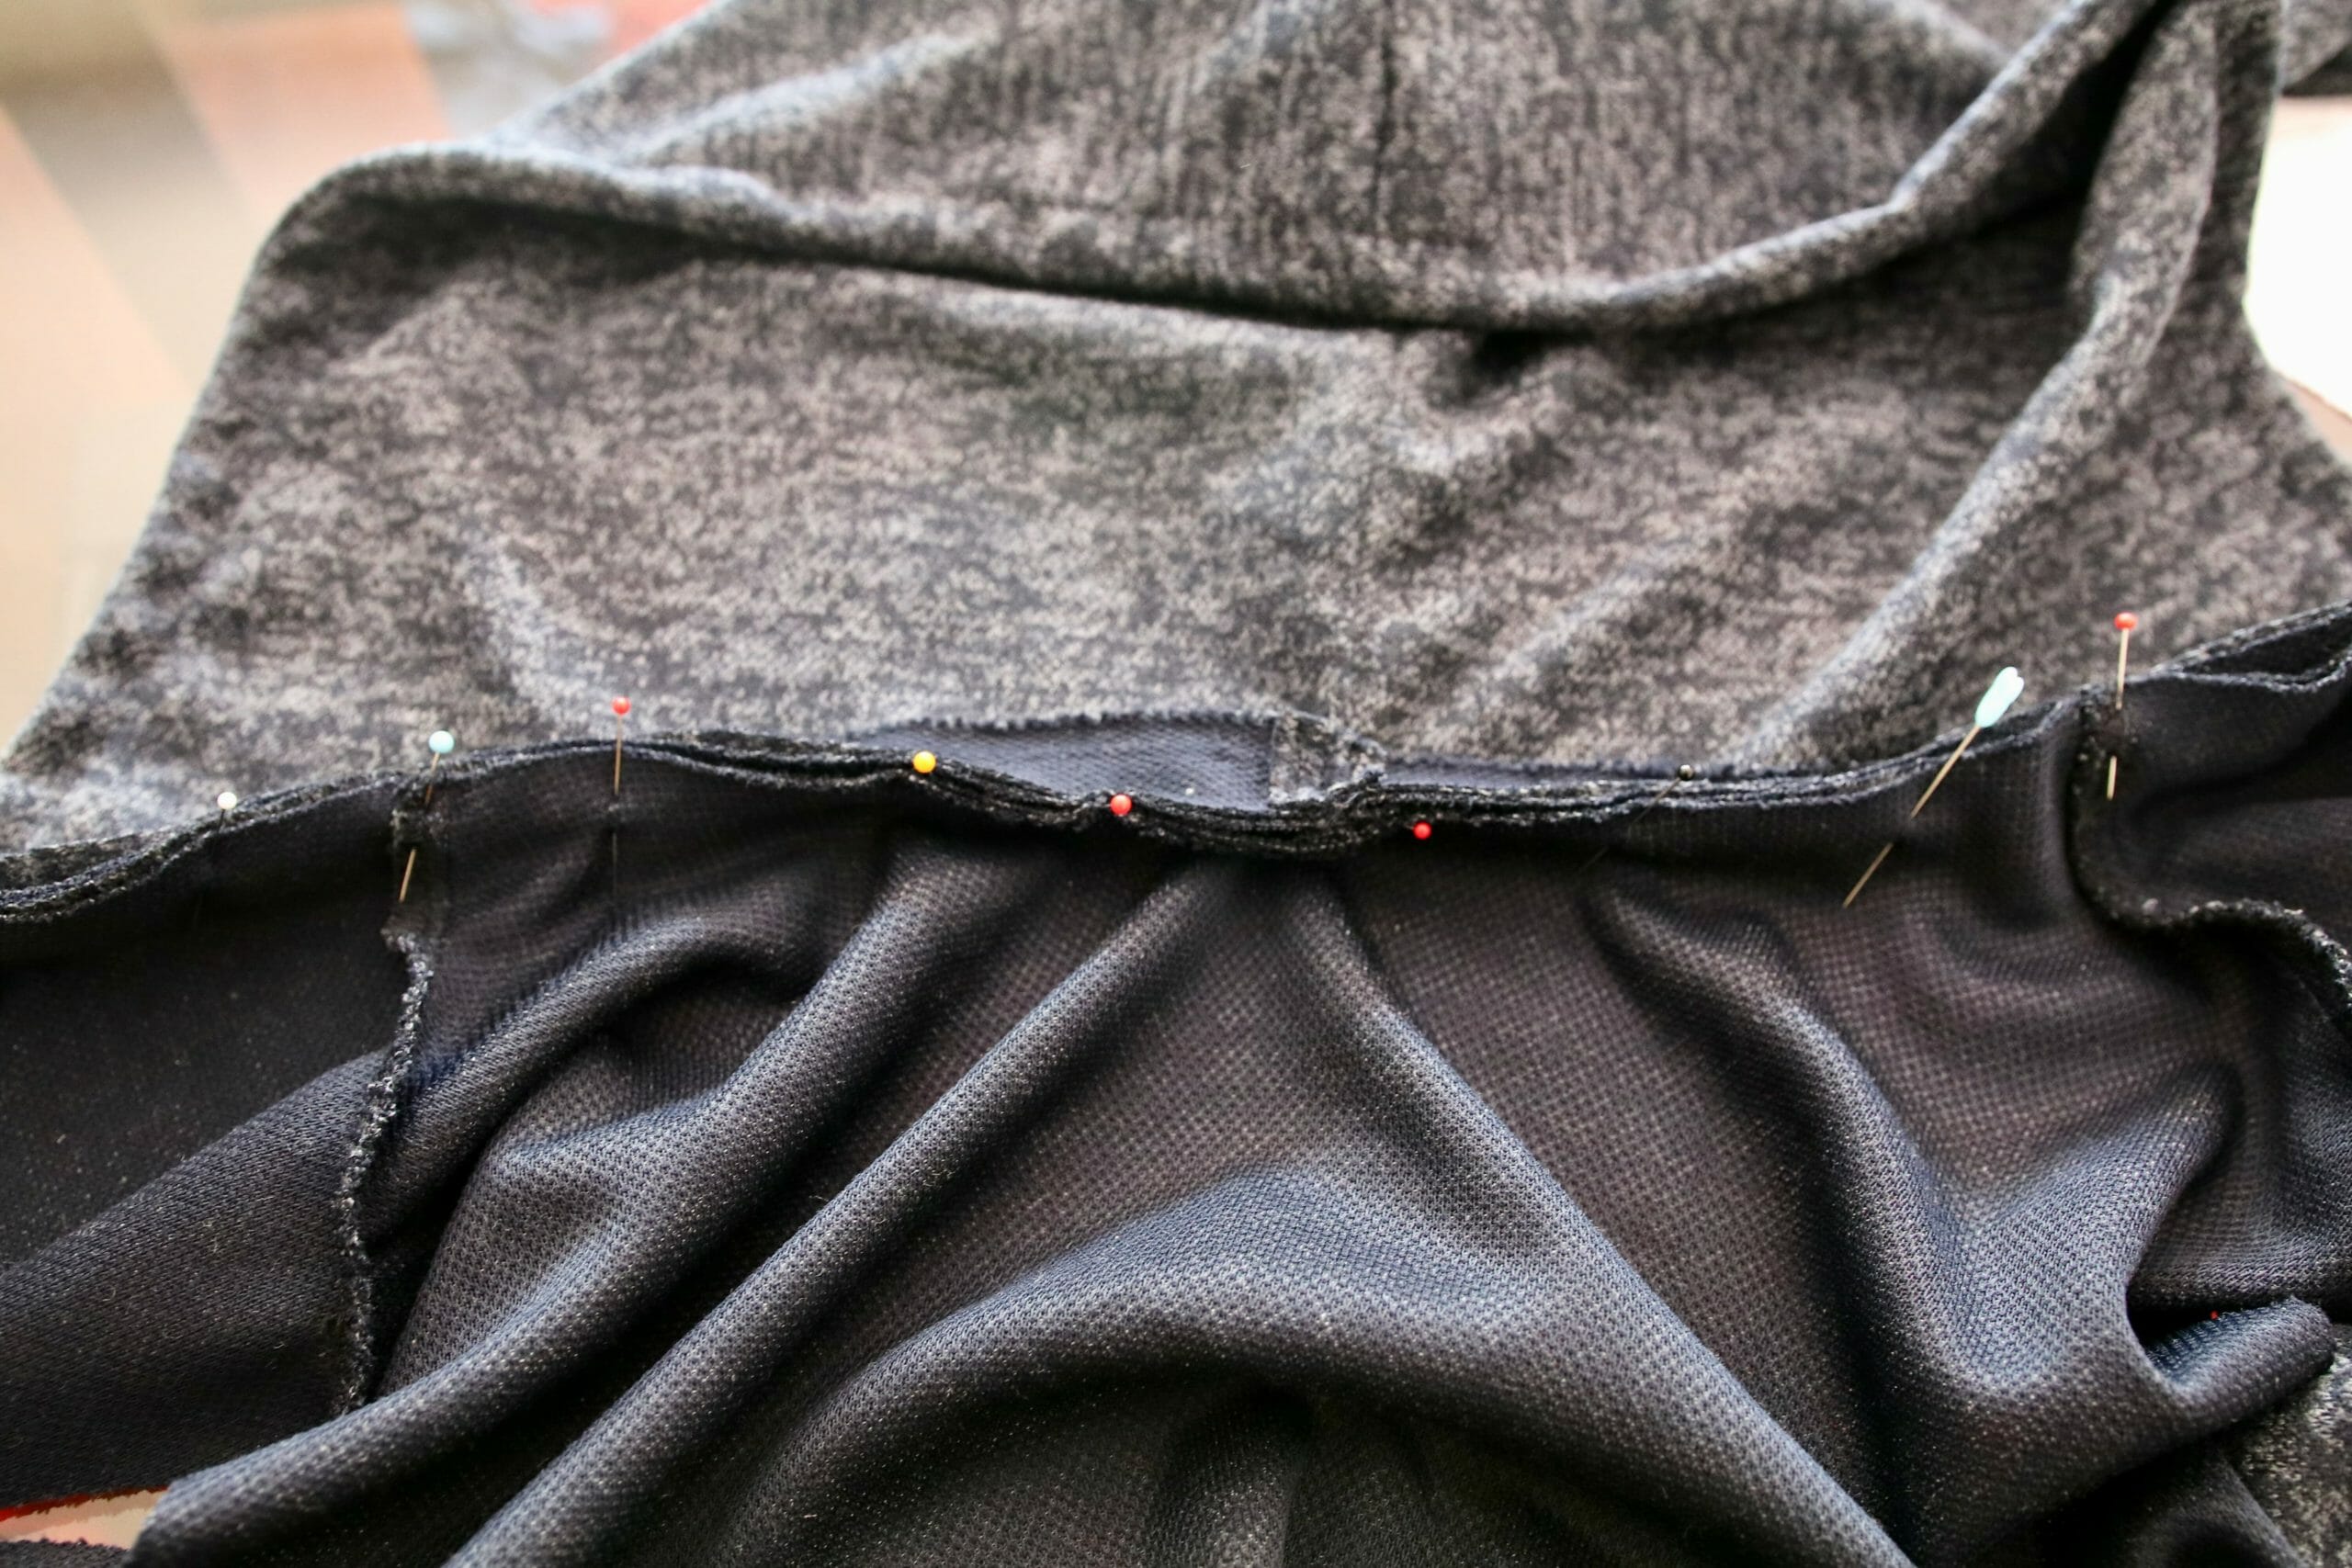
So you will end up with a sandwich cardigan+hood+strip of fabric. Pin the strip of fabric from the neckline to the front all the way to the hem then repeat on the other side. Sew the same way from the neckline to the hem on one side, then from the neckline to the hem on the other side.
This technique both conceals the seam allowance at the neckline and finished the front edge of the cardigan.
Step Five
Sew the sleeves to the cardigan then use your overlocker or zigzag the seam allowance.
Step Six
It is time to sew the sides of this hooded cardigan starting from the sleeve all the way to the hem. Overlock or zigzag the seam allowance open. This is my preference because when I go to make the hem it will lie nice and flat. When you overlock or zigzag the sides together there will be a lump at the sides.
Step Seven
Overlock or zigzag the hem keeping the sides seam allowance open.
Turn the hem 5/8″ and sew.
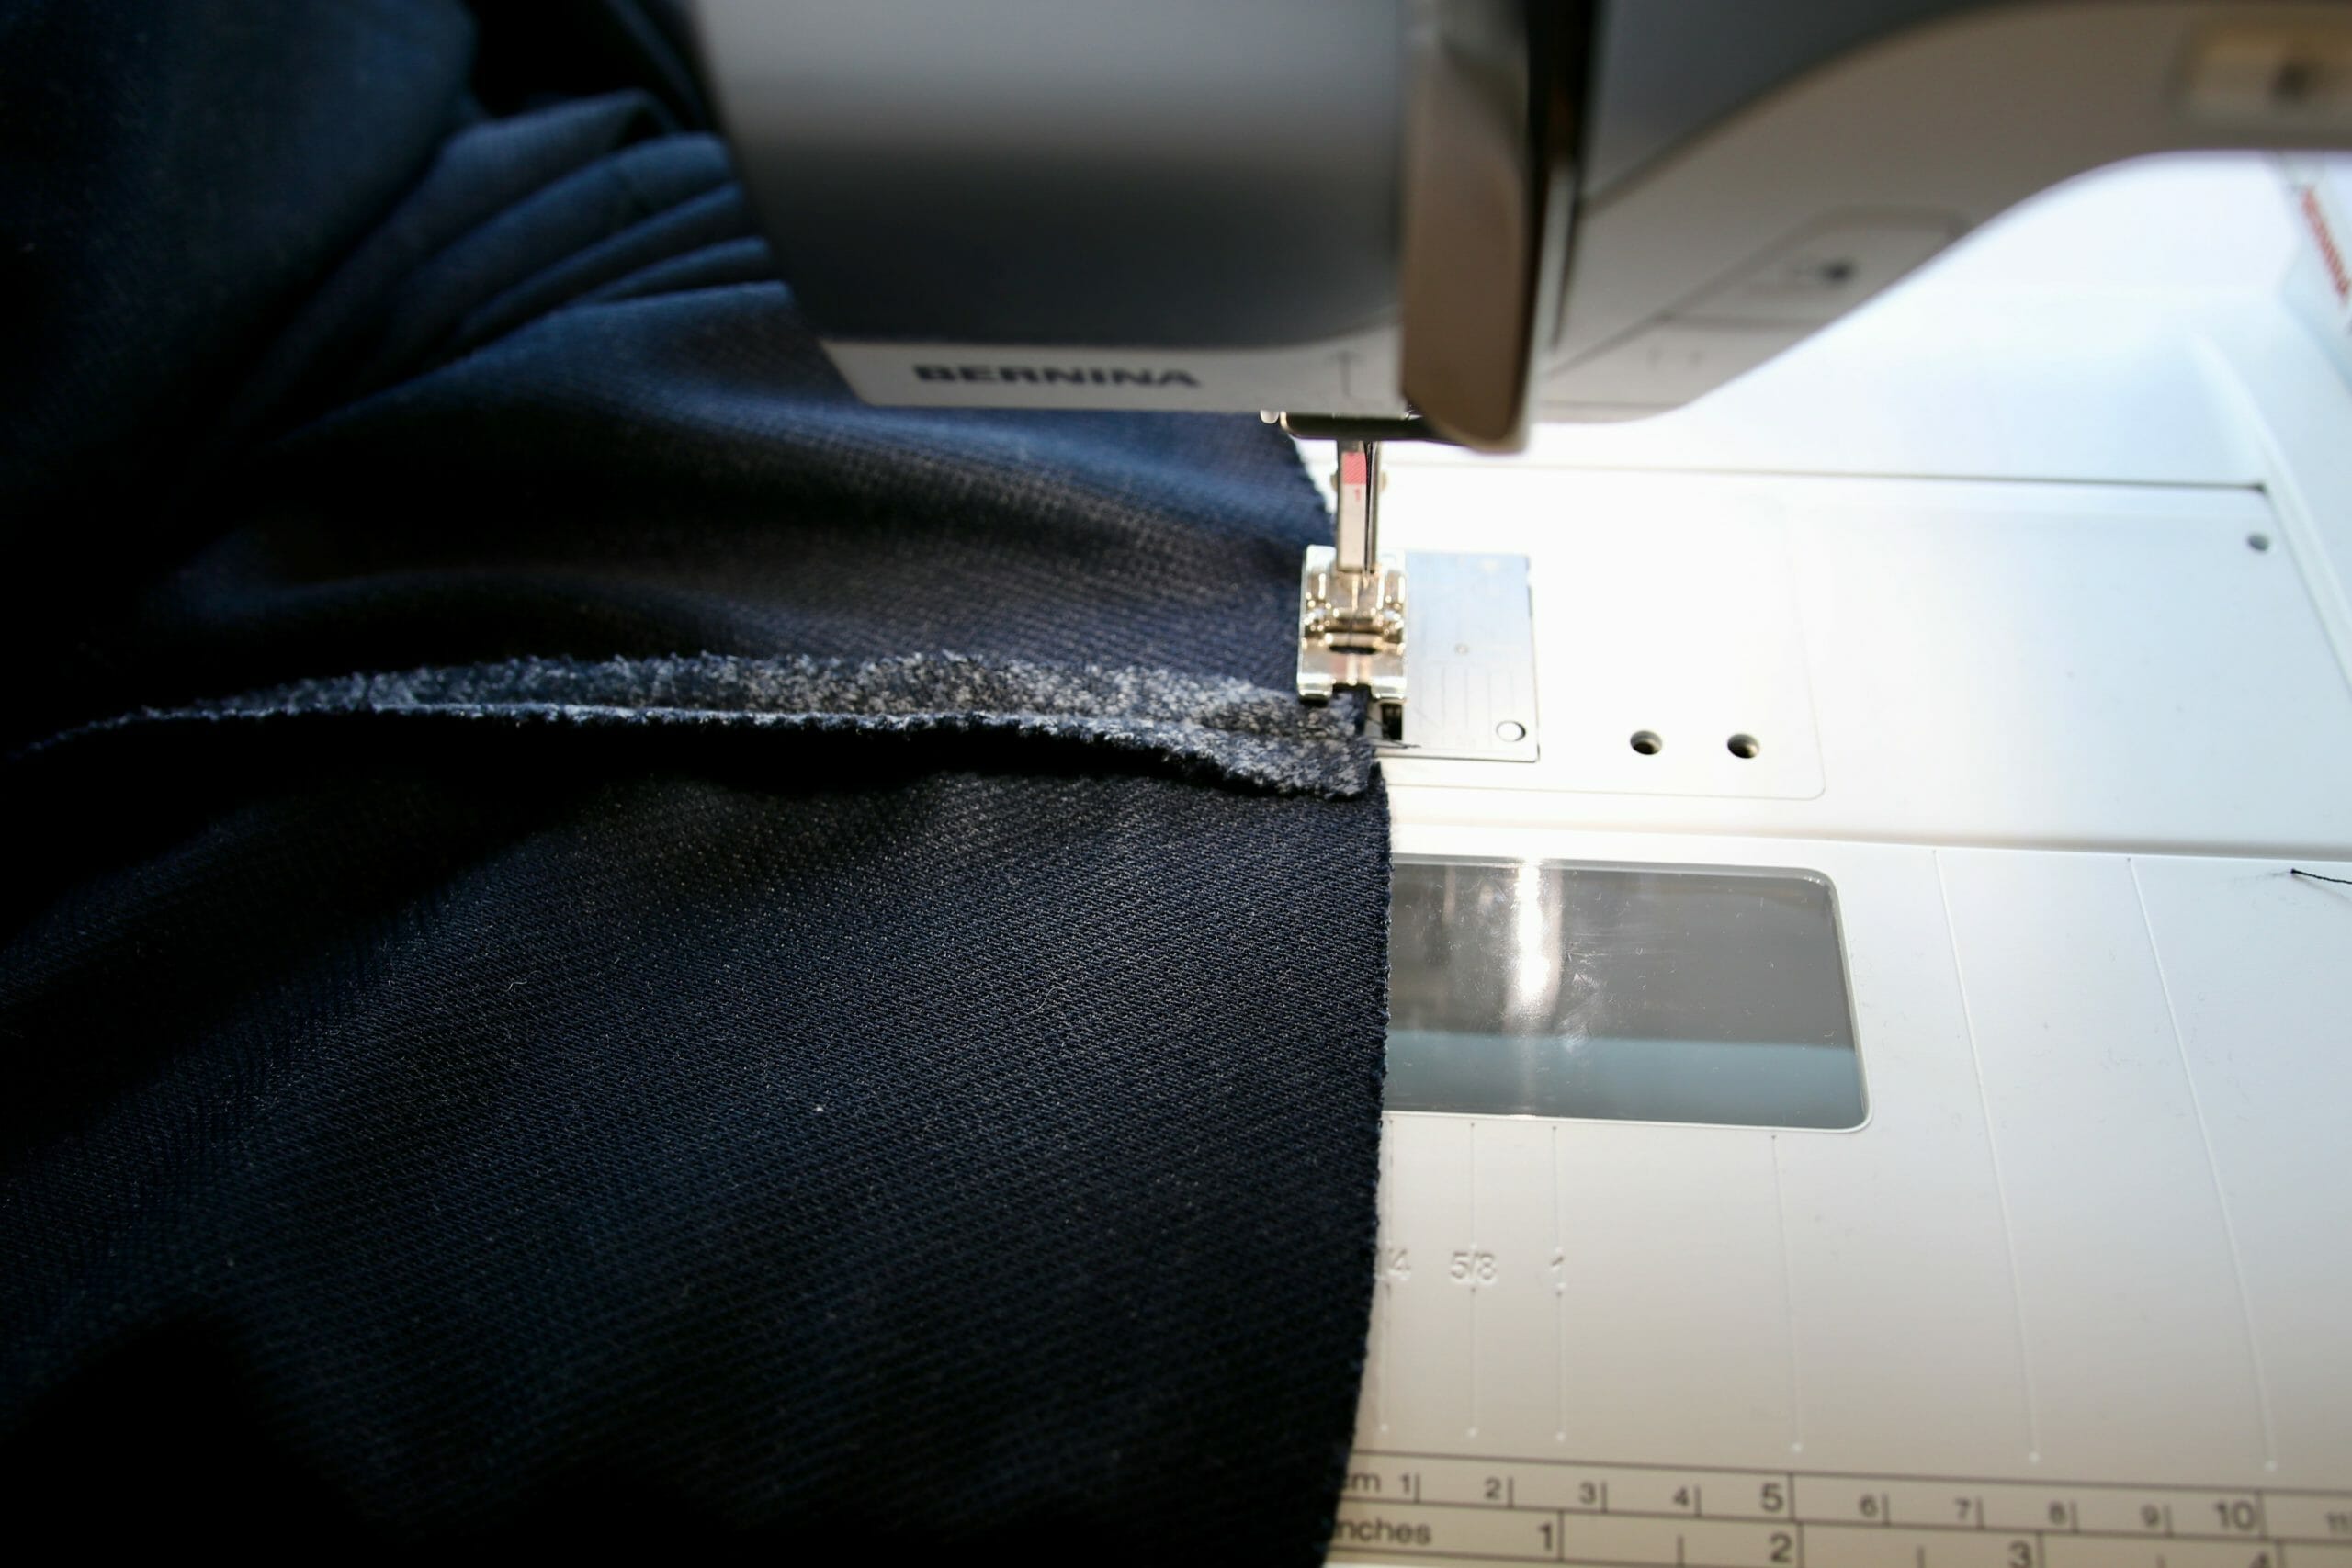
Step Eight
Now it is time to sew the strip down start at the neckline. Because we are using the selvage there is no need to overlock, but if you do not like the look, by all means, do pass the overlocker at the edge without cutting the fabric then stitch all the way to the hem. Repeat on the other side.

Why sew it this way you might ask? If you start on one side then finish on the other many times you will have fabric either missing or too much fabric at the end. Experience has taught me this is a better way to avoid mistakes. Since it is a challenge to unpick knit I rather avoid it as much as I can.
Hope you enjoy this week's project and the finished product. I'm looking forward to wearing it with a belt and double lobster claw where I have my wallet on one side and my car keys on the other. As always ladies and gentlemen, have a lovely time sewing.
Until next time, keep your scissors sharp!


Love the flexible and easy patterns. Thankyou 💕
Hi please can you tell me where I find the tutorial for the long cardigan , I have the pattern but not the instructions to make up
Thanks Maddie
You need to print them straight from the website; on the left of the screen, there is a print-friendly button please use it and you will have the instructions without the advertisement.
I have never sewn with sweater knit before. I see lots of sweater knits but they are not 4-way stretch, which is a little worrisome. Is it hard to cut out? How about sewing the seams (serger?) I LOVE this pattern but am a little intimidated! Definitely going to give it a go, though.
Hi Sunny, Please don’t be intimidated. The fabric is not hard to cut; you can use a serger; I mention an overlocker which is the same as a serger. Let me know how you did. Kind regards,MC
Hi Mayra, I really like the pattern. However, fabric.com is out of business here in the USA. I imagine that I could locate the fabric elsewhere.
Hmmm, I forgot about that. Thanks for the reminder. You can look for the same fabric on Amazon. Fabric.com was a subsidiary of Amazon.
Fantastic post — I have been looking for a project like this. Thanks! 😍♥💙❤
Very easy; I hope you make it.
Is the seam allowance already included or do I have to add it?
Hi Eva, Some aren’t, so you will have to read the instructions before cutting the fabric.
Please help the strip is sewn in step 3 al the way to the hem. So what do I do with the strip in step 7 again?
Hi,
I really don’t understand part 3, with the strip. What is the use? I can’t even see it in the pictures. I don’t know if you read comments here anymore since the pattern has been around for a while, but I would really appreciate some further guidance regarding this. Much love, Maria
Hi Maria, please read the first cardigan instructions linked on this post. It is done to sew all the pieces together give strength to the cardigan and finish the seam.
Fun and fast make, I was a little worried about putting the hood on but the instructions were super easy to follow and it came together without any need for a seam ripper!
Lovely pattern thank you for sharing it.
Yes, it is very easy to make, glad you found it that way!
I made one out of stretch blue velvet. It was the first time sewing a hood but the pattern and instructions made it easy. My daughter wants one as well!
Great pattern. Thank you for sharing.
Well you are simply amazing, love the fact that working with one of the most difficult fabrics in the planet did not faced you.
Thanks for this pattern ! I just got it printed and assembled 🙂 eeek ! Cannot wait to cut and sew .
I wanted to know if you have patterns available to print on A0 (shop file)? Just curious as it makes a huge difference .
Thanks again
HI Nicole I do not at the moment when this pattern changes from free to paid it will.
Just double checking, if I have the Easy Long Cardigan pattern, I only need to print out the hood pattern pieces to make the Hooded Cardigan, correct? I will make the back piece all one fabric.
HI Rose, no you need these one https://so-sew-easy.com/cardigan-pattern-many-occasions-part-one/
[…] week I will be showing you how to alter this cardigan pattern and will be showing you another look for your autumn […]
Could you use fleece for this pattern??
Great question, and no I would beyond Medium since it would look too bulky, I am working on a fleeced hooded jacket very simple lines you will be able have for free, so please hang in there.
Could I use brushed French Terry for this cardigan?
Yes, you can!
Looks fun to sew!
I am a little confused on the Step 3 instructions. What are the two strips of fabric you are referring too? Is it the back + the hood + front/shoulder pieces that make up the “sandwich”? And thank you for this, and other patterns! I recently lost a cardigan with a hood I bought from GoodWill, and was going to use it as a pattern.. but lost it first, this is so helpful!
Hi Sandy, the strip starts at the back with the hood then continues at the front of the cardigan. It will come clear once you have to attach the hood. Have you cut the fabric yet?
Merci
This pattern seems very easy to do. It will be a nice gift for my daughters.
Thank you
Yolande
Hi Yolande, yes it is very easy and I am certain your daughter would like it. XOX
How much ease does this have? This is almost my size, but that would depend on the ease
Why do your patterns require so many pages?
How would this be best modified for a straight body shape?
Hi Mike, you would have to measure the shoulders and chest area and see if they fit on any of the sizes if not your would have to increase the shoulders and do a full bust adjustment. Both very easy to make to a search on our site I have already covered both subjects.
I know you made it out of knit, but could a denim or flannel be used?
This is design to be used with knits only. You need the stretch for it to fall around the body with flow.