


 I'm always looking for ways to make my homemade bags looks more professional and although it does increase the cost, adding hardware such as clasps, feet, grommets, sliders, straps, rivets, studs, and handles really does make them look great.
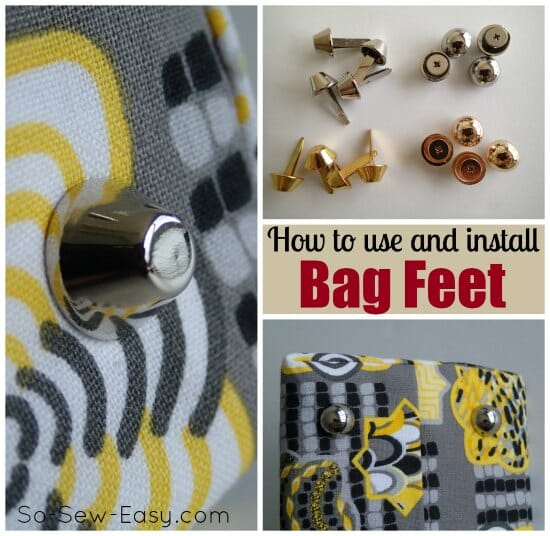
Today I'm looking at a couple of examples of bag feet and how we can easily install them.
 Both of these examples came from Amazon so you can find them easily if you want to add feet to any of your creations.
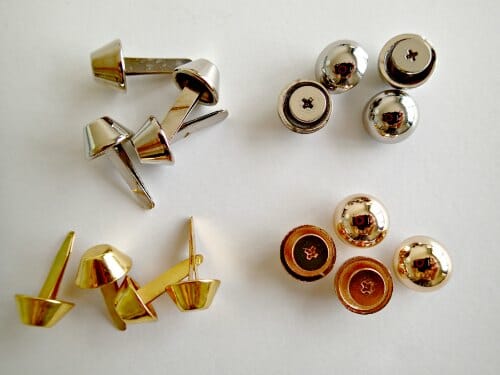
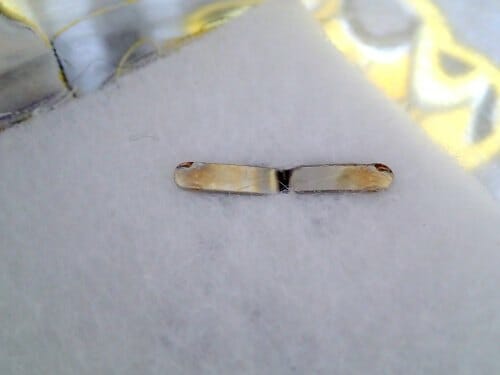
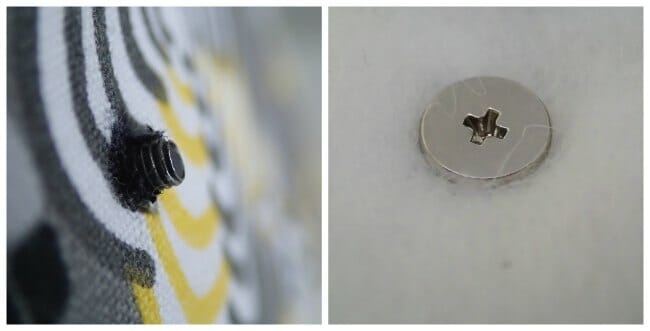
There is one you are probably more familiar with, the flattened cone shaped ones with the long prongs, and another that you don't see as often but are actually very versatile, these dome shaped ones with a screw fitting.
Let's have a look at how we can use them.
How to install Bag Feet – Do you have a ‘firm bottom' ?
Firstly, in order to install the bag feet, you need a bag with something in the bottom other than just fabric. This usually makes a flat and reasonably stiff bottom to the bag, makes it more hard-wearing, and gives the feet something to go through, other than just the fabric.
What you use depends either on what is called for in the pattern, or just what you can get locally.
Options:
- something stiff, light, and fairly thick like a foam core board
- something a little more flexible and thinner, like a Plastic Canvas
- a regular piece of thick and stiff cardboard, corrugated or even a couple of pieces of cereal box glued together if your bag is already quite sturdy
Adding the firm base to your bag
Whatever type of base you are using installation is usually the same. Measure how big you need the base, both measuring the width and the length. The base material usually sits at the bottom of the bag between the outer fabric and the lining so it doesn't need any finishing, although you could add a layer of fleece for a bit of a plush feel.
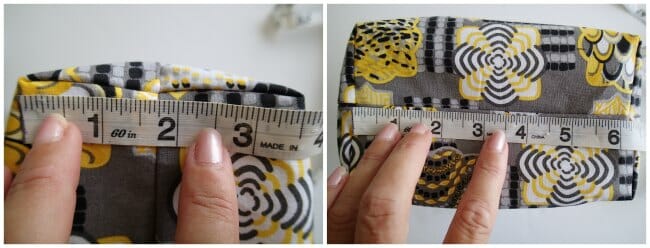
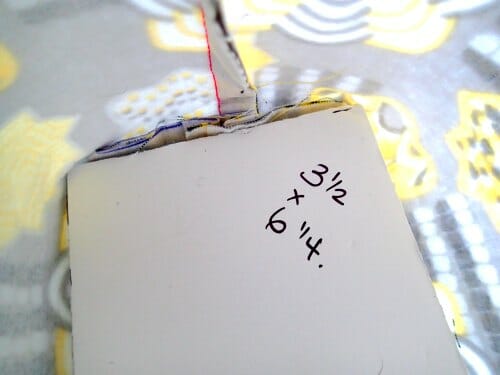
I'm installing a foam core base to my bag so I've measured both of the seam lines and cut my base to size. (Better to cut it a little big than too small, you can trim it later.) Push it down into the bottom of the bag, and where you have the boxed corners, pull the seam allowance up and fit the base tightly between the corners. Trim it a little if you need, to get a good fit.
If you want to add a little padding, you can place or glue a piece of fleece on top. No need to do anything else, the bag feet will hold it in place.
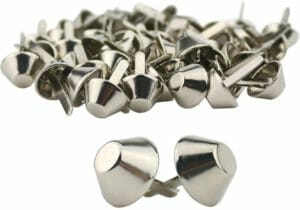
The traditional bag feet with prongs
These have long prongs and so can be used with any of the options for the base of the bag. As with most of the hardware, they come in a variety of colors to suit the style of the project and the fabric being used. These are usually very inexpensive and easy to find. Installation is easy too.
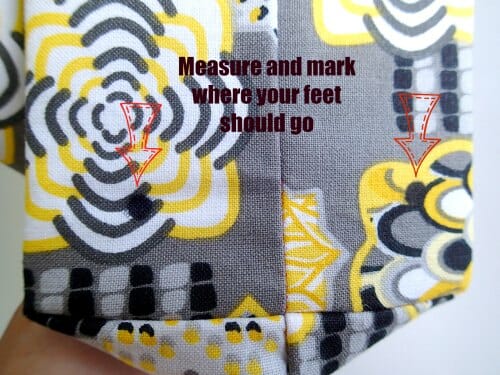
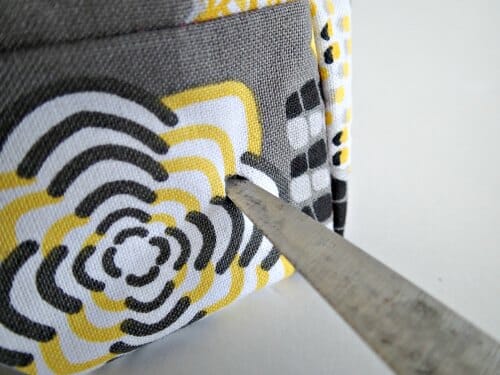
Measure and mark on the bottom of your bag where you want the feet to be. Now firmly hold the base in place against the fabric and use a tool to punch through both the fabric and the base at the same time. I've got one of these pointy sharp X-acto knives, so if you use the same, be very careful not to get blood on your bag!
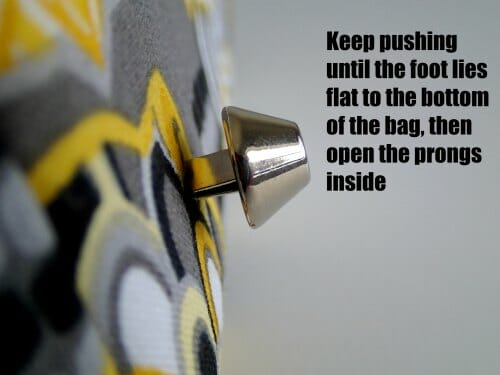
Push both prongs all the way through the fabric and the inner base, and then open up the prongs in opposite directions to hold the foot in place.
It's best to punch through and fit one foot at a time in case things shift around with your punching. So fit one, check things haven't shifted, punch again and fit the next. A quick and easy way to add a really nice touch to your bag.
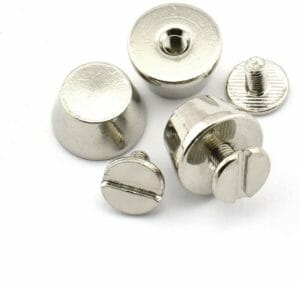
The screw-in studs
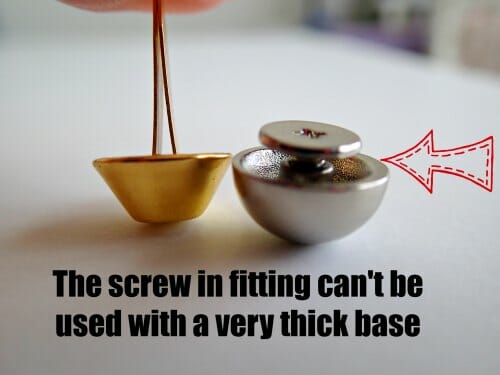
You'll also see these screw-in studs sold as bag feet, and yes these can look really nice. They are usually of much better quality than the ones with prongs, have a great shine, and are more hard-wearing. However, they don't have the same long prongs, just a small screw, and therefore cannot be used with a very thick base.
Installation is pretty much the same. Mark your holes, punch the first one. It won't need to be as wide as for the prongs but will need to be more round, so pop the point of your scissors through and give them a turn to make a hole in your thin base if you need to. (Obviously not your ‘good' scissors!)
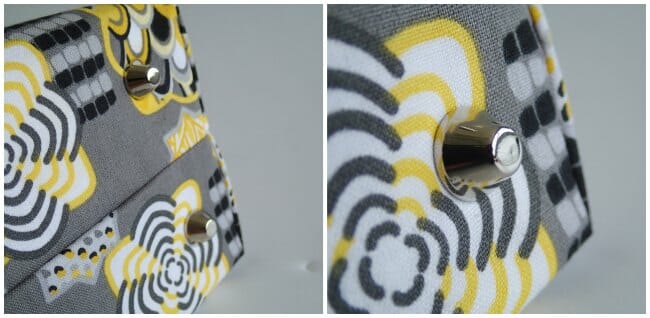
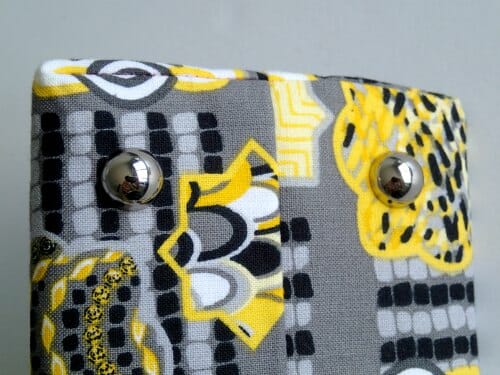
From the inside, poke the screw through the hole and match it up with the foot on the outside.
Turn the screw to tighten and your swanky foot is completed. Repeat for the others.
Alternate uses
These screw-in studs can be used in other ways on your way, not just as feet. If you look closely at the Zipper Top Tote bag, it uses ready-made handles, but see how those handles have studs on them – looks nice right. We can use the screw-in studs on our own handles too.
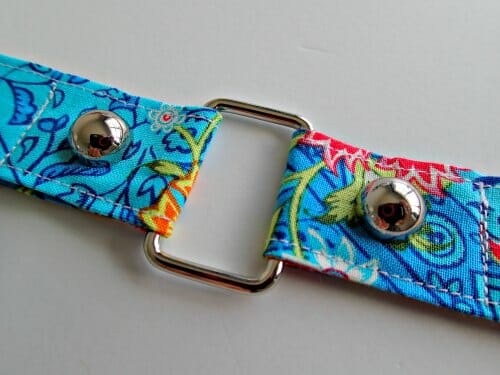
Here's an example of a regular fabric handle that has been given a bit of pizzazz with a stud pushed through and secured on the back. Looks good with vinyl and leather handles too. These studs look great as a design feature on your bags and don't just have to be hidden on the bottom as bag feet.
Sew your own bags and add hardware for a really smart look
Here are a few examples of bags you can sew that look great with purchased hardware.
Where to Get Supplies


Yes, Mayra, thanks for this post. I’ve shied away at times from making bags (and other items) because of being intimidated by not knowing how to add finishing hardware like these feet. Thanks for these instructions which demonstrate that at least the feet aren’t as scary as I thought.
I think that is a good idea thanks
I think it is too and want to put some on my canvas bag so it won’t get holes from wear. The issue is with the material being punched through, if not using leather or PVC leather, but rather material like canvas, cotton etc. how to keep the area around the hole under the bag foot from stretching, fraying and making the hole larger so eventually it spreads outside the bag foot and has a hole anyhow? Do you reinforce it in some way around that little hole that’s punched beneath the bag foot?
You could add an extra small square fabric to the inside to reinforce the hole, and use some fray check around the hole to keep from fraying. Hope this helps!
Thanks for this post. I just bought a duffel the inexplicably doesn’t have feet, and I wasn’t too keen having all the dirt and grime from the street and gym floor on my bag.
Went to numerous shoe and bag repairers here in Australia, and no one wanted or could install feet onto my bag (or wanted to charge $50 for the service).
Decided to just do the job myself based on your post. Bag has a cardboard base, so just bought screw in buttons per your post for $4. Thanks so much for this useful post.
Hi Leo, glad we could help. Thanks for your supportive comments.
Awesome! Thanks!
You got my vote naturally 🙂
Thank you very much. Jeri
Really useful – many thanks, as I am about to make my first ‘bag with a firm bottom’ 🙂
*Firm bottom* Hehe. !
I know! You’ve got to have a bit of fun…