


I was drawn to the idea of printing on fabric when I saw some amazing memory quilts shared by one of our readers in the sewing chat group. She used vintage family photos to create unique quilt blocks for her breath-taking quilts that will surely become treasured family heirlooms.
Sadly Facebook decided to mysteriously remove the lovely photos she sent me so I can't show you those, but here are a couple of other memory quilts shared by our group members using their own printed fabrics.
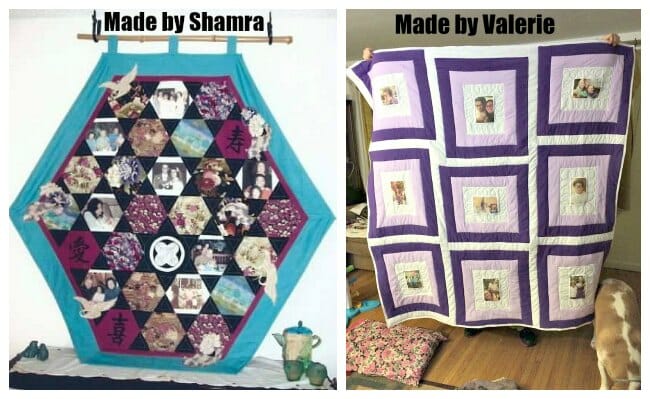
Of course, you don't have to just print photos, and you don't have to use them in memory quilts either. There are lots of other applications and reasons why you might want to print your own fabric. We'll take a look at a couple of examples.
Print your own fabric series
So how difficult might it be to get your photo, text or any other image onto fabric? Well, it's easy and it's hard – but there are several different options and several things that can go right and wrong along the process. We'll look at the whole process and the options that might or might not work for you, over this and the next two articles in this series:
- This one – How to print on fabric at home – 4 different ways
- Coming up next – Print your own fabric – what about washing and fading?
- Making your own sew in ‘designer' labels
- Last one – Using your print at home fabrics in a sewing project
Let's take a look first at how to get the fabric into your printer.
How to print on fabric at home
In all of these examples, I'm using my regular (old and cheap) Canon Multi-function bubble jet printer. It may also work on Laser Printers, but you'll have to test that for yourself. You'll need to make your fabric stiff and stable enough to feed through a printer successfully. There are several different methods, and I've picked the 4 most popular to try and test below. Here are my experiences.
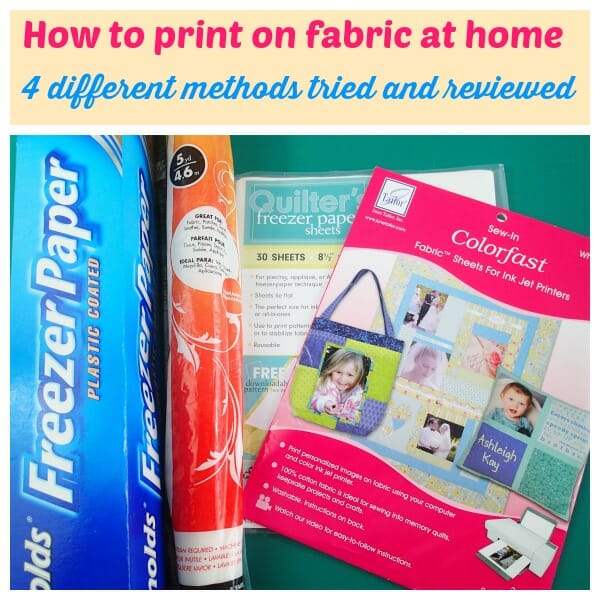
Method 1 – freezer paper sheets
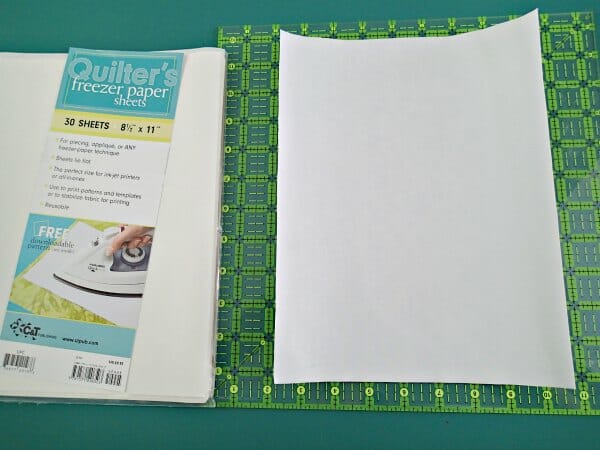
You can buy ready-cut freezer paper sheets that you simply iron with a dry iron to your fabric. My pack of 30 sheets costs $7.92 on Amazon. (US here or UK here.)
They went on quickly, easily and smoothly. Then trim around the sheet with scissors or a rotary cutter. Despite the description saying that ‘Sheets lie flat' mine did roll on the corners a little after fusing. I think one of my corners wasn't properly fused because it came away a little during the printing and created a smudge in that one corner.
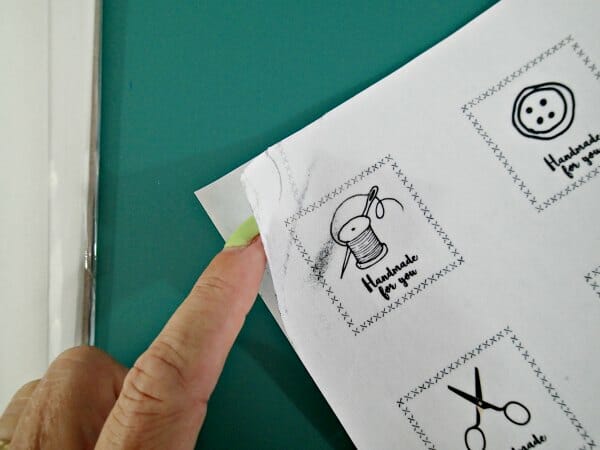
I tried it again with a second sheet, made sure the corners were good after trimming but that one was the same too. It came away during printing and created a smudge in the one corner. Not sure if it was my fabric, my printer or my trimming, or something else, but I didn't get perfect results with these ready cut freezer paper sheets.
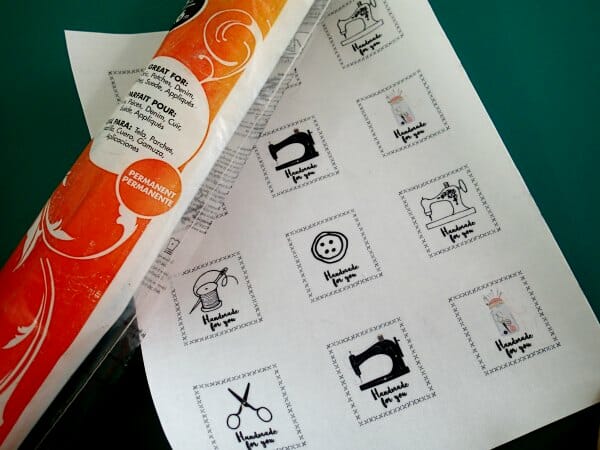
Method 2 – make your own freezer paper printables
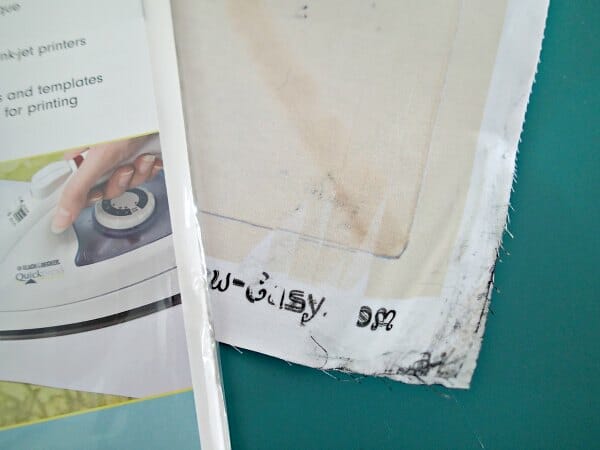
So assuming these freezer paper sheets are just that – sheets cut from freezer paper, can we simply make our own? I cut some freezer paper roughly to size, ironed it to my fabric and then trimmed the lot with a rotary cutter to a size to fit through my printer. The freezer paper went on easily and smoothly, felt no different to the sheets above.
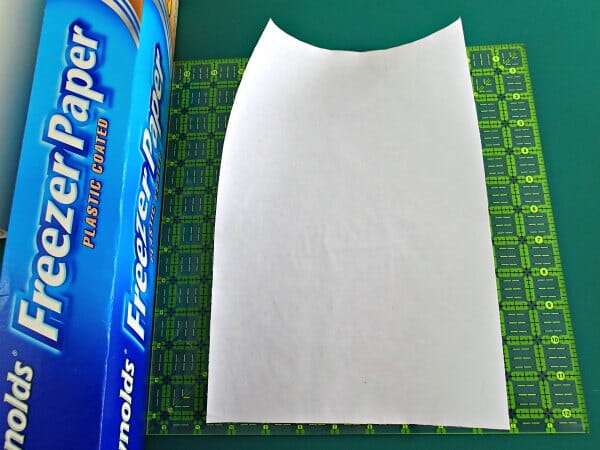
Obviously a little less convenient than simply pulling out a ready cut sheet, but it does mean you can make sheets any size you want, and that it would be cheaper than the ready cut sheets.
It's on a roll so I expected the end result to be curled, but it wasn't really any different to the curling on the ready cut sheets. It seemed to fuse better than the sheets and fed through my printer perfectly every time without any coming away or smudging. Right first time.

Method 3 – ready-made fabric printer sheets
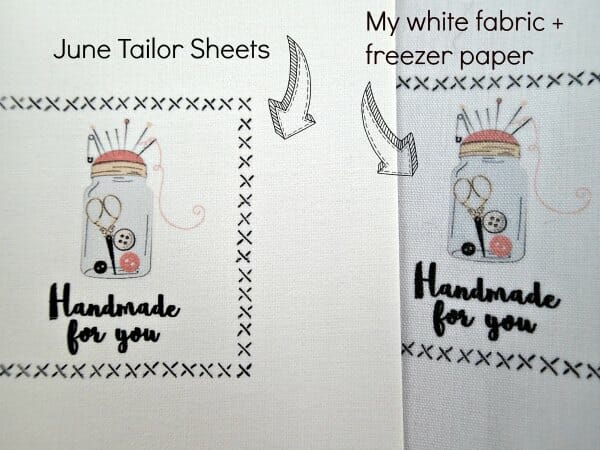
The most convenient and the most expensive method. I bought this pack of 3 pre-treated ready-made fabric printing sheets by June Tailor for about $10. (Amazon US here and UK here.) They also have another very big advantage – they are pre-treated with an ink-fixing treatment. We'll talk about inks and fading later on.
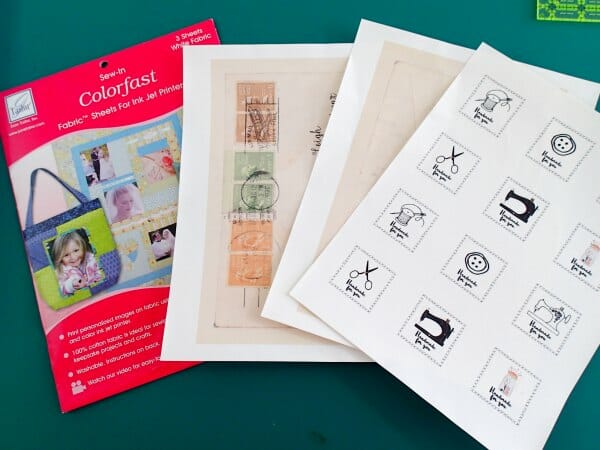
These were by far the most superior and for me, the best and most preferred method. The sheets were completely flat, thick and strong and fed through the printer perfectly every time, with no smudging. I was very confident in using them, and they gave a very crisp printed result, bright colors and a nice quality.
The color is described as white, but it was a little less bright white than the cotton fabric I was using. You can see here a comparison of color and of printing between my cotton fabric I was using with the freezer paper and the ready-cut fabric sheets in this package. Printing is generally clearer, brighter and crisper.
Method 4 – using a fusible web
I used the Heat N Bond fusible web to stiffen the fabric for printing in this final test. (Amazon US here and UK here.) Works similar to freezer paper but with an added advantage. Comes on a roll, so quite economical, and fuses to the fabric with a dry iron. Then trimmed to size same as the freezer paper method. Still curls when fused, but it was a little heavier weight than the freezer paper and fed perfectly through the printer every time, no smudging.
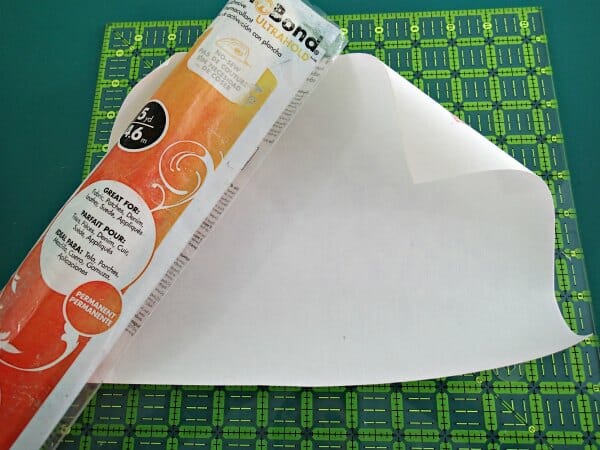
Added bonus – the fusible web is double-sided, so when you peel off the backing paper, your fabric sheet is now fusible and has a glue layer on the reverse so you can cut out shapes, photos, etc and fuse them to other projects or simply fuse them to another piece of fabric for strength and stability.
Pros and cons of each method of printing on fabric
Freezer paper – easy to use, making your own sheets is cheaper than buying the ready-made freezer paper sheets. Sheets might be reusable several times, but probably best not to. Possibility of some creasing, curling or smudging if your corners or leading edge aren't properly fused or have little threads.
Ready-prepared fabric sheets – easiest option and the best printed result. Pre-treated to be colorfast (read more about why this is important later), but expensive. Save for your ‘best' projects, anything that needs to be washed, and test print on the freezer paper method first. If you are going to choose – I recommend investing in these sheets instead of the cheaper methods. If a thing is worth doing, its worth doing well!
Fusible web – leaves a fusible layer on the reverse of your printed sheet – this can be an advantage or disadvantage depending on how you plan to use it. Easy to use and reasonably priced.
Coming up ….
Next in the series, we'll look at print settings to use, and whether your printed fabric is washable or not, and what to do about that! Until then, start to gather a few of those fabric printing supplies together because I'll have some printable files to share and we can work on a project.


Please make this printable. Thank you.
My 5yr old granddaughter is a gifted artist. No exaggeration. she Draws better than most adults. She made a card for me with two beautiful birds which I would love to print on fabric but not for quilting. I would love to put it on a skirt of dress for her. She is so proud of it. Do u think it would work as an appliqué?
Many thanks for this great article and easy-to-follow instructions. Am keen to try on my first grandaughter’s quilt, now 16 (started in 2004 awaiting completion) to add my photo and date to the back – maybe complete with snail (the rate of my progress)!
Hope you finish it! let me know how it went.
I have been printing on fabric with freezer paper but only one way!
I was thrilled to read this post because I’m making a quilt for my first Grand-Nephew, due to be born in about 5 months. I want to attach a label dedicating it to him and had no idea other than to make something by hand on white fabric with an indelible pen. Not good – my hand printing is UGLY! Now i can create something lovely! Thank you so much!
Maybe this idea is be covered in a later post but I saw a segment on Quilting Arts that I thought was brilliant. They had run out of a fabric and needed a little more or an antique quilt with damage needed a replacement piece, so using a small piece of the desired fabric, scanned it into the computer, photo copied, pasted it to the scan as many times as needed to make enough fabric then printed it on white fabric. I’ve needed small pieces for both these situations but just didn’t quite get there mentally.
Also, I used the freezer paper, from a roll, method to copy family American Civil War letters unto off-white fabric for the 4 – 8″ center blocks of a sampler American Civil War quilt. I got the idea to make this quilt when I discovered the letters in a box of miscellaneous items we inherited from my husband’s family. I used the ACW block patterns posted on Barbara Brackman’s blog, one per week for over a year, and made 60 pieced blocks. I also printed the name of each block on sashing to go above the blocks. I started this quilt 10 years ago and then for whatever reason (?) stopped working on it and it was added to my tall mound of UFO’s (UnFinished Objects). I recently made a rule for myself that I could NOT start a new project before I completed a UFO. So I got that Civil War sampler out and set the blocks together with said sashing with alternating navy blue and gray corner squares, the colors of the North and South armies, then put 3 borders on the outside edge, brown, gray and navy blue. I’m going to quilt with the Baptist Fan pattern on my longarm very soon. It’s time for this quilt to actually be a quilt.
Thanks for your blog. I copy many of your patterns and ideas.
Hi Jan, I do hope you get to make and share your finished quilt with me. I would love to see it. I have to admit I too have a whole basket full of UFO’s the oldest dating back 22 years ago. Thank you for using the patterns and ideas in this blog. Kind Regards,
Great information. I have purchased the already fused sheets of fabric. Pricey but needing just one more sheet for a project. I decided to try my own with the freezer paper. I cut a little larger than sheets for printer and fused my fabric. Then I trimmed to size got Great results. Even though I have now purchased more prefused, I am willing to try my own again. I can also print on colors, or lighter print fabrics, whatever I want. What have you tried with other methods like bubble jet liquid that you brush on and let dry before printing?
How do u use a print for a bigger size? Say I would like to reupholster and add a picture to the fabric which is wide. Is there a method I can iron on?
There are but you are limited by your printer. Most printers can accommodate an A4 Size paper.
Soy what about the ink? how do you fix it so when you wash the fabric it doesn’t move or erase?
Am I correct that the design is printed directly onto the fabric rather than onto a transfer that is ironed to a T-shirt or other piece of cloth?
Great Info.
Would like to see heat presses versus irons for hats and shirts, with applique.
Maybe even cutting machines.
Great tutorial! Thank you. I think I would have to read this over and over while doing it. It is complex but you nailed it with your instructions and thank you also, for your comparisons. They are invaluable!
Thank you for the great tutorial. I will be printing off a fabric print that is greatly reduced in size for a dollhouse.
Sorry for being dim,, you use the inkjet printer to print on the fabric side ……doesn’t that use a lot of ink or.smudge? The freezer paper or fusible web is just to make the plain cotton fabric more sturdy? Does this only work when printing on cotton or could you use felt, polyester cotton, silk or even fusible web side to make a pattern?
This was a great read, used to do this years ago when I made a 50 HS reunion quilt. Made a house and put before and current photos of each person in the windows. Matched each house in fabric they liked. As red/white/blue house for the retired service person and etc. Think Annie was asking do you dry iron on the dull side of the freezer paper or the side which has a shine on it? Marge
Have you ever tried to print on marine vinyl or any similar vinyl?
I’ve used the freezer paper method for years. I use a piece of light cardstock with a piece of double stick tape across the top. I stick the fabric to the tape. No problems. Feeds like the spendy sheets. The tape lasts for several printings. When it starts to get less than full stick across the paper, just pull it off and put on another piece. You could try putting on new piece over the old. You just don’t want to get it too thick with tape at the top.
How do you get the photograph on the fabric?
The same way as you would print onto a sheet of paper. Use one of the methods above – attach a piece of fabric to paper/freezer paper as per instructions above then feed it through your printer just as you would a sheet of printer paper and use whatever software/programme you would normally use to print an image onto paper.
I love this tutorial. Since you mentioned the questionable use of a laser printer let me touch that topic. Do not use a laser printer for anything that has adhesive on it or a meltable surface. Laserjets work by melting the ink onto the page with heat. Well I guess it would be silly if you were melting it on there with cold. Anyway, things like wax paper will melt in your laser printer. You can buy special types of transfer paper for laser printers. I had to replace the entire roller assembly in my laser printer after using T-shirt transfer paper designed for inkjet. Be sure to check for anything you buy and make sure it specifically says for use with a laser printer. I hope this saves somebody a lot of money due to my mistake.
Thank you for taking the time to share your experience! I hadn’t thought about how a laser printer works!
Can you share what kind of transfer paper you used for your laser printer? I am needing to make a memory quilt using photos and all I have is a laser printer. Thank you
I have used the white and color fuse on paper in a quilt for my oldest grand daughter, to print pictures of her life up to age 12. It turned out very well, loved by both her and parents. I don’t know about washing it, because they live about 130 miles from her and being handicapped don’t drive there as I would like.
Thank you so much for sharing this free information, it was very easy to follow. I look forward to more.
Good article. Appreciate the pros and consof each product. Did you test on inkjet or laser printer?
Inkjet.
I don’t really see any instructions for how to use the paper, etc. Do you print on it? Which side? Then what do you do? Do you iron it on? How hot is the iron? How long do you iron it? I’d really like instructions.
Diane – When using freezer paper as it says above “you simply iron with a dry iron to your fabric.” then feed the fabric through your printer. With fusible webbing you iron that onto your fabric and again feed fabric through the printer. The ‘ready made fabric printer sheets’ are ready to feed straight through your printer.
Hope this explains it well enough.
Anne