


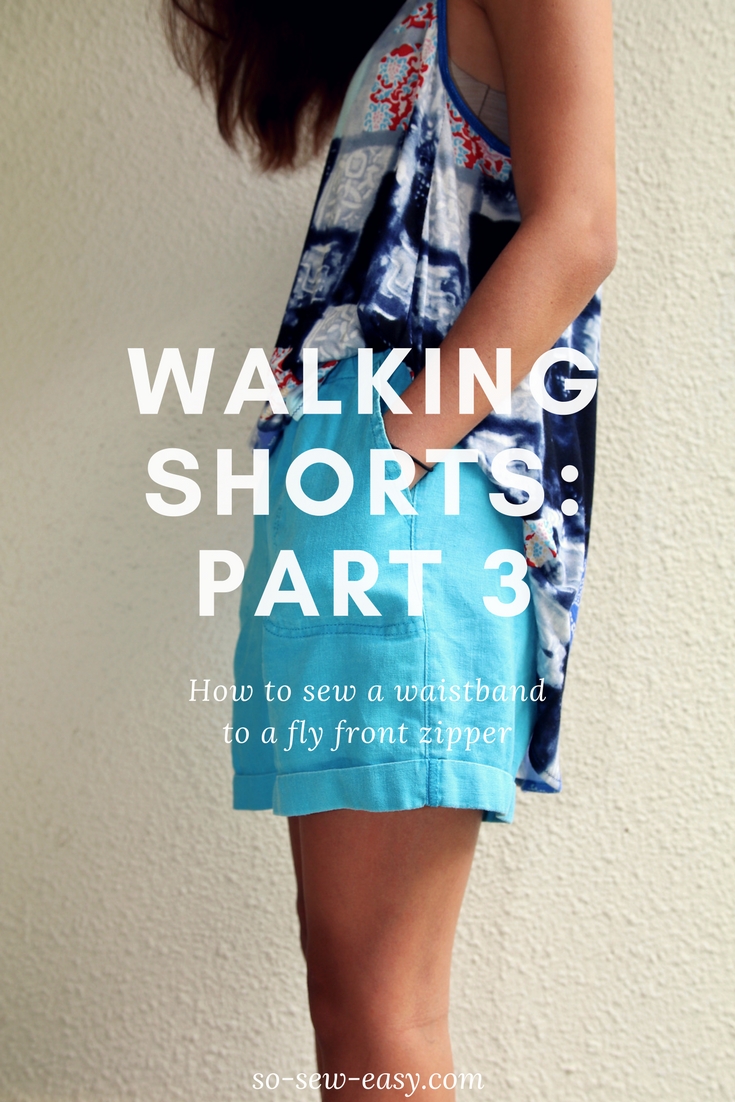
 In this third part of the Walking Shorts Sew Along, we will be sewing a waistband to a fly front zipper. But before that, I will be showing you how to trace the waistband so you can learn the process from pattern making to final sewing.
We are doing a straight waistband, so it will be easy to draft.
If you have missed the first two parts here are the links to take you there. Please read thoroughly the first two parts so you are able to follow until the end of the sew-along.
Walking Shorts Pattern & Sew-Along – Part One

Walking Shorts Sew-Along –Part Two: Slant Pocket and Zipper

Materials and Tools
- Fusible interfacing according to the weight of your fabric
- pattern making ruler or a meter stick
- measuring tape
- grading ruler
- button
- buttonhole foot
- thread to match
- patternmaking paper
Step Seven: Measurements Required to Sew and Trace a Waistband to a Fly Front Zipper
- Measure the waist of your shorts
- Divide the short's waist circumference the following way: Back, front left (button location) and front right (buttonhole location)

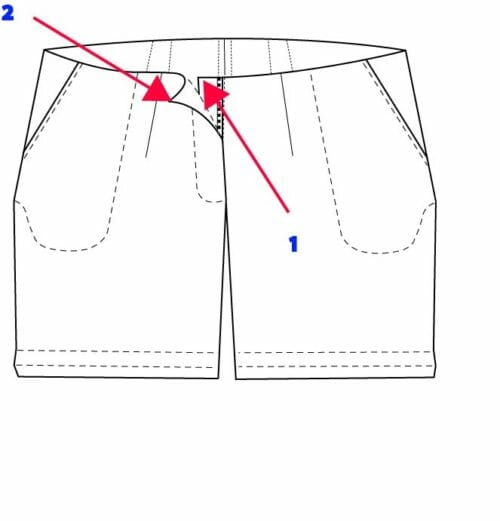
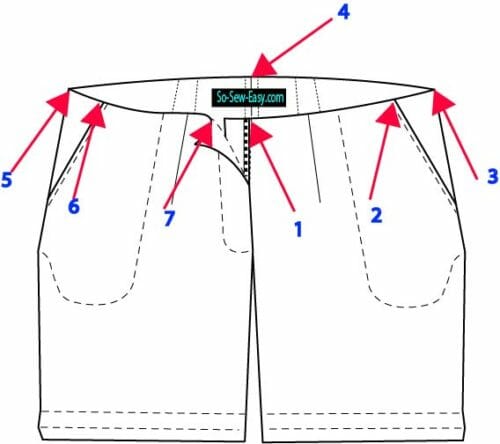
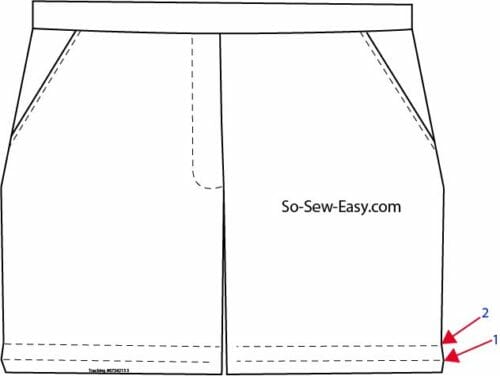
Step Eight: How to Trace the Waistband
I have to add before we continue that the following steps are for a straight waistband, not a curved waistband. Both types will use the same markings on the pattern. Starting on the left leg where the button will be located.
- Front center
- Left Pocket location
- Side seam
- Center Back
- Side seam
- Right Pocket location
- Center front
Trace a rectangle with the measurement you have taken from your shorts by 3 inches (7.5cm). This will become the interfacing pattern (B)
Waist measurement of shorts X 3 inches (7.5cm) 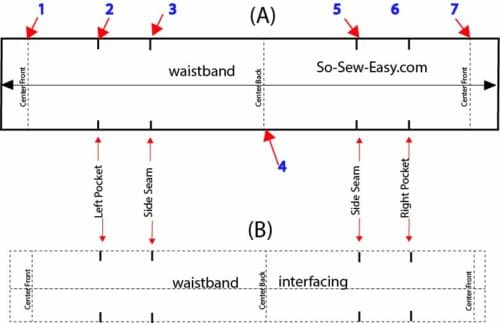
Retrace the rectangle with all the pattern markings and add the seam allowance and you will have (A), see drawing above.
Step Nine: How to Sew a Waistband to a Fly Front Zipper
This is the easiest way to sew a waistband, guaranteed!
Cut the waistband following the direction of the grain line. Cut the interfacing using the pattern you made, see the drawing (B) above.
Fuse the interfacing to the waistband on the wrong side of the fabric using an iron. Fold the waistband lengthwise matching all the notches and iron. This is done so it is clear where the middle is. We need the crease to guide us when finishing the waistband.
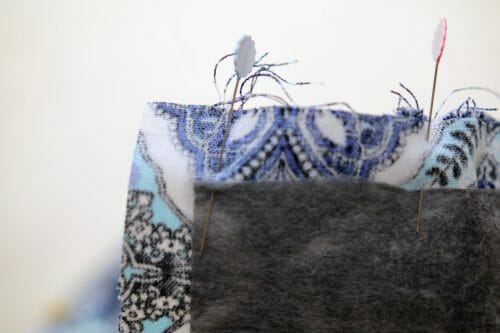
Pin the waist band to the shorts starting on the left leg leaving the seam allowance out. 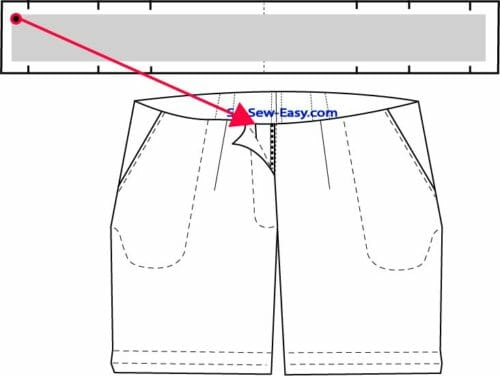
 This is how it should look.
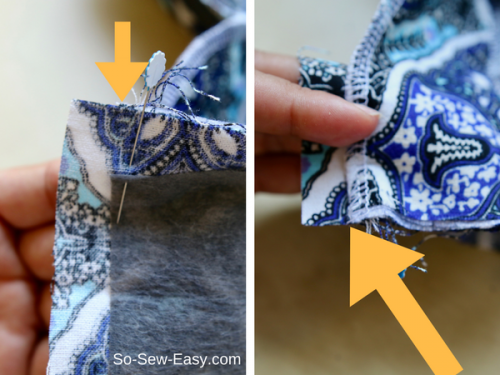
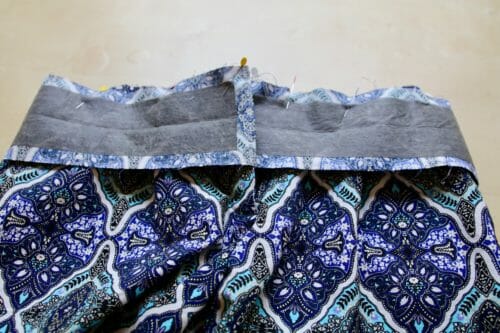
 Make sure to match all the notches to the shorts.
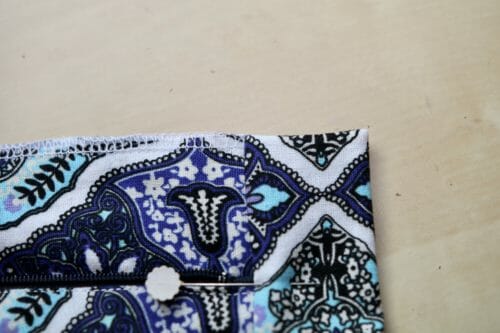
Start sewing at the beginning of the band. This stitching line will help you finish the band perfectly.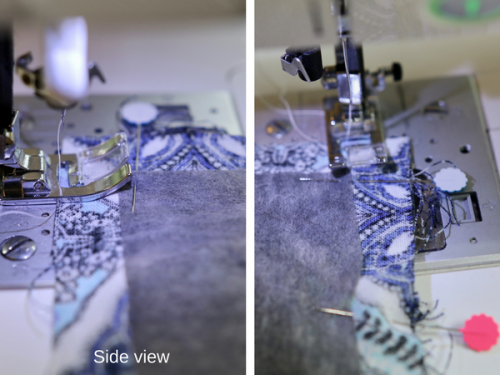
Press the seams upwards or towards the waistband.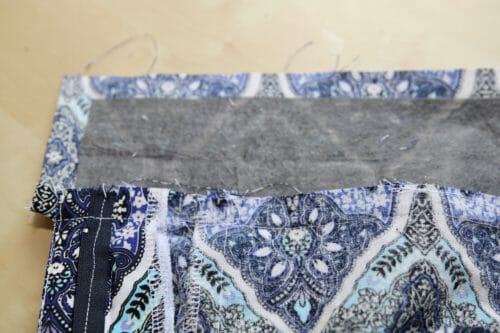 Trim the seam allowance (no more than half the seam allowance) of the shorts, not the band. This is a tip to reduce the bulk around the waist band.
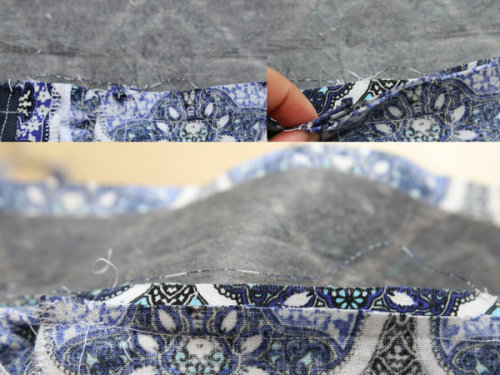
Another great tip is to iron and fold the seam allowance of the band before stitching it. It makes it so much easier to finish sewing the waistband.  Fold the waistband in half right sides together aligning the seam allowance.
 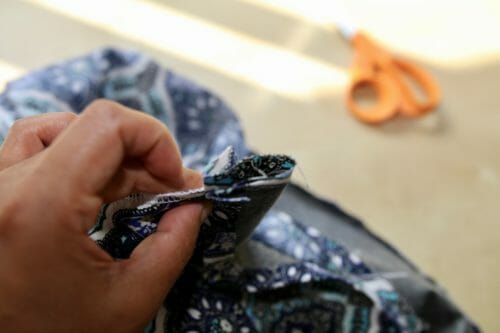 You should have the interfacing on the outside.
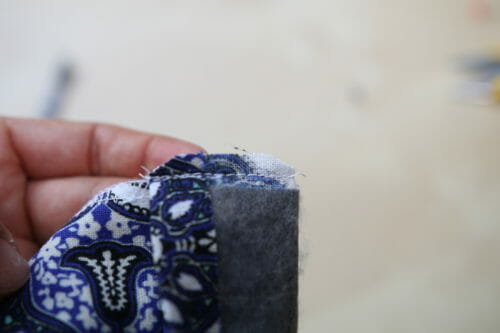
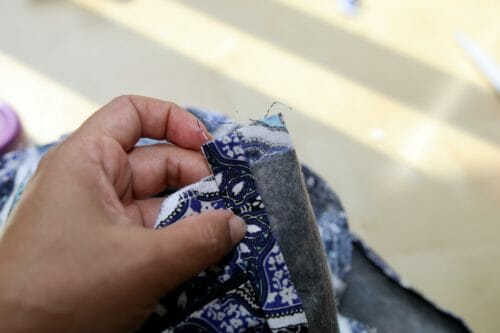 Sew both ends of the waistband and trim the seam allowance.
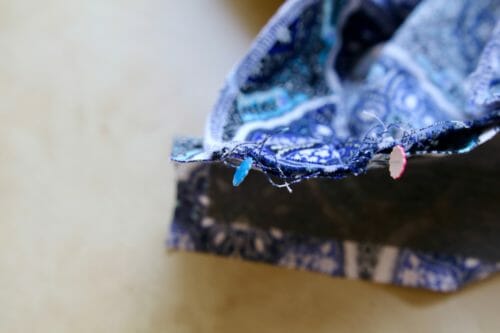
 Turn the waistband the right way and pin.
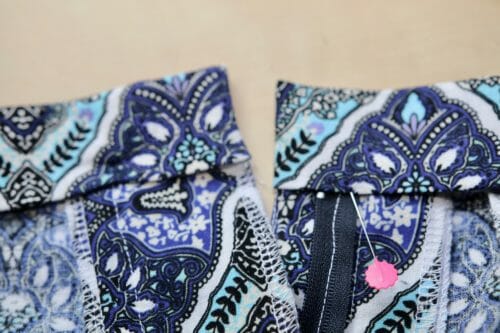
 If you are a beginner or have only sewn one or two waistbands, I suggest you baste the waistband by hand then stitch it with the sewing machine.
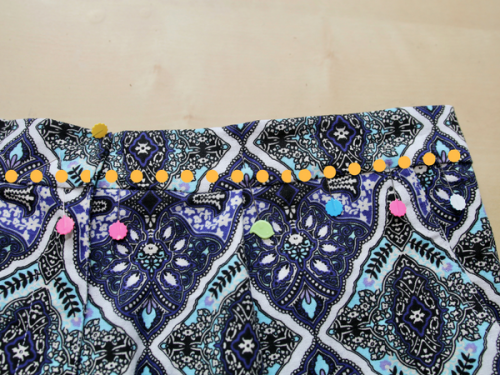 Start stitching on the right side of the shorts no more than 1/8″ from the edge of the waistband.
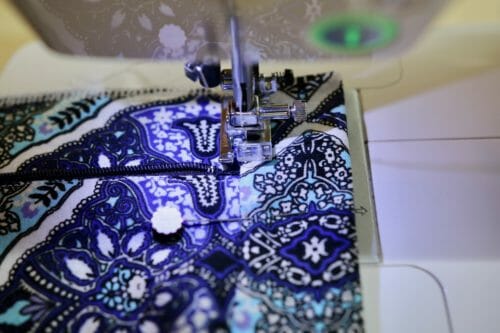
Front view.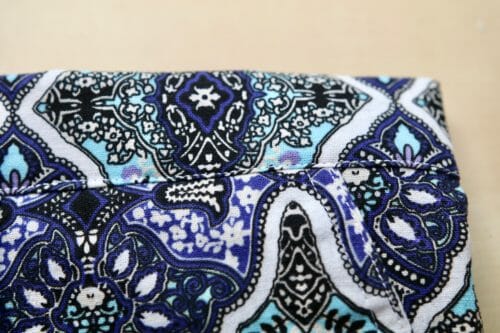 Inside view.
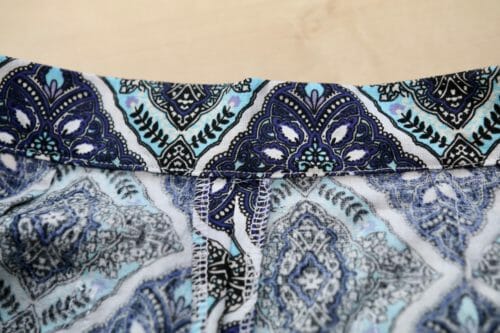
Step Ten: Heming Your Walking Shorts
There are a few ways to hem shorts. I thought I would write about all of them because I think you will be able to take advantage of all of these different techniques. For now, the simplest way is to follow the pattern you were given in Part One of the sew along.
Simply use the first fold line of your pattern as a reference.
- Fold the hem 1/2 inch. Iron.
- Fold again this time at one inch.
Use your sewing machine to make an invisible or blind stitch, hand stitched invisible hem or simply use your sewing machine to do a running stitch like I did.
All it remains is to sew a buttonhole using your buttonhole foot and for a quick and different way to sew a button use your sewing machine.
Please note the button and the end of buttonhole should align directly above the zipper head.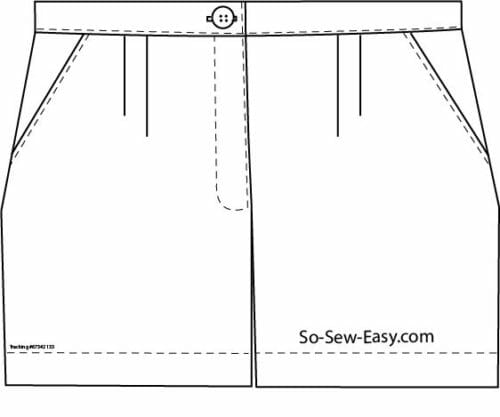
This is the end of part three. As usual, please leave any questions, comments or suggestions along with constructive criticism in the comments below and I will get back to you. Yes! and before you ask where are the cuffs for the shorts, I will be making a separate tutorial specially for the subject.
I am back from vacation next week and we will be back to my usual routine. I have many exciting projects for you to try. Hope you will enjoy them as much as I have enjoyed researching them.
Walking Shorts Sew-Along –Part Four: Adding Cuffs to Shorts or Pants


love the walking shorts, but I prefer an elastic waist. would you be doing one with the elastic waist?
thank you
This is fabulous. It was a little confusing at first, but the videos were extremely helpful. I really like this pattern and so enjoy your teaching. Thank you!
My pleasure!
So it must be there because it seems so many have finished. I don’t see the waist band in the pattern pieces. I did figure out the zipper. I wonder if it would help to show photos of fabric with a wrong and right side. I did have to rip out a seam or two but they have a zipper. Just need a waistband and button and hem.
I guess those black shoes are good for walking from the bordello to the corner and back with “breaks” in between on her back and/or knees?
WOW! That is what you see here? Around 10 days of work and That is what you see here?
I couldn’t get the pattern to fit right and I could not understand the instructions for the fly. I made them but they will be going in my scrap pile. Sorry!
What kind of alterations did you make? Always, always make a muslin because the pattern was made for a large butt/smaller waist ratio. I added alterations both to add at the waist or make the shorts narrow, there is a separate tutorial with a video for the fly front.
Thank you so much for taking the time to do this tutorial. These shorts will be the first clothing I have made. Since I’m such a novice, I’m having trouble following some steps. When do you think the video will be available?
The video takes time, and you are very ambitious on taking this as your first project. So I suggest you wait for the video or you will get disillusioned. I will edit it from a novice point of view. Do help me understand where you are having trouble. please send me an email at mayra@so-sew-easy.com
Thank you Maya. now going to finish my mock up and check it all out. Then off to get some material to make a proper pair of shorts.
Looking forward, Beverly! let me know if there is anything not clear by email or comment 🙂
Where do you cut the pattern to make the shorts longer? On the line at the top of the leg?
I’m looking forward to making these! Thank you
Please check Part One I explain in detail how to alter the pattern to suit your taste and body.
Hey, great pattern. I have cut the legs longer so I can have a cuff like in the picture of the blue shorts. I admire people who can create patterns. Thank you for your creativity!
Hi, Dana, this is coming very soon, I decided to add it apart because it will take another day or two to write and would make this article way too long:)
I was confused when reading this too. But In response to the first two comments, the answer is: Actually, no. Is does not mean to add three inches to the length of the waistband. It means to make the band the length of the top of the waist, plus seam allowance, but make it 3″ wide. Like 29″X3″. So when the band is folded in half lengthwise and sewn onto the waist it will be an aprox. 1″ wide waistband. If you add 3″ to the length of the band, your waistband will be too long. You should only add 1″ to the length of the waistband so you have a 1/2″ seam allowance at each end. Hope that makes sense.
Hi Leslie, good catch, I miss read the comment. This will teach me to sleep more. Thanks for taking the time to correct me and yes that is what I thought the question was.
Great explanation Leslie, thank you!
this tutorial is EXCELLENT!!
I’ve been meaning to make myself a pair of long shorts (I call them Bermudas…), and now I’m greatly encouraged by you. I’ve read the tutorial while on holidays, and when I’m back , I’ll be sure to make myself at least a pair.
Thank you very much.
You are welcome Ana Maria. Have fun! 🙂
does this statement mean to add 3″ to rectangle of waistband?
Trace a rectangle with the measurement you have taken from your shorts by 3 inches (7.5cm). This will become the interfacing pattern (B
Yes, Susan, you need to include the fly front, which increases the width of your original measurement. This measurement also depends on how you have fitted the shorts.