Hi SoSewEasy reader! Happy to be here again, after my latest post about your #1 serger's must have features. I'm Irene and I usually blog at Serger Pepper.
Let's start with a fact: this year I must have been a Good Girl, because Santa decided I deserved a new laptop 😉 It is bigger than the old one (which, by the way, was perfect for cooking eggs above the keyboard, since it was getting hotter every single time I turned it on), so now I have an old laptop bag that is too short for it.
When I started blogging about sewing, I decided that everything I was going to share, had to be something useful… this is why I'm showing you how to DIY an easy (but cute) padded laptop bag, that you can sew using your laptop (or maybe tablet) measurements.
How-to sew an easy padded laptop bag
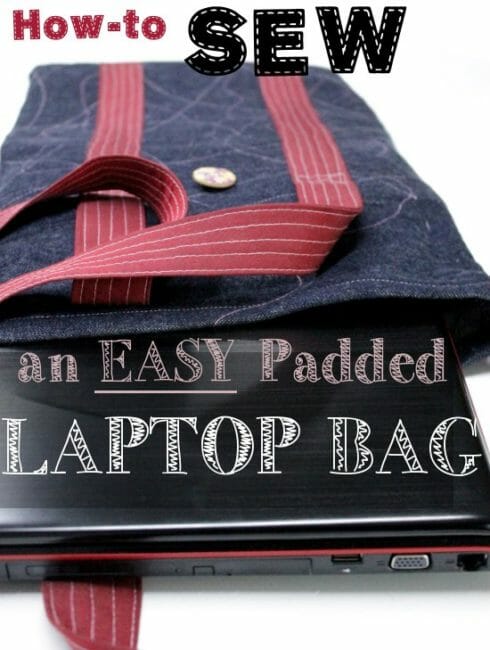
I'm giving you my own measurements too: use them if you have a 17.3″ notebook or, maybe, you simply want to sew a padded easy tote bag to carry around your delicate groceries or anything else and you don't want to spend time figuring out custom measurements!
If you feel any suggestions for deciding custom measurements are missing, please let me know and I'll help you with pleasure!
NOTE: I've seen several methods to do your own tote bag: this one is easier (and faster) than most, but works only for fabrics without a nap and/or non-directional prints!
I choose to construct it like a tote bag with longer straps to be able to wear it like a crossbody bag, which leaves your hands free (that's always a bonus feature, when you need to carry around children and your laptop, without losing neither!).
Materials:
Measurements are given only for 17.3″ laptop. For a custom-sized bag go on reading and find suggestions about how to measure your own laptop to determine how much fabric you need.
- 50 cm (20″) full width medium/heavyweight non-stretch denim from the bolt
- 50 cm (20″) full width padding material of choice (fusible fleece or sew-on other non-woven padding, or even fleece or boiled wool, maybe an old shrinked sweater can do the work)*
- 65 cm (26″) full width light/medium weight non-stretch fabric for the straps
- light/medium weight fusible interfacing for the straps (2 strips, 226 cm by 9 cm, or 2 strips 89″ by 3 1/2″). There's no need to cut them in one piece, they can be cut shorter, then joined ironing them on in place (scroll down to see a picture)
- thread, sewing machine
- a regular (90/14) or jeans machine needle (100/16 or 110/18)
- 2 big buttons
- 1 ponytails elastic
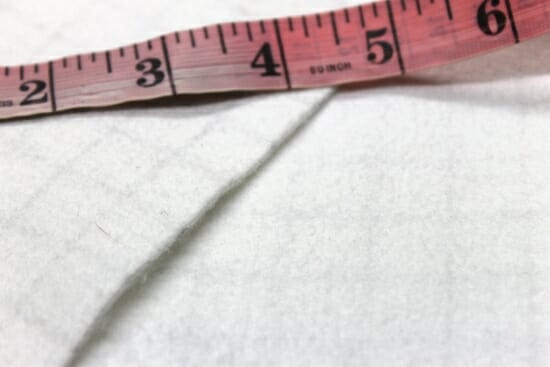
* If you're using a padding material without a finished side, you'd better double it with a lightweight lining fabric, to get a better look inside. I've found this non-woven material (it's used as air filter in industrial machines) which is perfect for this kind of things: not too heavy, not too thick, easy to be sewn and… free! And it's printed with a grid… cutting it straight is a breeze!
My suggestion is: always think outside the box and see if you can find useful materials in unexpected places…
Before you start
As always: pre-wash your fabrics, let them dry and press them wrinkle-free!
Tutorial
How to make straps:
To save some fabric, I'd suggest you to cut the strips shorter then needed, then piece them later to reach desired length (226 cm or 89″ each one): cut three (or four, depending on your fabric's width) strips crosswise, selvage to selvage, 16 cm (6 1/4″) wide.
TIP: An easy way to cut long strips is to fold in four your fabric, then cut the layers all in once, using a rotary cutter and mat. 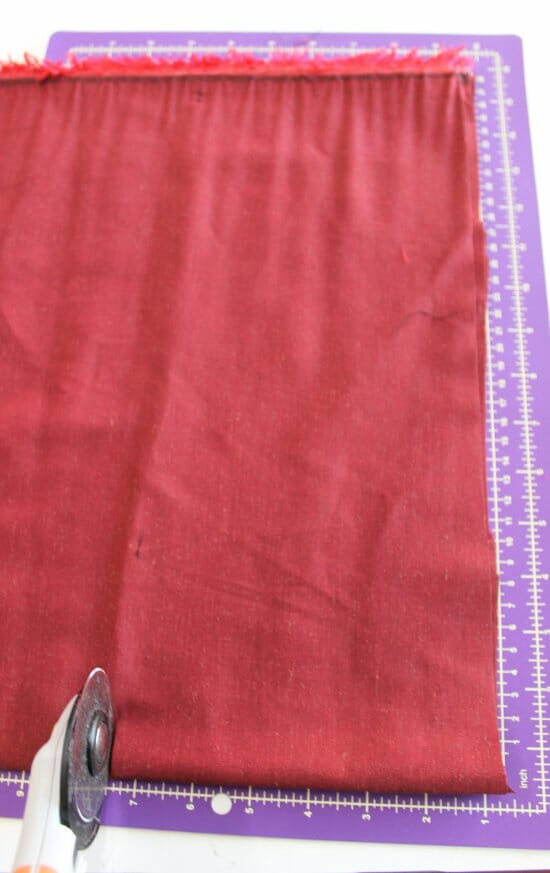

Sew using a short stitch length (2), with a straight stitch (backstitching on each end).
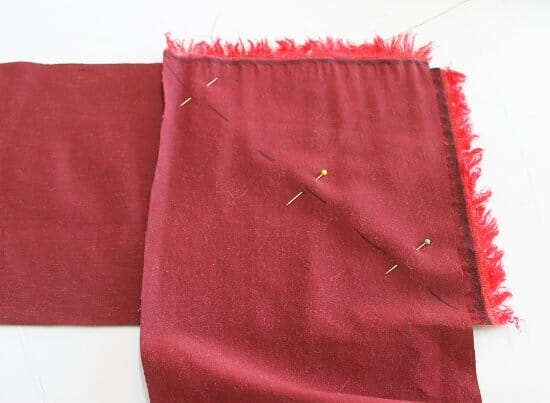
- Lay one of the strips on the table, right side up; lay, right side down, another strip, crosswise above it and sew a diagonal seam from corner to corner (help yourself drawing a line with a pen to be sure you're sewing it straight and put on a couple of pins to be sure it won't slip).
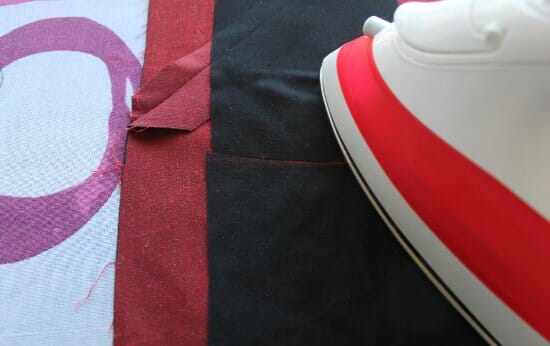
- Press seam allowances open, then cut off the excess fabric (don't do it the other way, or you're going to burn your fingers while pressing!)
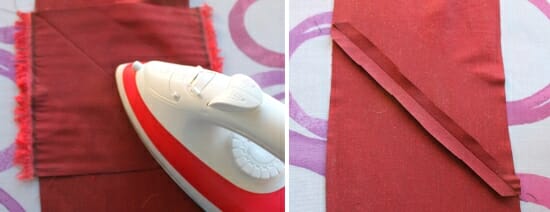

NOTE: let's pretend for a minute I didn't focus on the iron, instead of on the fabric, in left photo…
- Divide your strap in two (depending on your fabric width, you may end splitting it in half or you may have some remnants), matching to required measurement (226 cm or 89″)
- Iron on the fusible interfacing in the middle of the wrong side of each straps. If your interfacing strips are shorter than needed, don't sew them together: just lay them one next to the other, along the center of the strip.
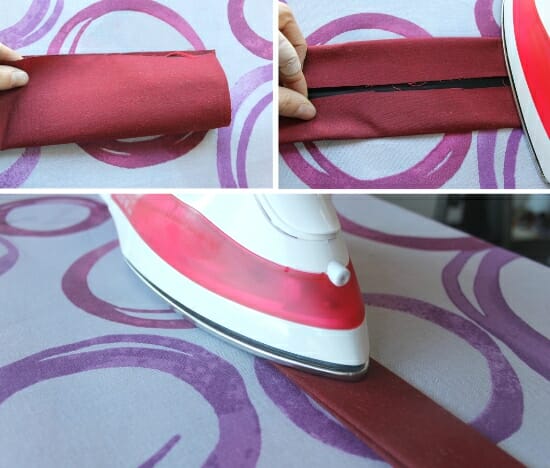
- Press each strip in half lengthwise, then open the fold
- Fold each raw long edge toward the first crease (leave just a scant 1/4″ between them, they don't have to touch); press again.
- Press the first fold another time, matching those two beautifully finished edges.
- Run a row of straight stitches right along the middle of each strap, to keep it together while assembling the rest of the bag. Put aside.
Create the body of the bag
Are you doing the 17.3″ version? Here are your measurements:
- padding: cut a rectangle 92 cm by 34 cm (36″ by 13 1/2″)
- underlining (optional): cut a rectangle 94 cm by 35 cm (37″ by 14″)
- main fabric: cut a rectangle 136 cm by 36 cm (53 1/2″ by 14″)
Doing custom measurements? Do the following:
First of all, measure your laptop dimensions (width X, length Y and height Z) 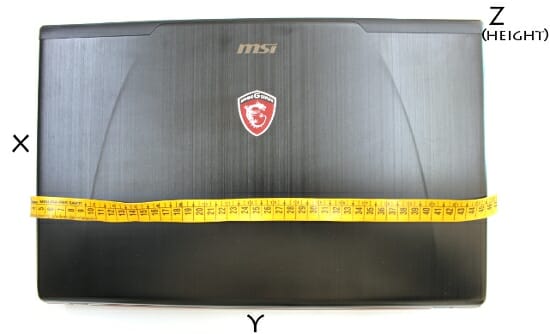

- padding: cut a rectangle with the following measurements:
- length: 2 times Y + Z + 2 cm (or 3/4″, for ease)
- width: X + Z + 1 cm (or 3/8″, for ease) + 2 cm (or 3/4″ for seam allowances)
- underlining (optional): cut a rectangle with the following measurements:
- length: 2 times Y + Z + 2 cm (or 3/4″, for ease) + 2 cm (or 3/4″, for hemming short raw edges: fold them 1 cm or 3/8″ toward the wrong side, press and topstitch)
- width: same as padding width + 1 cm (3/8″)
- main fabric: cut a rectangle with the following measurements:
- length: same as padding length +32 cm (12 1/2″, for the closure tab)
- width: same as padding width + 1 cm (3/8″)
Why do I suggest you to add underlining instead of lining? Because it's faster and gives your bag more stability and strength. I always love a good sewing project, well finished inside as well as outside but, let's face it: no one will ever notice if your side seams are finished, inside your laptop bag!
Let's put it together!
Lay your main fabric, wrong side up, then lay your padding right side up on top of it (optional and not pictured: add the underlining layer above all, right side up, if you're using it!).
Center the padding material (and the underlining, if needed) above the main one leaving about 1 cm (3/8″) along each long side and about 22 cm (8 1/2″) on each end of the longer side.
If you're using your own measurements, just center it, leaving the same width on each side! 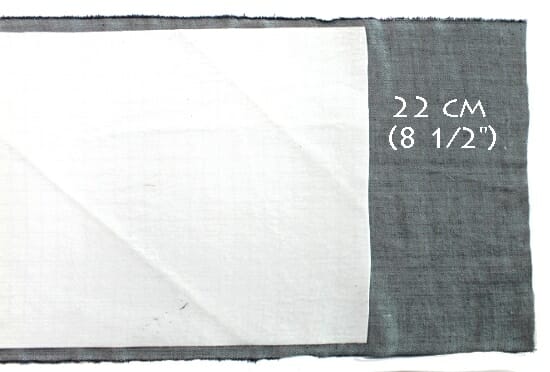

Disclaimer: I'm by no mean a quilter! If I broke any rules doing what I'm going to show you, I'm so sorry… but I am a rule-breaker in life, so I am in quilting too!
My only rule here is: HAVE FUN!
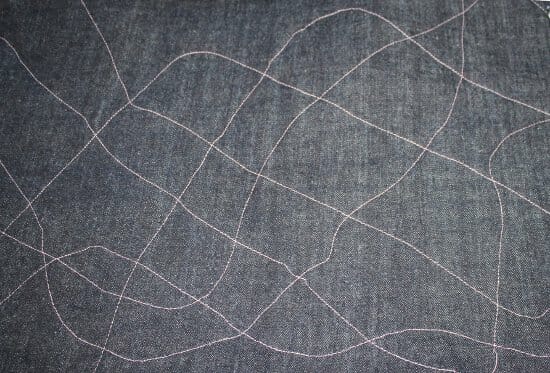
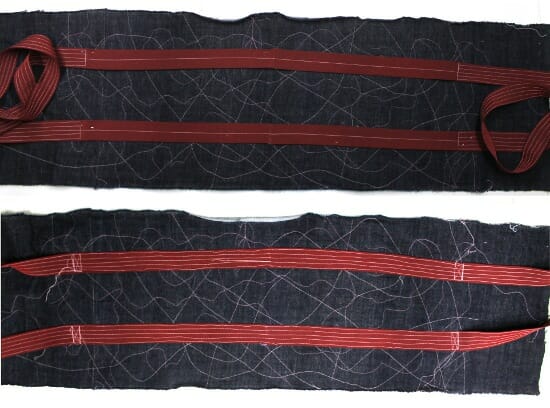
I started “quilting” together layers, using a contrasting thread (pink) but it wasn't enough for me… so I added other colors to the mix (all in the red spectrum) and went on having fun!
Just sew all around to secure the layers together while spicing up your bag (if you're a serious quilter, you can obviously add your own design here!).
UPDATE: I've found this inspiring post, after “quilting” my bag… I'd like to try something similar, sooner or later!
Customize straps' length, before you stitch them to the bag!
Fold your bag-to-be in half, wrong sides together.
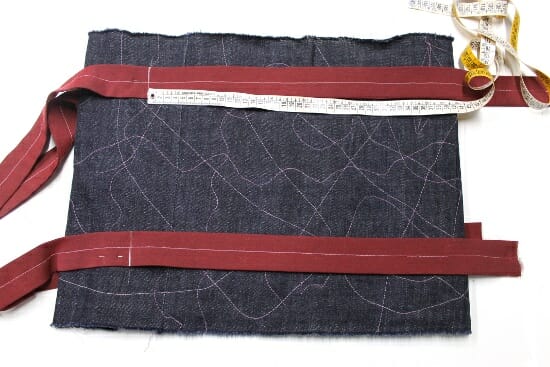
Pin straps in place, leaving about 8 cm (3″) from each side (make sure they're evenly spaced from the raw long edge).
Put a pin about 40 cm (16″) from the bottom fold: your straps are going to be stitched to the bag down from this point (and will be free above it.)
Make sure they're the same length and try on your bag: it's supposed to be a crossbody bag which will leave your hands free while you safely carry your laptop around. D
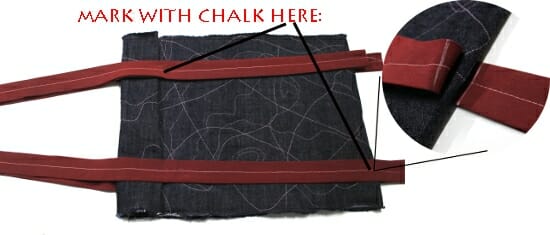
Decide the right length for you, playing with straps placement, then mark with chalk:
- A stitch line on each straps, where the bottom of the bag fold is right now.
- The 40 cm (16″) stitching line
- The bottom fold
Un-pin straps from the bag.
Make a loop with straps
To sew straps together, match their exterior sides along the bottom chalk line (you're going to end with a big loop made with both straps).
NOTE: Do this two times, one for each couple of strap end that meet on the bottom fold of the laptop bag.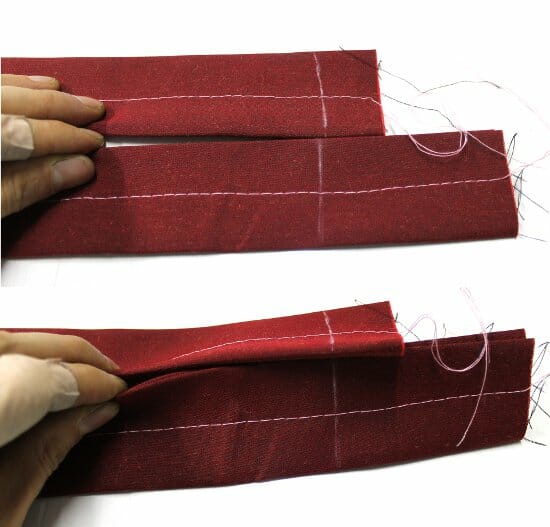

Sew, trim and press open (another option is to directly serge along the chalk line).
TIP: Make sure you're not twisting the straps: I'd suggest you to baste them and double check before you actually sew them together!
Finish the straps
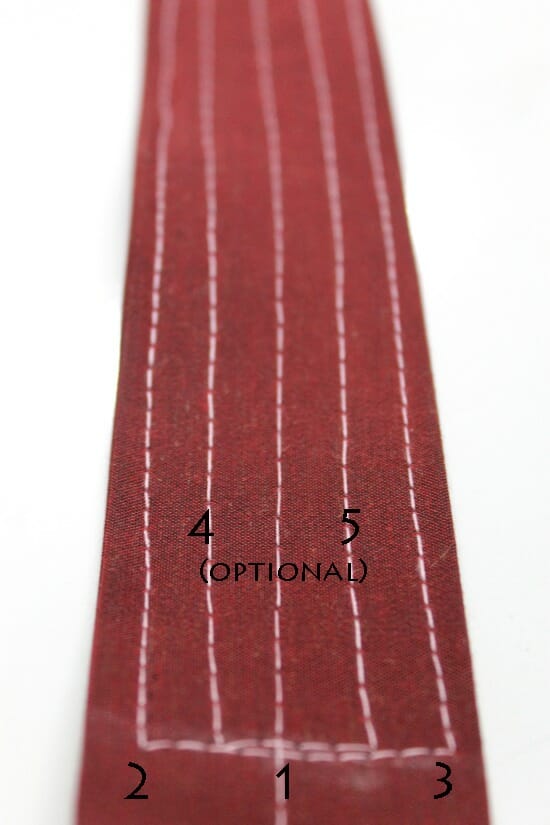
Let's topstitch the portion of the straps which is going to stay free, across your body: sew on both edges with a contrasting thread, until you reach the 40 cm (16″) chalk mark.
Optional: add another row of stitches halfway between the other three you've already done, like I did.
NOTE: I like the uneven look of rows of stitches, you can sew them perfectly aligned and parallel, if you prefer!
Attach the straps to the bag.
Lay your bags body on the table, right side up; align the straps loop seam on top of to the bottom fold chalk mark; pin straps in place, 8 cm (3″) from the long raw edges.
Sew them in place sewing the same rows of stitching as you did in the upper free portion of the straps.
Sew rectangles to reinforce the point where straps become free from the body of the bag (remember? The 40 cm – or 16″ – chalk mark?)
Sew side seams
Fold in half the bag, right sides together, keeping straps out-of-the-way.
Sew starting from the fold each side seam and finish seam allowances with a zig zag or adding a bias binding.
Other option is serging the edge (like I did). 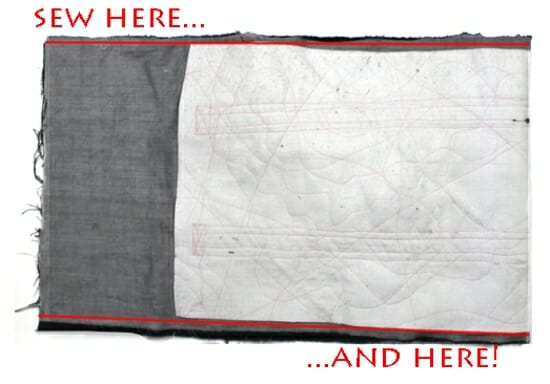

Finish the upper edge
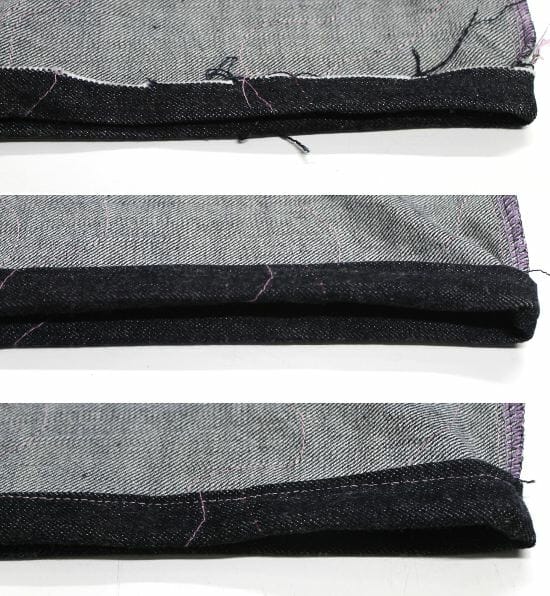
Fold the upper raw edge toward the wrong side of the bag (the inside); press, fold again. Both folds are 1 cm (3/8″) wide. Press and topstitch.
Add the buttons and the elastic
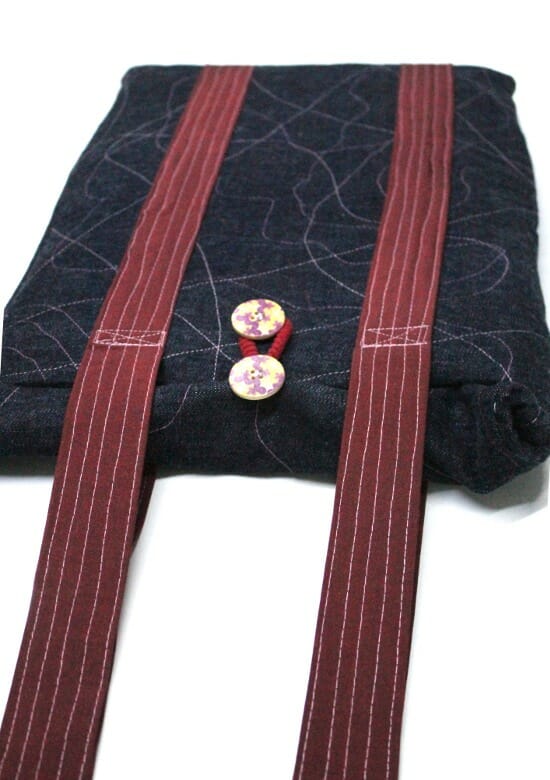
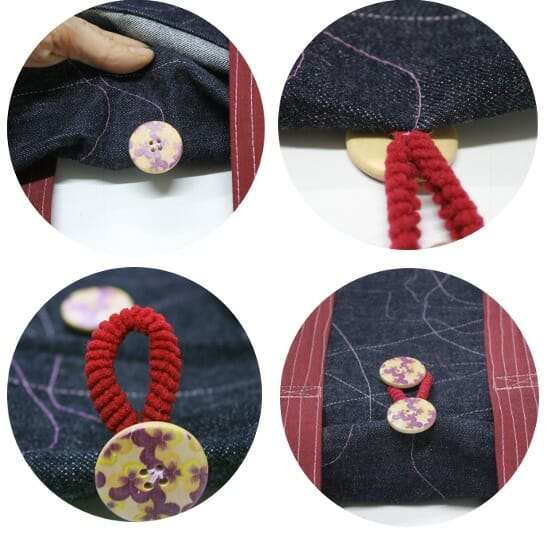
Turn the bag outside out and decide where you want the buttons to be: roll the opening on itself and try to figure out where you want them to be in your bag, considering your elastic length.
Mark a couple of crosses, where you're going to hand-sew your buttons.
TIP: Make sure you're catching one layer of fabric only, while you sew the buttons, or your laptop bag…won't work!
When you're done with buttons, wrap the elastic around the one you've just sewn on the flap and, pulling it tight, secure it in place with a couple of hand-stitches (use a thread color matching with your elastic, so it will better blend!)
You are done! Here's your bag, ready to harbour your precious new laptop!

Now, what about you? Have you ever sewn padded bags? Do you think it's worth the extra time? Let me know!
Hugs from Italy and… see you on Serger Pepper, if you like!
Irene


Hi! I'm Irene "MammaNene" and I blog about anything sewing on Serger Pepper. I love designing my own patterns, I have a thing for refashions and I am Pinterest addicted! My favorite sewing muse is my almost 6 years old daughter... but sometimes I sew for me too!




Thank you for the easy pattern.
This is going to be my first sewing project in over (shhhh) 40 years. Thanks for the great instructions. I only wish I could print it out.
Thanks for this pattern,I now have somewhere to start! I have changed it a bit, using wide cotton tape instead of making my own straps, and using a magnetic clasp. I also reversed the lining so that it looks like a tote bag inside with no seams showing. I also put a large pocket on the outside to house the charger,
Good idea with the pocket. Sometimes the cords and cables are the hardest part to organise and keep from getting tangled.
I’ve never thought to use an old sweater for padding, Irene. You are the queen of upcycling. A great laptop bag and tutorial.
Great project! Love the detailed instruction with the step by step pictures! Makes it so easy to understand what is meant in the written instructions when pictures are present.
Gail
That’s great!! I like the idea of using an old sweater for the padding. I’ve got a Craft Gossip post scheduled for later this morning that links to your tutorial:
http://sewing.craftgossip.com/tutorial-padded-laptop-or-tablet-tote/2015/01/14/
–Anne
Thanks Anne for liking and sharing!
I always try to include a refashion suggestion to all my projects 😉
Irene
SergerPepper.com