 This is the second part of the walking short sew along. In this post, we will be working on the slant pocket and the front zipper.
The slant pocket is the “darling” of pockets. It is easy to make, slimming and practical. It is the type of pocket we wish we had when pockets are missing on a pair of pants.
Below, I am showing you the fashion fabric project as well as the mockup in white and using black thread so you can see the stitching more clearly.
The steps below continue on from Part One of the sew along: Walking Shorts Pattern & Sew Along – Part One
Walking Shorts Pattern & Sew-Along – Part One
Step Three: Attaching the Slant Pockets
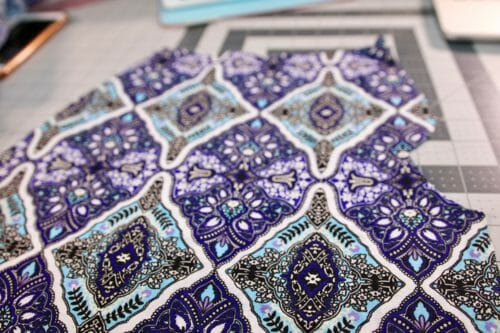
Apply a small amount of fusible interfacing along the opening of the pockets on the wrong side of the print.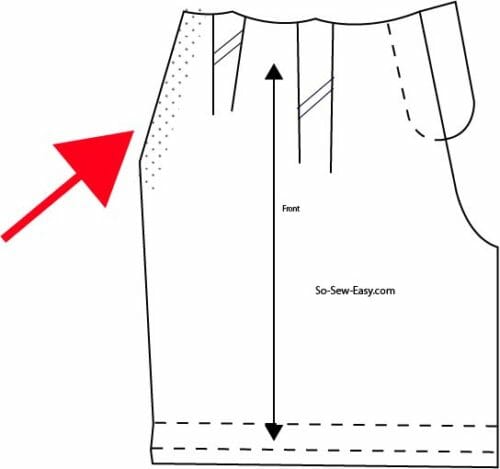

Lay the front of the pants prints side up.

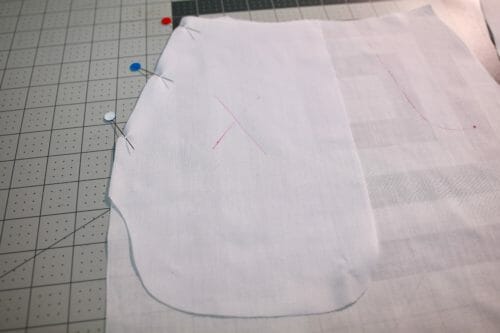
Place front facing of the pockets aligning it with the slant pocket. Print side down. I have marked an X to represent the wrong side. Sew at whatever seam allowance you have chosen. If you are doing a mockup, sew at 5/8″ where the pins are located, keep a strict seam allowance.

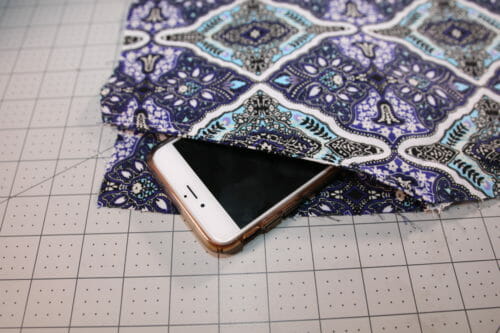
Separate the pocket from the pants and iron the seam allowance away from the pocket.
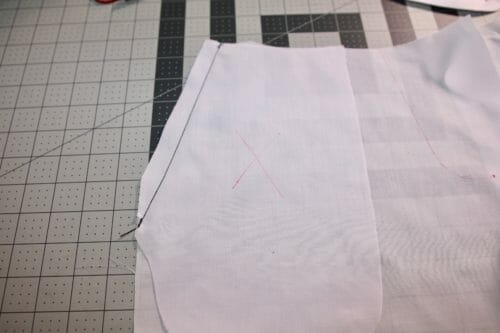

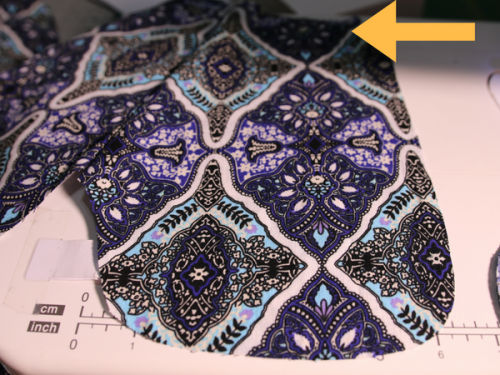

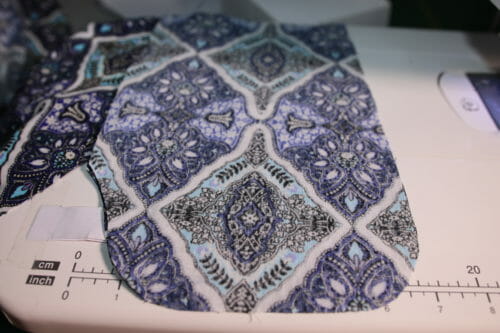

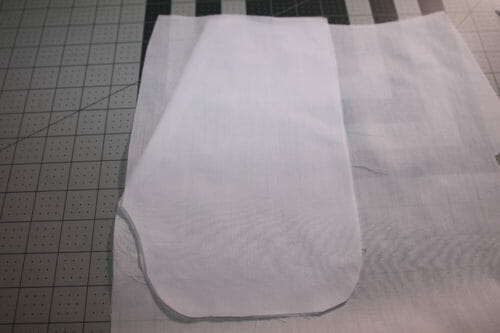

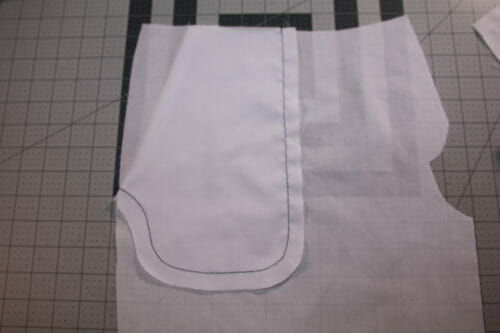

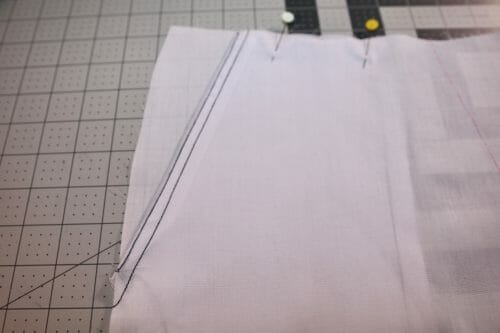

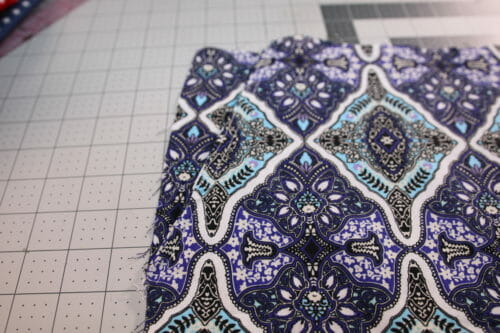

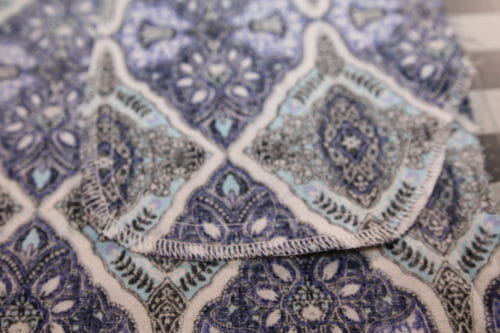

Iron the pockets with an iron cloth on top.
Step Four: Sewing the Fly Front
For the easiest way to attach a fly front zipper, the tutorial is already been created and it is on Youtube.
This video shows you the easiest way to attach a fly front zipper. I must say this technique is mostly used on the skirts and the easiest version to use. Many of the commercial patterns, with the exception of Vogue, will have you used this technique. I have given you a pattern that is the simplest to use. Very similar to the one on the video except for the little tab on the right of the picture below.
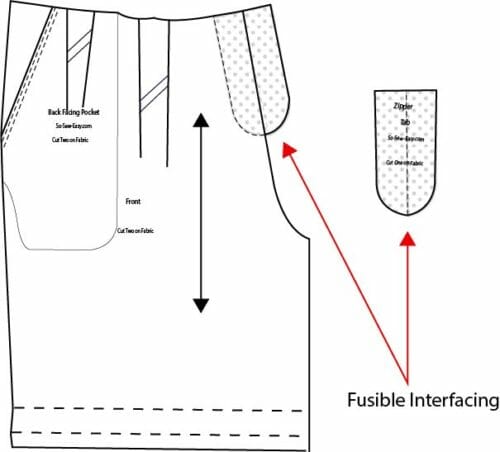

Place the two fronts of the pants together. Since you have added seam allowance to your pattern, you are going to sew the crotch, not including the zipper tab and the legs as shown in the picture below.
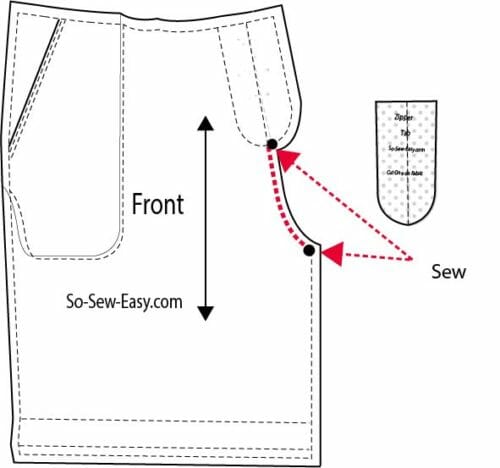


Take the tabs or packets (as they are officially called) and cut 2″ on the fabric you are using. The pattern says one but you really HAVE TO CUT TWO. Apply fusible interfacing, one side will have a button and the other the buttonhole.
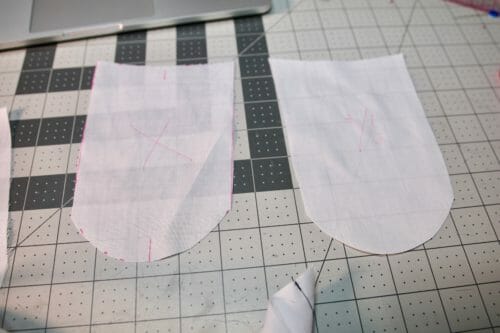

Serge the edge on one except the top and fold the other one in half and serge the raw sides except the top.
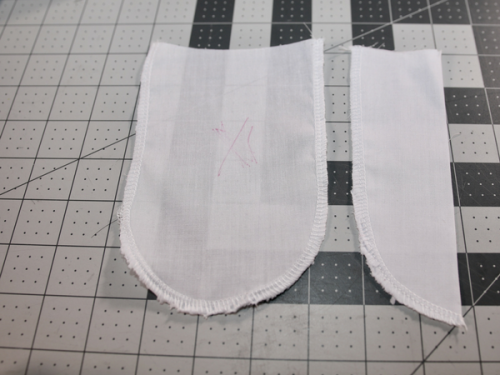

We are going to remove the placket (tab) but leave the seam allowance. Take the open one and place on the right leg (left on the picture) on top of the zipper opening print side down. Prints are facing each other.
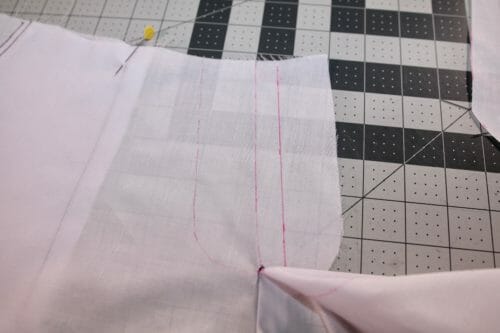

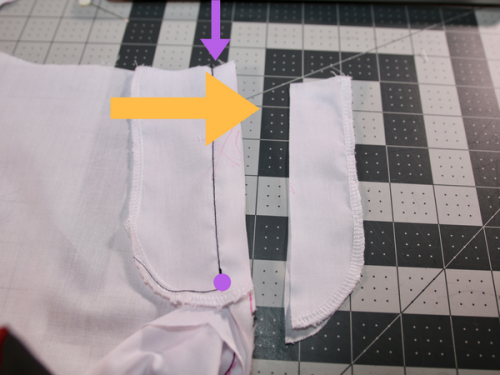

Take this opportunity to serge or zigzag the seam allowance, after attaching the zipper it will be almost impossible to do it and you will be left with a frayed seam allowance.


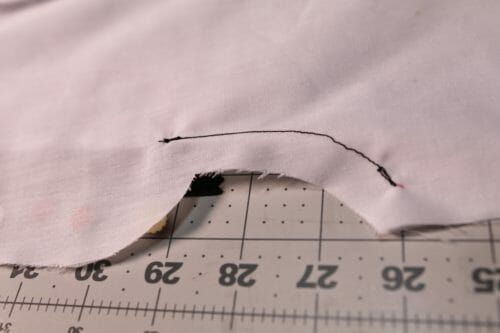
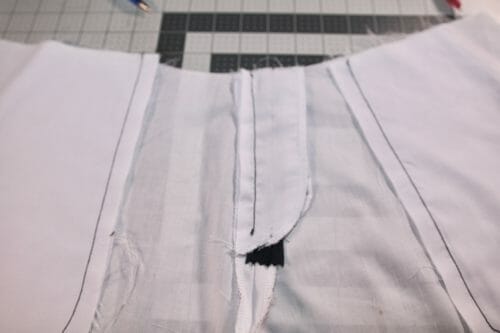
If you do not have a serger or an overlocker fold over the zigzag edge and topstitch matching the thread as close to the fabric as possible. Shown in the picture below in black stitching.
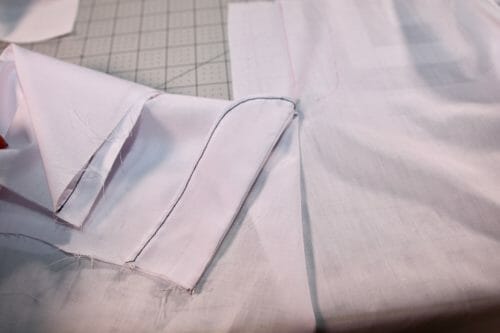

Fold the tab in the direction of the seam allowance and iron. Fold back under and topstitch as close to the edge as possible.
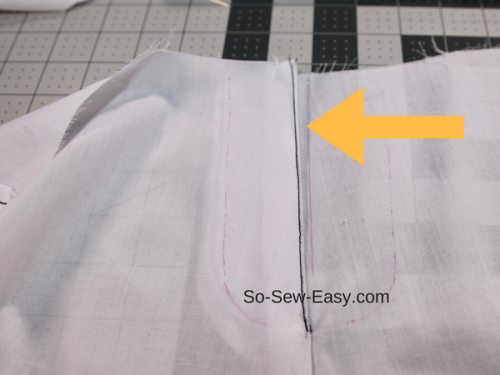

We will attach the zipper next. For that, we have to repeat the step to eliminate the zipper placket (tab) and leaving only the seam allowance.
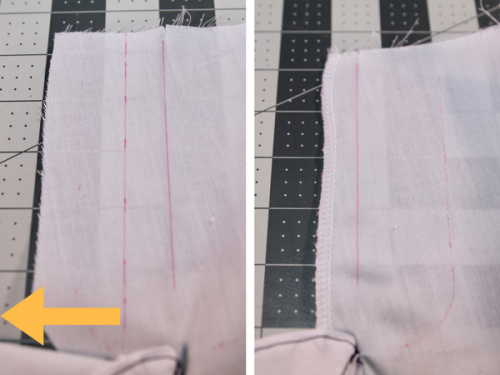

Step Five: Attaching the Zipper
For the next step, you will need the zipper and the zipper placket (I call it tab). Mark 3/8″ on the placket. 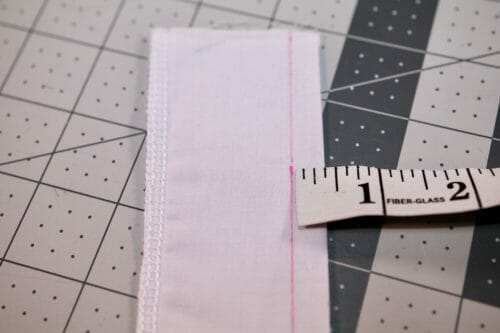

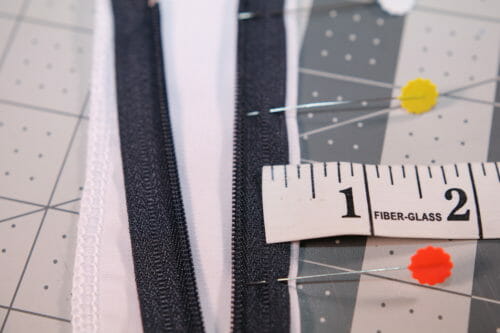

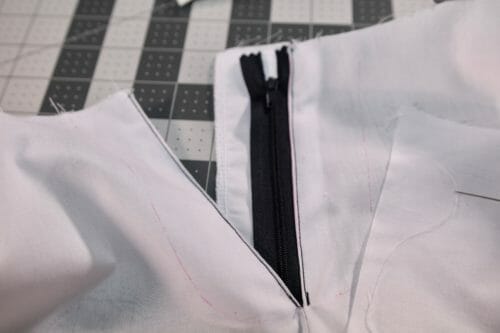

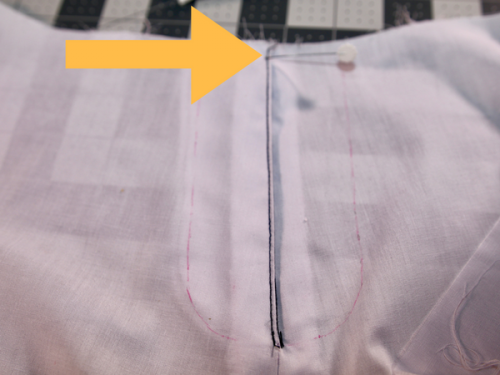

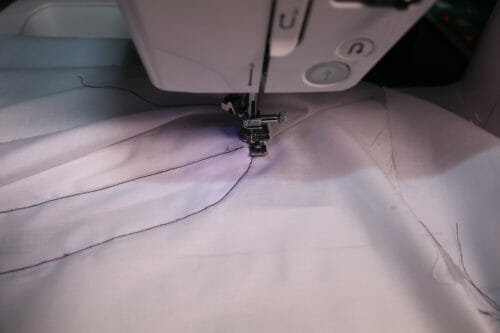
Finally, place the pants print side up, open the zipper and spread the sides apart. Sew the stitching on the outside sewing down the placket (tab) without sewing the other placket on the other side of the pants.
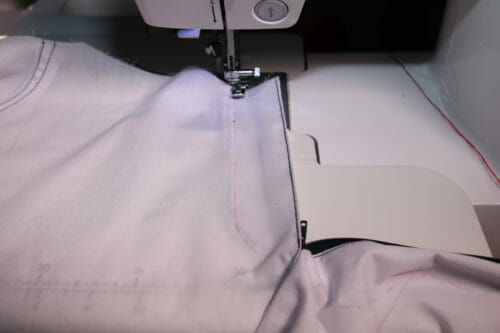



Note:
What is the difference between the two techniques for attaching a fly front zipper? On the technique I just showed you the zipper will be covered by fabric and the stitching line is the industry standard from the edge 1 3/8″ for men and 1 1/4″ for women.
The technique in the video is approximately 1/2″ and the zipper will be exposed on the wrong side of the fabric this is why it is mostly used on skirts and shorts with thin fabrics.
Step Six: Sewing the Pleats and Attaching the Back to the Front
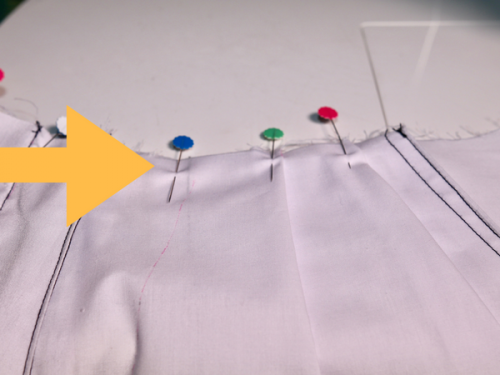
Fold the pleats to the sides or towards the pocket and stay stitch the top of the front so the pleats do not move when you are trying the shorts on.

Lay the front of the shorts print side up. Lay the back print side down.
Sew the outsides from waist to hem.
Sew the inner sides from crotch to hem.
Finally, sew the crotch keeping the seam allowances open.


Serging all the seams open and sewing the crotch last allows you to be able to alter the garment in the future. It is the difference between a tailored and a mass produced garment.
This is the end of Part Two.
Join me on Part Three shortly. We will be drafting and sewing a waistband. In addition, I will be adding more tips for the final fitting. As always send in your comments, suggestions, and questions, Until Next time!




Hi Mayra, I love your patterns and all the many tips and inspirations you give on your web. I am making the walking shorts but will eliminate the pleats in front and would like to elastic the back waistline. Would you just use the excess from the darts or add to the width of the back pattern piece? Thank you.
Can anybody tell me what it means to leave the seam allowances open?
After sewing Iron the seams open and attach the other pieces with them laying flat or Open.
I have one more question on the shorts construction. Above says to”sew the crotch keeping the seam allowances open”. I have no idea what it means to keep the seam allowances open.
For some reason, my question from a few days ago got truncated. I was asking about the step above that says to “separate the pocket from the pants. Since we had just sewn them together in the previous step I guess it means to fold the pocket back away from the front piece and fold them out flat. That makes sense to me but in the picture illustrating this step it shows the pocket piece with right side up and if you fold the piece as I just described it should be right side down. Unless, you are showing a picture of the front piece from the other side. i just didn’t think you would show some pictures of the right side and some from the left. Am I missing something?
HI Jay, got this week 1112 coments due to the giveaway so I guess it took me more time to see your coment, I read them both today. YOu are looking at a right pocket then at a left pocket that is why you can not make sense to the pictures. ) I choose the best qulaity picture for the article and never noticed this pictures did not match). A slanted pocket is part of the front of the pants when you fold them back then you need to attach another piece to finish off the pockets. So at the end you will end up with three layers of fabric on each side that attaches to the back of the pants. Perhaps you can look in your wardrobe for this type of pants to undrestand the construction a bit better. I will certainly have to make the video to clarify the process. I am very surprise and very impress at you challenging yourself with such an advance project since you just started sewing. Congratulations!
Thank you! I am very relieved to have that mystery solved. It was really bugging me that I couldn’t figure it out. I went ahead the other day and ignored the picture and sewed the pocket the way it had to be to work correctly and it came out alright. I’ve been practicing sewing straight seams the last couple of weeks from watching vairous videos (for french, straight with clean finish and flat felled seams) but some of the techniques such as darts, pleats, sewing zippers and waistbands, take some time to get good enough at to make a quality garments so I’m learning on these shorts. Thank you for providing the free pattern and instructions!
My Pleasure Jay, welcome to the wonderful world of sewing and creating,… all you need is practice
Thanks! I am practicing a lot every day and having a lot of fun! I’m 64 and have Parkinson’s and needed something to do since I’m not working and I’ve always admired people who could sew and I thought, “Why not?”. It’s kinda like woodworking (one of my other hobbies) except instead of wood, it’s fabric. You’re still creating something that is both artistic and functional, two great things to have in one product. I also took up drawing with graphite last year and that is also an amazingly fun pastime!
You are my kind of people, I also enjoy wood working and drawing. Anything creative I am willing to try.
Unless, in your picture showing the “separate” step you have changed to the view of the other side/piece of the front.. That would explain why the piece looks backwards to me
This is only my 2nd sewing project and i’m having trouble understanding an instruction about doing the slanted pockets. after sewing the front facing pocket piece to the slant in the front, you say to “separate the pocket from the pants (means front piece I think) and iron the seam allowance away from the pocket. Since I just sewed them together I don’t understand why you say to separate. If you mean to unfold the two pieces where you just sewed together then I can understand but your picture ilustrating this step shows the pocket piece with right side up and if I did what I just said it would make the piece be right side down. What am I missing?
I do not understand the instructions for putting in the zipper. On the first picture of putting the zipper on the zipper placket (tab), is the zipper upside down or right side up? The picture is not clear. What do you mean by “or simply place the left leg zipper opening on top and sew. Align the edge of the zipper foot with the fabric to produce a straight stitch 1/8″ from the edge”, how and when do you attach the zipper tab to the main part of the pant leg? Do you fold the left leg zipper opening along the center line, then sew close to the edge by the zipper? I have ripped out my zipper about 5 times now and can’t get it to work properly!
Also, please specify that the pattern does not have a seam allowance included somewhere on the pattern! When your instructions say to remove the seam allowance for fitting, I assume that there was a seam allowance built in that I needed to remove.
Did you watch the video of how to attach a zipper?
Great tutorial – especially for the zipper / fly which is always very confusing to get right.
One thing that I do for slant pockets which makes them less likely to be stretched out is I cut the pants as if there wasn’t a pocket & cut two copies of the inner pocket (the piece without wedge cut). I then assemble as you’ve described, and cut off the wedge after stitching the pocket seam. (this avoids handling bias cut pieces which can stretch out on you, and it makes it easier to sew the seam without stretching the pocket).
Hmmmm, this is so clever, Thank you for sharing!
what happened tp part 3?
It is out now. Thanks for your patience.
Can this shorts pattern be use for man?
I would not use this for a man unless he has an hourglass figure.
Hi Mayra! Is Part Two the last of the series or is there more? Thank you in advance for your help!
Hi Mary, there is more but I am on the road fabric hunting with very bad internet and unable to load the tutorial, as soon as I can I will. Let you know soon.
Hi Mayra any idea of when part three will out. So looking forward to finishing these shorts. Its been a greaat tutorial thanks for your hard work in putting it together
HI, Beverley, I am soon going back home after a much-needed break. Should be out the first week of August. Keep you posted.
Thank you Mayra hope you had a good break, reaaly appreciate the hard work you put into creating these tutorials
Thank you, Beverly 😉
Hi when will part 3 be out really want to get these shorts finished
Hi, Beverly, it is out now.
Hello Mayra! ? When top stitching last part of zip,is it One action to “join the 2 packets together and reinforce” … Or two different actions? ( this is top stitching that will be seen )
Put in zip. Not much overlap. How do I get more overlap?
Hi Anne-Marie, yes this will show so you need to match the thread to the fabric as close as possible. If you can not find the same color take one that is slightly darker. The overlap should be 3/4″ (2cm). Is this what you have?
Is the pants tutorial out yet ?
Hi Becky, soon, working on it at the moment.
I am a little confused. I thought a 3/8″ seam allowance was built in. Can you please clarify for me…the pockets have a 5/8″ seam allowance added but the side seams and inner leg seam do not? Thank you for sharing you skills with us.
Hi, Eileen, you are welcome! there is no seam allowance because you are supposed to compare your measurements with the pattern and do the appropriate fitting. Then add your seam allowance, I do recommend the 5/8″ so you have more room to fit later on before you place the waistband. You can trim the seam allowance with your serger.
great info thanks
are the slash pockets top stitched? and is the dart done including the pocket layers too? I missed that step in instructions? love these shorts , Im still altering my pattern.
Hi Judy, yes they are topstitch. The front has pleats not darts, but if you prefer darts once you do the mock up and try them up you will be able to decide whether to turn them into darts, or eliminated them all together.
Ok so I have made the mock up but have found that with the plets it is too tight so with out pleats fits just fine. Now just need to do waist band . Will now be on look out for some nice material to make them out of.
Excellent Beverly, pleats work for some people and not for others. I think is great you know what works for you.
Thank you for these instructions. I have a question though regarding the pockets. On the picture of the finished shorts at the top . the front pockets are topstiched to the front of the shorts. At what stage do you do this?
I do that last, serge the seam allowance of the pockets and if you have a twin needle go for it, however, it will only be noticed if your fabric does not have a busy pattern. Double stitching looks best on plain fabric.