


In many parts of the world Autumn or Fall is here and Winter is on the way. It's time to think about wrapping up warm and adding an extra layer. When I'm not in shorts, I'm in leggings. So enjoy this free tutorial for a custom leggings pattern.
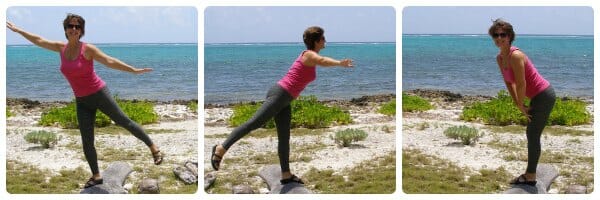
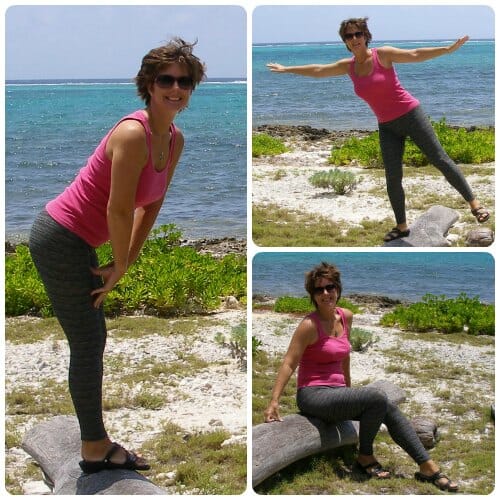
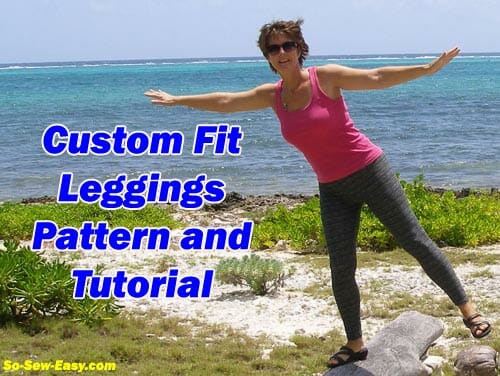
(There's no sensible or glamorous way to model leggings on the internet, so I thought I might as well make a complete fool of myself and have some fun. I can't remember the number of times I fell off this log after setting the timer and running ! These wobbly photos are the best of the lot.)
Surely everyone love leggings. Wear them under short dresses or tunics, wear them to the gym and for exercising, lounge around at home and even sleep in them. Wear them long and ankle length, calf for jogging, knee length or even as cycling shorts. Wear them in wool, jersey, lycra, stripes, prints and lightweight for summer. Leggings are versatile and an essential part of your wardrobe.
This tutorial will show you how to easily draft your own custom fit leggings pattern and my unique spreadsheet will make drawing your pattern easy. This is a quick and easy sew and once you have your pattern to keep, you can run up a new pair of leggings whenever you like in whatever fabric you like.
Taking your measurements
Equipment needed:
- Tape measure and note pad
- Paper to draw your pattern (I use this large roll of paper for pattern drafting and tracing too. Strong but see-thru.)
- Ruler
- Paper scissors
- Painters tape/masking tape
- Close fitting clothing such as existing leggings, tights or just in your undies
If you are lucky, you might have a helper to assist with the measurements, but perhaps its just you, so I've made a video to show you how and where to take these measurements to get the best fit.
(Once the video starts to play, you can change the quality for a clearer picture using the little ‘gear' icon on the bottom right.)
Subscribe to the YouTube channel:
All about ease
Now that you have your measurements recorded, before we start to draft the pattern, there's one important decision to make – ease. You may have come across the term ease before in sewing. Most usually in woven garments that don't stretch, the ease is the difference in the measurement of the finished garment and your corresponding body measurement. So a shirt may have a finished bust measurement of 38 and if your bust actually measures 36 inches, then there are 2 inches of ‘positive ease' in this pattern. Ease is there for two reasons – comfort and movement, and design and styling.
However in stretch garments, comfort and movement are not as much of an issue because the fabric stretches while you move. So ease is more about styling. For leggings, there would not normally be any ease – they fit your body. In fact, in a very stretchy fabric, you may even decide to add ‘negative ease' where the fabric measurement is LESS than your body measurement. This is particularly true of swimwear, maybe exercise wear and certainly shapewear and underwear such as Spanx.
So you need to decide about ease. You can have no negative ease and make the leggings to fit you according to your measurements, or you can add negative ease of up to 10% to make them fit you skin tight with a little stretch – like the leggings in the shops will usually do. The calculator spreadsheet allows you to use any number you like, but I recommend 90 -100% with 90 giving the tight fit and 100 giving the looser fit. Note – adding a number greater than 100 won't work with this calculator.
Using the easy spreadsheet
Now that you have your measurements, you'll want to enter them into the spreadsheet in order to work out the length of the lines for drawing your pattern. You can enter your measurements in centimeters or in inches (but not both) and the results come out in both too.
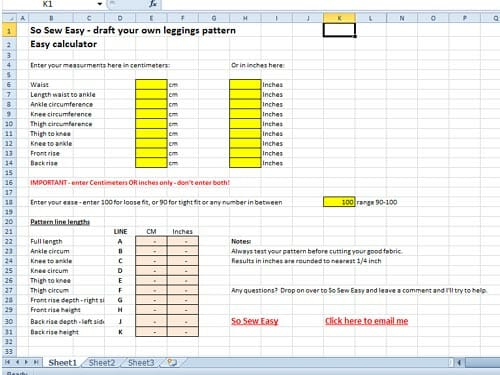
Remember to fill in the box for ease percentage, a number in the range 90-100 is recommended. 90 for very stretchy fabrics and a tight fit, 100 for less stretchy and a looser fit, and any number in between.
Download the Custom-Fit Leggings spread-sheet from our website.
How to draw your pattern
Start with a large piece of paper. This will need to be the full length of your leggings from waist to ankle plus about 4 inches. For the width, use your thigh circumference plus about 4 inches. Tape together smaller pieces of paper if you need to.
Now find the center of your paper and draw a long straight line from the top to the bottom. This is your ‘center line' and represents the line along the side of your leg where you measured earlier. There is no seam line here on leggings.
Follow along with these instructions as I draw my own pattern. I'm working in a smaller scale to make it easier to see and photgraph.
1. About 2 inches down from the top of your paper, make a mark on the center line. Then measure down this line towards the bottom measurement A. This is the approximate length of your leggings. Make a mark.
2. Now take the ankle circumference B, and draw a horizontal line where you have marked, centering it on the middle line. So if your line B is 9 inches, draw 4.5 inches on one side of the center and 4.5 inches on the other side.
3. From your ankle line, measure up C and make a mark. This is where your knee will hit.
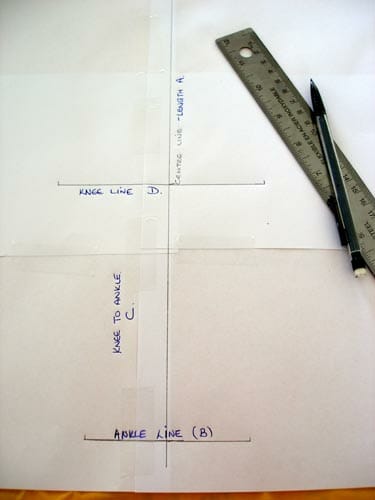
4. Draw line D at the knee point, centering the knee circumference over the center line, same on either side.
5. Measure up from the knee line measurement E and mark. This is your thigh line. Draw on your thigh circumference F, centering it on the center line.
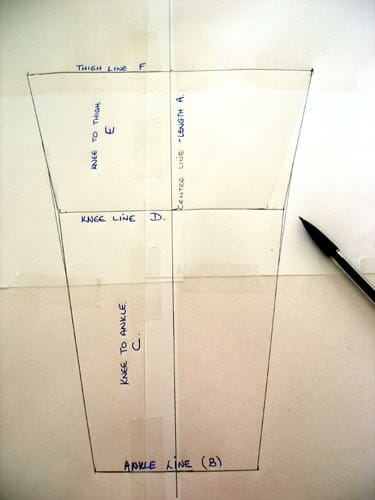
6. Connect the ends of the lines down to make the inseam of your pattern on either side. As our bodies are curved not pointed, smooth out the transition at the knee to make a gentle curve rather than a point.
7. Now it's time to deal with the rise depth. On the right hand side of the pattern, this will be the front of your body. Write front there to remind you. From the right hand end of the thigh line, measure in and mark measurement G.
8. From this mark, draw a line straight up, at right angles to the thigh line, your front rise height measurement H.
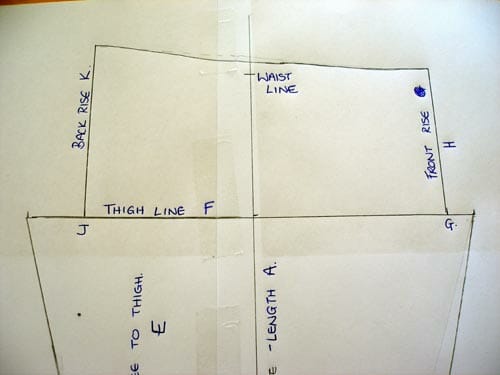
9. Let's repeat for the back. On the left hand side of the thigh line, measure in and mark the back depth J and mark. Draw a line up at right angles, measurement K.
10. Now draw in the waist line at the top between these two upright lines. Start out straight for a little while at the right hand side (front) and curve the line gently to meet the waist at the back. The back rise will usually be higher.
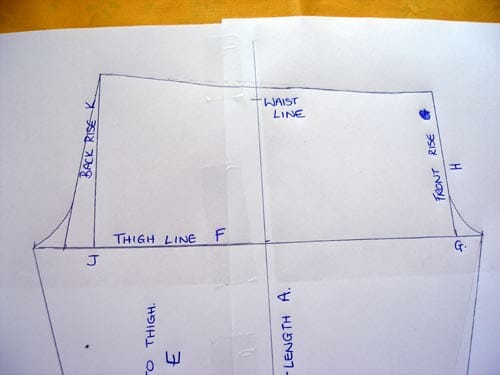
11. Now take your ruler and draw in a line from the top of the back waist to about halfway along that little line that is sticking out at thigh level on the left. This allows for some extra space in the back for your behind.
12. Finally draw in curves using a plate or other round object to fill in those lower corners. Your basic pattern is now drawn.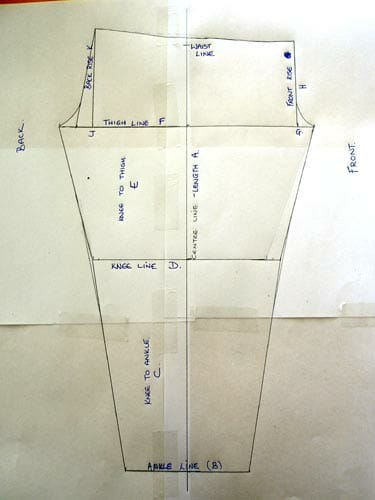
13. Decide on your seam allowances. For the waist, add the width of your elastic – usually 3/4 inch or 1 inch. For the ankle seam, you only need a small amount – say an inch. For the side seams, it depends on how you intend to sew. If you are using a regular zig-zag or stretch stitch, then you might want to include a standard 5/8th inch seam allowance and trim your seams later. I'll be using an overcasting stitch which sews close to the edge of the fabric so I only need a small seam allowance – about 1/4 of an inch. Draw in your seam allowance all the way round your pattern.
14. Cut it out and mark it up so you can save it to use over again. Add any notes you think will be useful.
This full tutorial on drafting the pattern and sewing the leggings is available as a PDF download for you to keep. To make downloading easy and reliable, the tutorial is hosted in my design account with Payhip. If you don’t already have an account, you will need to sign up to download, but don’t worry, it’s free, quick and easy. Add the pattern to your cart, and then checkout – no payment/address details etc needed.
Types of fabric to use
If you already own leggings then you will be familiar with the types of stretch fabrics they are usually made from. When selecting fabrics, stretch and recovery and most important. If the fabric is fairly thick and only has ‘give' rather than stretch then you will find your leggings hard to get on, and stiff to move around in. Look for fabric that contains lycra/spandex at least 5%. 5-10% would be better. Lycra/spandex allows the fabric to stretch, but it also gives it rebound.
A 100% cotton jersey will certainly stretch, but test some out in your local fabric shop or on a scrap you own – give it a good stretch. When you let go, does it look the same as before or does it still look a bit stretched, a bit wrinkly? Without that lycra, the fabric won't rebound back into shape the same way. That's Ok for pj's but you won't want to go out in leggings that don't rebound because before you know it, your leggings will be suffering from baggy bum and loose knees.
How to sew your leggings
Fold your fabric in half with the two selvedge edges together. Place your pattern on the fabric with the center line parallel to the selvedge. Cut out two pieces of fabric using your new pattern so you get two mirror image pieces.
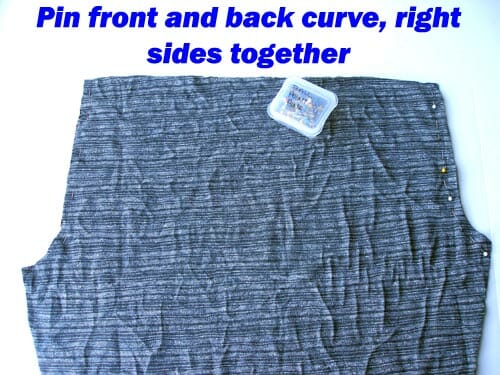
Put these two pieces right sides together and pin along the front and back curve only.
Sew using a stretch stitch, narrow zig-zag stitch or serger to allow the stitches to stretch with the fabric.
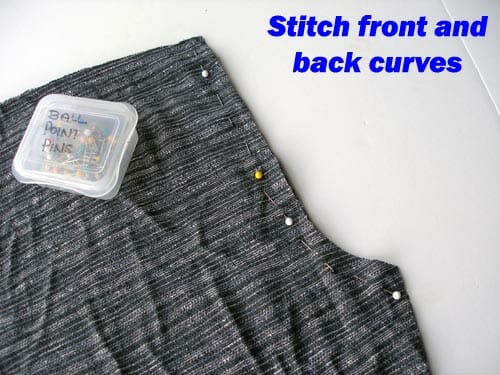
Most knit fabrics don't unravel but you might want to trim your edges down to about 1/4 of an inch and then finish with a zig-zag or another row of stretch stitches for strength.
Now pick up the pieces and put the front and back center seams together and now they look like leggings. Match up the leg seams, pin and then stitch.
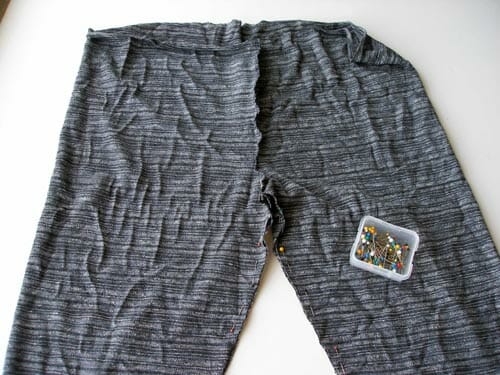
Try on your leggings for fit, adjust if necessary. Check out the height of the waist front and back and make any adjustment. Take your wide elastic around your waist (or where you want the top of the leggings to come on your body) until you get a comfortable fit and mark it where it overlaps, but don't cut it just yet.
On the inside of the leggings, pin one end of the elastic to the center back seam. Now mark half way and quarter way around on both the leggings waist seam and the elastic. Match up those marks and pin in place so the elastic is evenly spaced. You may have some excess fabric.
Stitch the elastic to the waist of the leggings using a triple stretch stitch if you have one, or a large zig-zag stitch. Slightly stretch the elastic if needed to match the fabric, but don't stretch the fabric at the waist as you sew.
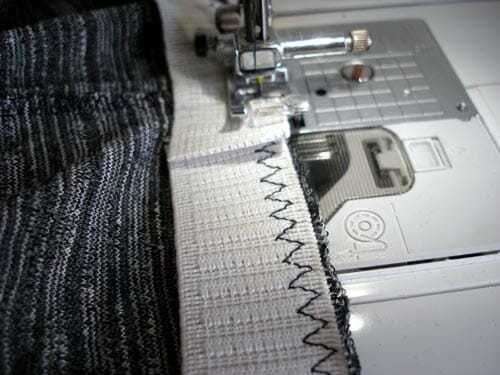
When you get to the overlap, cut the elastic flush with the other end to reduce bulk. Secure the two ends together with a few zig zag stitches.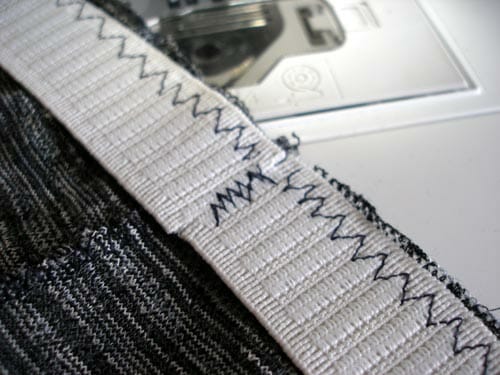
Turn the elastic inwards, keeping a nice tight edge and then stitch again over the previous stitching to hold it in place.
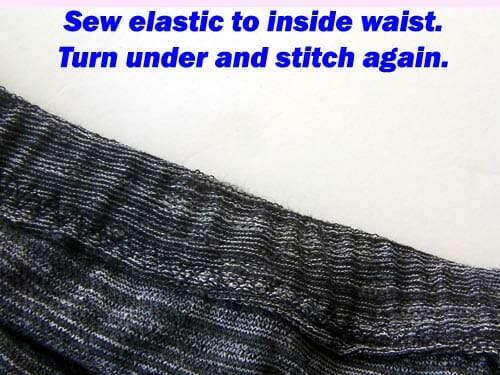
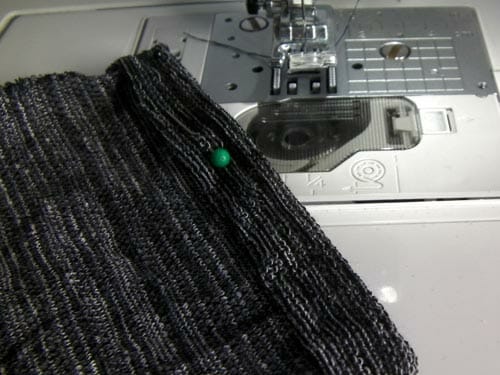
Try on the leggings and check the length. Turn in the hemline and stitch using a twin needle or a narrow zig-zag stitch. And you are finished. Now use that same pattern to go and sew lots more. They're really quick to sew!
The pattern can also be adapted to make leggings for children too. In the case of children, you may probably prefer leaving the ease setting at 100 for a looser fit.
Want to be featured on So Sew Easy? Send in photos or links to things you've made with my patterns or tutorials. Feedback, comments, suggestions and requests all also welcome.
Authored by: Deby at So Sew Easy































I finally made my own leggings using your leggings pattern. My mock up ended up with two right legs. So I made sure to flip the pattern for the final product. My plain pair was soooo sew easy. Then I got creative and added an accent piece. I can send you pictures if you want them.
Ah yes, I’ve made the same mistake once on a pair of trousers, very easy to do. They are a quick and easy sew once you have the pattern all set to fit you. I really must get round to making some more perhaps in a shorter length for yoga. I’d love to see photos – can you load them to the forum at http://soseweasy.ning.com then we can all admire your good work.
Gosh thank you so much for this pattern. It’s hard to find leggings in plus sizes and this makes it easy.
Amazing and easy tutorial to follow.
Question… How would a guy go about adding that extra room?
You would have to change the slope at the front to give more room in the front curve, but its not something I’ve done. But I know a man who has – take a look at this guy who used the pattern to make a spider man costume and made man-adjustments.
I just came across this and would love to try it. Do you think it would work for workout leggings (to wear to yoga?). I am in love with mid-foot leggings these days and think it would be fun to make my own rather than dropping $100 at lululemon 🙂
Absolutely. Provided you get the right fabric, these are perfect to work out. I wear mine to yoga all the time.
I am excited to try this legging and was wondering if anyone has any great online sources for nice legging material. I have a feeling my Joann’s won’t have much of a selection.
I get most of my knits from two places. Fabric Mart or Fabric.com. They both have a very big range, good prices and I’ve never been disappointed.
Thanks Deby!
Hi Deby. THANK you for your instructions. I too was stumped by G & J calculations because I use a MAC which uses Numbers program instead of Xcel. So I’ll make the calculations the old fashioned way – with a calculator. Thanks!
Renee
I just used your tutorial to make a pair of leggings this weekend and they’re amazing!! Thank you so much! I’m a stay-at-home mom so I consider leggings my uniform and these are super comfy! You’re a genius!
That’s great! Thanks so much for letting me know how they worked out for you Lynne. Got any pictures to share? I’d love to post them on the Facebook page. You can send in by email if you don’t feel shy.
Thank you for the great tutorial and leggings pattern .
So glad you liked it Isabel. Thanks for letting me know you dropped by.
This is awesome I have been looking for a pattern for dance shorts for my very skinny daughter. I tried it last night and it worked perfectly to make a pair of jazz shorts. Thanks a lot I will use this many times over.
That’s awesome! I’m so glad you were able to find what you needed and that the fit was spot on. Maybe if you get a chance, you would take a picture and upload the finished shorts to Craftsy or Facebook? We’d all love to see what you sewed.
You already know I love this tutorial, but I did say I would let you know how my costume leggings came out. Check out my post about them (link below) if you want. They came out pretty well, with minor issues that are in no way a reflection on your tutorial. 🙂 http://spiderbencosplay.wordpress.com/2014/05/24/scary-sewing-of-spandex-part-2-the-crotchening/
So funny! I’m sharing about your costume efforts on my FB page tomorrow so you will get some ladies popping over to take a look at your ‘fitting issues’. I’ll be following along to see how it turns out.
Thanks for sharing! Ha. Yeah, I’m sure my leggings will become an international phenomenon. 🙂
Thanks again for sharing re: my costume blog. There has been quite an uptick in views! Especially for the “Crotchening” post. Maybe it’s the title… Anyway, cheers!
I really liked your video demonstration for taking measurements, so thanks for that AND for your spreadsheet. Those are great additions to the original tutorial on Etsy from 2012. Great work!
It would be cool to figure out how to measure the stretchiness of one’s fabric selection and then to use that figure to decide on ease. If I think of a way to do it, I’ll let you know!
Anyway, thank you for this!
Got it. Thanks again!
Thanks so much for this incredibly detailed tute! I’m excited to make my first pair but when I try to download the spreadsheet Dropbox says that the file doesn’t have permission to share. Is there another way to access the spreadsheet?
Ah ha, they had carried out some kind of security update and disabled all the links. Not very helpful. But I think I’ve got it back up and running so you should be able to get to it now. Thanks for letting me know.
Thanks for the great tutorial! I’d love to make some of these for my mother-in-law. She has a big tummy but a very flat bottom, which makes it very difficult for her to find pants of any type. Can you tell me how I would accommodate her body type with this pattern? It doesn’t seem that the rise would do it, since it’s simply a straight line from the crotch to the waist. Thanks for any insight you can provide!
Hmm, that’s a difficult one. Usually I would say to draft twice, once using a back waist and once using a front waist measurement to get different sizes for front and back pattern pieces. But because this is a single pattern piece I’m not sure that would work. You might give it a try. Draft the same twice, once using the back waist measurement x 2 plus and inch and the second time using the front waist measurement twice. Then compare both patterns you have drawn, take the back from the narrower one and the front from the wider one. Then add on a couple of inches or so to the rise when you draft. Make a ‘muslin’ in a cheap 4-way stretch fabric and test it for fit. Once you can see what changes need to be made, then you can cut them apart again and used the revisions to make a new pattern. Will make for a longer process, but hopefully ensure a much more custom fit in the end. Good luck.
I’ll give that a try. Thanks for your quick reply!
I think you’re a genius! + I loved your photos!!
That’s probably a bit of an over-exaggeration – but thank you anyway!
Being teapot shaped (short and stout) I don’t do leggings, but this sounds like a great tutorial and my daughter wants leggings, so I do believe I’ll be using it soon. I was hoping you might have something similar for yoga pants since they are overall looser than leggings (I was just going to up the ease here but then read carefully and saw that we couldn’t go over 100%, so that was out). If you would do this for us, I’m sure lots of us teapots would be over the moon. Thank you so much.
I’ll certainly add some yoga pants to the pattern schedule Terri. Would you be good enough to send me over some links and pictures for inspiration so I can see the kind of fit that you are looking for and I’ll see what I can draft up. What size hip are you? Do drop me an email…Deby
Please explain the measurement “knee to thigh.” where on knee and where on thigh?
If you watch the video, you will see how I have made marks on the side of my leg and you measure between these marks. If you are still unsure, do ask again and I’ll try to explain further.
OMG thank you so much! I absolutely LOVE leggings (much more effective than jeans for chasing toddlers!) and I have just gotten back into sewing! Dug my Mom’s old sewing machine out of the far reaches of “attic land” and now I am super excited to give these a whirl!
Thanks:)
Yay – I’m excited for you. Good luck with the pattern. It’s pretty straightforward but let me know if you have any questions.
What a great tutorial! I’m so glad you linked up at Sewlicious
Have a great week!
Marti
I love wearing leggings! I really need to make some maternity leggings to wear this winter!
Thank you for sharing! You always have great patterns! Sharing on my fb page. Thanks for linking it up at Monday Funday!
Thank you so much! What a great tutorial! Really appreciate the time and detail as I am a fairly new to sewing.
Heading into summer down here in Australia but a wonderful tutorial for me next year. Down in Melbourne we still get very cool days now (Spring) and then again in Autumn. Thanks so much for the tutorial
Following from ASWC Linky Party.
I fail at making patterns 🙁 No matter how hard I try~ And it sucks ’cause mine are a lot smaller than this. This is pretty awesome though, you definitely gots teh skills!
Eres muy divertida.
Es un gran tutorial.
Gracias por compartir.
Usted es muy agradable. Gracias por dejar un comentario.
This is GREAT! Thank you sew much. I am tall 5′ 10″ and heavy set so I can’t find leggings for me. Always wanted some to wear under long shirts and thanks to you and your video I will be able to have all the leggings I want. I’m doing a happy dance!
This looks fabulous! I am definitely going to be trying this when I get some fabric. I love your video. It helps to have a visual. This post looks like it took you a lot of time to do. How very thoughtful and generous of you to have made this so easy for us to do!!
This is a great tutorial! Can’t have enough leggings, and I’m always too tall for store bought ones. Great post, I’m a new follower!
Thanks for leaving a comment – new followers are always very welcome! I thought your post about drawing on clothing was so funny – I can just imagine a child’s confusion over that project!
Great job Deby! Love the video and the spreadsheet. Sharing via Pinterest!
Love this and totally pinned it!~ I have the hardest time finding leggings because I’m wide and short, so all the ones in my size are WAY too long. boo!
Then this tutorial is MADE for YOU! Good luck with it Angie.
Great tutorial Deby, thanks for sharing.Will have to try this. cheers Val.
Thank you so much for your wisdom. I hope I get to try these soon.
Debbie, thank you so much for the tutorial! You inspire me to continue sewing. I’m glad I found you!!!
Hi Deby
Thanks for the demo. I understand the back and front rise height (H and K), but how do you determine the front and back rise depth ( G and J)?
Measurements G and J come from the spreadsheet – did you use it or are you working things out for yourself? Length G is (Thigh circumference after ease adjustment) minus (waist measurement divided by 2 after ease adjustment), then divide by 3. This first result is G. Times G by 2 to get J. It really is easier with the spreadsheet if you can open it! Let me know if you have any other questions, Deb
Thanks for the clarification. I just purchased a couple of pair of skirted leggings (QVC) and thought that this may be a fun project to combine your tube skirt with these leggings in fun coordinating patterns and colors.
It’s the measurement you need to take for the depth of the waist to crutch (allows for abdomen roundness), and the the back waist and crutch – to allow for curve of the buttocks.Otherwise you get seams doing unspeakable things!
Whoa lady!
This is by far the best custom drafting leggings tutorial I have come across EVER.
Thanks and High Five!
You go Grrrl!!!
Blush – now you’ve made me go all shy….thank you so much for your kind comment. I’m so happy that you like it – I’ll be smiling for hours now. makes up for me having to show my behind on the internet.
I’m completely the wrong shape and quantity for leggings on their own – no wish to frighten the horses! – but, I do wear them beneath long skirts in the winter (am in Ireland, on the coast – an ex-pat Brit, used to N.European weather) instead of tights, which I don’t like. I shall be trying the whole process out, as making them myself is a better way of getting the right fit. Thank you for such a practical and sensible approach.
What I love is how versatile they are – wear them loud and proud if you have the figure for it, wear them layered or under a long tunic or short dress, wear them for lounging/bedtime, or for exercise etc. In fact, I’m wearing them now as I sit at home and blog. Love your British sense of humor – one of the few things I do miss about home in the UK.
Thanks Deby! Great tutorial. I really appreciate you sharing your knowledge with all of us sewers out there. I am amazed that you have not been sewing a lifetime!
I love leggings! Thanks for the great tutorial. Will be trying it out soon.
Great tutorial, Deby! Love the wobbly pictures and the video. I’ll have to try to make some of my own.
I’ve just skimmed your post, Deby… WAY too hot to think about leggings here at the moment, but I’m pinning for next year. I wear a lot of leggings with tunic length tops. I was going to buy a pattern, but drafting my own, with your fabulous help, is even better. Thanks so much for sharing!!!
I wear a lot of leggings here in the evenings. It’s still warm but if I pick my fabric carefully they are still comfortable, and perfect for keeping the evening mosquitos away. Glad to hear this is going to be useful for you Pam.
Featured today, Deby…
http://www.threadingmyway.com/2013/10/threading-your-way-features_19.html
Yay Pam – you are always the best. Thank you so much.