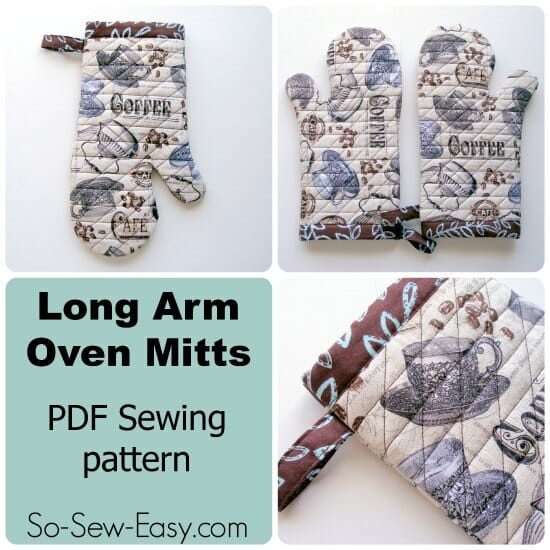
With all of the recent posts on bias binding, and the potholders tutorial to get you started, this Long Arm Oven Mitts pattern is going to be a breeze! I was happy to make up a matching pair and retire my old and very worn oven mitts for good. But these aren't your standard oven mitts (oven gloves if you are from the UK). I get fed up with burning my wrists on the upper shelf when I take things out of the oven, so these are drafted extra long in the arm to make sure your wrists and arms are protected too.
Features:
- Longer length to protect your wrists and arms
- Can be shortened for regular length too
- Quilted
- Insulating layer and batting for heat protection
- Full sewing instructions are downloaded with the pattern pieces
Skill level: Beginner.
Where can you get the Long Arm Oven Mitts pattern?


As usual, to make downloading easy and reliable, the pattern is hosted in my design account with Payhip. If you don’t already have an account, you will need to sign up to download, but don’t worry, it’s free, quick and easy. Add the pattern to your cart, and then checkout – no payment/address details etc needed.
Download the pattern pieces and full instructions from my design account at Payhip...
Having trouble downloading or opening the pattern? Take a look at my post to help you out – How to Download and Print PDF Sewing Patterns.
Materials (for one mitt)
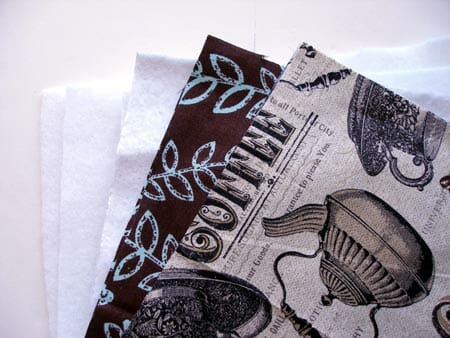

- Outer fabric 20 x 15 inches
- Inner lining fabric 20 x 15 inches
- Insult-Bright insulating lining 20 x 15 inches
- Fabric for loop and binding 4 x 22 inches
- Cotton batting, old sweatshirt, fleece, toweling for lining
- Useful – overcasting foot, disappearing fabric marker, quilting guide
Long Arm Oven Mitts Sewing Instructions
These are small photos for the blog only. The pattern download includes detailed instructions and bigger photos to help you step by step along the way to a great finished pair of oven mitts. This is just a quick overview.
NOTE – if you want to make a regular length oven mitt, simply check for size and remove the extra length from the wrist end of the pattern. If you shorten the pattern you may also shorten the length of the fabric used accordingly.
1. Cut your fabric as follows:
- Outer fabric – two pieces 10 x 15 inches
- Inner fabric – two pieces 10 x 15 inches
- Insul-bright or other insulating liner – two pieces 10 x 15 inches
- Batting, fleece or other lining fabric – two pieces 10 x 15 inches
- Hanging loop – one piece 3 x 6 inches
- Wrist binding – two pieces 4 x 8 inches
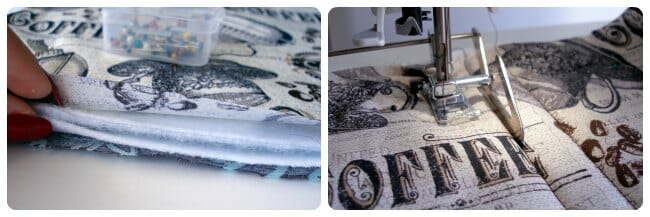

2. Layer your fabrics starting with the lining fabric right side down, then the batting or fleece, then the Insul-Bright with the metallic reflective side facing upwards, then the outer fabric right side up. Pin through all of the layers to prevent them shifting as you quilt.
3. Starting in the middle, quilt through all layers. This was my very first time quilting, and I used the quilting guide attachment that came with my machine to keep my lines even. I started with a cross-wise line, then worked out from the center. Then I started at one corner and did a line across at 45 degrees to form a diamond shape and working again from the center, spaced out lines equally until the entire piece was quilted. Repeat the same for the other set of fabrics, using the same width for your quilting lines.
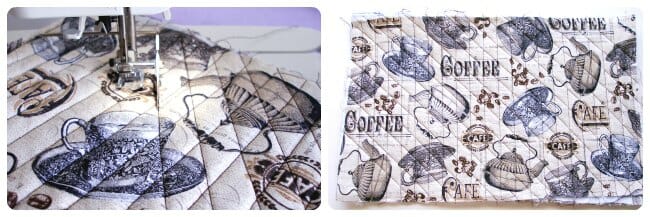

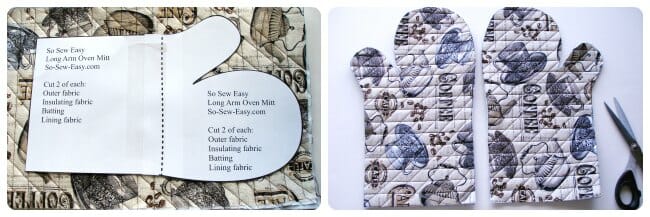
4. Now place, mark and cut out your pattern. IMPORTANT – don't cut both sides with the pattern facing up, you need a mirror image, so cut one side with the pattern facing up and one side with the pattern facing down to get a mirror image.

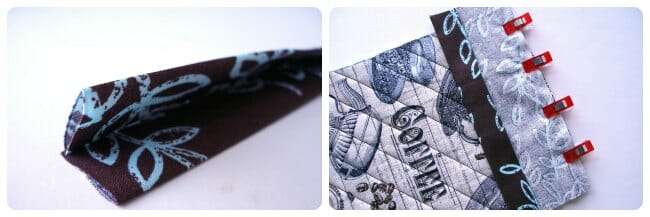
5. Take your pieces of wrist binding and make them into double fold binding tape by pressing in half, then pressing each half into the center.
6. Open out the binding tape, pinning one raw edge to the wrist edge of the mitt, right sides facing. Pin in place and then stitch in the fold of the binding.

7. Turn the binding over to the inside of the glove, pin in place. Then stitch from the outside, just inside the seam line catching the edge of the binding on the reverse. You will find useful binding tutorials on the sewing tutorials page.
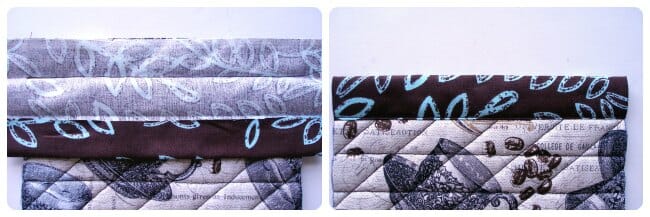

8. Trim the binding even with the edge of the glove, then use a serger, zig-zag stitch or overcasting stitch to neaten all the way around the edge of both halves. I used my overcasting foot for a neat finish.
9. Make the hanging loop by folding the piece in half length-ways, then bringing the edges into the center and folding in half again to make a long strip of fabric. Sew close to each of the folded edges. Then fold in half to create a loop and baste it to the side of one glove, just underneath the binding.
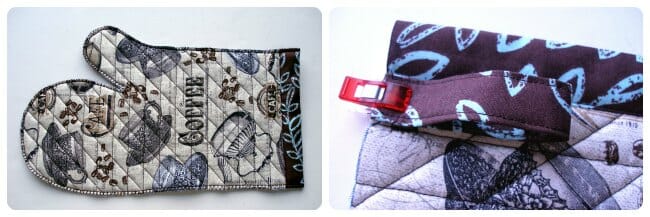

10. Now place both halves together, right sides facing and stitch around the edge with a narrow hem. I used about a 1/4 inch, keeping my line of stitching just to the outside of the neatening stitches. At the thumb, snip close to the stitches, but not through, to create room for movement. My Clover Wonder Clips helped me keep the thick layers in place better than regular pins.
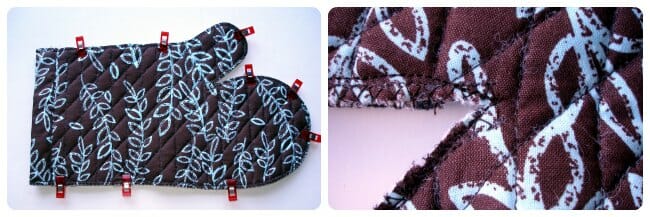

11. Turn your oven mitt the right side out. You will need some kind of pokey tool to help in turning the thumb.
12. Cook, wear and enjoy!
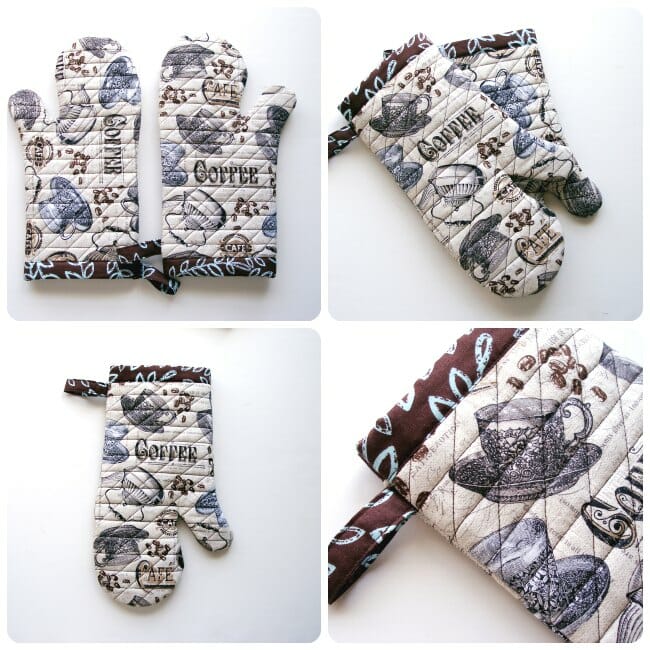

Thanks for downloading this pattern. Watch out for the next pattern coming soon.


As usual, to make downloading easy and reliable, the pattern is hosted in my design account with Payhip. If you don’t already have an account, you will need to sign up to download, but don’t worry, it’s free, quick and easy. Add the pattern to your cart, and then checkout – no payment/address details etc needed.
Download the pattern pieces and full instructions from my design account at Payhip...


Thank you very much!
Thank you for this. I would like to make them for myself and then for gifts for a couple of friends of next Christmas. I really do appreciate your free pattern.
Mayra, thank you vey much!!!
My pleasure, Happy Sewing!
Mayra, thank you. This is good timing. It’s hard to find the longer oven mitts in the USA too. (I recently made one mitt from a pattern from a different source and it finished too small and I could not get the thumb turned out even with tools. I had used InsulBrite and very thin batting. I will have to compare the size and watch my zigzag more carefully.)
Mu Pleasure Carol, indeed they are hard to find, I make them long for my mother who has diabetes and any cut or burn can get to be very hard to treat.
Thank you
My pleasure!Happy sewing!
[…] 1. Cooking or Oven Mitt […]
do you have any patterns for oven mitts that open like a puppet?
No, but what a great idea!!!!! Consider it done.
I just finished a pair of these using batiks to match my kitchen accessories. It was my first time using both insul-bright and the overcast stitch. My mitts turned out sort of like lobster claws in shape, probably due to my inexperience with overcast stitching. On the bright side, they work great and fit perfectly! (Although my hubby can’t get his hands in them.) Really great directions; I plan to make more now that I understand what I did wrong. Thank you for sharing your talents!
Hi Beeje, thanks for sharing your comments and experience. Kind regards.
Does the oven mitt pattern include seam allowances?
Thanks!
Anita
Yes it does Anita, but do check your hand against the pattern – if you have large hands or want to make it for a man with large hands, just check on the size first.
Thank you.
I have small hands, and it looks like I’ll have plenty of room.
I’m also making a pair for my sister, and she is six inches taller than I am. Hers are a surprise, so I’m going to cross my fingers and hope for the best.
Anita
Thank you, Deby for all the work you did! I actually was going to make a pair of oven mitts a while ago, even bought fabric and batting, but …. you know… Now with your pattern I have no excuses not to make them! Thank you!
I know, sometimes practical sewing isn’t the most exciting project and gets put off, but actually I like to sew things that I will really use every day and find this more rewarding in the end than sewing a most awesome dress I’ll only ever wear once.
Good Morning!! thank you for the tutorial. what is the name if the coffee fabric and if possible where did you purchase? Coffee is my theme!!! 🙂 and i love it….Thanks!
Kelly
I love Coffee too and just HAD to get this fabric. It’s from JoAnns fabrics – but I did get it some time ago and I don’t see it on the website now. You might still find it in store.
At least i have a place to start! Thank you thank you thank you!!! 🙂
Thank you for this great pattern!! I’m going to try it today. Where did you get that cute fabric? Do you know the name?
It’s from JoAnns fabrics – but I did get it some time ago and I don’t see it on the website now. You might still find it in store.
Thank you, just downloaded pattern to library. I have been on your tutorials and have ordered a wedge ruler to do the round playmat quilt. I’m going to adapt to make a round table cloth.
Thank you for all the help and inspiration