


Hi everyone! It's Jann from Newton Custom Interiors again. I love sewing for my grandchildren, and I especially love sewing something for them when they're newborns. Today, I'm going to share with you how to make a baby quilt. This is what I made for my newest grandson when he was born, and I love how it turned out.

How To Make A Baby Quilt
The finished size of the baby quilt is 33″ wide x 38″ long

Materials needed:
1/2 – 3/4 yards of 4 coordinating fabrics
1 1/4 yards of fabric or lining for the back side
1 1/4 yards of Warm & Natural
Disappearing ink marking pen
Thread to match binding fabric
Thread to match quilt fabrics
Instructions:
- Pre-wash all of the fabrics and the Warm & Natural (following package instructions).
- Cut out your back piece of fabric and the Warm & Natural at 33″ x 38″.
- Cut out strips of fabric for the outer edge binding. The strips are cut at 6″ wide. Cut enough strips to go around the outer edge of the quilt. Approximately 150″ will be needed.

- Cut out the 4 corner pieces 7″ x 7″

- Cut out the 4 outer rectangles. Cut 2 of them at 7″ x 21″, and 2 of them at 7″ x 26″

- Cut out the 4 inner squares at 6″ x 6″.

- Cut out the 4 inner rectangles. Cut 2 at 6″ x 11″, and 2 at 6″ x 16″.


- Cut out the middle rectangle at 11″ x 16″.

- Sew all of the pieces for the front of the quilt together using a 1/2″ seam allowance. Press seams open.

- Lay the back piece of fabric wrong side up on table. Lay the piece of Warm & Natural on top of it, and then lay the front piece right side up on top of the Warm & Natural. Pin all of the layers together.

- Mark the quilting lines on the front side of the quilt with a disappearing ink marking pen. I wanted my quilting lines to follow the square shapes across and down the quilt. Sorry, I didn't get a good picture of this. Tip – roll up the quilt so that it is easier to work with at your machine.

- Stitch along the lines marked. Here you can see how the stitch lines look on the back of the quilt.

- Seam all of the binding strips together using a bias seam. Iron the strip in half and then each side in half again.
 Glue baste the binding to the outer edges of the quilt. The binding will encase the edges of the quilt, so that you will have binding on both sides of the quilt.


- Fold the fabric as shown for each corner – front and back sides.


- Topstitch the binding to the quilt – making sure that you catch the binding on both sides.

- Here's what the front and back sides will look like after the binding is topstitched.


I hope you've enjoyed this sewing tutorial for how to make a baby quilt! Have you made a baby quilt for someone special?

I hope you've enjoyed this sewing tutorial for how to make a baby quilt! Have you made a baby quilt for someone special?
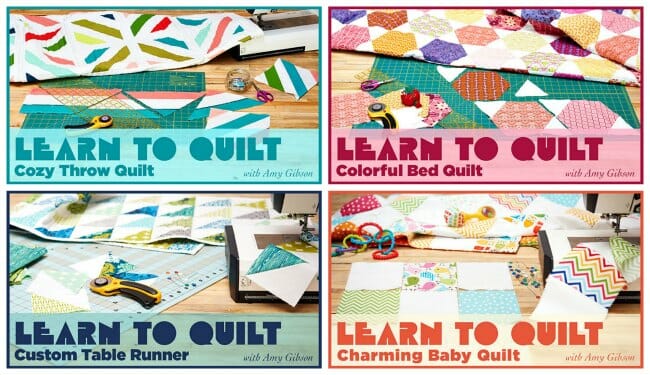
If you want to learn more about easy quilting, check out these beginner quilting classes:
- Learn to Quilt: Charming Baby Quilt
- Learn to Quilt: Cozy Throw Quilt
- Learn to Quilt: Colorful Bed Quilt
- Learn to Quilt: Custom Table Runner
Hi! I'm Jann Newton, and I blog about home decor, sewing tutorials and DIY projects at Newton Custom Interiors.
Recently, I was asked to teach a class for Craftsy - Custom Bedding - Decorative Shams & Bolsters. So Sew Easy readers enjoy a discount on my class!


How do you sew the the outer 4 corners. I’m confused with it. The inner was easier to piece together. I wish there was a video for this one baby quilt.
Thank you for this pattern. I learned to sew by my mother giving me a piece of fabric and a pattern with the instruction, “you know how to read”. I’m always looking for new looks for my baby gifts for friends and my adult kids friends. I usually give receiving blankets, bibs and burp cloths. A quilt would be a nice addition. Thanks again.
I love the design. I will be a new grandma in August. The nursery theme is woodland…the colours for your quilt above is perfect. Can you tell me where you bought it!
This is a very old post. Sadly fabrics are no longer available.
I was looking for a nice quilt that would go relatively fast and be attractive. This one fills the bill. We are making wheelchair lap robes for disabled veterans in our area. I just need to add a couple inches extra on both sides. Very nice pattern, thank you for sharing.
you are most welcome, if you can please when you are done use #soseweasy so I can see your quilt, Thanks!
Have been everywhere looking for instructions for a baby blanket that is NOT QUILTED !!! Been to the bookstores, the fabric store (s) and all over the internet ….
How do I find a baby blanket that is NOT QUILTED???
I love it! My very first blanket and it turned out great. I am so happy. Your instructions and pictures were such a great help.
Thank you so much for sharing.
Rebecca
I made one for my first baby last year. It’s the perfect size for the car seat. Thank you for sharing!
Regarding the Binding…..do I sew the binding onto the back side first, then top stick binding to front side.
Reviewed the 2 photos above….thx.
Thank you for making this! I followed this for my first quilt and I’m really happy with the result!
Hi Leanne, that’s great to hear. Any chance you can attach a photo here in the comments? I’d love to see your work.
Hi, I’m making the baby quilt. I figure out the middle. But how do you sew the out-corners pieces to the center? I’m lost at the outer four corners and the pieces to sew to it
Should the polka dot strips be 7 x 23 and 7 x 28 rather than 7 x 21 and 7 x 26? Just adding the 2-6x6s and the 6 x 11 (12+11=23) and the 2-6x6s and the 6 x 16 (12+16=28) I get different measurements.
Nevermind…I figured it out. Your measurements are correct, due to the seam allowance.
I would suggest cutting the backing and batting a few inches bigger that the measurement for the top, then trim after the quilting is finished.
I am having trouble making the binding. Has anyone made this using pre-made binding and if so, what width would I use?
You’re pictures are great and were very easy to follow until I went to sew the last two vertical rows onto the quilt top and the measurements didn’t add up. Then I went back and read all of the smaller print and found your mention of using a 1/2″ seam. This was really frustrating as I then had to seam rip and now I am having to figure out how to save this quilt. I had hoped for a quick and easy baby present and now that won’t be the case. Please put in bold somewhere at the beginning of the blog that you are using a non-standard seam allowance for quilting. Maybe in a huge font. I am going to have to cut fabric from my backing in order to fix this or re-sew the inside seams… I truly don’t understand why you would use non-standard quilting seam allowances if you are teaching people how to quilt.
Tonya, I’m not a quilter. I make pillows, draperies and valances for my business. In the drapery world, 1/2″ seam allowance is the norm. So, whenever I come up with a sewing project, that is how I figure the measurements. Sorry this caused some confusion, but it is written in the instructions to use a 1/2″ seam allowance.
I hate that you had to apologize for someone else not following instructions. I’m making my second quilt ever and both times I have used your pattern and I love it. You’re nice enough to post it without asking for money, I’m not going to complain about something that went wrong because I didn’t pay attention. THANK YOU!
I think 1/2″ seam allowance is a good idea for a baby quilt. That is what my mom always used because it gets washed a a lot.
Do you think that I would be able to use fleece or would it stretch too much?
wow thanks for sharing what seems to be a simple quilt! Would be a good first time quilt for me. Love the photos, too! I am going to give it a try:) Thanks again for sharing!
Gail, thanks! Good luck with your project!
What type of foot did you use?
A regular sewing machine foot. Nothing fancy.
What type of glue did you use?
I’m brand new to this so I hope this isn’t a dumb question. Thanks!
Just fabric glue.
I have a question … it says to use a 1/2 inch seam allowance … Wanted to be sure this is correct because I thought quilts use a 1/4 inch seam allowance.
Hi Sharon, this design is made for using a 1/2 inch seam allowance. Best to follow those dimensions.
Mayra, this was an easy baby quilt to make. I made one & I love it ! Btw, I used 1/2 inch seams for it.
Hi Janice, thanks for the feedback. Glad you enjoyed it. Happy sewing!
Janice, I’m so glad you enjoyed making this baby quilt!
Sharon, I am not a quilter, so I made my grandchildren’s quilts using the 1/2″ seam allowance that is the norm in my drapery/pillow world. It will work either way, you would just need to adjust your cut measurements if you want to use a 1/4″ seam allowance.
I wish this was done in video tutorial, I like having my IPad nearby as I sew…..I guess I’ll just have to download all the directions. Ugh, I’m getting lazy in my old age……lol
Gorgeous colours and an easy to follow tutorial, Jann. Featured today….