
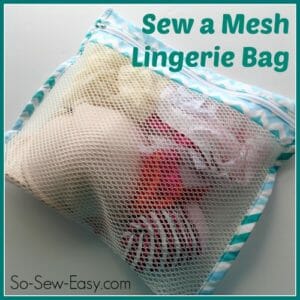
Did you see the mesh lingerie bags I sewed? I had bought a yard of the mesh fabric and even after several bags, I still had a good size piece left over. What to do? Well I thought about the properties of the mesh fabric. It's pretty hard wearing, its breathable and lets water drain right through. Washable, you can see through it and its a bit stretchy in one direction.
I was in the shower wondering about how to use the left overs when I realised my husband had used the last of the shampoo. Grr, I hate having to drip water all over the bathroom floor to go and get a new bottle. If only we had room for more bottles and all my beauty goodies without cluttering up all around the bath. Light bulb moment – we need a hanging shower caddy! The mesh fabric was perfect.
Where to buy your mesh fabric
It’s not something you’ll find everywhere and might not be in your local fabric store. You can find mesh fabric online at JoAnn, Fabric.com and Online Fabric Store.
How to make your own mesh shower caddy
You will need the following materials:
- Mesh – 16 x 16 inches
- Mesh pocket 1 – 16 x 5 inches
- Mesh pocket 2 – 16 x 7 inches
- 7 strips of fabric 2 x 18 inches
- 2 strips of fabric 4 x 14 inches
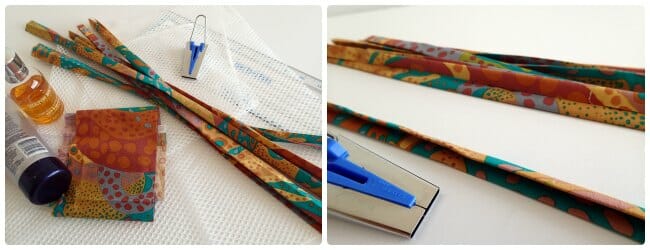

Cut out all of your pieces. Prepare the binding by folding each strip in half length-ways, opening out and turning the raw edges into the center before folding in half again to make 4 layers with the raw edges hidden. I used my Clover Bias Tape Maker, in the same way as making bias binding, even though these were straight cut and it saved a lot of time and burned fingers.
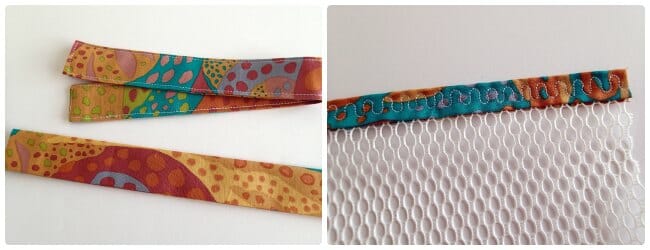

Repeat the same process for the 4 inch wide strips to make finished strips 1 inch wide. Tuck in 1/2 inch at each end to make a neat end and then top stitch all round. Set them aside.
Bind the top of both pocket pieces by sandwiching the mesh fabric in the middle of the binding as you sew. Because mesh fabric is mostly air and holes, I used a wide decorative stitch to make sure it was strongly caught in the binding. I also slightly stretched the mesh for the top pocket so it could accommodate round jars so mine looks a little wavy, but having done it, I don't really think this is necessary.
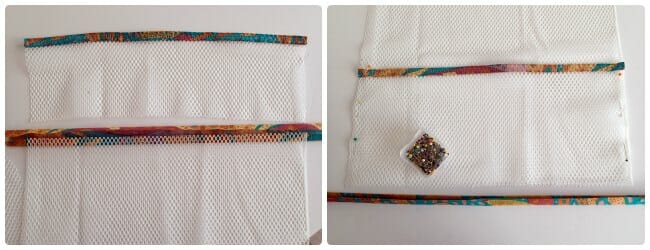

Line up the bottom of the bottom pocket with the bottom of the main mesh piece and bind across catching both layers. Trim the ends of the binding.
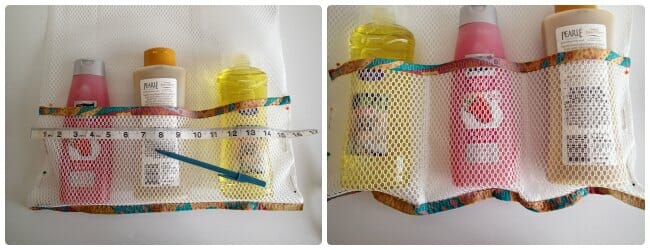

Add some bottles and decide where you want your pockets depending on what you plan to store. I used 3 equal pockets, measuring mine at 5.5 and 10.5 inches from the left side. Sew from top to bottom with a wide zig-zag, triple zig-zag or decorative stitch to make the divisions.
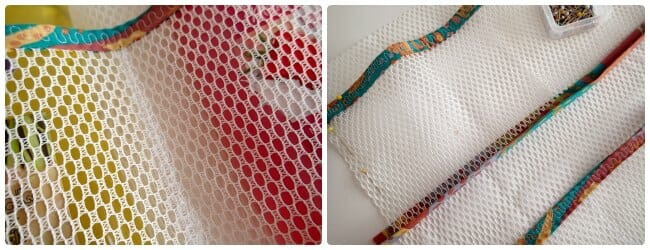

Decide on placement for your top pocket. Pin in place. Fold a strip of binding over the lower edge of the pocket and stitch through all layers.
Measure, mark and stitch for the top pocket divisions. I made mine at 4, 8 and 12 inches across. NOTE – just stitch through the mesh and leave the top binding open.
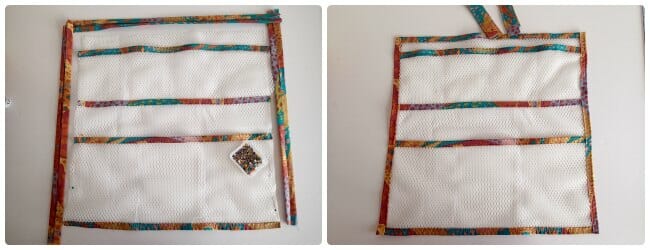

Bind the top of the piece and trim. Then bind the sides, catching the pocket edges. Turn in 1 inch on each end of the side binding for a neat finish.
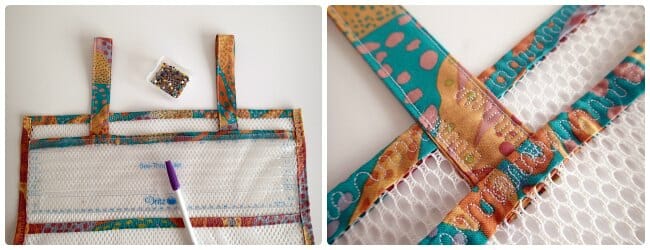

Measure and place the top hanging straps. At the front, tuck the end of the strap in behind the top pocket binding for extra strength and match it to the other end of the strap on the back of the mesh. Top stitch through all layers. I centered my straps 4 inches in from each side.
This creates fixed straps which you can hang from your shower curtain rail or from the curtain hooks. If you want open straps, you can sew them with Velcro so the caddy can be easily moved, or sew two long straps and tie them at the top. It's up to you.
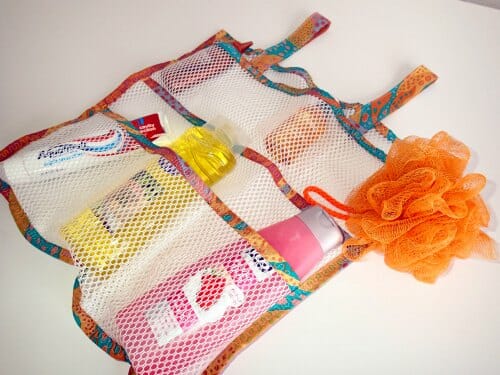

You can download this tutorial as a free PDF to keep – DOWNLOAD.
Now I've just got some scraps of the mesh left, enough for one more tiny project. I've got an idea, will see if it works out…
Authored by: Deby at So Sew Easy




I would also like to suggest an old shower pouff. I save those cause ya just never know what you might be able to do with it. It’s not as heavy duty as perhaps a laundry mesh bag, but if it works, it works! I haven’t made one yet, so I can’t say what results I will get. But thank you so much for the pattern!
Also, did you know you can put a tension shower rod along the “wall” of your bathtub and hang a mesh shower bag on that to hold all your toiletries? No need for shelves or placing bottles on the floor of the shower.
Thanks for the pattern. I made it in a couple of hours. It’s easy, fun and now I am going to make a few more for the motorhome.
In the US we get some produce in plastic mesh bags (onions and potatoes for example). I could see reusing that for something like this. It would have to be doubled but, I believe, workable.
[…] Mesh Shower Caddy […]
Using your pattern, I made one for my husband’s reading material & glasses he keeps in the bathroom. It hangs on the exterior of the shower door. Works great & so nice to get that stuff up off of the bathroom floor. I’ll be making more of these to take with us when we travel too! Such a great & useful pattern. Thank you!
I made a shower caddy similar to yours. My hubby would not buy me one so your pattern helped me to make one! So, happy with the outcome. Thank you, Renea
Looks fantastic! Well done. Thanks for sharing the pic.
I like the shower hanging caddy. I think the mesh would make great beach bags and veg bags
as well. Its really hard to get hold of in UK.
love this tutorial! Your tutorials are always full of pictures and you make it so easy to follow along with each step of the project.
I love this idea! As I was reading this I thought how great it would be to hang on the shower head arm….how? Use a plastic hanger with metal hook and the plastic arms have hooks (I have these from clothing purchases) that could hold the tabs on the mesh organizer.
Great idea Jane. Thanks for sharing!
You can buy a mesh laundry bag at the dollar store and then make these projects- I would imagine the mesh would cost less this way, but I don’t know. I do know I am inspired!
How about hanging them in the closet for socks, stockings, scarves, mittens, slips, etc.?
Hi Deby, so did you use what was left of your mesh? I bought a cpl of yards of mesh and I will sew this organizer tomorrow – perfect for our vacations. But it would be wonderful to get more ideas to use it all, thanks! I love your tutorials.
I made the shower caddy and the lingerie bag, so I really only have some scraps left over. They are still there waiting for me, but I was thinking maybe a simple drawstring bag to use as a soap holder. I think it would be ideal to pop in your bar of soap and then scrub with the mesh baggie, like a soap and scrub in one. What do you think?
Genius idea! Thanks. Perfect for traveling and to use at home, too. I will definitely make the soap baggies asap!
I would use the suction cup hooks, then you could place it in the most convenient area
How are you supposed to hang it up???? Take the shower rod down and run it thru the loops?
You could do that certainly, but my shower curtain hangs on hooks so I just hung it over a couple of the hooks that hang the curtain. Then it slides back and forth with the curtain.
This will be Perfect for the shower in the camper!! Have you seen the NEW hang-up hooks & accessories for the shower by Command Products? I think 2 hooks will hold this mesh bag just fine! This is TOO cute Deby, THANK You for sharing!!! I’m off to the sewing room to cut up the hubs old ditty bag from when he was in the Navy. Have a GREAT week Y’all!!!
Clever idea, Deby. This would also be good for travelling, for those times when there’s nowhere convenient to place shampoo, etc.
True, could roll up in your bag then just unroll and hang when you get there.