I'm embarking upon an epic fitting exercise and learning to sew the perfect fit this year, following along with the Craftsy course of the same name and the lovely instructor Lynda Maynard. You can read Part 1 of the series at 2013 is the year of Sew the Perfect Fit, Part 2 at Muslin Bodice Adjustment and Part 3 in Bodice Pattern Adjustment. Today, making a skirt muslin, adjustment and pattern correction.

Warning ! Not very flattering photos below. If you are under 18 or of a nervous disposition or have a weak heart or stomach – best not to look!
Lesson 7 – The Lower Body, Making a Skirt Muslin
So having followed Lynda's directions, I cut my entire pattern as a size 12, despite the pattern envelope telling me quite clearly that I was going to be a much larger size than that below the waist. I made my muslin without alteration and tried to get it on. Yikes. And you don't even want to see the back view – trust me it's not pretty.
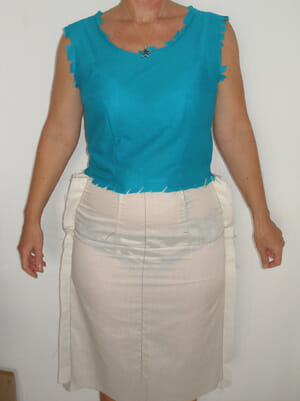
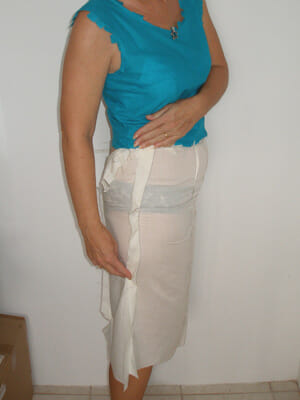

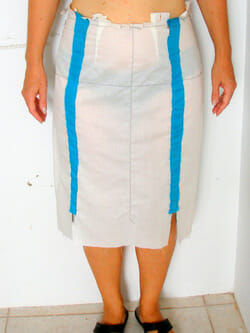
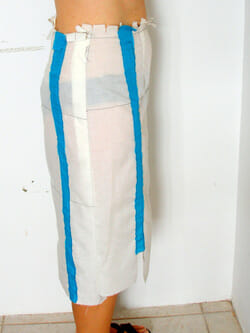
Again I used the slash and add method, cutting the skirt from top to bottom front and back on the outside of the darts, and adding in fabric until it felt right. I pinned and then basted the extra fabric in place because the pins kept falling out as I walked about.
  |
  |
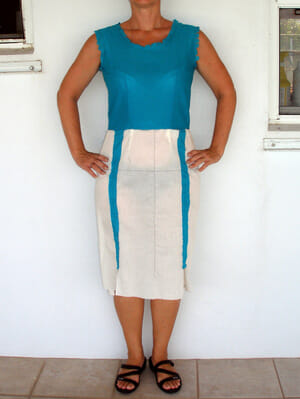
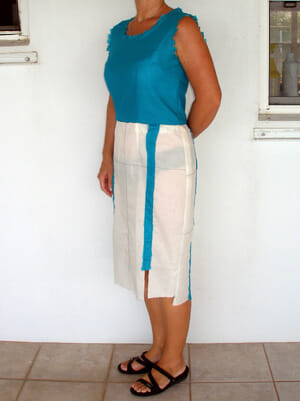
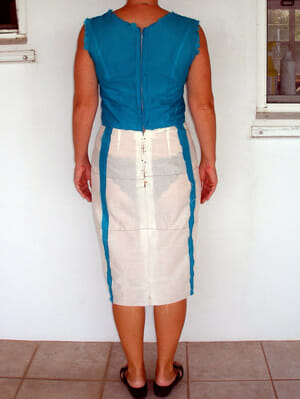
I got all over-excited and pinned it to the bodice I had already completed to take a look. Well, I think it's a very unusual take on this season's trend of color-blocking! But as my first ever real muslin – I love it!



Time to mark the skirt adjustments on the pattern pieces. Again I traced the tissue pattern onto some medical paper, marked all the pattern markings including stitching and cuttings lines and then made the same adjustments to the paper as I had made to the fabric. This time it was a little more complicated as I had not added a tapered or straight amount but a combination so I had to use various hinge points. Here are the finished pattern pieces with the adjustments marked.
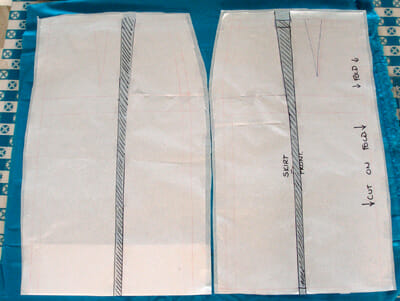

Because of my square shape, I needed more in the waist, a little less in the hip and not much added from the widest part down.
In our next lessons, sleeves, armholes, and truing the pattern.
Good news for So Sew Easy readers - in return for this class review, Payhip have offered you all an exclusive discount off the Sew the Perfect Fit course - get 20% off using this direct link.
Disclosure – I bought the course myself and am not being compensated in any way from Craftsy for this course review. I really love the Craftsy classes and negotiated this special rate for your benefit. I am an affiliate so will receive a commission if you buy this course using my special discount link.
Authored by: Deby at So Sew Easy


I love your tutorial thank you for share .
whow… you are getting technical here. what a great share! thanks for linking it up, gal!!!
Really helpful tutorial! And the skirt is really looking good! Thanks for sharing at All Things Pretty!
As usual, your insight and directions are perfect!
Amazing as always! I am stopping by from Made U Look Blog hop today. I look forward to your visit at homemaker-mom.com
The way the wrinkles in the back are going it appears you maybe need a wee bit more room in the hip – the wrinkles are similar to “crotch smile” in the front where the hips essentially pull lower fabric up to make more wiggle room.
I love your muslin though! The method seems so easy. Does the Craftsy course include jacket/top muslins? I have thicker arms and a bustier chest and I’ve been wanting to muslin out a jacket or long sleeved top for ages but haven’t had the nerve to start.
Can’t wait to see the finished product!
Thank you for the tips. Yes, its hard to fit yourself – I wish I had a pinning buddy. I really have found it very easy, especially now I am starting with the correct pattern size. The slash and add and then do the same to the pattern – it feel kind of ‘rough’ but it has worked well for me so far. The course only includes the dress, but it goes through so many different variations, on 3 very different models, I really think once you have the method understood, it would apply to anything you want to alter. There are plenty of bust alterations and a good section on sleeves, although I am making the sleeveless dress. I certainly recommend the course – I’m really learning a lot.
Wonderful tutorial. I can’t sew well enough to make a skirt but I wish I could.
Thanks for sharing at our Thursday Favorite Things Blog Hop.
Angel
You make this look soooo easy, but I know it’s not! Smiles!
great job! pattern alterations are certainly not for the faint of heart!
I love this! I have never really tried to sew skirts for myself…maybe will give it a try. Do you try sitting also to see what it does?