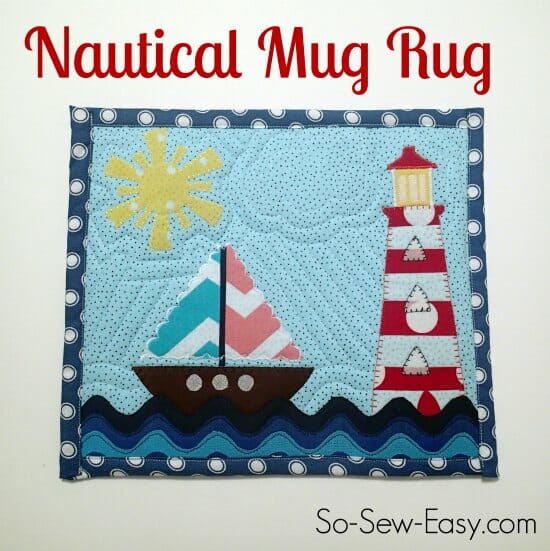
I heard that everything nautical was in fashion this year. Nautical has always been one of my favorite styles in art, decor and sometimes clothes too. If that makes me fashionable, it will be the first time in about 25 years! They say everything comes around again if you wait long enough.
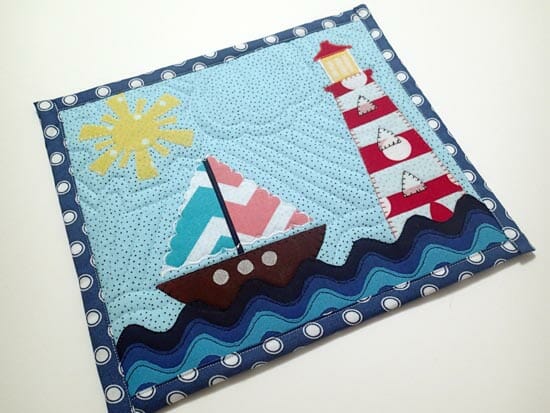
I searched my stash for some red, white and blue. I wish I'd had a better red than this one with spots on, and perhaps a brighter yellow, but I'm pretty happy with how this came out.
Want to make one yourself, or one similar? Great! Instructions and the template to download are below.
Is this your first time with applique? Have a review of this article with more details on the applique process.
Sew a Nautical Mug Rug
Download the template and instructions and print out the template on your printer. Adjust scaling if you like for bigger or smaller. My finished measurements were about 8.75 x 10 inches.


Download your Nautical Mug Rug pattern pieces and instructions here. The pattern can be downloaded from my design account at Payhip. If you have any trouble downloading, opening or printing the pattern, please see this post - How to download PDF sewing patterns.
Decide what fabrics will look good where.
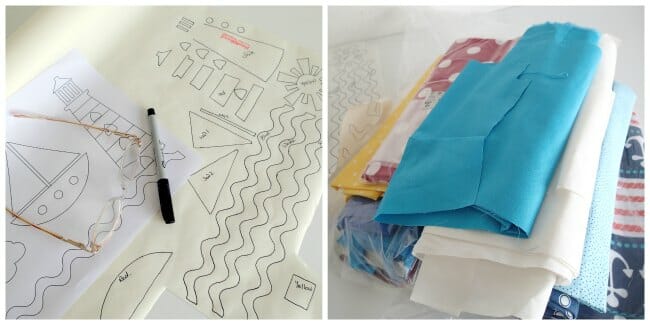

Trace the elements you need onto the paper side of some Heat N Bond or other fusible sheet. You can also cut your fusible sheet to letter size and feed it right through the printer I'm told, although I've not tried that.
Roughly cut out the shapes you need. You might want to duplicate the waves at the bottom like I did. Match the shapes to the fabric you want to use, and fuse the shape to the wrong side, following the manufacturers instructions.
Cut out each piece carefully.
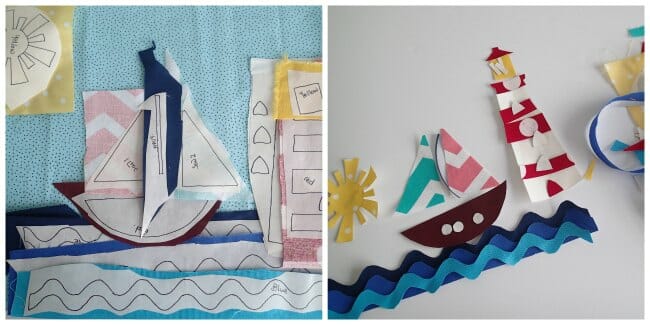

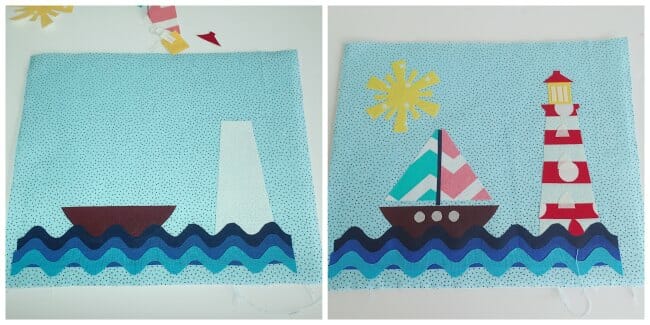
Cut your background piece bigger than your finished size to allow for some trimming later, then start to lay out your shapes. Take notice of which shapes go in front or behind other shapes. Once you have a few laid out, fuse them to the background in small groups.
Continue adding, checking and fusing until you have all the pieces secured in place where you want them.

Now it's time to sew on your pieces. First you'll need to strengthen your fabric. You can use a tear away stabilizer like this one from Sulky, or add a light interfacing to the back, or even iron on a piece of fusible fleece. Something that will give a little extra stability to your fabric.
You can use a variety of stitches, anything from a basic running stitch to a blanket stitch or any of the decorative stitches on your sewing machine. Mix and match the stitches and threads used and get creative with it. There is no right or wrong way.
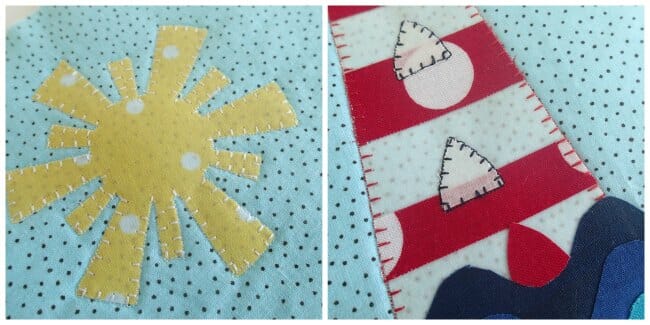

I like the slightly wonky look. I want it to look handmade, not mass produced, so if my stitching is a little off, if my pieces is a little wonky, for me, it adds to the charm. If you are more of a perfectionist, take your time to get it all just right.
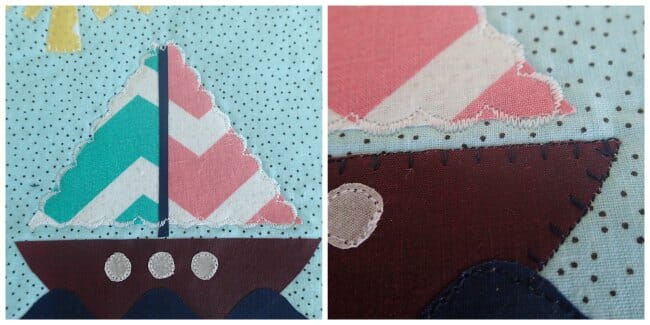

Once all your pieces are sewn into place, its time to decide again. You can leave the piece as it is, or you can add in some decorative lines of stitching. If you are done, trim down your piece, remembering that the binding will be about 1/2 inc wide, so leave space for that.
If you want more of a quilted look, cut a piece of batting or fleece and a plain piece of cotton or calico as the backing and layer them with the decorative side facing up. Pin, spray baste or hand baste the layers in place. Make your batting and fabric slightly larger than you need, to allow for some shifting as you quilt.
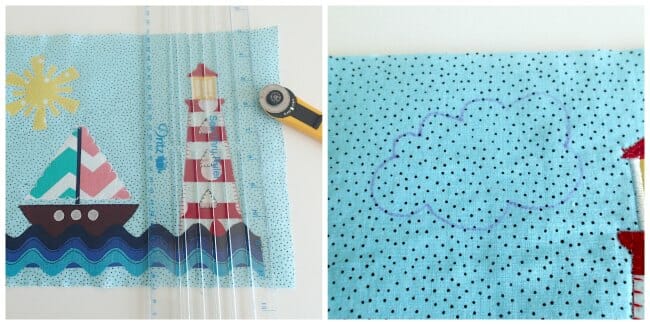

I used my disappearing fabric marker to line out some shapes I wanted, including a cloud and then I followed the shapes of the applique pieces until I was done. Pull your threads through to the back, knot and snip them off. Trim everything again if you need to.
Cut a piece of backing fabric which is 2 inches wider and taller than the trimmed panel. Sit it wrong side up with the quilted panel in the middle and turn in 1/2 inch on each side and press.
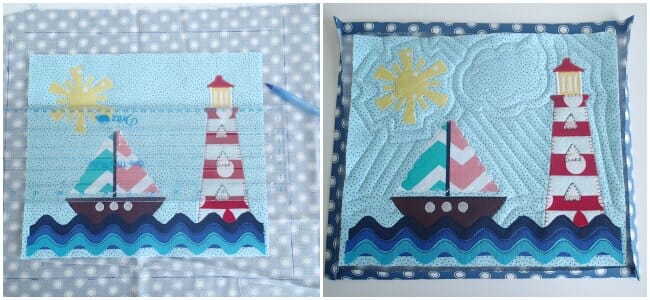

Then turn the pressed edges over the raw edges of the quilted panel to hide those edges and pin in place. Take care to make nice neat corners, and stitch these edges in place on all 4 sides.
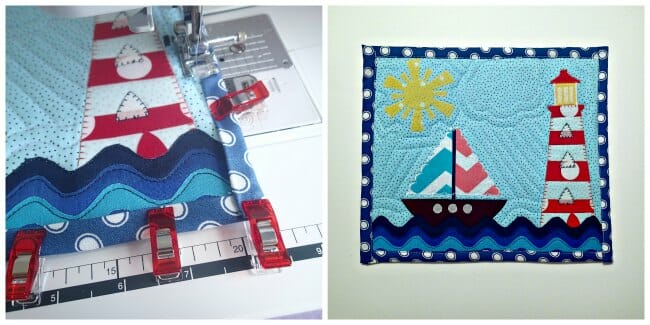

And voila – you're now bang up to style with your nautical mug rug. But why stop there, you could create a matching table runner or some smaller coasters too.


Love it! We have a condo by the Chesapeake bay so I enjoy that view depicted in your mug rug! Will definitely make this project!
Thanks for sharing!
Thank you for the pattern. I love the pattern.
I downloaded the Nautical Mug Rug pattern but got no templates. Where can I get the templets /
Hi Sharron, the template is page 8 of the pattern. Please have a look. Kind regards and happy sewing, Mayra
Ohmygosh this is adorable! Just looking at it makes me want to smile. This gives me a lot of ideas. Thank you for sharing it.
The design is cute. I am a long time appliqué-er. I wish the pattern had lines where the pieces overlapped..for beginners this would be helpful. The waves will not fit as drawn..the back two waves are wider than the top one or you will see the background. A beginner will not see this. a suggestion for waves: use ric rac in different widths. Yours turned out adorable and I love the shell stitching you used and your creative Quilting.
This is so sweet, love your website 🙂
Would love to make this for my daughter,but I can’t find the templates to print. Go to spot you said to go to and no patterns.
You click on the big orange box to go over to my account on Craftsy. Then there is a big button to add the digital pattern to your account – which says Download Digital Pattern. Its added to your ‘cart’ and you check out although it is free, then its saved to your pattern library to download whenever you like, and you are also sent an email receipt with the download link. I just checked the orange button and its working OK.
I cannot figure out how to download to print the pattern pieces,
Hi Carol. Sorry you are having trouble. Have you been able to download and open the PDF file OK? If you are still not sure what to do, you can send me an email to deby@so-sew-easy.com explaining what the problem is and I’ll my best to help you.
I would love to make this mug rug but I cannot find the templates.
Hi Jo, In the article, just down from the top is a heading “Sew a Nautical Mug Rug” and just underneath that is a yellow box with a bright orange button, which says “Pattern Download”. If you click there, it takes you through to my account on Craftsy where you can download the templates. Any difficulty, just let me know.
Thank you for the information and the mug rug.
Congratulations! You’ve been featured on Wicked Awesome Wednesday! Your mug rug is so cute! The stitching details just bring it all together!
My blog’s adress is http://ingrid-ingridlafiebredelpatchwork.blogspot.com/. I closed my wordpress blog some time ago.
Thanks Ingrid – if anyone would like to take a look, this is the great mug rug she sewed for her Dad – http://ingrid-ingridlafiebredelpatchwork.blogspot.com/2014/06/felicidades-los-padres-en-su-dia.html
Thanks for sharing. I made one for my husband, and I’m publishing it today on my blog with a link. Kisses from Venezuela
I’d love to be able to take a look. Your blog is marked as private so I sent a request to view it Ingrid.
Thank you, Deby. Very cute and would make a cute design for a kid’s quilt too! I LOVE the photo of you two from 1988. Such a cute young couple!
This is great, Deby! I particularly like the quilting — it’s a great accent. Thanks for joining the Caffeinated Crafters link up — hope to see you there next Tuesday! 🙂
LOVE this! I’m not sure I have the patience to make one, but it’s pretty cool. Thanks so much for joining in the first ever Caffeintated Crafters link party!
I love your mug rug with the lighthouse and sailboat!
Awesome rug and gret tutorial too!Well done!
Thanks for sharing. Love the mug rug. Awesome !!!!
I LOVE the mug rug, it’s such a cute idea and looks very fashionable!! Pinning. 🙂
Thx. for pattern. Will be perfect for a friend who is into sailing.
I love this nautical mug rug! I’m on the hunt for nautical craft ideas! I’m definitely pinning this!
Navy Wifey Peters @ Submarine Sunday Link Party
Hopping over from Show off Saturday, What cuteness.. I so love nautical.. Did this go out of style because I wore my necklace yesterday, now no perm but I cant find anyone to do one.. LOL I have a giveaway at my blog please jump over.
LOVE the design of your mug rug, Deby!!! I think it would look cool as a cushion, too. I used to love those shell necklaces.
I’ve featured your mug rug today, Deby.
love it 🙂 I need a disappearing pen! too cool! Love the quilting. So you don’t backstitch? you have to pull the ends to the back? I kind of cheated on my quilt and sewed off the edges but had no idea about the pull/knot.
I prefer not to back stitch because it shows up more than the regular line of stitching so I have to be much more careful of where I stop and start. I find it easier to just sew, then when I get back to where I started I pull all the threads through to the back and knot them. Of course if you are starting and stopping right at the edges where it will be covered by the binding, then you don’t have to worry about it and can backstitch to hold it.
That makes sense 🙂