Welcome to Episode 3 in the How to Sew A Skirt Sew-along series. The subjects for today are: Cutting your fabric and pattern matching.
How to cut out your fabric
Well let's take a look at fabric.
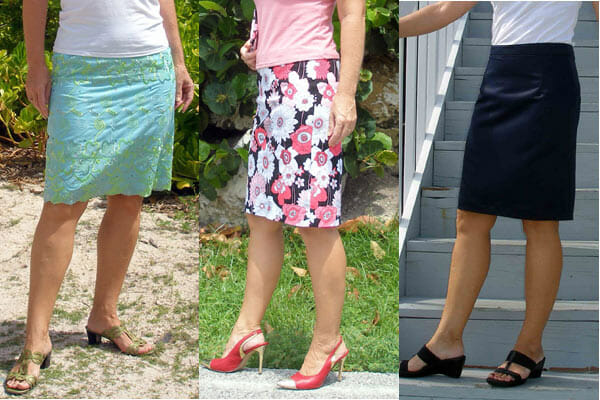
You might have bought something plain without a design like the navy skirt, or you might have something with a border or scallop like the green skirt, or something with a large pattern like the floral skirt. Each one will need a different approach for cutting your fabric. Cutting our skirt will be very simple but I wanted to explain to you as much as possible so that you are well equipped for cutting more complicated patterns in future.
For cutting fabric
There are some things to bear in mind that will apply to cutting out your fabric which ever style you have.
- Direction of the grain line
- Right side and wrong side
- Cutting on the fold
- Laying out and saving fabric
Finding and following the Grain line
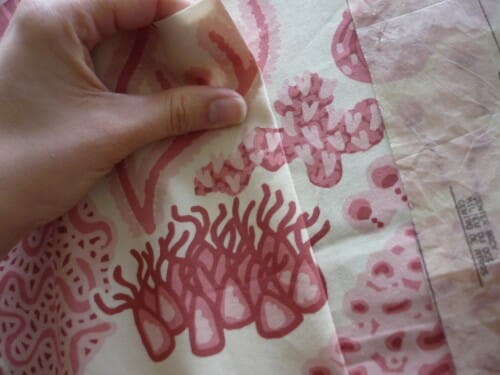
Let's look first at the grain line of the fabric. In a woven fabric the fibers typically cross each other at 90 degrees. One set of fibers run top to bottom and the other set run across. There are edges to your fabric that run the whole length – these are the selvage/selvedge of the fabric. There will be one on each side and if you have a printed fabric, they will mostly be unprinted. They often have a perforated appearance with little holes along the edge and sometimes can even look a little puckered. They are used to manufacture the fabric, and they stop the edges from fraying.
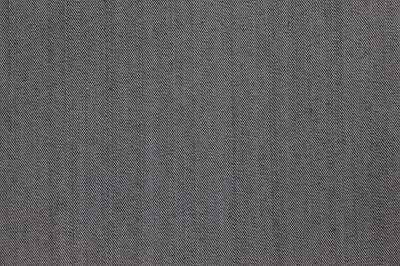

When you place your pattern pieces on the fabric, if you want your garment to hang nicely and not twist around when you are wearing it, then you should line up carefully with the grain line. When you buy a commercial pattern, the grain line will be marked on each piece. For our pattern, the grain line is directly in line with the center front and the center back, so these need to match the grain of the fabric when we lay out the pieces.
You can find the grain line of a fabric by measuring in a set distance from the selvedge edge in several places and placing the marked grain line of the pattern piece along the measured line. Here is also an excellent tutorial on finding the grain line.
Right side and wrong side
Your fabric will have an outside and an inside. Sometimes you will not easily tell which is which and sometimes it will be very obvious if the fabric has a printed or woven pattern. When laying out your pattern pieces, often you are asked to Cut 2. But you can't just cut any two – these will normally need to be opposites and this is why it is important to pay attention to the right and wrong side of your fabric. Your body has two sides and each is a mirror image of the other so when you cut fabric to fit your body, the two pieces also need to be mirror images. This is normally achieved in one of two ways:
- Fold the fabric in half with the two right sides together and then place the pattern piece on the fabric and cut through both layers at once to get two pieces which are a mirror image of each other, or
- Cut twice on a single piece of fabric. Once with the pattern piece face up, and once with it face down.
Cutting on the fold
There will be some pattern pieces that need to be cut on the fold of the fabric. This is for symmetrical pieces – in our case the front of our skirt. There is no seam down the center of the skirt. When cutting on the fold, make sure the fold of your fabric follows the grain line by measuring your fold line at a set distance from the selvedge along the length.
Laying out and saving fabric
Commercial patterns normally supply a suggested layout. This allows you to place your pattern pieces in the tightest way to allow for the shortest possible length of fabric. This saves you money. Our pattern is very straight forward. But do consider where you are making your fold for the front of the skirt. If you simply fold your fabric straight down the middle and cut the skirt front there, will there be enough fabric left on either side to cut the back? Probably not! Do get into the habit of laying out ALL of the pattern pieces before you start to cut to make sure you have enough fabric.
Pattern matching
Your skirt has a center back seam. For the most professional and invisible result down that back seam, you would aim to match up the fabric on either side of the seam so that the design looked correct. If you are a beginner, this isn't easy, and can be complicated with stripes and chevrons and for patterns with a large scale repeat, needing quite a bit of additional fabric length to achieve. But it can be done and when done correctly it looks awesome! And sets apart those sewists who can achieve this level of finish.

My favorite tutorial for how to match pattern designs is from Tasia from Sewaholic. Take a look at her tutorial for How to match prints along seams. Sadly I only had a yard of this flowery fabric and with a large pattern repeat there was no way I could match up at the back center seam. So I did the next best thing of cutting the back on the fold of fabric and then cutting it down the middle. At least then the design was all on the correct level even if the center back didn't quite match.
Let's cut your fabric !
Now that you know everything there is to know about pattern matching, grain lines and more, its time to keep all of this in mind while you cut your fabric. We will start with the front. Fold in a length of fabric just wide enough to accommodate the front pattern piece and without getting too close to the selvedge. Use your tape measure to make sure the width between selvedge edge and the fold is uniform to make sure the fabric is folded on grain.
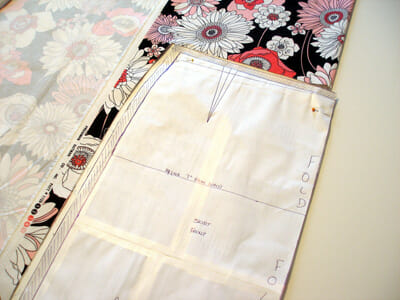

Now place the skirt front pattern piece on the fold. Hold in place with pattern weights, pins or tins of tuna while you cut out your fabric.
Now time to cut the back. This needs to be cut twice, with each side being opposite to the other, so we will fold the fabric again, measuring to make sure it is on grain. Then place the pattern piece, secure with pins or weights and cut both pieces of fabric at once.
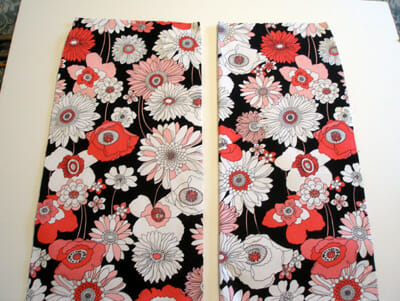

You will have three pieces of fabric. And that's it for the skirt fabric – super easy. Keep them attached to the pattern pieces for now and we will come back again soon and transfer those dart markings and sew the darts.
Our next steps
Join me soon for the next step in our Sew A Skirt series –Marking darts perfectly.


Deb, I love all your tutorials. I wonder why you are not featured in the new sewing tutes. Also, I have always admired your figure, and your posture highlights your uniqueness.
HI Miss peepers, I bought the blog from Deby in late 2015, for 5 years it has been only me writing and making all the patterns for free. Sadly for me, I do not have time to make patterns for sale anymore, Perhaps I will change that this year. Thank you for stopping by and taking the time to comment. KInd Regards, Mayra Cecilia
[…] Cutting your fabric and pattern matching […]
[…] you will need. Sectionize and jot down all the steps you need to do in chronological order from making pattern, cutting fabrics up to sewing the last […]
I am a beginner sewer and I want to sew a dress with a border pattern at the bottom. Please help me by giving me advice on how to cut the material. I am making a simple a line dress. thank you. Do I cut the material on the crosswise or lengthwise. I want to keep the floral border pattern around the bottom intact.
Hi Tasia, to help you better please send me the photo of the pattern and the fabric you are intending to use. My email mayra@so-sew-easy.com Cheers!
I have ruined so much fabric trying to match patterns that I have given up. Just cut out a maxi skirt and it doesn’t match on side seams. Its a big busy print. Wondering if I should sew it anyway.
When You are trying to match patterns you need much more fabric than you think. The pattern needs to start where the other ended, taking in consideration the seam allowance. Maybe this article will help you…https://so-sew-easy.com/5-mistakes-to-avoid-when-cutting-fabric/
Thanks Mayra that was helpful. The pattern I cut out is for my granddaughter. May I send you a picture of the fabric to via Facebook or email to get your opinion on whether I should sew up the skirt. I dont want her to look bad. 🙂
Sure Betty, Email would be better. If your granddaughter is not a teen I am sure she won’t mind.
Deby,
Why is the edge of your pattern piece set just off the edge of the fold in the first picture showing how to cut your fabric? Shouldn’t it be right on the fold?Thanks for all your tutorials!
Yes, it should be placed on the fold, the picture is just trying to show where the fold of the fabric is, and then you’ll move the edge of the pattern piece over to line up with the fold before cutting. Somethings I find things hard to illustrate in 2d. If I put the pattern on top, then you can’t see the fabric. Thanks for checking though.
Oh, ok! I just wanted to make sure. I thought maybe I had been doing it wrong all these years! LOL!
Not pattern matching drives me crazy – I think it really sets the good quality apart!
Something we can all aspire to. I am so in awe of the fabulous projects I see where patterns match perfectly at waist seams on dresses and center back etc. Just yet, as quite a new sewist I find it sometimes just one too many things to try to get right. Fitting is my problem area so even if I take the time to match when I cut, it usually gets messed up later when I have to adjust the fit. You are right – it really does set the great apart from the good.
Brilliant info, so helpful! If only you were doing a simple maxi skirt! Maybe the rest of your series will help me anyway!
You can find lots of maxi skirt patterns in the Free skirt Patterns page. Or if you take a look at the 30 minute easy skirt on my own tutorials page, you can use the exact same method to make yourself a knit maxi skirt – cut it looser and longer and its exactly the same – but more what you are looking for. I hope this helps. I’m off to take a look at your site – I’m intrigued by the name..
You make me want to start sewing again 🙂
Love your how to sew a skirt series! Such great info! I wish I would have seen it before my failed skirt attempt!
Sorry to hear about the failure! Lots more good info to come, keep reading and hopefully this one will be perfect.