


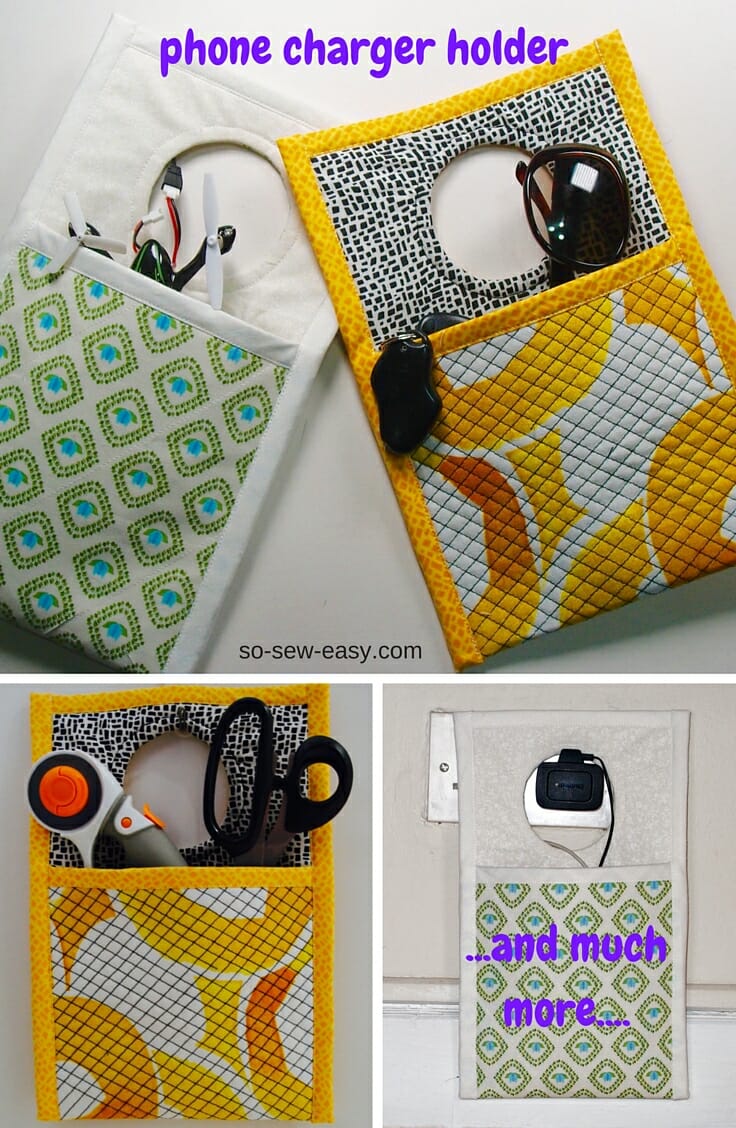
A phone charger holder seems to me to be a great way to keep the mess of cables and electronics contained. I don't know about you, but the piles of cables on the kitchen counter, on the floor, or on the desks are enough to send me into a frowning mood. So I thought this little project can make the ugly cables disappear and the best part is that the holder can be done in only seven easy steps.
This is an easy project and is a good way to practice your skills while making something useful. I have found these holders make good gifts as well as potentially items for your Etsy shop or church bazaar.
Required Sewing Materials
- 2 rectangles of quilting fabric, the color of your choice, 18” x 8”
- Fusible interfacing
- Non-woven, sew-in interfacing. I am using Therm-O-Web but Pellon is equally good and cheaper.
- Bias tape of 1/2″ wide x 38” long (you need a strip of 2″x 38″ long) follow this post to make your own bias binding tape.
- Sewing thread
Required Sewing Tools
- Sewing scissors
- Sewing machine
- Binding foot (optional)
Special Fabric Recommendations from Fabric.com
Pattern Download
You can download the pattern for this Easy Phone Charger Holder from our account at Payhip.
For help downloading and printing PDF patterns, please CLICK HERE.
Step 1: Cutting your fabric and applying fusible interfacing
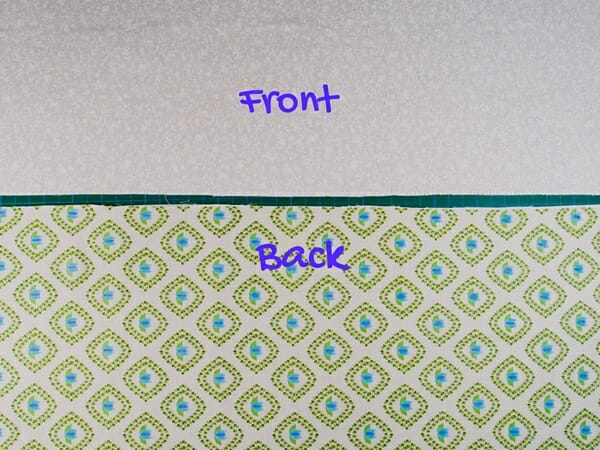
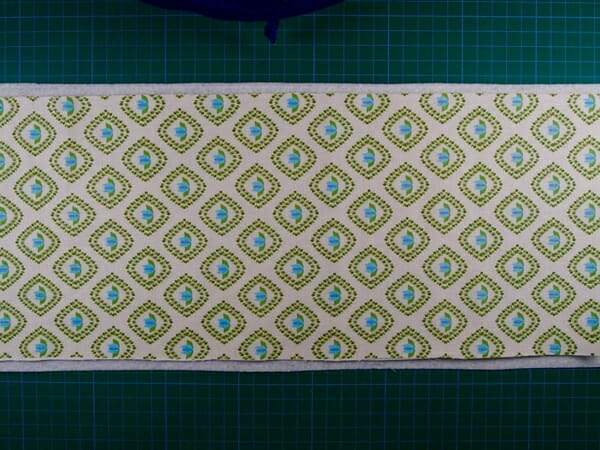
Cut two rectangles of fabric 18” x 8”. You need to decide what is going to be the pattern or color on the very front of the holder and what is going to be behind. You could, of course, choose to make the project with only one pattern or color, but I think the differentiation and contrast make the item much more attractive.
Apply fusible interfacing to the rectangle that will show at the back/bottom. By “back”, I mean as you fold the bottom upwards it will become a pocket and the back will show. The top/front part will be in white and the bottom/back in green in my project. I applied fusible interfacing to the green patterned fabric. This instruction will become clearer at the end of the project.
The fusible interfacing should be cut to exactly the same size as the back/bottom piece and applied to the wrong side of the fabric or the side opposite the print/pattern side that you want to show.
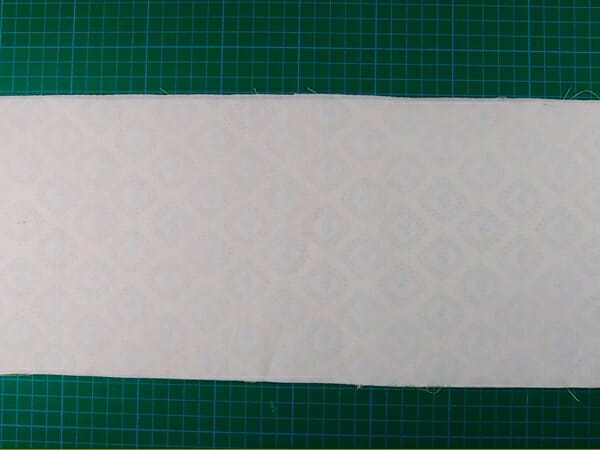
Step 2: Cutting and trimming your sew-in interfacing
Cut the sew-in interfacing ¼” bigger than your fabric rectangles on all sides (left, right, top, bottom)
Step 3: Aligning the interfacing
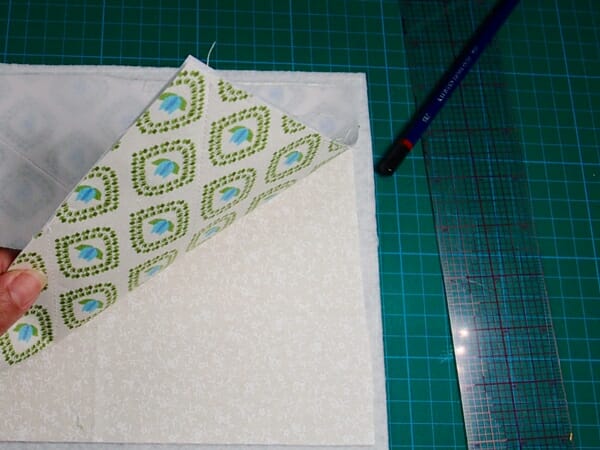
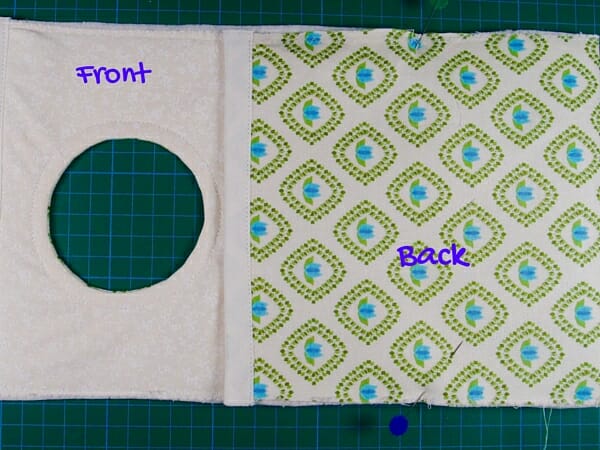
Place your sew-in interfacing first, then the “front” rectangle with the print facing up, then the “back” rectangle (this is the one with the fusible interfacing) with the print facing down. The fabrics are facing right or print side together. You can pin all the layers together to hold them in place as you do the next step.
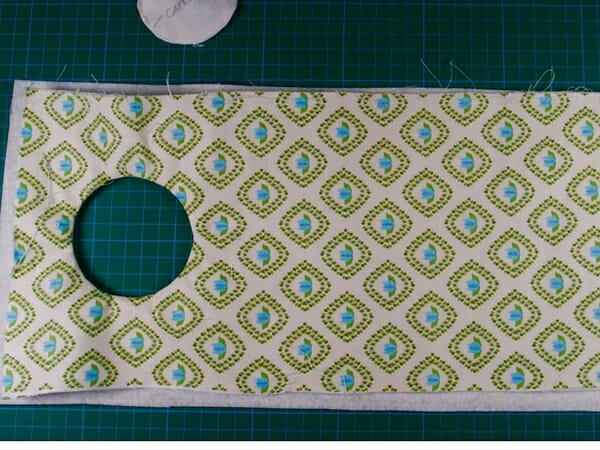
Step 4: Making the hole
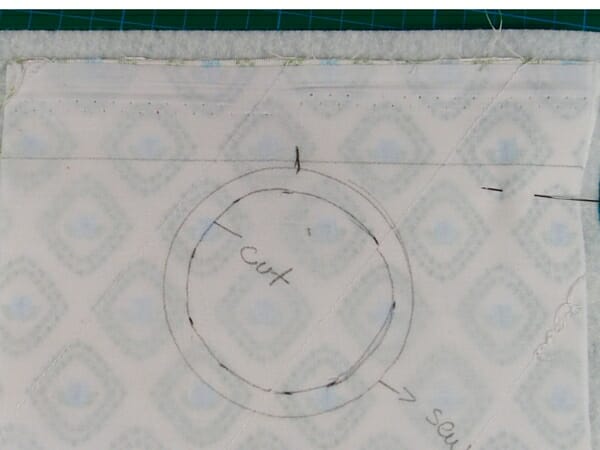
Draw a circle. This circle will be on the fusible interfacing and will become your stitching line. You can use anything round and the size you want it to be. If you want the holder it fit over a doorknob, just make sure it's big enough. I used the inner side of a masking tape roll to make my circle. Draw another circle inside the circle you've just traced but about ¼” smaller. This circle will be your cutting line. Stitch carefully along the big circle. Please don't rush this step because it will deform the shape of your circle.

Following the cut line, cut out the center and nip along the allowance making sure you don’t cut the stitching line. Cut every ¼” this cuts will make the fabric easier to turn.
Step 5: Turning the fabric
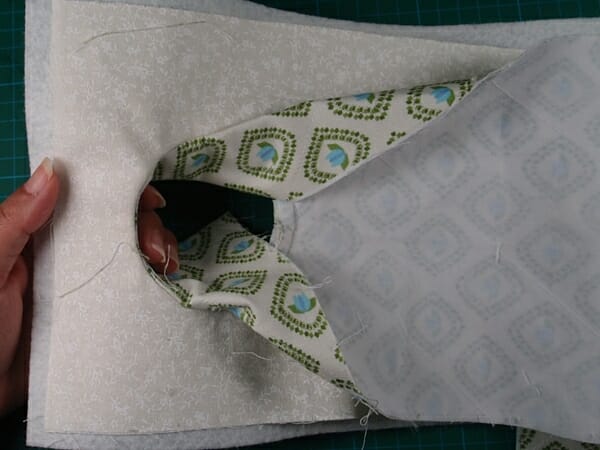
Begin to turn the first layer of fabric starting at the top. Feed the layer with the fusible interfacing through the hole.

Notice one print side of the fabric is on one side or at the back, then the sew-in interfacing and then the other fabric is on the other side or the front showing the print side.
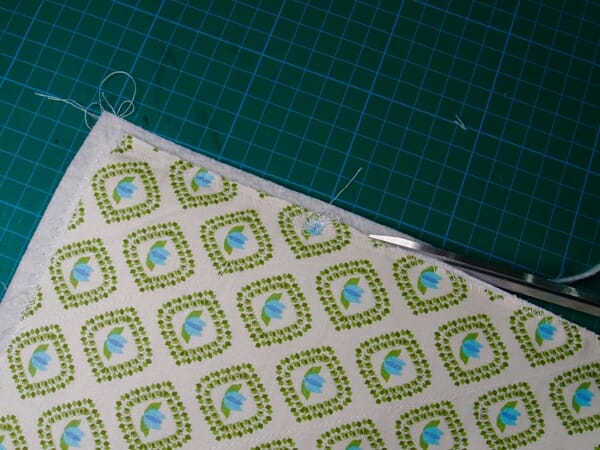
Step 6: Trimming the interfacing and adding bias tape to the top and bottom edges
Zigzag along all edges of the fabric. This step will stabilize and join all the layers. Trim the excess of the interfacing. Stitch around the circle no wider than one side of your presser foot or ¼”. Add bias tape to the top and bottom edges.
Step 7: Folding and adding the bias tape to the sides
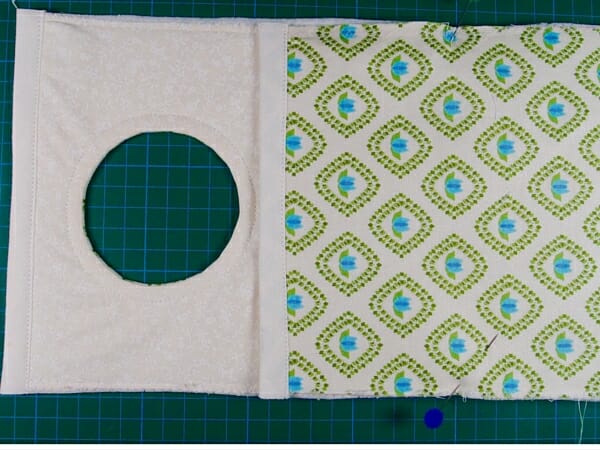
Fold the layers to make the pocket. Make sure the “back” folds forward so that the print shows like in the photo. Pin together.
Add bias tape to the sides. This might be a good opportunity to use your binding foot if it can handle the thickness. I actually wasn't able to since my fabric is quite thick, but if your fabric is thinner or you have a foot that can handle it, please give it a go. For a quick tutorial on How to Use Your Binding Foot, please click the link.
For a better finish of your project. please see this tutorial about Turning Corners with Bias Binding.
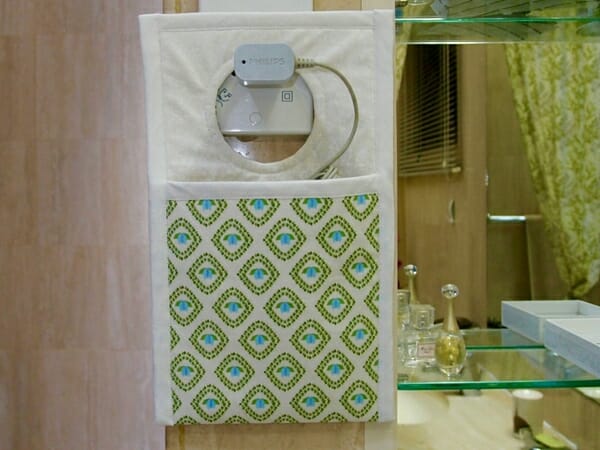
This project is not just a phone charger holder, but it can be used for the many little gadgets we have around the house. One of the best uses I have found so far is to hold my husband's electric shaver, keeping it away from the basin and the faucet.
We'd love to post some photos of finished projects on the site!


I was trying to down load your pattern and Cloud flare block me please see if can fix this Clould flare Rad ID: 7b6f6024394617b9
Hi Jeanie, I can do nothing from my side, but you can empty your cookies and browsing data, and it will disappear. This site is secure and free of bugs and viruses, or it will not have the lock on the left of the address bar. Kind regards,
How about making it out of oil cloth, filling it with clothes pins and hanging it outside on your clothes line? Being water proof, it would be protected from the weather changes.
I downloaded the pattern but no instructions were with it. Is this the way its supposed to be? Looks really cute!
HI Ruth, on the left of your screen, is a print-friendly button; please use it; you can download the instructions without the ads.
What is the best needle size for this? My fabric with the sew-in fusing has become so thick that it broke my size 80 needle and a size 90 refuses to go through it. This started happening when I tried to put the bias tape in. I got the Thermo-Web sew-in fleece, that says High Loft on the package. Did I get the wrong type of interfacing?
You can either try a jeans needle or a walking foot to see if you can manage all the layers. Otherwise, try using a thinner interfacing. Looking at the positive side though you have found the limit of your sewing machine and will be able to adjust the list of materials in the future.
I was wondering about inserting/ using a curtain grommet for the hole?
Yes, that would work perfectly!
Thanks for this great free pattern. Being a pensioner with a very tight budget I am most grateful for people like you who share their patterns. You always seem to have the most splendid ideas! I just made one and plan to make a few more for friends
I could not download the pattern. Really didn’t want to change programs, etc in order to obtain it. Looks really cute and would have likes to have made it.
There is no need to change programs, the only thing you need is Adobe Reader.
I don’t have Adobe, I used the print button on the left (green) and was able to print and download with no questions and no problems.
Thank you for the free pattern. I am wondering about safety so I will make smaller hole and use a command hook and place near outlet. Thank you so much. I agree the uses are endless! I might even make one as a door hanger for my keys so I can find them easily.
One last thing for people with machines who won’t go through layers of fabric, would a French seam work? Or maybe use small zigzag and then flip, press and topstitch?
Indeed all of the above can work. You can also apply the bias tape by hand. Here are some hand stitches that will work very well on this project; I would recommend the running back stitch https://so-sew-easy.com/hand-sewing-stitches-for-making-clothes-by-hand/
Mary,
I downloaded the design, I did not have the problem you mentioned.
I appreciate your work and your blog and free patterns. I do not want to allow any extensions to my computer (allows that software to change my computer). I do not seem to be able to obtain the free pattern without giving up control of my computer to some entity. This has not always been true for your free patterns. Please change your website.
I use a Mac and never have had trouble with downloading these free patterns.
Is it possible you don’t have free Adobe Reader on your computer or another similar program that Microsoft uses. I don’t know much about these programs, really, but thought it might help you achieve your goal of obtaining the patterns. Apple has it’s own default program that will open programs that require Adobe Reader.
Another thought is you might have some safe guard turned on in your settings that won’t allow you to download.
Please don’t blame the designer for a fault you are having now. Obviously, you were able to download these before so something must have changed on your end.
Good luck!
I recenly made similar pockets to hold the remotes for our dual motion bed. They hang on the knob of the night tables and are always within reach. I used a button hole to go over the knobs, but like your idea better.
What a brilliant idea! We recently purchased dual motion beds and reaching for the remote can be a bit of a stretch!!
What a terrific idea! Love it. Going to give it a try right away. Thanks so much for your fun ideas and free patterns!
I am unable to find the download link
There is no pattern, just measurements given.
After you hit the print button, in the upper left corner are choices of “print, PDF, Email” I simply hit PDF so I can find it easily whenever I want as I have a tendency to place my patterns somewhere “safe” never to be found again, lol. I also love that I can email it to my sister!
Hello! I’m new to your site.
Thanks for all of the great ideas and info!
Is there a printable version of this Phone Charger Holder tutorial?
Hi Sandy, welcome to the site. There’s not a specific download for that project but you can go to the sharing buttons on the left side of the screen. There are three dots ( … ) in the bottom circle. Click on that and choose “printfriendly”. That will allow you to print the page or download a .pdf without the ads and stuff. Hope that helps. Kind regards and happy sewing!
I know this can be done with other materials, but this is a great way to use up those little dribs and drabs of fabric already in my stash. Looks like a good way to use up some of my crazy quilt bits too.
I made something similar. I added a buttonhole above the large hole and a button at the top of the pocket. I can slip my charger and cord in the pocket and button it up to throw in the travel bag.
Great idea Kathy. Thanks for sharing.
I made one very similar a few years ago and gave it to a friend. i cut out the side of a lotion bottle and used that for the hole section instead of interfacing.
I bet you could modify mitten shaped or square pot holders to do the same thing, plus it would be fire-retardant. For this to be semi-safe, it would have to have a way to hang beside it, under it, or above it. The way this is done could be a fire hazard with the smallest of spark, short, or power surge.
Thank you for the patterns. I think I am off to the dollar store this week to try using your patterns with the pot holders or pan grabbers. Either way, I can buy the hooks that you just stretch the sticky stuff to release. I will also make sure to include some type of holes to help release heat, since some cell phones get semi or quite hot when charging, as do the chargers in the wall. Plastic is also a definite no-no, as it melts. I wonder if they make or I could make a mesh or even buy a flame resistant mesh to make these out of so that the heat build up can escape?
I keep my phone charging next to my bed at ear level, but far enough away that if something happened to it, I would not be harmed. This is so it is easier to answer if I am asleep. I just hang in a two strip sling which were made out of repurposed wide shoulder straps from a sundress that I inserted grommets and hang from appropriate sized old ceiling plant hangers I painted to match my wall color.
BTW, I am handicapped and bedridden. Most of what I do is hand-sewn until I can find a way to use my sewing machine in bed. lol I am also only turning 47, so I have to be very creative to find ways to do old things or do things differently, but will still work properly. If I had a way to have my sewing machine and storage for my sewing items, that would be heaven to me, but when you have to count pennies, every cent is spent on bills like the internet, since I don’t even have a ramp to get out of my house, and the internet keeps me sane, but a huge pattern hoarder (hoarder of many things), hoping one day I will have the space or be able to have a room just for crafts that is wheelchair/handicapped accessible. lol An almost mid-life gal can dream! LOL
Hi Kimberly, thanks for your comments. We’re delighted you found the article useful. Let us know how you go with modifying a pot holder!
I use a Mac and never have had trouble with downloading these free patterns.
Is it possible you don’t have free Adobe Reader on your computer or another similar program that Microsoft uses. I don’t know much about these programs, really, but thought it might help you achieve your goal of obtaining the patterns. Apple has it’s own default program that will open programs that require Adobe Reader.
Another thought is you might have some safe guard turned on in your settings that won’t allow you to download.
Please don’t blame the designer for a fault you are having now. Obviously, you were able to download these before so something must have changed on your end.
Good luck!
Dollar Tree has (or used to have, I haven’t been there in a while) mesh bags that I think could be cut and sewn to work for what you describe, I think. Although not fire retardant would work for allowing heat not to build up.
I love all the alternate uses for this! I’ve got a Craft Gossip post scheduled for tomorrow morning that features your tutorial: http://sewing.craftgossip.com/?p=86763 –Anne
Thanks Anne!
I’m so looking forward to making one really soon! They’d make a great gift. Thanks ladies for all your wonderful patterns…..you two are awesome!
That looks like a wonderful idea!!! Thank you for including the free pattern. I can’t wait to try it.
Look for FABRIC used for children’s fire retardant sewing. Hobby Lobby etc.