


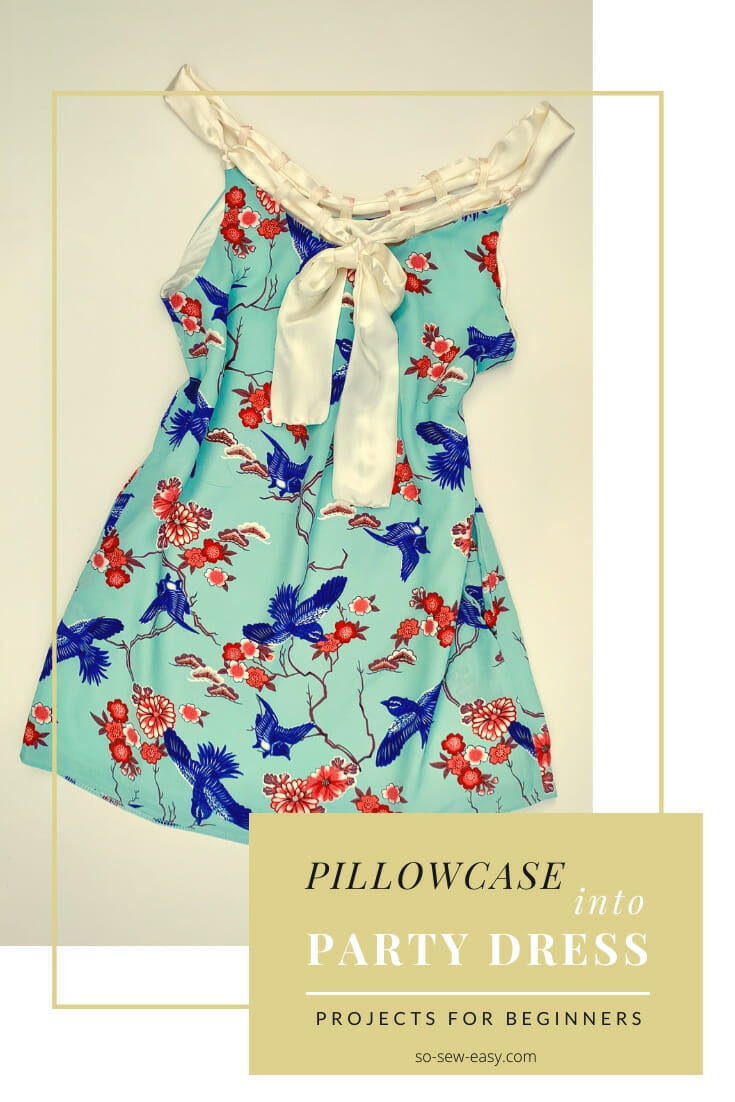
This is the pillowcase party dress, a perfect project for those learning how to sew, yet still elegant enough to show off your new skills in a very flattering way.
The other day I read a comment on the SSE chat group, I had asked what you'd all like to see more of on the site. Someone wrote back saying that, they would like to see more simple projects, not those that are just for showing off sewing skills.
This got me thinking… have I lost touch with some of the readers? Am I sharing too many scary patterns with advanced sewing skills? Am I a show-off? If you knew me personally you would know that I am very humble when it comes to showing off (anything), in fact, there are but a handful of times when I take a picture of myself wearing the item I am sharing. I do hate having my picture taken and listening to my own voice on YouTube. Don't take this as a sign that I have low self-esteem, not all. However, it is true the projects have not been so easy as of late, and the name of the blog is so-sew-easy after all. There are other issues about blogging that I will get on later.
For now, I thought I'd challenge myself to share patterns that are easy to put together that make great outfits, where you end up having the attention in a group especially when you are asked “did you make that…..(skirt, blouse, dress, pants, bag)?” and you very casually reply, “I made it”. Only to leave people green with envy.
What do people sew when they don't know how to sew? I don't even know. I think perhaps I have forgotten what is like not knowing how to use a sewing machine or even how to cut fabric. So here I go trying to imagine how can I make a dress for a party with little effort. I know many new readers look for new, simple projects to work with, and this party dress is a great one to start on.
Technically this pillowcase party dress should be made from a pillowcase, mind the redundancy here, but really what fun would that be? And are we 6 years old? no, so we need to spice up our dress in the following way.
Description
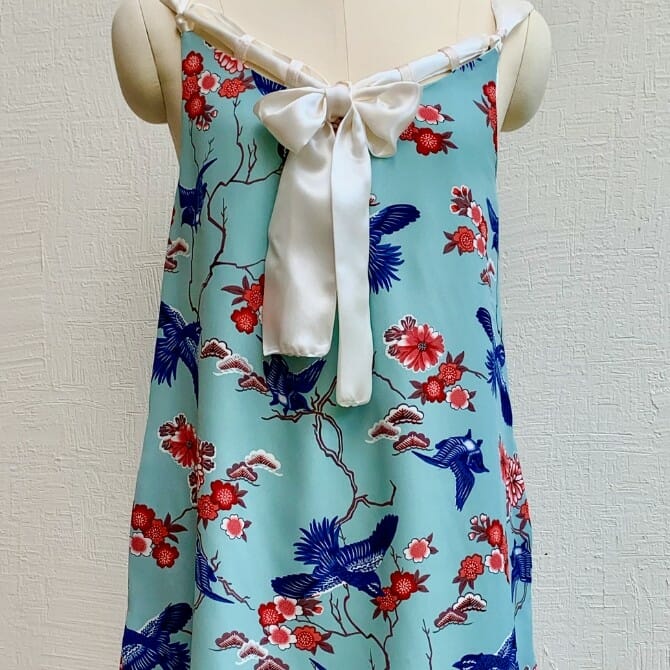
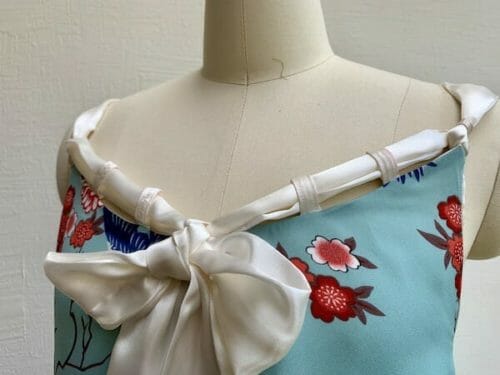
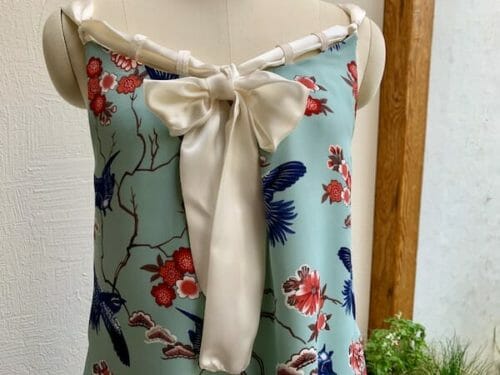
The bow is a decorative detail that brings us back to the 70's decades, makes it in a contrasting color for added glamour.
Lined so it looks more elegant and expensive.
Above the knee, even short for some but if you wear it with high knee boots it will be the perfect sexy yet sophisticated outfit. You can always make it longer, but I would not wear it much lower than below the knee.
Materials
- satin back crepe, charmeuse, crepe, wool crepe, or any fluid fabric with good body.
- thread to match
Tools
- scissors
- tape measure
- sewing machine
- overlocker
- seam ripper
- sewing needle size 70 or 80
Fabric Suggestions From Amazon.com
The pictures below will take you my recommendations on this site, use them as a guide. Click the picture and read the descriptions of the fabric. This is the best way to learn what fabric to use depending on the project.
How To Download Your Pillowcase Party Dress Pattern?
We're going to continue to use the new Payhip web store to distribute our patterns. As most readers know, Craftsy, now Bluprint, has changed a lot and they have stopped designers like us from publishing new patterns on their site, so we've had to move to another service.
Our patterns are still free, but now you have the option of making a small contribution if you like my work! We'd really appreciate it and it will help is keep going with new and fun designs like this. Even a dollar or two really goes a long way.
Thanks so much in advance for helping us out. You can use any credit card and you don't need a Paypal account, although you can use one if you have one
Pattern Download
Pattern Layout

Sewing Skill: Beginner
You MUST read the following article
Please add the seam allowance to the pattern, I will be using a 1/2″ seam allowance.
The only other article you need to read before you start this project is:
Fitting Your Pillowcase Party Dress
Check the chest measurement, and allow at least 3″ for ease.
Size Chart And Finished Measurements
| S | M | L | XL | |
| Chest | 34″ | 38″ | 42″ | 44″ |
| Hips | 35″ | 40″ | 44″ | 48″ |
How To Make Your Pillowcase Party Dress
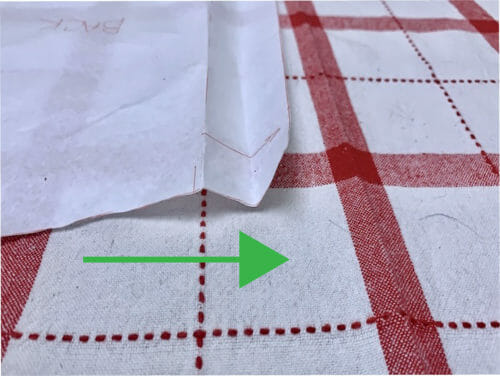
Step One: Making The Pleats
There are two pleats one in the front and one in the back. Follow the direction of the arrow marked in the pattern, which is towards the center.
Another easy way to make a pleat is to pin the two notches together.
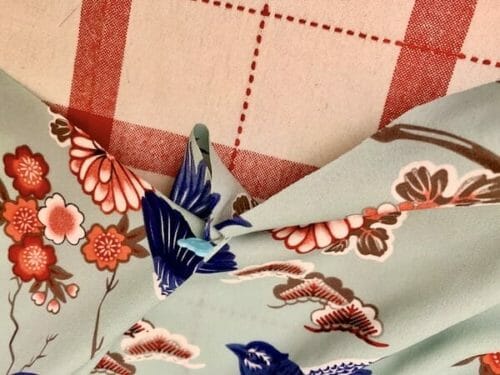
Flatten the pleat with your finger distributing the fabric in equal parts.
This is how the front looks.
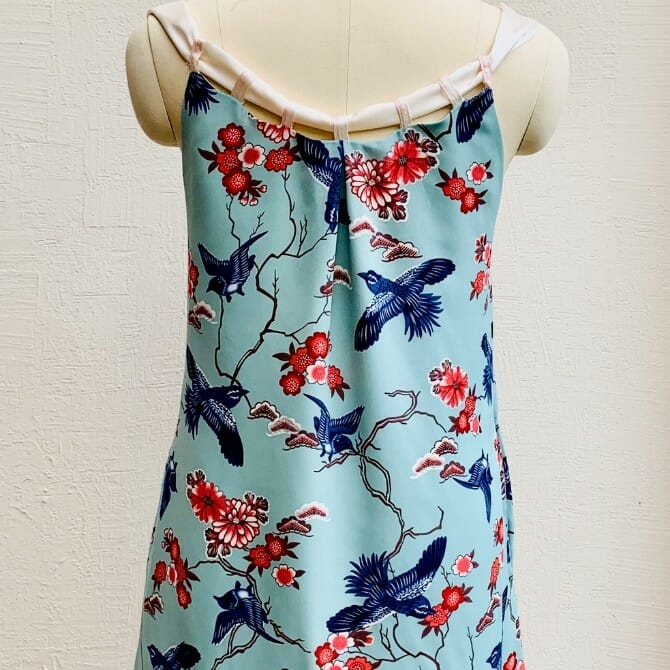
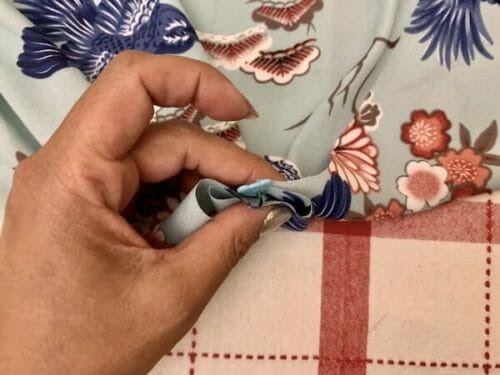
Here is the back view. This pleat is known as a box pleat.
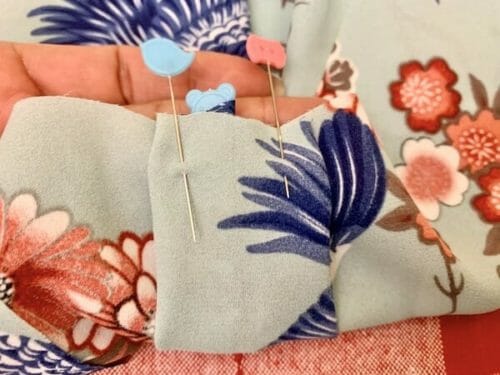
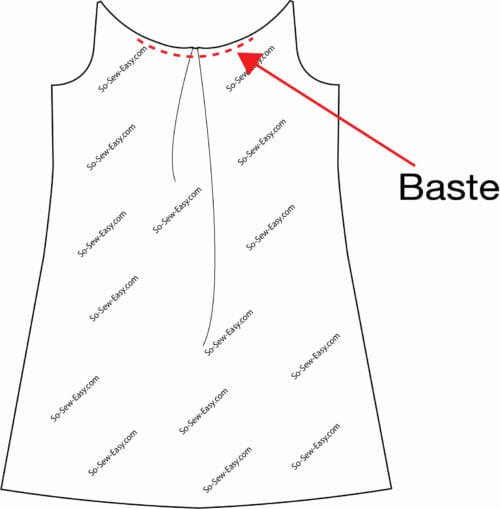
Baste to keep the shape. Basting is better than pinning when you are starting to sew.
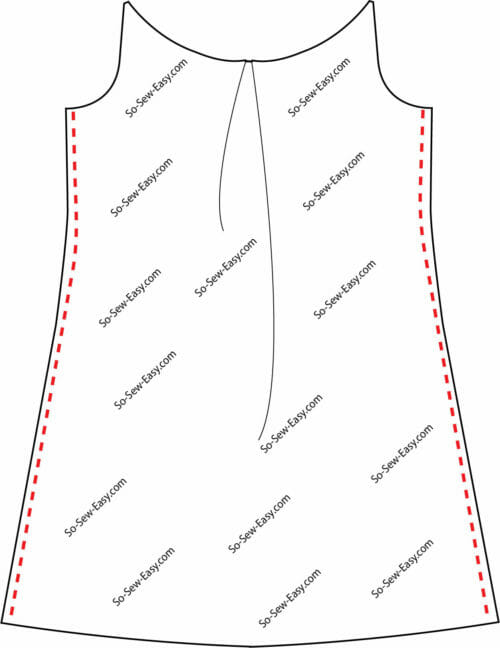
Step Two: Sewing The Outer Fabric
Sew the sides at 1/2″ or your chosen seam allowance.
Step Two: Sewing The Lining
Make the pleats as you did before front and back and baste.
Sew the sides of the lining as you did on the outer layer.
Overlock the seam allowances.
Overlock the hem.
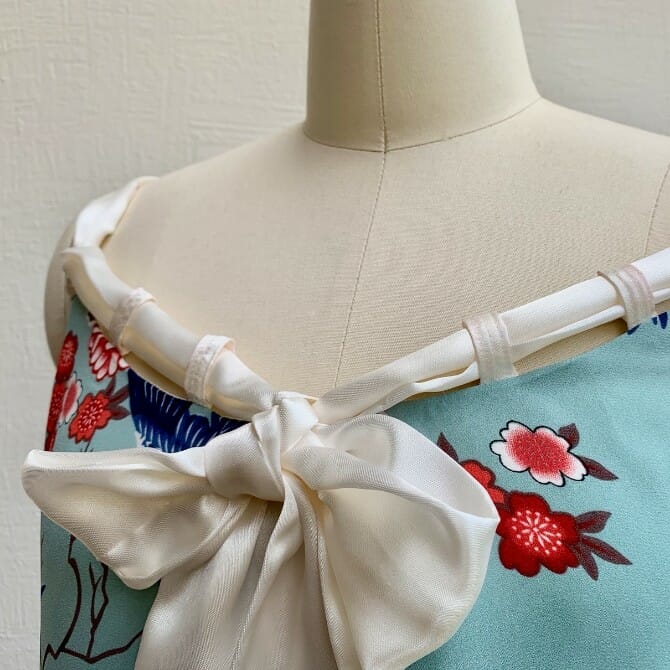
Step Three: Making The Loops And The Sash/Bow
You will need to make 14 loops, the fastest way to do it is to cut a strip of fabric 45″ in length by 2″ wide. Sew lengthwise at 1/2″.
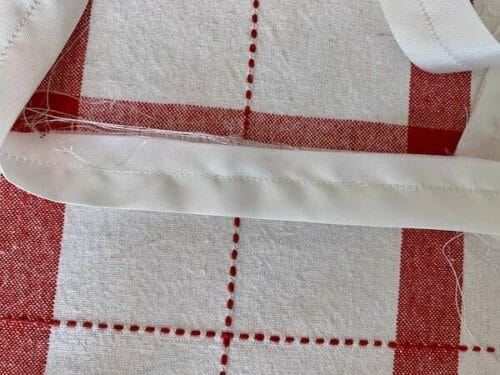
Turn using a loop turner or a safety pin.
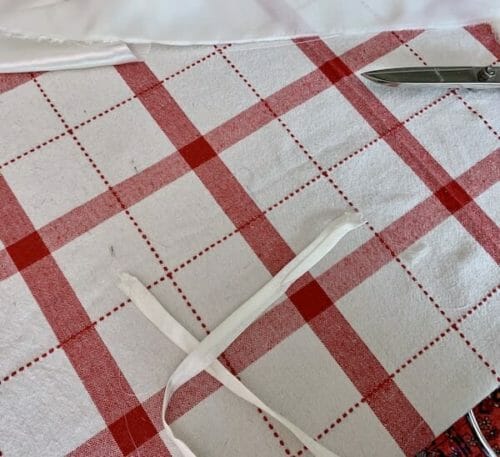
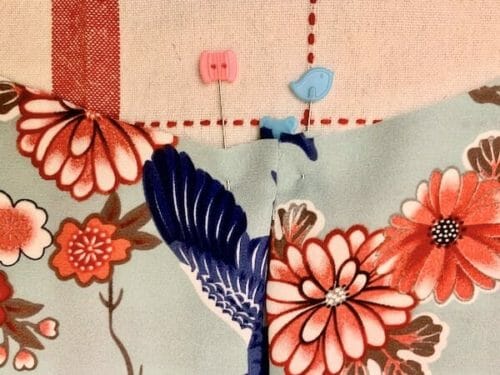
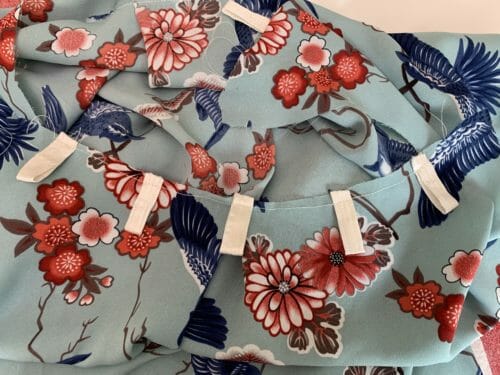
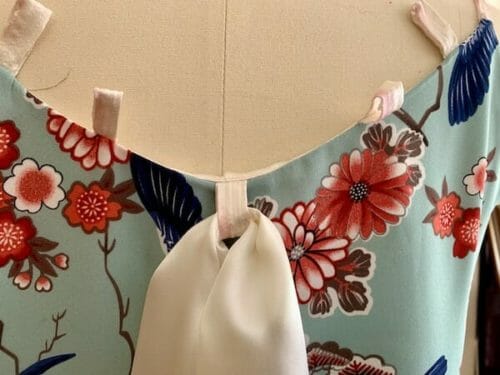
Cut into 3″ strips fold them and pin evenly upside down around the back and front neckline
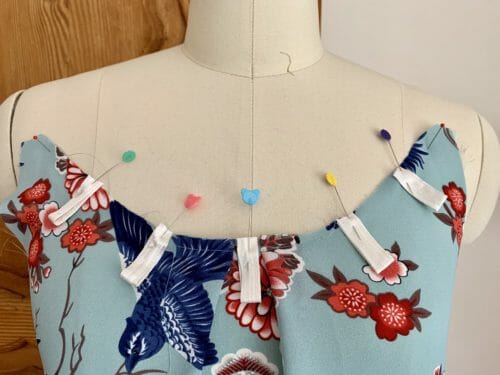
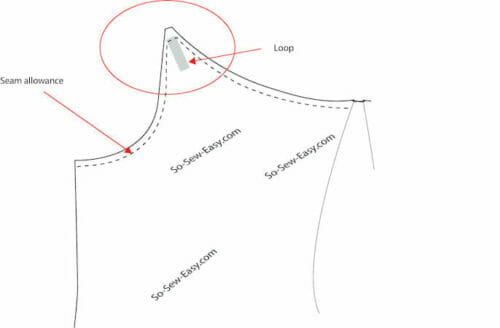
The loop that will serve as the shoulder strap needs to be pin at an angle see drawing below.
Make sure the loop is not caught on the sides.
Showing below against the lining so it is not so distracting.
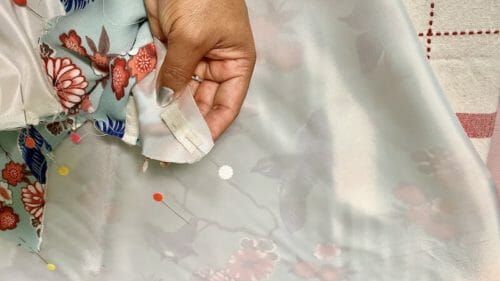
Baste the loops.
Step Four: Shaping Your Pillowcase Party Dress.
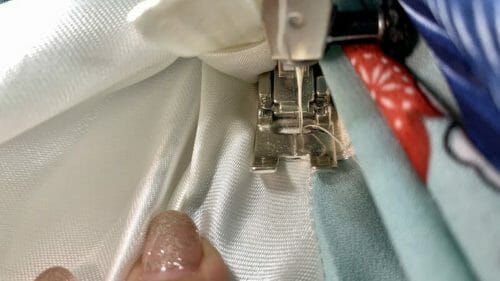
Print sides together. Be extra careful here, make sure you have the right side of the lining facing the loops with the right side of the print.
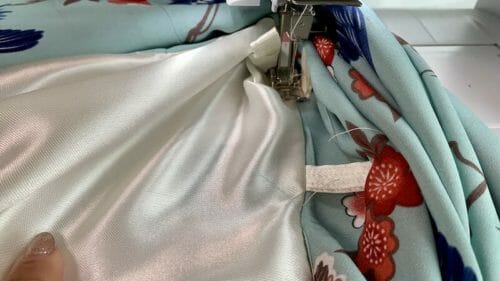
Start by sewing the armhole, then progress to the shoulder carefully sew the loop at the point but make sure you do not catch the loop sides with the seam allowance. Continue sewing the front, the other armhole and the back ending where you began. Turn the lining inside the dress. Iron. Understitch the armholes then clip the seam allowance to 1/4′.
Understitch the front and back of the dress catching the seam allowance and the lining together, this will allow the lining to hand inside the dress without showing. Reduce the seam allowance to 1/4″.
Step Five: Making The Sash/Strap/Bow
Cut a long strip of fabric 6″ wide and at least 76″ long. Mine is 76″ but I think I could have the bow a bit longer. I would add and extra 6″ if I could, but I have run out of fabric.
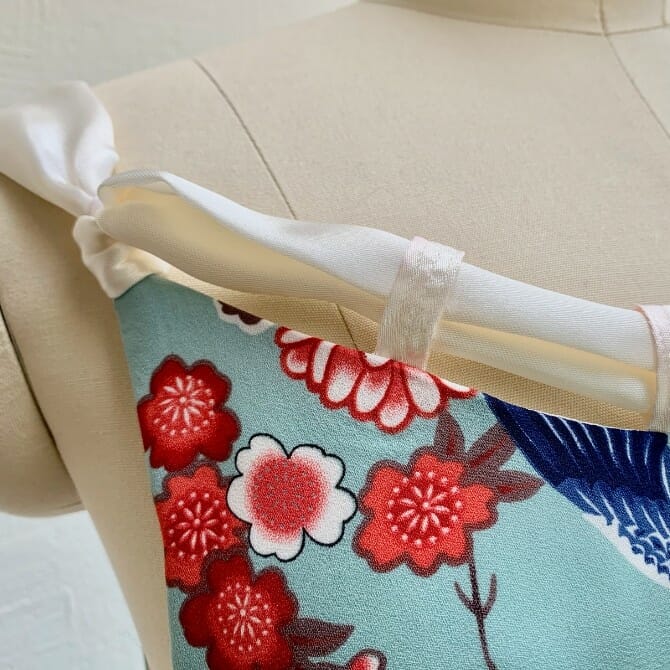
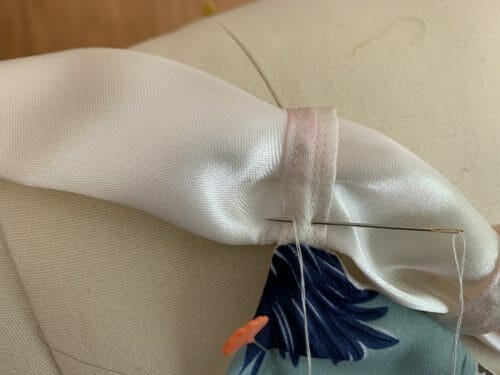
Loop the sash in the center loop at the back.
Then thread the sash to the right and the left until you reach the loop that will work as a strap and sew a couple of stitches to prevent the dress from bunching up.
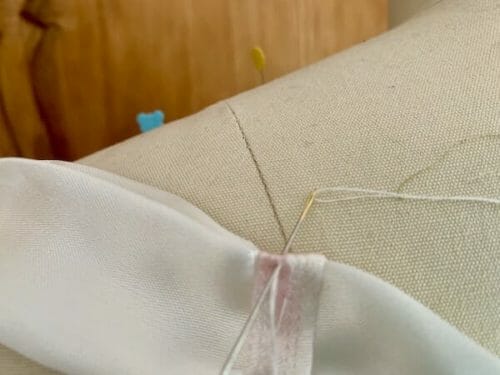
Pass the sash to the front and either make another couple of stitches or a knot as I did to secure the shoulder strap.

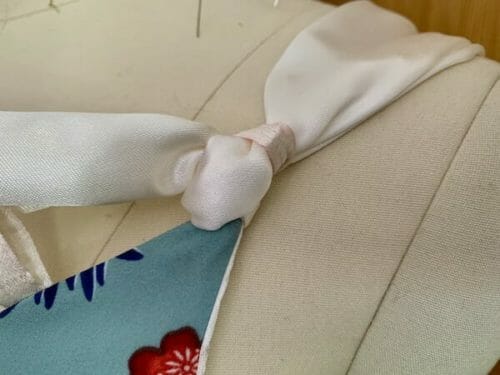
Continue threading the strip of fabric until you reach the center front loop and crisscross it to make a bow.
Finally, all it is left is to turn the hem twice and stitch it. I forgot to add the 1″ hem allowance, so my pillowcase party dress is short. Thankfully I am only 5'1″ so it doesn't matter, but for you do not forget to add a one-inch hem and a 1/2″ seam allowance.
Did you notice my loops with a red/pinkish stain? I made a sash with the remains of next week's project. Unfortunately, I did not test the fabric before working on it and I am wondering how much the dress color will change after the first wash? This is a newbie mistake.
What do you think of this pillowcase party dress? Do you find it is a beginner's project?
Conclusion
So today I tried to show you how to end up with a dress that requires little effort to make. When I say little effort I don't mean DIY stuff such as “She made two stitches and came up with a wedding dress type clickbait video nonsense. I meant there is very little fitting to be done. Because in real professional sewing the fitting and the details are what show the level of expertise.
I like to think of myself as an advanced intermediate. This is because I know there is still so much I can learn from others and the expert level is something people say about you not a title you give yourself. The moment we become arrogant and think we know it all is the day we will begin to stop being curious, wondering and learning. I guess that is my definition of aging.
There is another way to make this pillowcase party dress, how would you approach the shoulder straps? Leave me your thoughts and questions in the comments sections below. Always looking forward to hearing from you!
Until next time, Happy sewing!


Hi! I’m new to your site but I’m very excited to have found you! I read what you said earlier and I have to agree with what the ladies right before me said. You seem like a very knowledgeable young woman and your concern for others is touching but you need to follow your heart and do the work that you want to do. You are volunteering your time and helping lots of people above and beyond. Yes its nice occasionally to stop and do something simple (I love this pattern and if there is another way, i’d love to see that too.) , but no matter what you do. How well you do it, how many people you include, how much time you spend, there will always be someone who thinks there is something wrong and will try to make you feel bad. Dont let them. You do the best you can do, enjoy yourself, and know that 99% of your people will think you hang the moon! I sure do! Thank you!
I really like the loops and sash details of the dress. They make the dress fancier.
yes, I thought so. Thank you for noticing!
This looks so cute! How much fabric is needed?
Hi Steph, print the pattern and work out the yardage depending on the size you are using and the width of the fabric. Here is a tutorial to work out exactly how much you need to avoid waste. https://so-sew-easy.com/avoid-waste-buying-fabric/
Thank you Mayra! Sometimes simple patterns are a good reminder of how we all started. I also like the boost I get when I finish something simple. I then have more energy for more complex work.
I will be on the lookout for the right fabric for a dress like this. I can’t wait to have something cute to wear for summer!
Looking forward to your feedback!
I love this dress! It is too short for me, as I never wear such short garments, but I am sure my husband would love it as a nightgown 🙂
Thank you for the Emails and the beautiful patterns!!
And I mean my husband would love it on ME as a nightgown! Hahaha
My pleasure Marli, yes why not make your hubby happy?
Sorry, I forgot to ask if it is necessary to pleat the lining also?
Yes, the directions are the same for the outer layer and for the lining when the pattern piece is the same. Great question!
Thank you for the pattern & tutorial. I have to question if it is necessary to anchor the tie with knots or can it just be left loose for maybe tying at a shoulder? Is there a need to anchor for draping or stability?
Hi Tara, Great question! I found it added both interest, stability, which means the detail of the anchor would have to be tailored to the person who is wearing it. It is a simple knot and it is not permanent if you do decide to pass on the detail would you let me know how it turns out?
This is such a lovely design! Thank you so much for sharing!
My pleasure Sarah, if you have Instagram and make the dress please use #soseweasy so I can see it. Thank you!
Beautiful! I recently wore several pillowcase dresses on a trip to Hawaii. Very comfortable and cool, although they were not lined or fancy. Do you tie and untie the bow or just slip over your head? I like the loops but am thinking the bow would not suit me, maybe tying on one shoulder. Thank you for the pattern
The bows are set by the knot you have to make, the front bow you can make bigger or smaller or leave it and slip over your head.
this is great!! I’m too old and flabby for wearing this as is but I’m going to make this out of wool and put it over a nice turtle or tee and leggings!! thank you for a simple but lovely pattern!!
I would love to see this outfit!
What a cute idea! I love the loops at the neckline. What a clever and simple way to add visual interest and yet so functional! Keep up the good work!
It is my pleasure, Connie! happy New Year!
I will definitely try this. Thanks Mayra and Happy Christmas from Ireland.
Love the simple”party dress” design. Would love to see a similar design with a different neckline for a child. I am thinking of sewing some childrens clothing for several granddaughters and charity projects.
HI Alice in my list of things for next year, I would like to star a few lessons on creating your own children’s patterns. I don’t do children clothes but I think it would be fun to start
I think you’re amazing and this is a great article and a fabulous proposal for a dress.
True is that you’re so far more than an advanced intermediate, and I think we all followers of you know that. But that is precisely the advantage: you can translate sofisticated patterns into those projects we can get courage to start. And in my opinion, that’s the case for the secretary blouse. Is sooooo lovely! And different! And if someone don’t dare to try it, well, there are plenty of other easier options in So Sew Easy!
Something that you’ll never be able to control is the haters in the net. People that just enjoy to critize, undervalue your work, make you feel incomfortable and guilty for what you share and what you teach… People that saying that your projects are just a show off, won’t even try this pillowcase dress or read the article…
So, please trust in yourself and in all the followers that you have since I don’t remember when!
And regarding the pillowcase dress, please show us all the ways you know to make it! Is such a basic for the summer! Maybe with a yoke could be an interest option?
Wish you all the best for the New Year and thank you a lot for all you do!
Ditto to what Laura said above! Mora, your amazing and we all appreciate the time and effort you put in to create these patterns for all of us. Stay as lovely & sweet as you are! I’m a follower of yours for life!
Thank you, Leah, so much, Happy New Year!
Dear Laura, I have tears in my eyes as I read your comment, thank you from the bottom of my heart for your kind words. I wish you all the best life has to offer to you and your family in the New Year.