


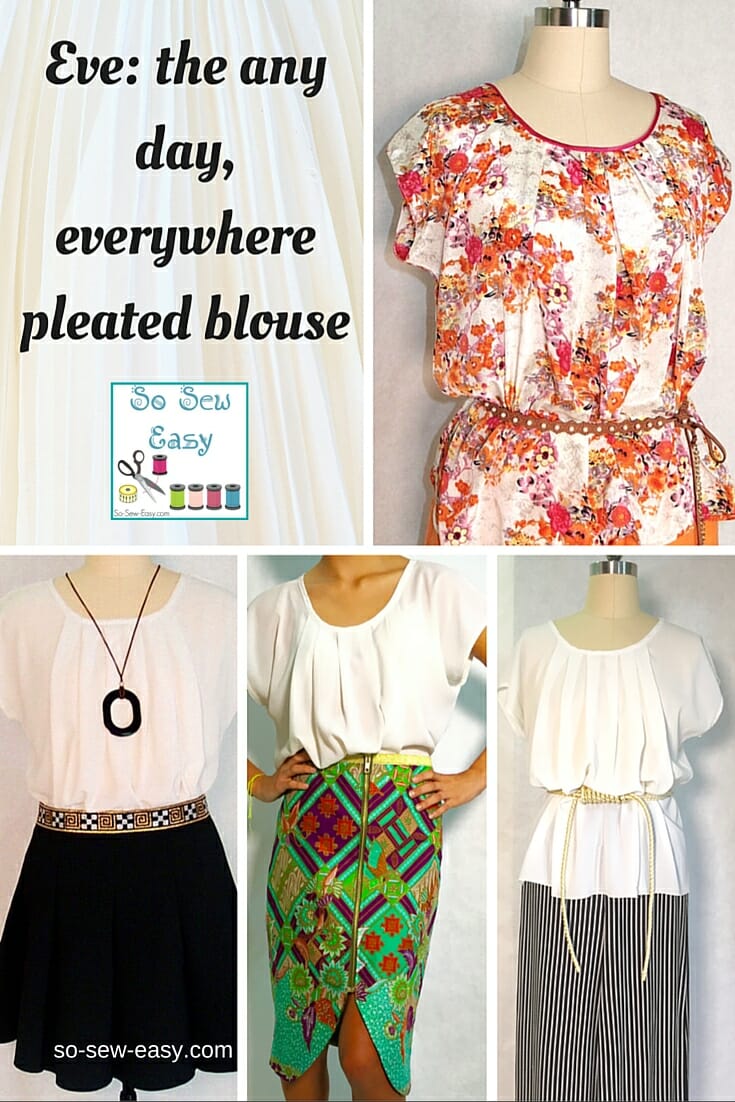
Many of you may remember the popular project we published recently featuring Bali the Reversible Skirt. When we were shooting the photos for this post, we chose to use a white pleated blouse to complement the skirt. While the skirt was very well received and many of our members did the project, we got as many questions about the blouse the model was wearing as we did about the skirt!

So this week, I decided to make a pattern and project for this attractive pleated blouse.
About the name: Eve, the any-day blouse, why the name? According to the Bible, Eve was the first mother. As mothers go, you will always be a mother once you are a mother. I wanted to share this blouse tutorial with you as a gift for all the women who play many roles as mothers, wives, friends, and daughters.
So here is a blouse to represent you all in many different activities. For lunch with a friend, taking a long trip, going to the doctor, or even hiking, this blouse will do it all, depending on what fabric you choose. I have chosen silk because of its breathability in the soaring temperatures, particularly where I live here in Singapore. This blouse will look great with shorts, pencil skirts, skinny jeans, and pajama pants, and it goes fantastic under a suit.
The blouse will accommodate a bust and hips from 34″ to 54″ in width.
The best part? For intermediate-level sewers, this project is super easy to make. I hope you enjoy it!
Materials
- 1 1/2 yards of Silk, Georgette, Satin, Crepe, Gauze, or Rayon. It must drape and cling to the body.
- Suggested fabrics: Satin, Crepe, or Challis Rayon (this is what is used in the white version in the photos)
- One yard of 1-inch bias tape for beginners. For experienced sewers, a 1/2-inch satin bias is an option. Or you can make your own.
- Sewing thread
- Size 9 sewing needle. We always use Schmetz.
- Rotary cutter and a large mat. Fiskars makes a good set if you don't have one.
- Sewing machine
- Serger (optional)
Fabric Recommendations
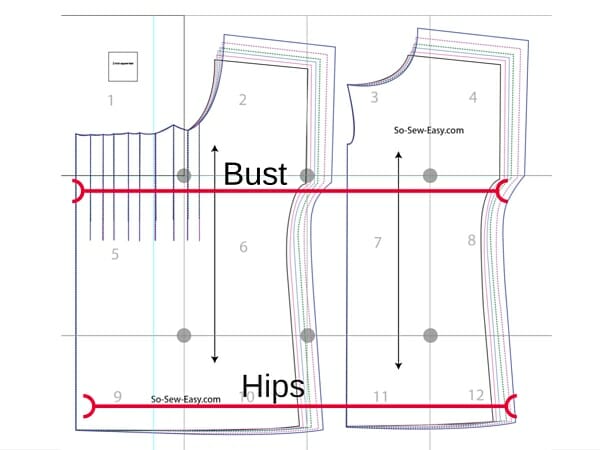
Pattern Measurements
Please allow this blouse 8- 12 inches of ease; you can wear it tighter if you wish. Extra small does mean for an extra small person. The blouse's design allows ease on the fabric but does not mean that a person with a 49-inch bust can wear the XS. Body bust measurements are 30″ to 44″ inches.
Warning: This is not a plus-size blouse despite the measurements given below. The blouse has a large amount of ease due to the pleats, and it will look best on someone with an hourglass figure or a triangle figure.
Here are the body measurements.
| Size | Bust | Hips |
| XS | 30″ | 36″ |
| S | 34″ | 39″ |
| M | 38″ | 41″ |
| L | 40″ | 44″ |
| XL | 42″ | 48.5″ |
| XXL | 44″ | 51.5″ |
How To Download Your Easy Pleated Blouse Pattern
We will continue using the new Payhip web store to distribute our patterns.
Our patterns are still free, but now you have the option of making a small contribution if you like our work! We'd appreciate it, and it will help us keep going with new and fun designs like this. Even a dollar or two goes a long way.
Thanks so much in advance for helping us out. You can use any credit card, and you don't need a Paypal account, although you can use one if you have one.
Step One: Wash the fabric
Pre-washing is crucial if you use a fabric with natural fibers. If you are unsure what fabric composition you have on hand, check out this YouTube video on how to test for the presence of polyester in your fabric.
Subscribe to the YouTube channel:
This step is best done at night before going to bed. You can leave the fabric to air dry away from sunlight. Iron the fabric at a low temperature and you are ready to start cutting.
Step Two: Cut the fabric
Because we are using a very slinky material (I am using a printed silk satin), we must find the grain of the fabric. For a way to find the grain and more tips on cutting fabric, please visit our tutorial: 5 Mistakes to avoid when cutting fabric.
The use of weights when cutting with a rotary cutter is a widely accepted practice; however, make sure you have a very sharp blade otherwise, your fabric will move around, causing you to waste your time having to align the edges of the fabric again. It is best to weigh down the fabric and pin it in a few places, especially around the curves.
The front part is cut on the fold, and the back has two pieces.
Bonus Tip: I cut my fabric with the wrong sides facing because I am going to make a French seam. This makes it easier to take the fabric pieces straight to the machine. For guidance on How to sew a French Seam, please review this tutorial.
Mark the pleats clearly with a notch to indicate the fold lines and placement of pleats.
Step Three: Make the bias tape.
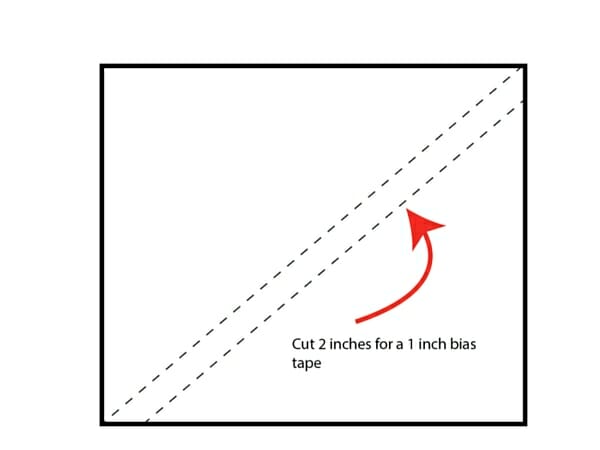
Making your bias tape would be the ideal way to use the leftover fabric. To do this, cut a 2-inch strip to make the 1-inch bias. I am using a contrasting color and a smaller size. I prefer to match the bias to the rest of the blouse, but for tutorial purposes, I am using a contrasting color so the details stand out. For more information and guidance on Making continuous bias binding tape, please review this tutorial.
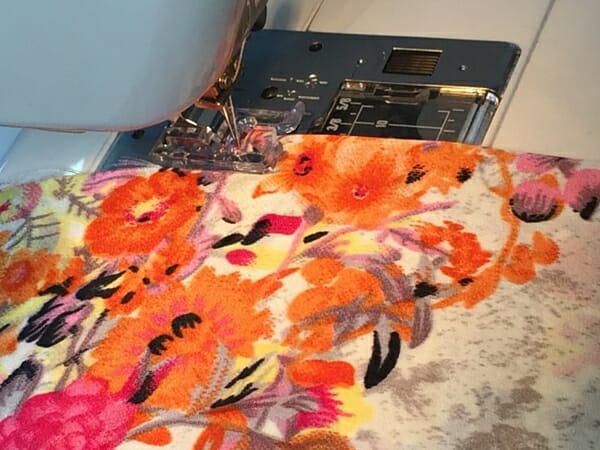
Step Four: Sew the back
You can use your serger, to finish the seams if you want, but because of the delicate nature of silk and satin, the French seam is the best seam to use to sew the blouse. Start by sewing the back at 3/8″, iron the seam to one side, and turn the piece, iron again.

Sew again at 3/8″.
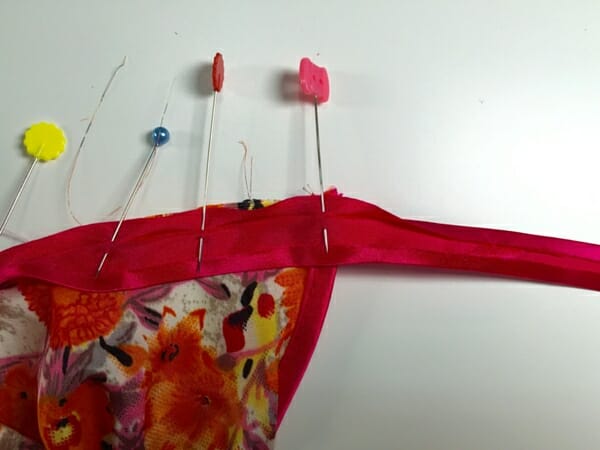
Pin the bias tape to the keyhole in the back and sew. Follow the first crease of the bias tape or the one closest to the edge of the fabric.

I am using a very thin bias tape. If you are not used to sewing with slippery fabric or sewing bias tape, please use 1-inch tape which will be easier. If you are an experienced sewer, use the satin 1/2″ bias tape.
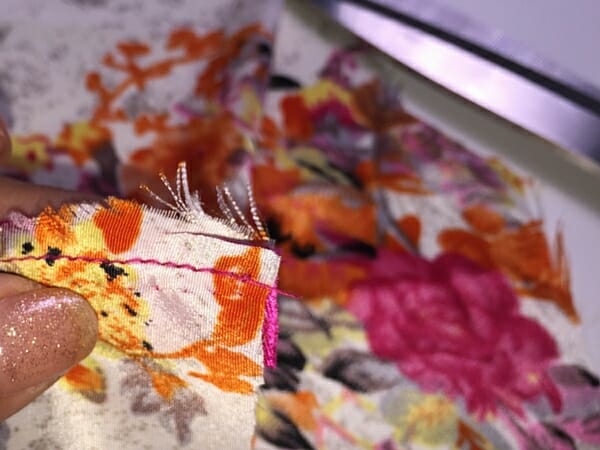
Trim the threads of the fabric if it is unraveling, but not too close because it will be difficult to catch the edge of the fabric inside the tape.
Iron the fabric, and fold the bias making sure the end of the tape will cover the stitch you just made and sew.
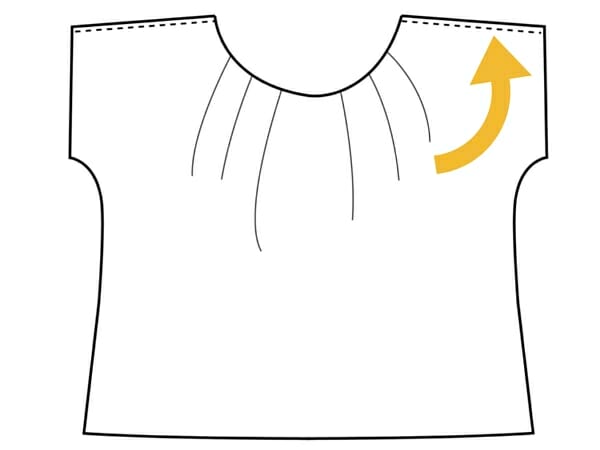
Step Five: Make the pleats
The pattern has two-fold lines and one placement line per pleat.
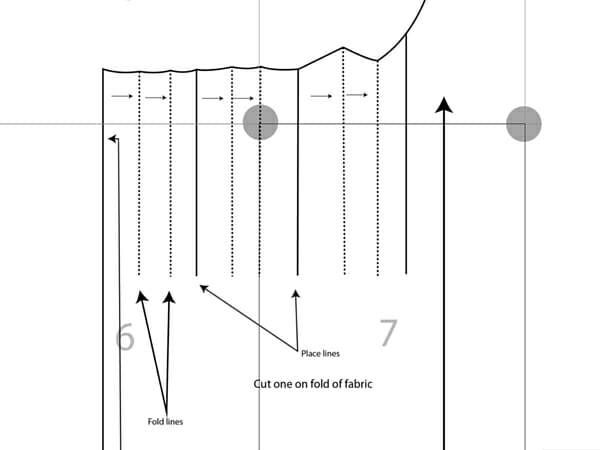
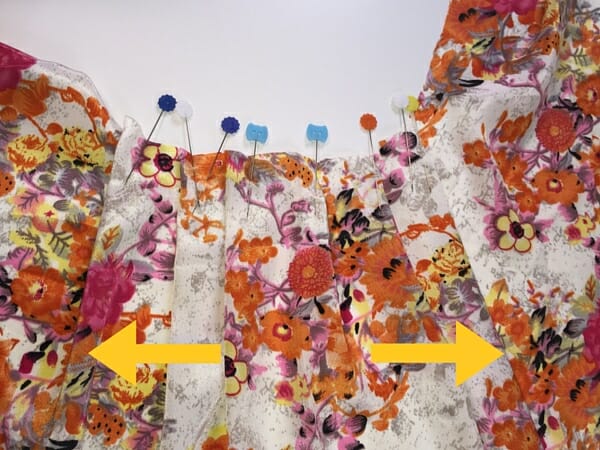
You will be making three pleats that fold to the right and three pleats that fold to the left.
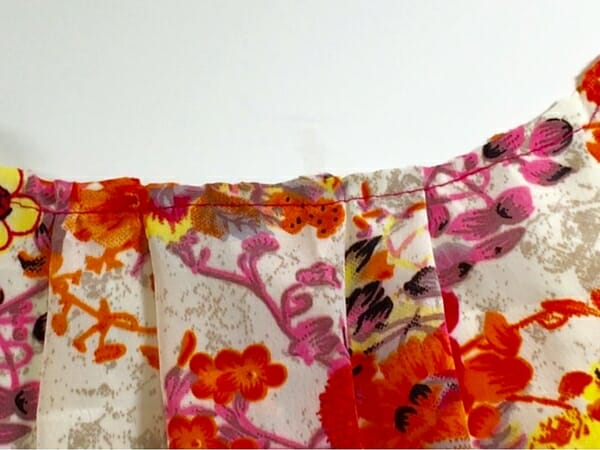
Stay stitch the pleats.
Step Six: Assembling your pleated blouse
Using a straight stitch, then a serger, sew the shoulders. You can use a French seam.
Sew the sides the same way you did the shoulders.
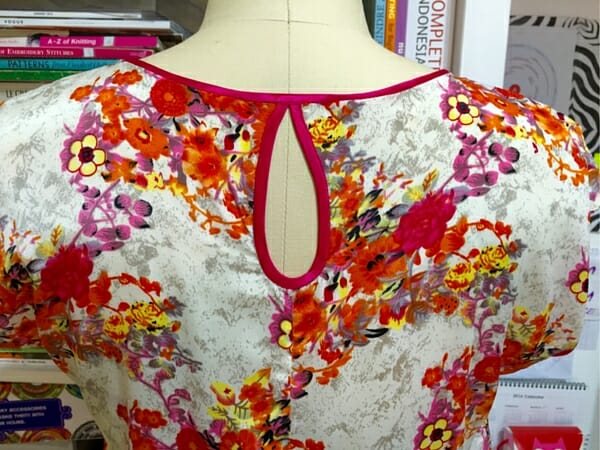
Step Seven: Finish the neck
Apply bias tape to the neck. For a more detailed explanation of how to apply bias tape to the neck, follow this on how to Use bias tape for a neckline or armhole facing.
I have done it a bit differently. This technique is highly recommended when using stretch fabrics, except that when using stretch fabric, you need to make the tape slightly smaller. In our case, it needs to be the same length as the opening of the neck.
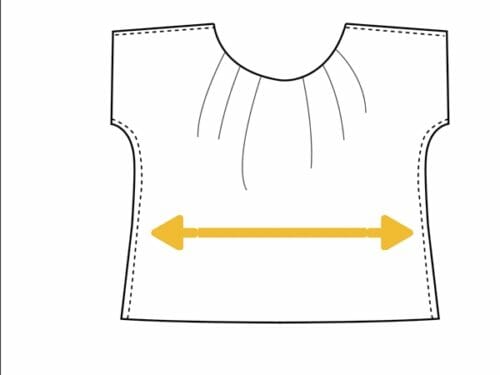
Measure the neck of the size you are making and cut the same amount plus 5/8″
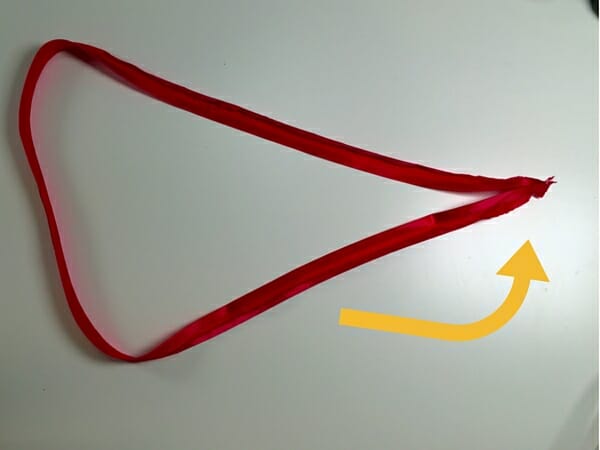
Sew both ends of the tape using a 5/8″ seam to make a loop.
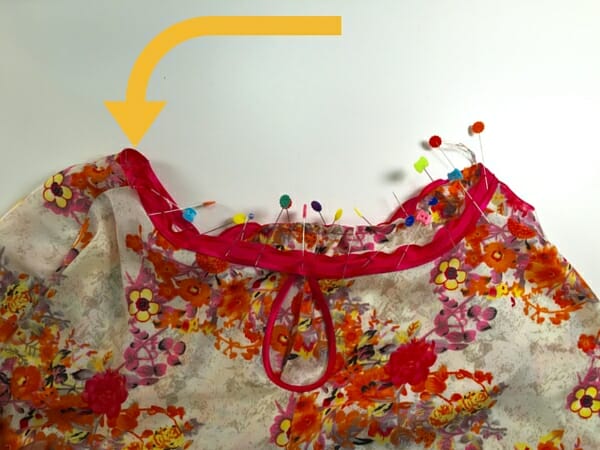
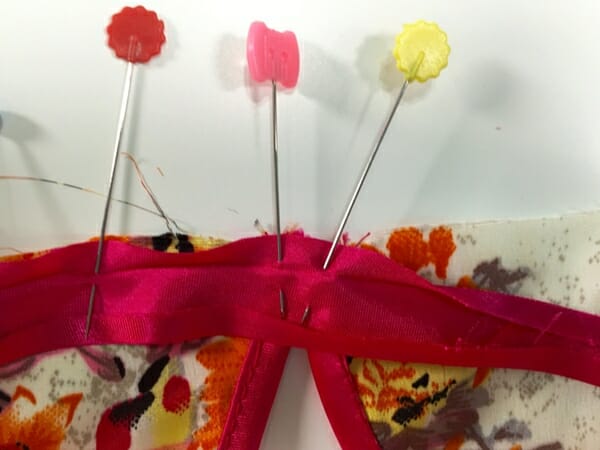
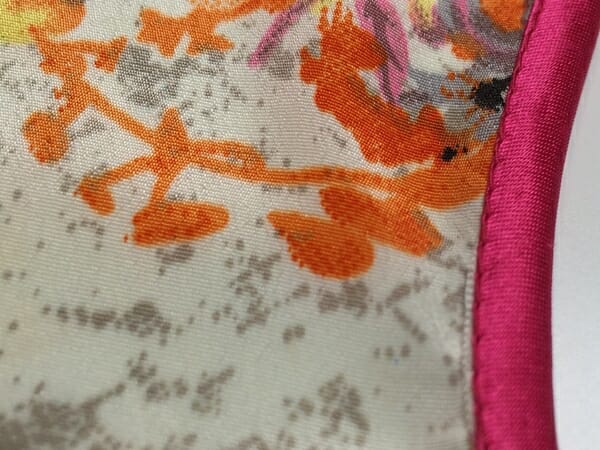
On the right side of the fabric, pin the loop seam to the shoulder seam, you will be able to adjust the tape if it is too tight or too loose using the 5/8″ allowance. If you measure correctly, you will have no adjustments to make. Pay special attention when pinning the tape to the keyhole area. The keyhole should be pinned side by side with no gaps. Cut the seam allowance of the loop by half. This will allow you to turn the tape easier. Proceed to sew the bias tape all around the neck. Turn and pin again, this time making sure you grab the back of the tape. Sew very carefully, either on the gap between the fabric and the tape or slightly on the edge of the tape. This is part of your designer's discretion.
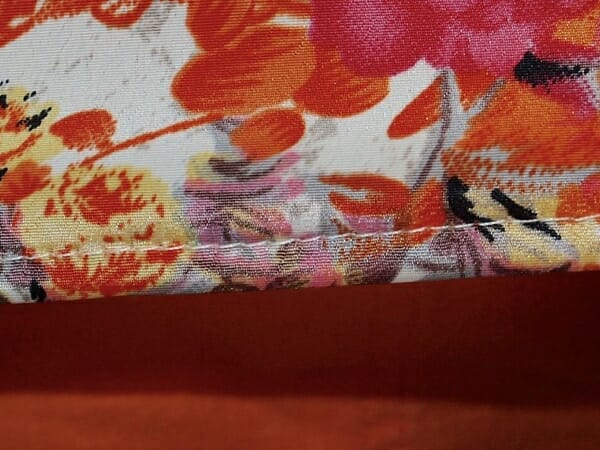
Step Eight: Sew the hems
You can finish the hem and the sleeves in several ways, depending on your taste.
Use the serger to clean the edges, fold about 3/8″, and sew. Use a twin needle to make a good-looking hem. For additional guidance on How to use a twin needle, please review this tutorial.
You could also use a roll hem foot and finish the sleeves and hem with it. But what happens when you do not have a rolled hem foot or a serger?
This is what you can do.
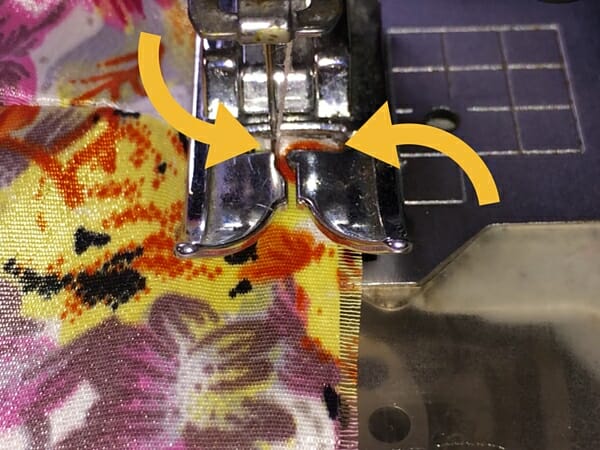

Choose a small zigzag setting; I am using the number 2. Starting with your needle no wider than the space of the foot. About 1/4″. Here is how it should look: fold about 3/8″ and sew the hem with a straight stitch. Turn the hem 1/4″ or 3/8″ and sew. For the sleeves, you can make them even narrower if you want.
A third option is to apply bias tape to the sleeves exactly as you did the neckline. If using a contrasting bias tape, I find this technique very elegant, but it will require a high standard of sewing.
NOTE: I have edited the pattern to include a hemline at the armholes. Serge the armhole and turn 3/8″.
It has taken me a little over an hour to make this pleated blouse. It's pretty easy to make for intermediate sewers yet has great functionality and can be worn with skinny jeans, shorts, pencil skirts, or pajama pants. This blouse will look great under a blazer as well. Please enjoy and happy sewing!
If You'd Like To Support Our Site
If you want to help us continue to bring you a wide selection of free sewing patterns and projects, please consider buying us a coffee. We'd really, really appreciate it.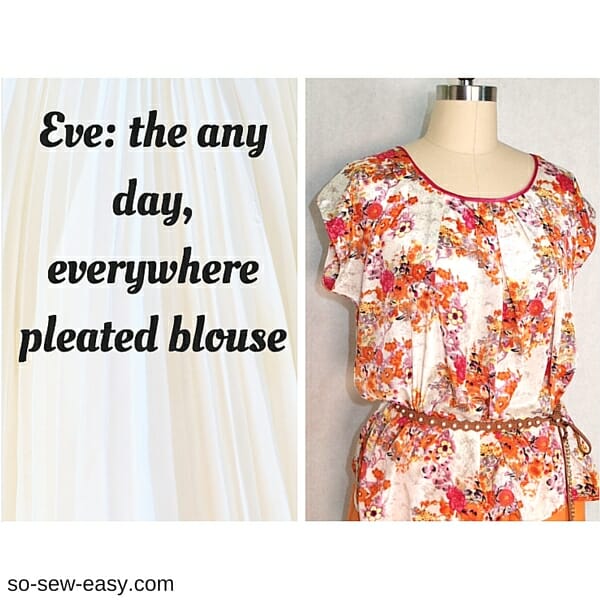
You can download the pattern and instructions for the Eve, Pleated Blouse from our account at Payhip.
For help downloading and printing PDF patterns, please CLICK HERE.


Instantly attracted to the blouse when I saw the photo, and guess what my Mum’s name is Eve (Evelyn)
I did think the style looks better in a plain fabric but obviously everyone has their own taste.
Love this design. It’s really made for my mom so I’ll get the fabric and start on it one of these days. Thxxxxxxxxxxxxxxx
Hello! may i know the seam allowance for the pattern? Is seam allowance included in the pattern already?
Hello! I download the free pattern a long time ago and just printed it today.The printed pages make no sense and here I am going crazy trying to put this together.Pages just don’t look right .The instructions to put bit together are very wrong! Don’t get me wrong,I appreciate you sharing your pattern with the world but what good does it do if it’s wrong?
Hi Nicole, I will have to print the pattern to see if it is your end or mine; from what I can see, it looks like you have scaled the pattern because page 5 does not correspond with the layout picture; let me get back to you. It is time I make a video about this blouse anyways.
Hi Mayra, I think this is a beautiful blouse and would suit most women both large and small. I will admit I am not a sewer, but was wondering how I would adjust this pattern to fit a plus size 28 woman. There is not a lot of clothing out there for bigger ladies and this style can change the look by the fabric pattern or as you said accessories.
Yes, this is true, I should try to make some larger sizes but I lack a model to fit the clothes on. I will have to find one locally. I will try
Download is blocked by 3 browsers for safety reasons
At the bottom of the page you can test the safety of this site. This is not about safety it is that you have a cookie somewhere tring to sell you an antivirus.
I cannot download the pattern. I click on ‘Add to cart’, but nothing shows up in the cart. Please assist
Not sure what is happening, perhaps you have a window blocker in your browser. You need a PayHip account as well.
I’m wondering what benefit the keyhole is if you meet the edges together & bind them together with the bias tape. Am I missing something?
IT is a good practice to learn to make this detail. Absolutely optional design detail.
I love the look of this blouse. I have horrible upper arms and always am in the lookout for patterns that will hide them. Do you think it would be possible to extend out the arms/sleeves to the length I need them? Would it be possible to do that and perhaps leave the seam open from just below the shoulder in the arm to almost down to the elbow? That’s the length I’m looking for.
Hi Tracy, I am having a hard time with the picture in my mind. I think I better share a top that you will be able to hide your arms with. Stay Tuned please.
Yes Tracy you can make sleeves longer easily and finish the seams instead of connecting them to create a version of a flutter sleeve. Experiment with it a little using cheaper fabric to get the look you want then cut it out in the fabric you intend for the blouse.
You are one very talented lady and now that the British weather is warming, I shall do my very best to attempt sewing this; you made it as simple as anyone like me could wish for. Thank you, thank you. Laura
Hi, I love your pattern and I’m trying to print it, but I’m in France, and I can’t print it properly, the printer partly cuts off the grey circles and I’ve been spending an hour trying to figure out how to assemble all the sheets. Can you help me? Thanks!
Hi Isabella, sorry you’re having difficulties. That pattern is very popular so I’m confident in it. Make sure you’re using Adobe Reader which is a free program to print it. You can get the latest version here: https://acrobat.adobe.com/us/en/acrobat/pdf-reader.html It is always free.
Print the pattern using Adobe Reader. This is the only program you need to download and print the pattern. Print using Actual Size and Landscape Mode. There are additional instructions for printing on the pattern.
If you’re still having issues please review these articles:
https://so-sew-easy.com/download-print-pdf-sewing-patterns/
https://so-sew-easy.com/print-assemble-pdf-pattern/
Thank you! It worked out fine!
You say that, despite given measurements, this is not a “plus-size” blouse. What do you consider XL and XXL? (I’ve read that the average size worn by women in the US is size 18. This being the case, the term “plus-size” should be eliminated from use.)
Hi Melissa, you need to leave a minimun of 8″ for the pleats. So the larges size of these blouse is going to accommodate someone no larger than 47 inches around the bust. Someone with a 47 inch chest is a size 22. You need to check the armhole against yours to make sure it will fit as for the feedback I have gotten from the people that have made the blouse.
I am wondering if I can leave out the key hole in the back?
Measure the pattern and then your hard to make sure it can go through the neckline of the blouse.
Hi,
I’m almost done with the pattern, just have to finish the neckline and hems. I tried it on and the sleeves are too tight, the rest fits great. Can you tell me if there is a way to easily adjust the sleeve or make them cap sleeves? I’m a beginner. So links to tutorials would be great.