


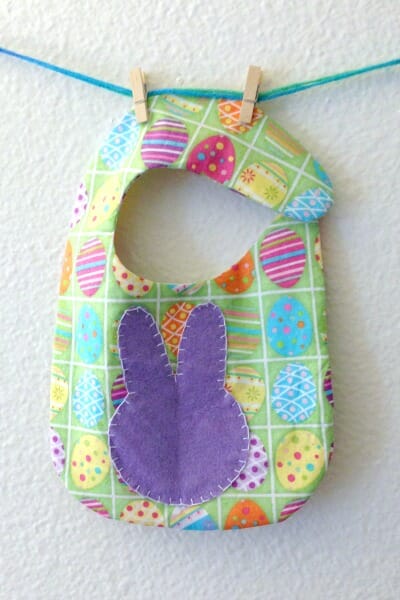
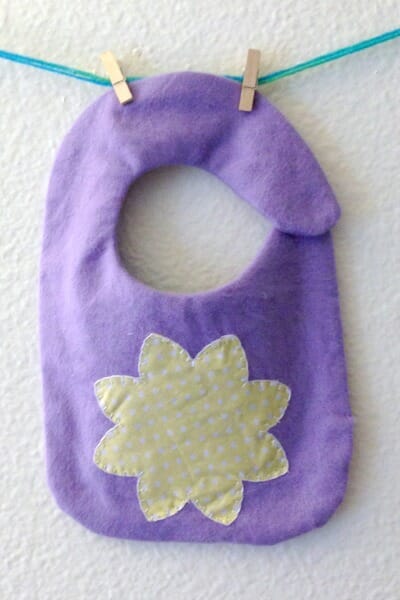
Next in the seasonal baby bib series, I created some quick Easter and Spring designs.
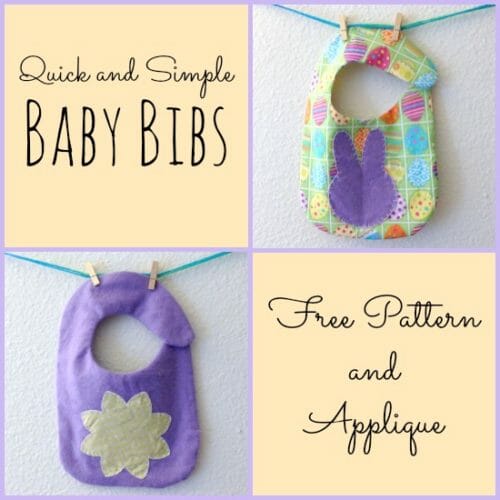
As I mentioned in the Valentine's post, if you don’t have a baby to sew for, these silhouettes can be used for a multitude of other projects! They would be cute on a t-shirt too!
To make your own Spring or Easter baby bib, you will need:
- The Pattern (link below)
- a couple of large scraps of fabric
- a couple of small scraps of fabric (for the appliques)
- matching thread
- freezer paper (optional – If you have never used freezer paper before, check out my freezer paper tips!)
- Heat N Bond Lite
- scissors
- sewing machine
How to sew a Spring / Easter baby bib
[Note: for more photos of each of the steps, check out the Christmas bib tutorial too!]
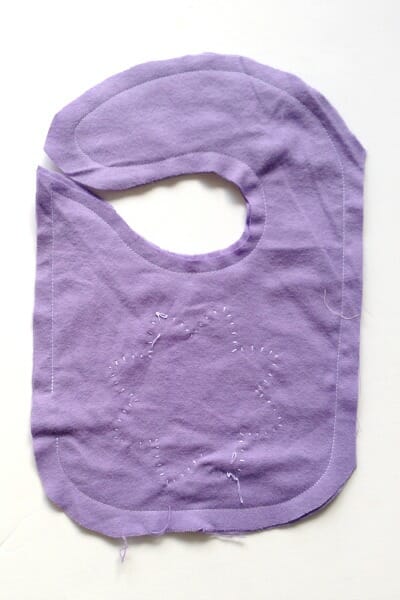
- Cut two of the baby bib (mirrored). Note: seam allowance is not included in the pattern. Cut around the pattern, including your desired seam allowance. I used about 1/4 inch.
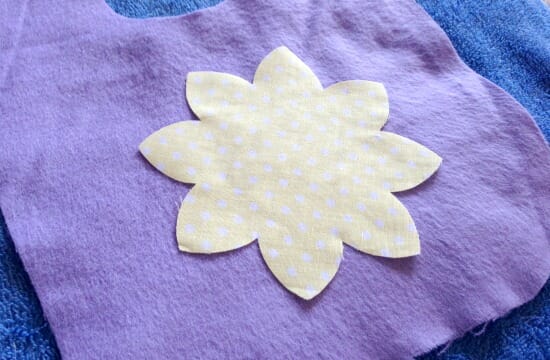
- Choose your applique and your desired fabric You will choose either the bunny or the flower. Cut directly on the line. Do not include a seam allowance, as the design will be appliqued on. Trace the design to your Heat N Bond (or freezer paper) and apply to the reverse of the fabric. Cut out around the pattern you drew.
- Remove paper backing from the Heat N Bond and iron it to the front of the bib, using the included instructions. If using freezer paper, remove the paper and either apply a fabric adhesive or not, you decide.
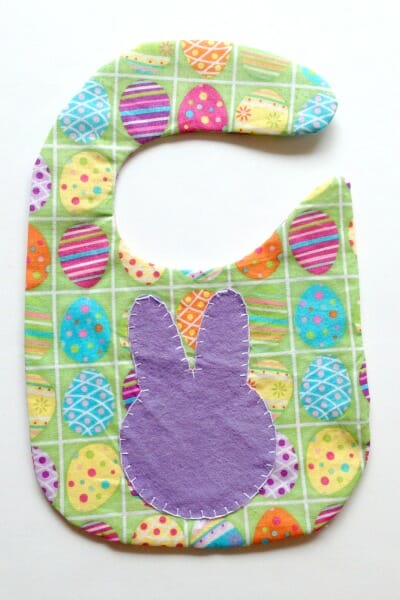
- Applique the silhouette (I hand-sewed a blanket stitch around the edges of mine but you can also use your machine for this step.)

- With right sides together, sew around the edges of the bib, leaving a small gap on one side to turn.
- Clip the fabric along the curves (Be careful not to clip through the seam.)
- Turn rightside and press.
- Topstitch all the way around the bib, making sure to complete the seam where you turned the bib.
- Install the snap (I used snaps for my bibs because I had them on hand but you could also sew velcro onto the bib to use as a closure instead.)

Like I mentioned above, the silhouettes can be used for a variety of projects. I would love to see what you make from them. Come by and share your projects on the Felt With Love Designs Facebook page or tag me on Instagram (@feltwithlovedesigns)!

For more fun, kid-friendly projects, head over to Felt With Love Designs. I recently designed a fun seal softie that would make an awesome baby toy and an adorable girly robot softie!
If you are interested in more baby-related projects, I frequently pin fun (mostly free) patterns and projects to my sewing for baby Pinterest board. You also might like the round-up of free diaper bag patterns!

If You'd Like To Support Our Site
If you want to help us continue to bring you a wide selection of free sewing patterns and projects, please consider buying us a coffee. We'd really, really appreciate it.
Hi! I'm Alicia from Felt With Love Designs where my husband, Patrick, and I write about all of our crafty and artistic endeavors. Patrick is the artist behind our designs. I create all our patterns and designs based on his sketches and bring them to life with a needle and thread.


Thanks for sharing this tutorial, it will be a great gift to make for a new mom!