Different materials may need different handling for a sewing project to be successful. For leather and sewing with fur, however, the key is being prepared. This means trying out the stitch on other material to get it right before you start work on the leather. Mistakes on leather leave holes and weakened the material if you have to undo the stitch.
Below are some tips on working with and sewing leather that can increase your odds of success when completing a project with this sensitive but luxurious material.
Stitching/Sewing Leather
For thicker material, the stitch must be lengthened accordingly. If you work with leather or fur that is really thick, consider using a stitch of three or more to complete the seam. If the seam is going to be thicker, then you need to increase the stitch length to match. Stitches that are too small, or created too close together will tear the leather.
Keep in mind that while working with leather, it is important to leave a long thread at both the beginning and end of the seam. This is needed so you can tie off the seam by hand. A backstitch is only used on leather when the seam will be encased or crossed by another or completely covered by a piece of leather.
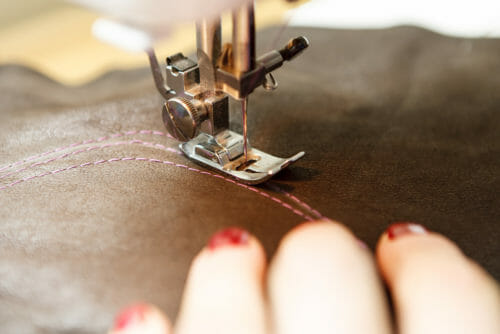

Using patterns with leather will mean similar interfacing that occurs in the same locations as on other materials. A product called Leather Fuse is sold for the purpose of fusing leather if that appears necessary during a sewing project. This product fuses the leather at lower temperatures and more quickly than other methods, decreasing the risk of damage to the leather.
For areas of the pattern that need to be pressed, a small amount of steam will be effective and will not cause shrinkage. This is because leather undergoes a tanning process prior to being sold. However, it is important to use a brown paper press cloth between the iron and the material. Also, do not leave an iron sitting on the leather for an extended period of time.
When you are working with leather and find thick spots, a good method is to put down a paper or cloth and then use a rubber mallet and pound them out. Protecting the leather with paper or cloth means you won't leave dents or scratches.
For a project with leather that is more casual, consider using overlapped seams. This can be done by top stitching to hold the seam allowance and stitch with a single-hole throat plate. This results in even and straight stitching.
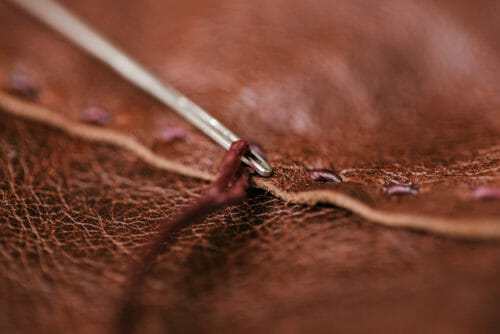
In the case of skipped stitches while working with leather, do not stop what you are doing. Finish the seam. Complete those areas of stitching by hand. To start, anchor a needle between the layers of the garment and come up through the first skipped hole. Then, cross the floating thread that was skipped and pull the needle back through the hole. Pull the stitch tight, and then repeat for every skipped stitch. This maintains the integrity of the seam and also reinforces that area.

Any pattern can be used when working with leather, as long as the pattern does not involve multiple seams. Patterns with multiple seams do not work well with leather. It is also a good idea to avoid patterns with large pieces.
This is not to say it can not be done, but it does take more effort, creativity, and experience to complete these projects.
For a project where you plan to use leather, use a muslin first to work out all the fitting requirements and the seam finishing. This allows you to understand the pattern and the constructions of the garment. Then, you can take it apart and use the muslin to create a heavy paper version of the pattern. This might take more time, but at the end, you will end up with a project that is well made, well fitted and that will last for many years.
Working with leather makes some people uncomfortable. However, with the right preparation, you can be successful. Start with a small project when you begin working with leather. This will be easier to complete and will be a confidence boost, so you will feel more ready to tackle a big project like a pair of leather pants.
Skins
Choosing leather for a project is a careful undertaking. The skin should be supple and soft. Below are different types of skin and the considerations that go with choosing to work with that type.
- Cowhide– Cowhide is tough by nature and suited for outerwear more than for garments that touch your skin. However, the skin is usually available in large segments, which are called sides. This can be a good choice for many patterns, due to its size.
- Pigskin– This type of skin is also popular because it is medium weight and is also found in larger pieces. It can be suitable for numerous patterns as well.
- Lambskin– Lambskin is very soft and lightweight. It is available in smaller pieces, so it is best used for smaller patterns. This type of skin can rip and tear since it is lighter and thinner. Therefore, more care must be taken during work on lambskin. However, this skin is a great choice for shirts, skirts, and jackets.
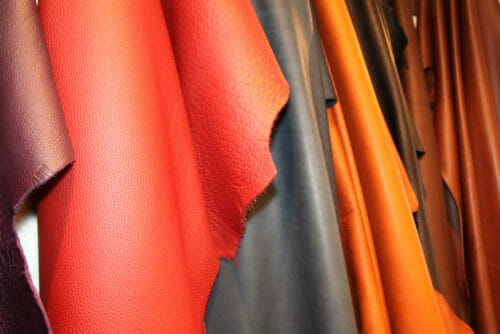

Skins like these are pre-measured and sold by square foot or meter. They are available at various prices, depending on the tanning process and the type of skin. There are also different colors, textures, and sizes. It is wise to purchase this type of skin in person since you can consider your options and also look for tears, thin spots, flaws, holds, and folds in each piece of skin. If buying the skin in person is not an option, look for an online supplier that offers a refund on the uncut skin. This helps you if you receive a piece that is damaged upon arrival or does not match the other skin you plan to use in the same project.
When you are trying to determine how much leather to buy, try this method: take the yardage of the pattern and multiply by 1.25, then add 15% to account for potential waste. If this does not seem accurate, you can always ask the supplier what their rule of thumb is regarding skin purchases.
Cutting/Marking
The grain of leather runs along the backbone of the skin. With a full piece, this puts the grain in the middle. Meanwhile, for a cut piece of skin, the grain will be along the cut edge. The lengthwise grain of the leather is much stronger than a comparable piece of fabric. However, it also will not stretch as much. When laying out a pattern, make sure to work with the finished side of the skin facing up. Also, place the center fronts and backs along the grain while you work.
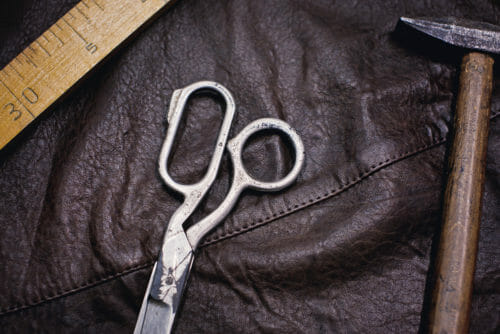

Masking tape is a good way to attach the pattern to the leather without causing unnecessary holes. However, do not leave the masking tape on for long. It can remove the finish. Cutting should be done with a rotary cutter to provide clean edges.
Transferring markings can be done simply. One option is to cut tiny pieces into the seam allowance for notches and darts. Then, you can use was chalk to mark hem allowances, darts, pockets, buttonholes, and other important features.
Make sure to mark the dart points on the wrong side of the skin. This can be done by using a pin to pierce the pattern. However, be sure the pin does not go through the leather skin. This causes holes. Once you move the pattern, you can mark the pinhole with chalk and then use chalk and a ruler to mark the dart line for stitching.
Materials Needed for Sewing Leather
If you are interested in sewing leather clothing, crafts, or upholstery, you will need the following basic items:
- Teflon foot is perhaps one of the most important tools

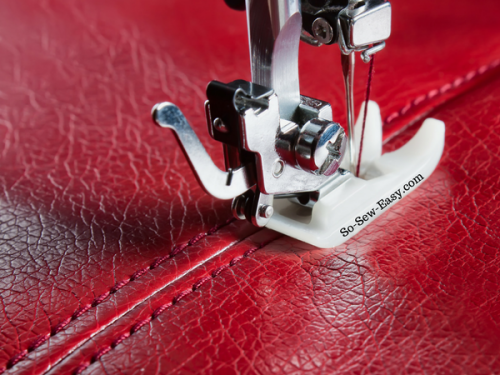
- Leather needle for the machine and Glover's needle for hand stitching
- Thread that is 100% polyester – do not use cotton or cotton blend because the chemicals in the leather from the tanning will cause the thread to rot
- Rubber cement or two-sided adhesive tape
- Rotary cutter to cut clean edges and a knife cutter
- Wax chalk to use for marking
- Cold tape
- Rubber mallet
- Patterns
- Brown paper to transfer pattern.
Notions
- An invisible zipper can create a clean look for projects involving soft leather. To attach the zipper, use a narrow piece of fusible interfacing. Tape the seams together, instead of basting, and baste the zipper using rubber cement before you do the top stitching.
- Exposed buttons can scratch the leather. Instead, opt for covered buttons, which protect the skin. Use a metal toothed button to make sure it will grip and hold and use dental floss to sew the buttons on since this will prevent the button's metal shank from cutting through the regular thread.
Keep in mind that success in working with leather is related to choosing the right type of skin, using the right tools, and taking time with the project to avoid creating holes and tears. Once you have completed a project with leather, you will begin to understand how easy and fun it is to work with this material.
I hope these few tips on sewing leather will help you with your next project. Don't be afraid. Sewing with leather is not that hard and the outcome can be fantastic! Let me know in the comments below if you would like to see a few patterns and projects involving sewing leather.
In the meantime, I have a very easy tote bag FREE pattern that can be made in a couple of hours. Check it out HERE.




for the leather fuse, are you meaning 420 Fashion Fuse by Pellon?
I started leather crafting in my teens so am used to hand sewing heavier weight leathers by punching holes first, then using a needle on each end of the heavy thread to make the seam. My latest projects include a possibles bag for black powder rifle shooting and holsters for cowboy action shooting. The Possibles bag is only 20 years since completion and still looks good. Same with the holsters though they get more wear. If you want to try it but don’t know where to get the heavy equipment needed, Tandy Leather Company is were I started almost 6o years ago and they are still in business, so I trust them.
Hi. Your post is much needed, thank you. I do have question though, should I change my needle to something that will work with the heavier material? Of so what number should I use? I am working with a thinner leather something like you would get at hobby lobby
Hi Sue, it has been many years since I have been to Hobby Lobby, so I really do not know what you mean, however the key with leather if the stitch is going to show is to have the thread matching the needle. If your needle is too wide and thread too it will make your project look cheap. The best thing is to practice with a scrap of leather and if your machine can handle size 14 or a thinner leather needle with a walking foot then go with that. You really need to practice to see what look you are looking for.
Thanks A lot ma! I really appreciate… would also love to see some projects made with leather, preferably bags and/or accessory items as well
This is a very informative post, thank you Mayra! I would also love to see some projects made with leather, preferably bags and/or accessory items.
Definitely a geat class to have, I have leather that I would like to sew and this class would be great!
wonderful ideas- i would like to try sewing leather sometime soon!!
Thanks for these tips! A friend recently gave me some deer hides. I would love some simple patterns to make.