


“Where is my…….?” That must be one question I ask myself at least 5 times a day. I lose just about everything (much to the chagrin of my family..) and I have to admit that I am a messy worker. I waste a lot of time looking for things I need; bobbins, needles, screwdrivers, tape measure, scissors, clips –you name it. The tools are not really lost since they are certainly just somewhere, usually under something. For everyone's sanity, I felt it was about time I change the way I do things.
I got the idea for a sewing mat organizer one morning after spending four hours the prior night looking for a regular presser foot for my sewing machine, only to find it at the bottom of my serger scrap catcher. I found it mixed up with a collection of sewing machine needles, pins, and almost empty bobbins.
The needles are all still good because I will always throw out the bad ones immediately, as this is best practice to avoid potentially dangerous broken needles. But I was at a loss of what to do with all the ones at the bottom of the scrap catcher. I counted 22! Should I dump them and start all over? I'd hate to waste good needles like that.
So what about starting again with suitable sewing mat organizer that would eliminate the guessing about where and what kind of needles they are? But what about the zipper foot and the rest of the tools that tend to go missing when I am working in my notorious messy table? How about using a transparent material to make some pockets so I can see exactly what's inside?
I decided to design a new sewing mat organizer pattern and project for you that would not only keep my tools in an easy place but also double as a scrap catcher. I also added a handy reference ruler and place to pin, sort, and store my sewing machine needles.
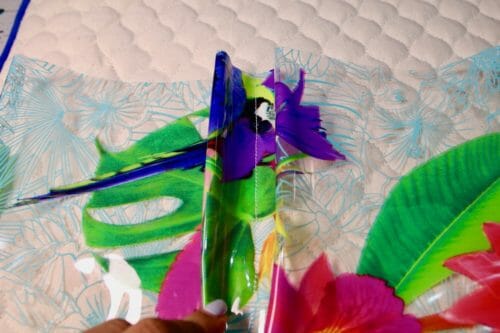
I was so focused when I was making this project that I did not realize how hard it might be for you to follow. It reminded me of the story of the Emperor's New Clothes except the transparent vinyl is actually there, but it is so hard to photograph. I was going to use completely clear vinyl plastic to make the pockets but I chose a vinyl that had some pattern so you could actually see it in the tutorial. For my own, I'd use only clear vinyl so I could more easily see what's in the pocket, but I'm sure you wouldn't be able to see the pockets at all in the tutorial.
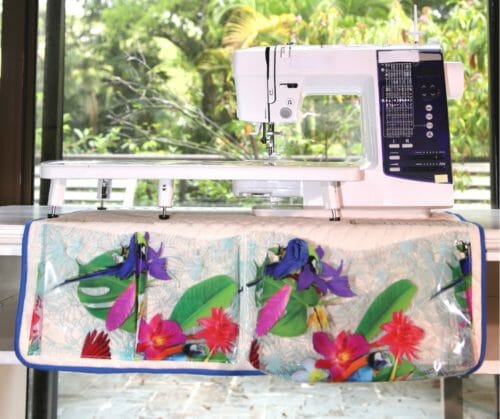
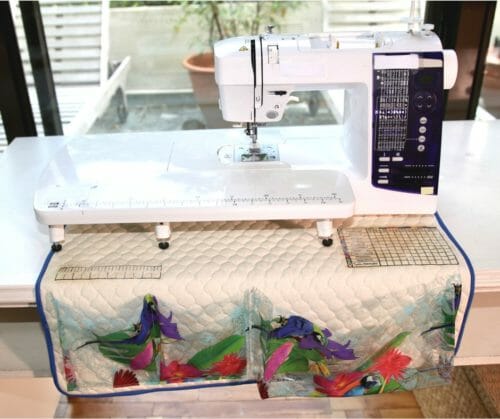
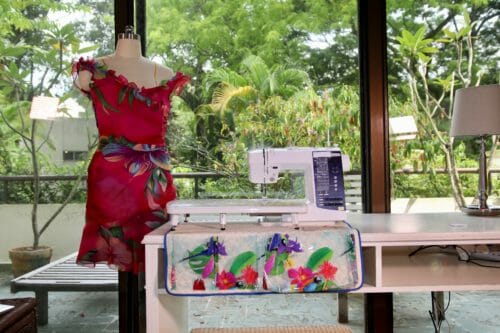
This Sewing Mat Organizer has one needle organizer, one small ruler (in centimeters and in inches), and two pockets (one will double as scrap catcher and the other can hold your tools). In a separate tutorial I will show you how to make a pincushion, but here are 125 pincushions patterns you can choose from and add to the mat.
So let's get started!
Materials:
- 3/4 yards of quilted cotton fabric
- 1/2″ yard of clear vinyl
- Thread to match the fabric
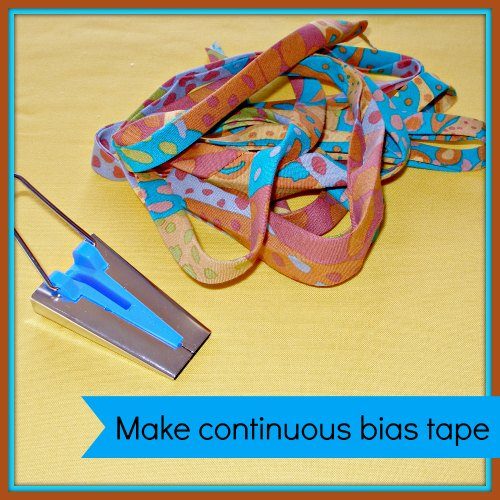
- Bias Tape
Tools:
- Teflon foot
- Leather needle
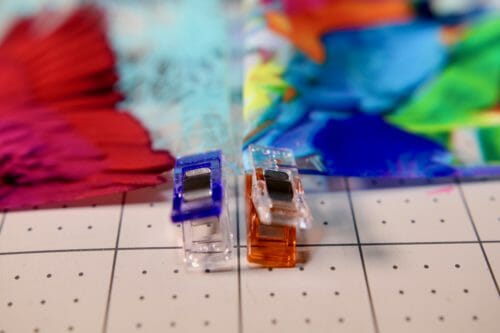
- Wonder clips
- Ruler
- Penknife (best) or Rotary cutter
- Walking Foot
- Cutting Mat
- T-Shirt transfer paper by Canon
- Inkjet Printer I am using the Pixma Canon TS5020
Fabric recommendations
Pattern Layout

How To Download
We will continue using the new Payhip web store to distribute our patterns.
Our patterns are still free, but now you have the option of making a small contribution if you like our work! We'd appreciate it, and it will help us keep going with new and fun designs like this. Even a dollar or two goes a long way.
Thanks so much in advance for helping us out. You can use any credit card, and you don't need a Paypal account, although you can use one if you have one.
How to print the sewing mat organizer pattern
Use Adobe Reader to download and open the pattern. To print your cardigan pattern size, print on Actual Size and Landscape form. Do not scale the pattern.
How to make the sewing mat organizer
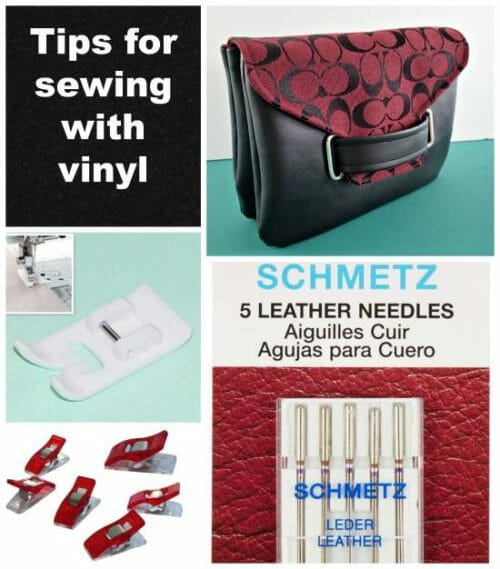
Before starting to make this project, make sure you have all the materials. For best results when sewing with vinyl, the use of a Teflon foot is a must. Practice on a piece of vinyl using the Teflon foot if you have never worked with this material before. You may also want to review this tutorial on tips for sewing with vinyl:
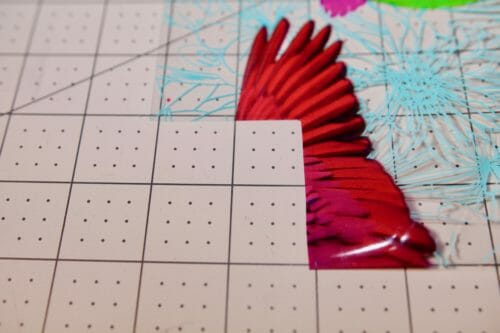
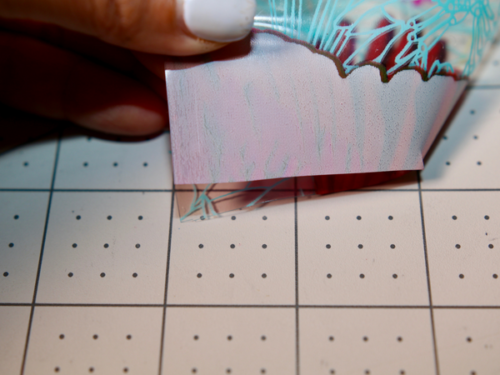
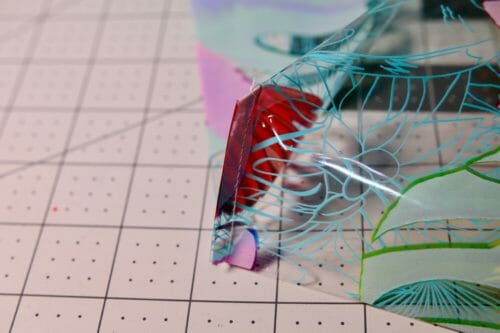
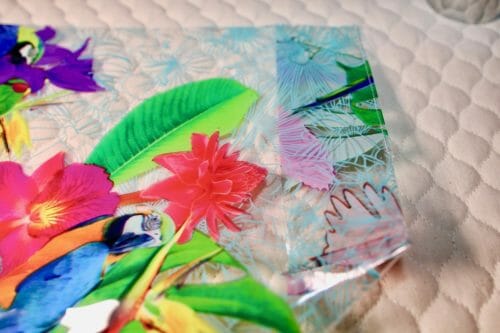
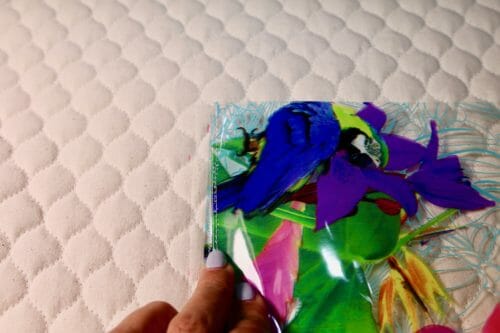
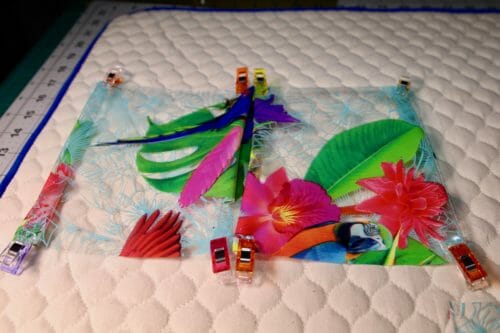
Cut the pieces in vinyl using a penknife and a cutting mat. I find the pen knife tool the best when it comes to cutting the corners. Keep in mind that the two front pockets are made slightly differently.
We want the scrap catcher pocket to hold itself open to potentially catch any falling scraps, while the other pocket is made to hold itself more closed to better secure your valuable sewing tools.
Step One: Sewing the bias tape to the mat
If you need to make your own bias tape please follow this tutorial:
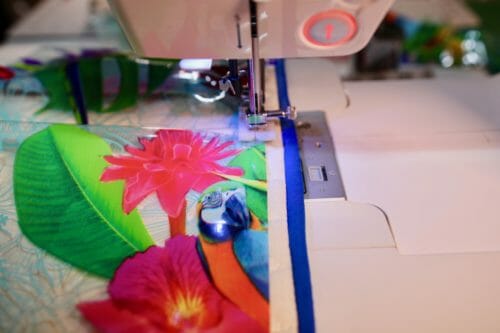
Sew the tape to the mat starting on the right side of the fabric at 3/8″.
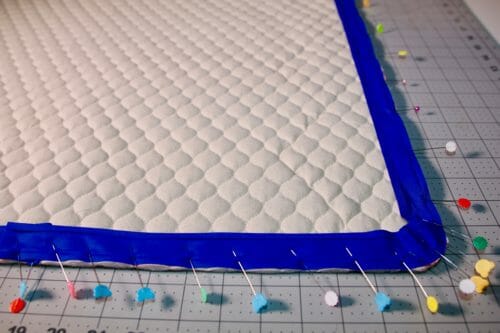
Turn the tape and sew once again using the technique of “stitch in the ditch”.
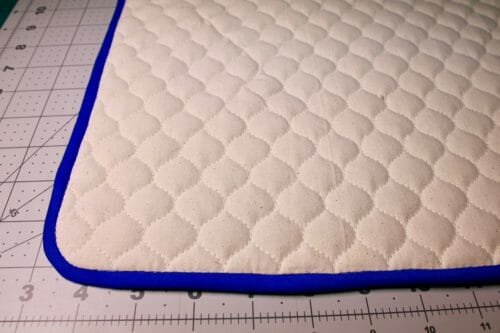
Iron the mat with a lot of steam and put aside.
Step two: Sewing the scrap catcher pocket
This first pocket will allow you to catch sewing scraps that might fall from your sewing machine or serger. It performs the same function as our highly popular serger scrap catcher project. You may want to review this tutorial to get a better sense of the concept.
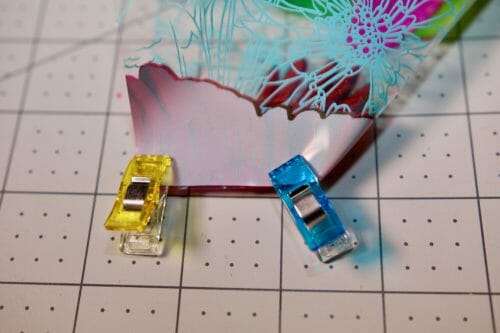
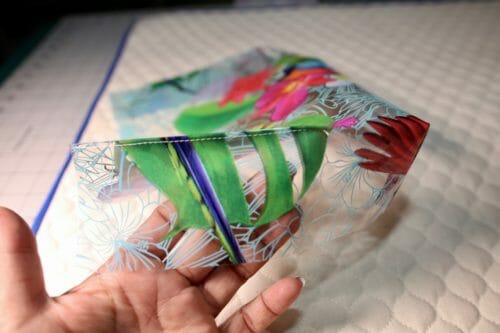
We will start by squaring the corners laying the scrap catcher piece print side up on the cutting mat.
Join the corner print sides together.
Use your clips to keep the corners together.
Sew at 1/4″.
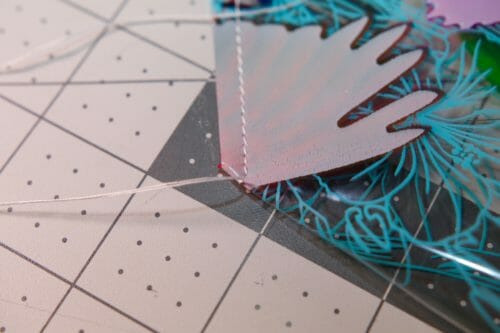
Do not tack the seam back and forth but rather make a knot.
Turn the corners right side out. From the point that forms at each side of the scrap catcher/pocket, fold the edges measuring 2″ wide to form a gusset.
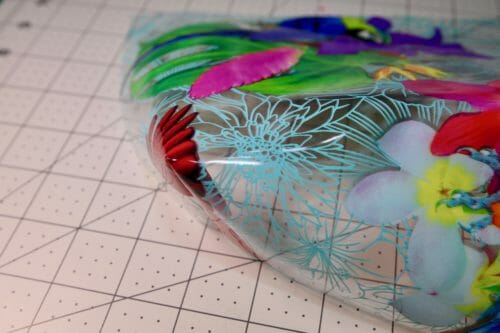
Clip the fold to hold it in place.
Topstitch both folded edges at 1/8″. This is done to make sure the crap catcher/pocket will have a squared shape and it will hang with the pocket open.
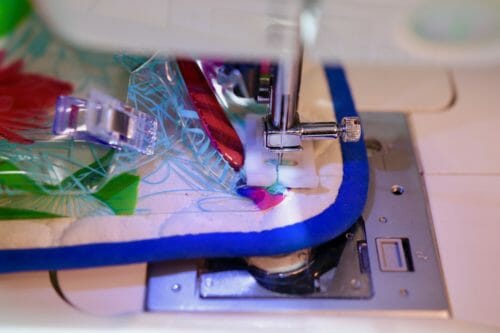
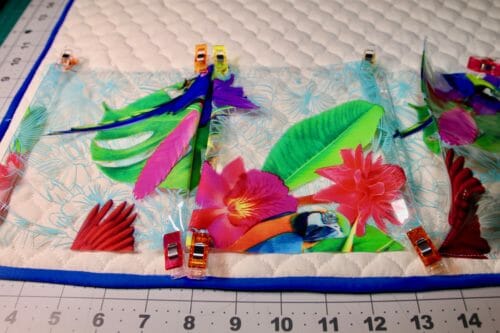
Place the pocket on the right side of the quilted mat and leave a 1/2 inch margin from the biased edge on the right side and 3/8″ at the bottom. The distance at the bottom changes because as you sew the pocket down the corners get rounded up.
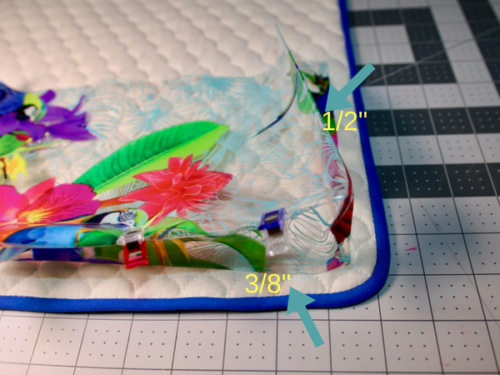
How far to the left? Make sure the topstitched edge folds right on top of the edge where you are going to sew the pocket down to the mat.
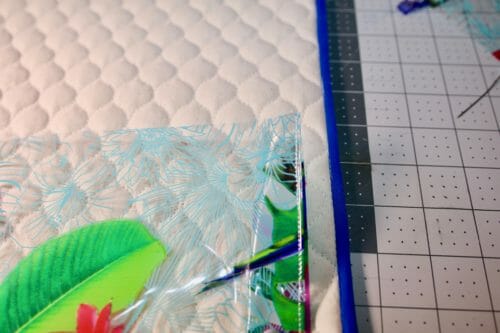
Sew at 1/8″.
As you go around the corner, flatten the vinyl so you are able to move the mat around. As you sew the corner, open the seam allowance. This is the trickiest part of the whole project so take your time.

Step Three: Sewing the storage pocket
This second pocket will hold the things you use the most while sewing –a pair of scissors, a tape measure, and a seam reaper to name a few practical things but the choice is yours.
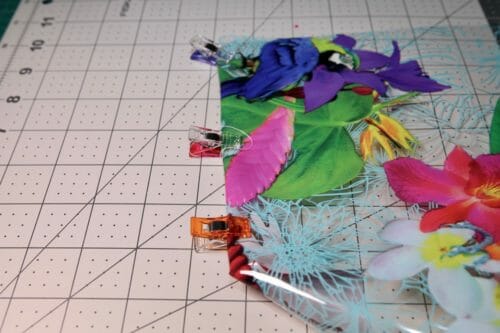
The pattern will give you an indication of how to fold the pleats on the sides, so follow it closely. Make the pleats and hold them together with the clips.
Align the pocket with the right pocket and start sewing on the right-hand side. Make sure you are happy where the pocket is going since there is no chance to change your mind once you have sewn the pocket down.
Sew the pocket down at 1/8″.
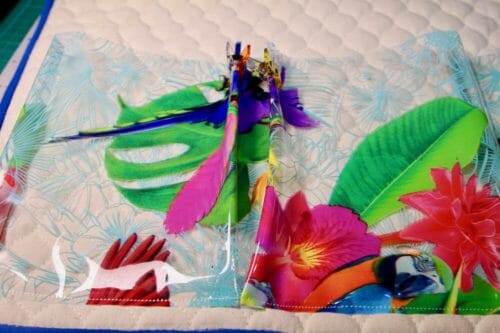
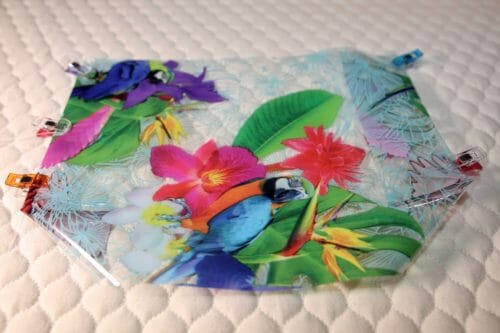
Finally, sew a stitch line in the middle.
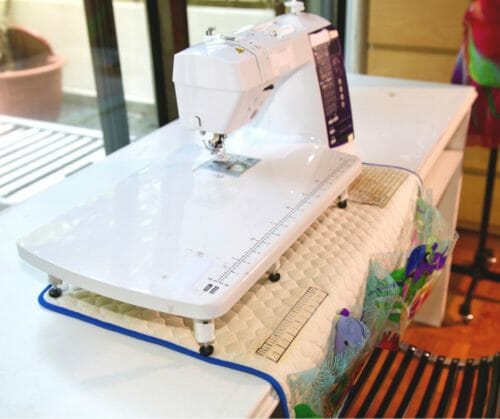
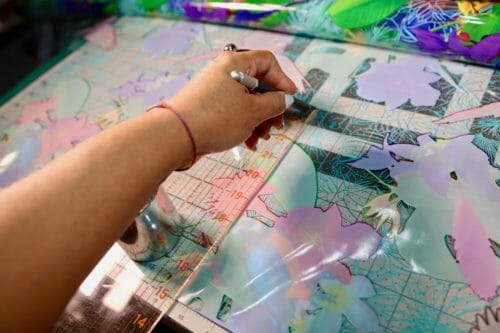
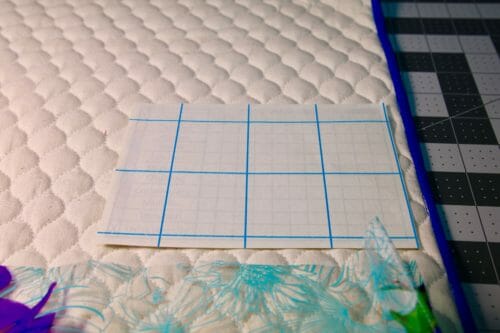
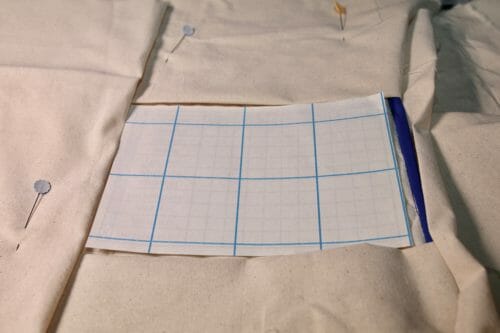
Step Four: Transferring the ruler and the needle organizer
I have printed the ruler and the needle organizer chart which is included in the pattern on T-shirt Transfer paper. You're going to use this to mark the image of the needle organizer and the ruler onto the sewing mat where you'll always be able to find it.
According to the instructions on the paper, I am supposed to iron the transfer paper with a very hot iron.
Experience with burning cloth tells me I have to protect the fabric around the transfer.
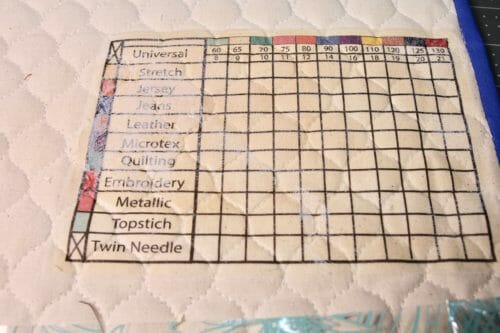
Followed the instructions on the product and despite taking care with the transfer I have to say I am a little disappointed with the result. The chart has a yellowish tint to it, and not as attractive as I would have liked but it will be very useful.
If you are adventurous, there are many other ways you can print the chart and ruler on the fabric Here are 4 methods of printing fabric at home that we wrote about before that will also work.
And you're done. Now neither you nor I have any excuse about why we can't find the exact needle we want or any of the other commonly misplaced tools.
Join me next time when I will share with you the pincushion that goes with this mat but if you cannot wait have a look at these 125 pincushion patterns we have collected for you.
Until next time! And don't forget to leave comments and questions with photos in the comments section below.


Very good idea. I already put my machine on a padded mat as it runs better with padding underneath. Just extend the padding! But I would take care not to put sharp objects in the pocket as they could poke into me when sitting up next to the pockets.
Oh I am so happy to hear you say you can’t find anything around your sewing machine. I am the same way and am always spending too much time looking for small things that I need like seam rippers frixtion pens and such just to keep at it. Sometimes I get so sick of myself and my disorganization I just quit sewing until I see another fabric I like then I’m off the the races again. LOL Love this sewing and it’s so much more fun now, than when I was young. Thanks for the patterns, the instructions, the humor, and the kind thoughts for everyone. Kind regards to you Myra. Pat
It is truly my pleasure!
This is a wonderful idea and thankfully, I understood it. Reading the comments reminded me to print the chart backwards, lol. My friend made me one of these with fabric pockets and I love it. I have been meaning to make another one for my 2nd machine and the vinyl would never had occurred to me. BRILLIANT !! I also love someone’s idea to create a hanging holder for stabilizer / interfacing rolls.
Hi Debbie, indeed do print the chart backwards, let me know how it turns out please. Kind Regards, MC
I use a king-size mousemat under my machines and stick pins and needles in. An old cutlery tree stops the bobbins and scissors vanishing, a jamjar stops the tacking thread wandering.
I shall use the remains of the vinyl I used for bespoke computer covers for your idea for a see through scrap collector, so very helpful idea.
Keep going, I love your posts.
Thank you Mary, I must say I do love your idea of the cutlery tree, I think I will adopt it.
I love this idea!!! Right now I have all those items (thread nippers, ruler, seam ripper, etc ) on the table in front of me. And I’m always dropping them! This is going to be the next project for my sewing area.
Everyone – stay healthy and safe. And keep creating!
Thankyou so so much for sharing your talents with everyone, at the present time life is tough and I think every little helps, really grateful. Stay safe .xx
Is there a way to contact this site?
Hi Betty, just use the details on the Contact Us page: https://so-sew-easy.com/contact/
Should some bias tape be put along the top of the vinyl pockets to help keep them from cracking open after being used after awhile?
I think it is a great idea.
I really do not understand what we are to do with the needle chart in it’s backward position. Would you please send out a copy that is printable?
Hello Daphne, the chart is meant to be printed on a transfer paper then transferred on to your mat so you can pin the needles according to the size and type do you can reuse the needles. It is not meant as a paper chart.
I like the design on the vinyl ! As my machine is in a cabinet, I am making something similar for the end of my ironing board, though not vinyl…
Just a comment but, what a shame to have such a view from your sewing room, — Ha !! I really envy ThAT! My little dark spare bedroom is just opposite.
Great tutorial, Happy sewing, and thanks.
OLee
Let me join you in having no view. I have a closet with double doors that open up the end of the room to prevent claustrophobia. It is really quite well fitted with built-in shelves and drawers. So,, I am not complaining just commiserating with your lack of a view.
My machine came with an akward freearm attachment and I couldn’t store tools in it. I’ve used fabric for the pockets, and put a zip right across the top. I take this machine ‘out’ once a week, and it’s great. The pocket is large enough for the cord as well, and I’ve made a separate thread catcher, where the foot resides when travelling. I thought about sewing a measuring tape across the top, but wondered if that would stretch the tape.
I actually bought ribbon that had measuring tape printed on it
thanks, Just what I needed. Nice pattern.
I love this pattern and will definitely make one someday. However, I would like add a little magnetic part where I can store my pins AND make the matt so that it can fold around my sewing machine. That way, I’ll never have to worry where to stock the matt.
Great ideas, the pincushion I am working on has magnets. I will share that with you but definitely would love to see your version.
Thank you for the pattern. I know I am being particularly dim this morning. (It’s Monday: that’s my excuse and I’m sticking to it!) I don’t quite get the needle storage/sorting area. I can see that the grid helps to identify which needle one has, although I wouldn’t know how to recognise the different types. I presume one pins the needle into the corresponding grid square to achieve the “sorting”. For the “storage” aspect, does one simply leave them there? Would they not snag on a larger piece one was working on, or scratch one’s arm if leaned on while working? Sorry if I’m asking the totally obvious.
I like to place my machine on a non-slip mat so it can’t slide on the desk – I do the same with my chopping board in the kitchen – so I think your mat might be a little more secure with a non-slip mat under it. From your photo your machine appears to have little rubber feet which would grip the desk, but by placing them on a quilt don’t you risk your machine skating across the desk just when you need to be accurate? (Not a criticism, I promise, simply an observation from a very nervous novice sewing person.)
Keep up the good work!
HI, Julia, the rubber feet you see on my machine is from the table attached to the sewing machine. Most machines are heavy enough that there wouldn’t be any skipping around. The point of the mat is to have all the handy tools within reach so you can finish a project quicker. The needle area is when you are changing fabric types and the need to change the needle, not just pin it in a pin cushion and forget what the needle is for. With time you will learn, that a wrong needle will ruin your project and sometimes the needle is still good to be able to use it in another project. It is not meant to be left on the mat forever, but like I said I never bother to place the needle back in the container because it is used. But, then again that is just me. I sew every day and use different types of needles five to six needles a week, sometimes more.
The needle chart is backwards.
Hi Paula, thanks for reminding me. I meant to put that in the instructions. It’s designed for being used with transfer printing so it has to be backwards so it comes out forwards when transferred on to the mat.
I am 81 so I did not grow up with computers and my skills are minimal. I don’t know how long it would take, but why do you not have a printable option? One perhaps that drops all those pictures. If I don’t print it out I am in danger of forgetting it or having (as my last computer did) a computer just up and die and everything stored in it was lost.
Hi Rusty, thanks for your comments and feedback. If you go to the sharing buttons on the left side of the screen, you will see a bottom button with three little dots. When you click that, it will give you a whole bunch of sharing options. Choose “printerfriendly”. This will let you easily remove anything you want from the page and download a very printable .pdf file. Please give that a try. Hope that helps, kind regards, and happy sewing!
This is a really good idea with the clear vinyl on the pre-quilted fabric. I’m going to make one!
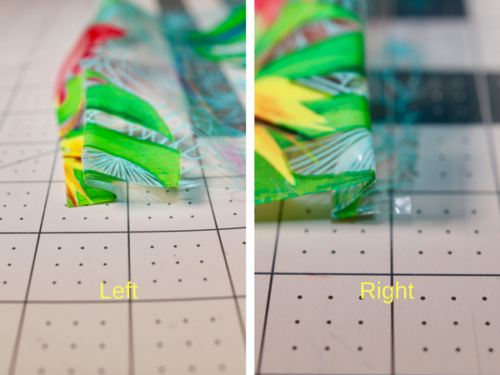
However, I had a hard time seeing what was going on with the vinyl pockets because of the print on the vinyl against the white fabric and the white thread, and your hand behind the vinyl, in that one picture, mixed in.
I’m sure it’s my brain being unable to comprehend the mix. (I can’t get a book at the library, either. LOL) I love using the vinyl. Once, I got a new makeup bag at the Goodwill and used a piece of vinyl to completely line it. I save the vinyl bags that sheets come in (Costco). It’s
“heavy duty”. I cut them apart at the seams keeping the piece as large as possible. I plan to make something similar to a hanging shoe pocket thingy for my rolls of embroidery stabilizer so they will be horizontal and not scattered and rolling off the table.
Thanks for your tutorial. It’s really helpful and I’m excited to make my sewing mat organizer !
Karen
Hi Karen, thanks for your comments and feedback. It would be great if you can share a picture of your creation when you’re done! Kind regards and happy sewing!
Sorry, Karen that is as good as I can get it. Otherwise, you will have to wait for the video. The original mat is with completely transparent vinyl, that did not even showed up in the pictures. IF you download the pattern you will be able to understand the pieces better. Let me know if you still need further help.
Thank you for the free pattern and instructions. I might make some modifications for my personal use, but this will be my guide. I’m taking up sewing again after a 25 year break due to not having a working machine… Thank you for inspiration!
Absolutely, Nancy, that is what I am most interested, to see your take on the mat and you adapt it to your needs. Do share a photo would love to see your creation 🙂