


This simple long sleeves t-shirt pattern will allow you to make tops that are great to wear over jeans, skirts, scrubs, wide-leg pants, and culottes. As well as an alternative to a pajama top.
I realize that our new reality is making us spend a great deal of time at home. I'm sure all the readers know the joy and stress relief of making things with your hands. It feels good to be creative and busy, especially these days.
Here you have a pattern that is amazingly versatile and comfortable. Depending on the print you use, you can have everything from a comfortable athleisure top to a casual lunch shirt.
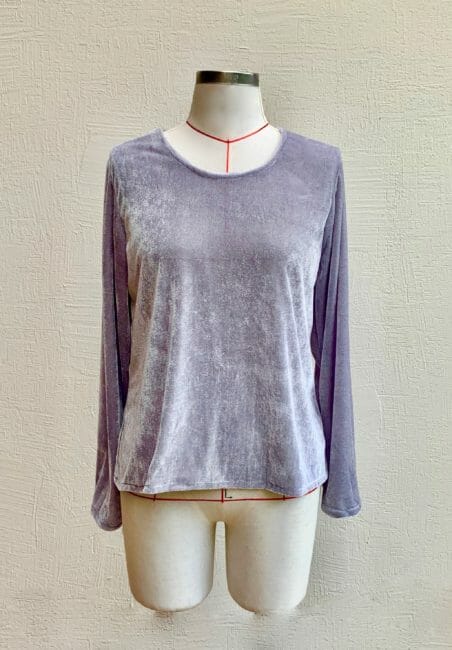
The pattern has a scoop neck. It's high enough for those of us entering the cooler months.
It has a short hem at the front and the bottom. As well as long sleeves that you can raise or lengthen to your preference. The most important part is the slight A-line, so you'll have room to move about, and whether you're doing yoga in the garden or sleeping in, the A-line will be comfortable without looking frumpy.
Materials
- 1 1/2 – 2 yards of 60″ wide cotton, rayon or bamboo knit with at least 25% stretch
- Thread to match
Tools
- Sewing machine
- Jersey or double point needle size 80
- Serger or overlocker (ideal)
- Cover stitch is ideal but not essential
Fabric Recommendations from Amazon.com
Skill Level: Beginner
Above are my fabric recommendations for this Long sleeve T-shirt. I used a very thick velvet which I do not recommend. It was a nightmare to sew if you do not have a serger. I used this fabric myself because I bought a lot of it so cheap that I use the fabric as a muslin.
Take note that this simple long sleeves T-Shirt pattern has no seam allowance, but I have added the hem to the sleeves and to the front and back. I used a 3/8″ and made the entire top using my overlocker with four threads and two needles. I did hem the sleeves and bottom using the sewing machine.
You must understand the technique of creating a bias tape as a facing to complete this project. Please check out the article below.
How To Download Your PDF Pattern
We're going to continue to use the new PayHip Webstore to distribute our patterns. As most readers know, Craftsy (Bluprint now) is changing a lot and they have stopped designers like us from publishing new patterns on their site, so we've had to move to another service.
Our patterns are still free, but now you now have the option of making a small contribution if you like our work! We'd really appreciate it and it will help is keep going with new and fun designs like this. Even a dollar or two really goes a long way. Maybe you don't know it takes an average of 26 hours of work to make a post and that does not include a video.
Thanks so much in advance for helping us out. You can use any credit card and you don't need a PayPal account, although you can use one if you have one.
Pattern Download
Please Consider Supporting Our Site
If you'd like to support our site where almost everything we do is free to everyone, we'd really appreciate a cup of coffee to keep us going..
Pattern Layout
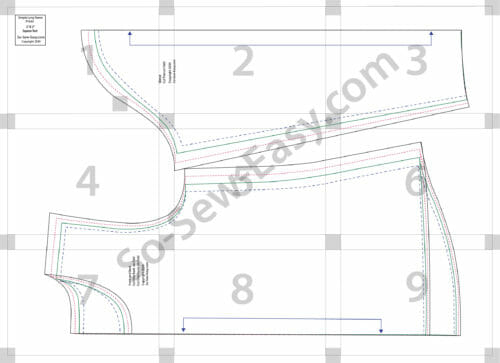
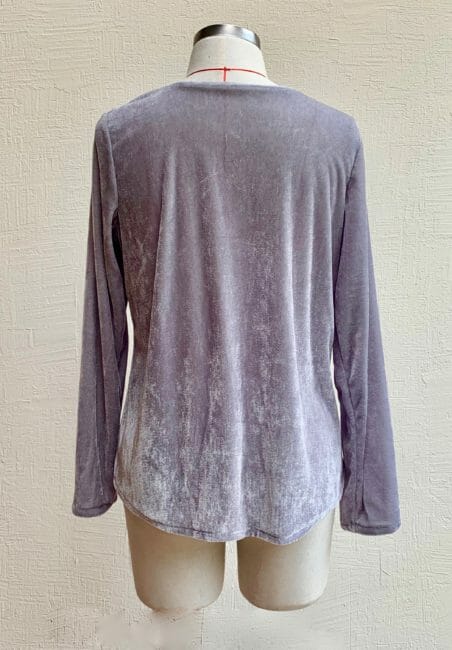
The front and the back are the same Please trace the front in a separate paper. The instructions are here on the site free for you to use.
Sizes:
Allow 4 to 6″ of ease at the hips. It is a slight A -line shape perfect for hour glass and pear shape. You can wear it tighter the bust (helped by the stretch of the fabric) a bit looser at the bottom. This is not a pattern for a woman bigger than 40″ at the bust and 47″ at the hips. I know I need to change this and make a team of pattern testers that can help me with the fitting of curvy woman. I simply do not have more time at the moment. However I will follow up with fitting tutorials that can help you change this pattern to your measurements. Use the pivot and slide method to adjust the pattern for a full bust adjustment.
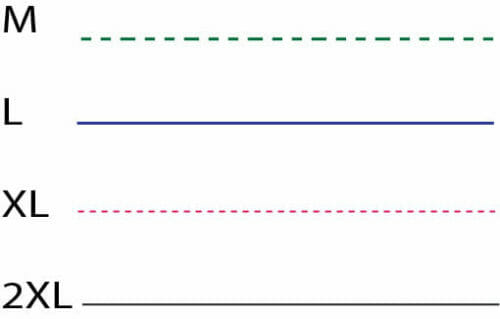
| Size | Bust/Hips | Waist | FrontLength | Sleeve |
| M | 37 1/2-41 1/2 | 38 1/2 | 23 | 23 |
| L | 39 1/2-47 | 40 1/2 | 23 1/4 | 23 1/4 |
| XL | 42-49 | 42 1/2 | 23 3/4 | 23 3/4 |
| 2XL | 44-51 | 44 1/2 | 24 | 24 |
How To Sew Your Simple Long Sleeves T-Shirt
1. Sew The Shoulders
Right sides together, sew the shoulders.
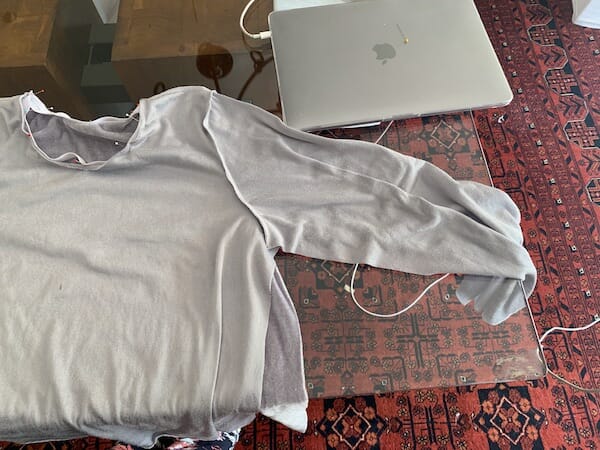
2. Sew The Sleeves
Mark the middle of the sleeve by folding it.
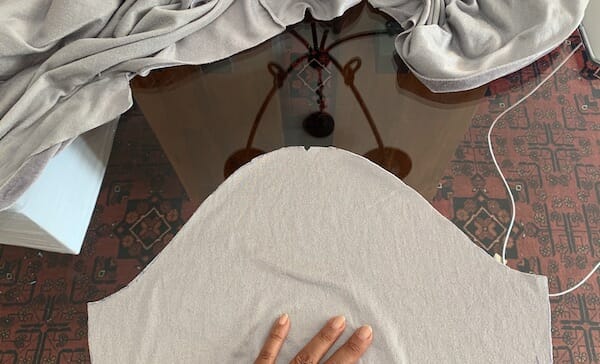
Pin it to the armhole right sides facing each other and sew.
Attach the other sleeve. Sew the sleeves.
Then sew from the wrist pass the armhole all the way to the hemline.
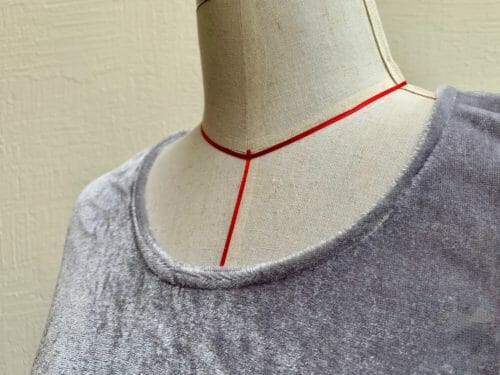
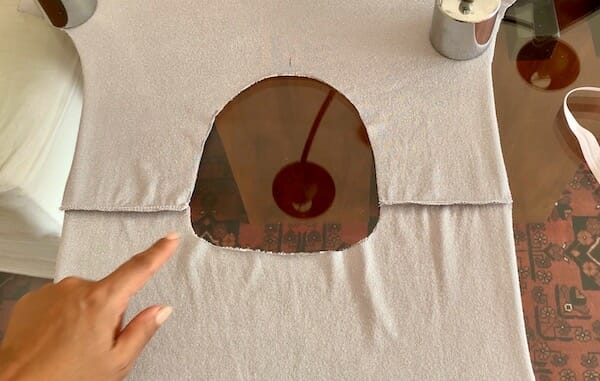
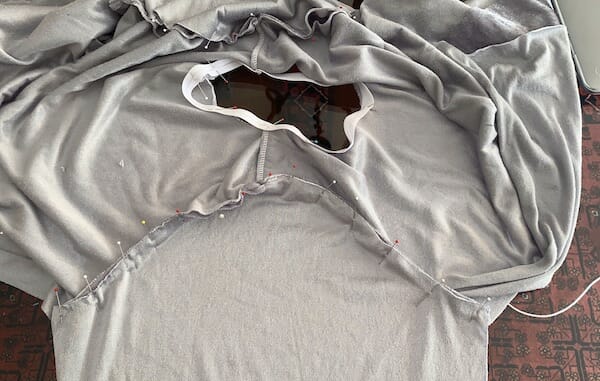
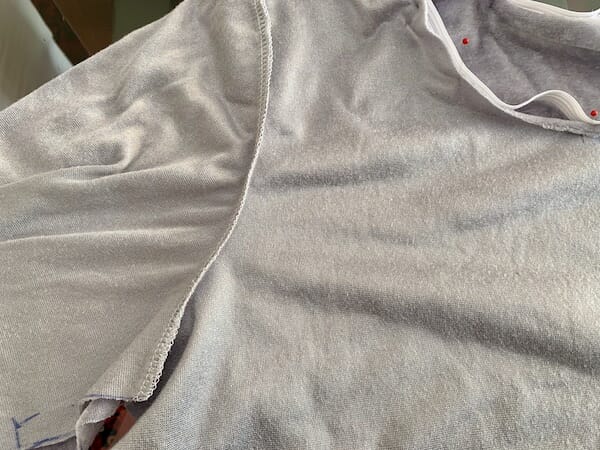
3. Sew The Neckline
As I mentioned before there are a few ways to sew a scooped neckline, I tried to use the double elastic tape commonly used on sports clothing, but because of the nature of my fabric (crushed velvet), it did not look very good. So I am forced to use the remains of fabric to make bias tape. I do not have a tutorial for how to do this, so I'll be posting one on it soon.
But if you are using bamboo knit or ITY knit go ahead and use the double elastic as it is much easier to sew. On how to apply this stretchable bias tape on the neckline please see the tutorial above.
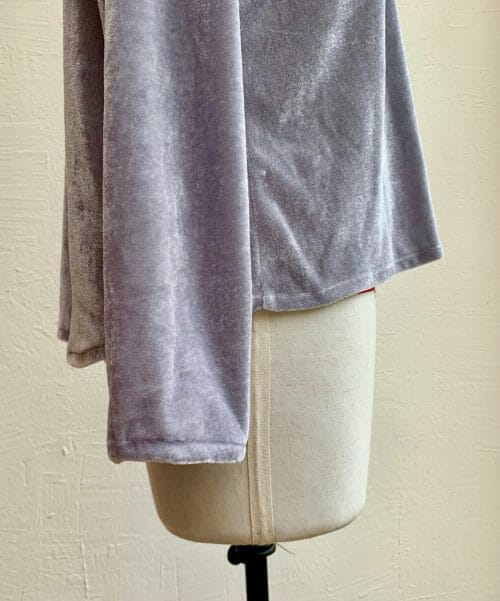
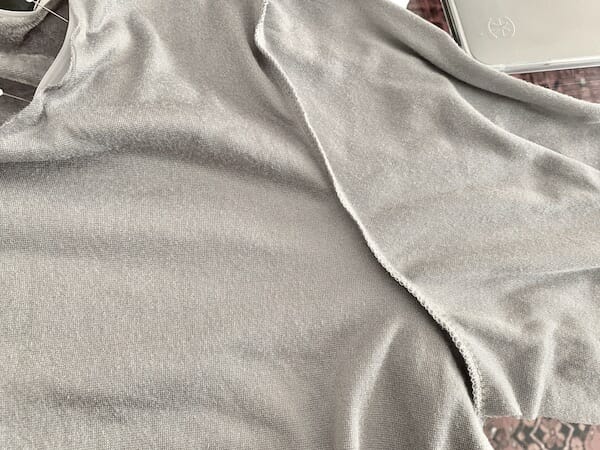
4. Sew The Hem
The sleeves' hem is 1″ — fold 1/2″ twice then sew.
The bottom of the top's hem is 1/2″.
It's that simple to complete this long sleeves t-shirt pattern to create a top that is both functional and comfortable.
Why a long sleeve top? Well, I am currently in quarantine in Santiago, Chile, and the weather is turning cold with the early autumn. So I know very soon I will have to wear warm clothing even inside the house because the houses in this country are not built for a cold winter.
The other reason is, if I have to venture outside I'd rather wear long sleeves so I can be more protected and just come home and immediately change and wash the clothes in hot water and soap. Hence my need for a pattern that can be used with different prints.
I plan on teaming up this top with the palazzo pants below for a chic relaxed look at home.
I hope everybody is staying safe and healthy. This pattern would make a great first project, with so many people staying home it's a great time to encourage someone you know to take up sewing as a new hobby.
Anyways, until next time, Happy Sewing!


I love this shirt and am hoping to make two for my oldest daughter, BUT I have to admit, I am old school and NEVER have been able to fit these PDF pages together correctly. Either I cut the margins incorrectly or something, but the sleeve (piece 5) just doesn’t fit with the rest of the sleeve, and the last three, 7, 8, 9 are not aligned. I HATE trying to put these things together, and I always have trouble with it (hint: I am 80 years old and have been sewing since day1 but this is very frustrating!)
So if I understand correctly we need to add 3/8 of an inch for the seam allowance?
In my experience, the general rule for neck binding is: 20% smaller than the actual neck. Otherwise, you end up with ugly gaping in the front. No need to stretch or pull the binding when sewing it on; simply ease it in place. And stitch with the garment side against the machine.
Thank you for all of your work. Your patterns are wonderful.
Do I understand correctly…There is no seam allowance already added to the pattern pieces, other than noted. You used a serger without adding seam allowances? What would be the best way for me to approach using this pattern? I do have a serger.
Wishing your and yours a Merry Christmas and a Happier New Year. pj stitches!
Great pattern just what I needed as I have made a couple pairs of lounge pants/ pjs so this pattern will be ideal to make a nice set for both. Thank you .
when matching the pattern pieces after printing are you suppose to put the gray squares over each other or just match up the lines and where it lands it lands?
Hi, Virginia the last one, the square need to measure 1 inch.
Thank you!!
How many yards of fabric does a size Large require?
Depends on the width of your fabric. Print the pattern, choose your fabric then work out how much you need.
I can’t thank you enough for this pattern! I’d been talking to my mom about making some blouses for her & it turns out this fits her perfectly & she loves the way it looks on her. The only knit fabric I’ve been able to find lately was some budget fabric I nicknamed “Curly” lol. With a LOT of practice & TONS of starch I was able to pull it off for a Mother’s Day gift. Can’t wait to make it with something better!
I have limited experience with knits & making clothes so to anyone who’s on the fence about making this…go for it! If I can make this, so can you! But do try it with something better than I did. Fabric that curls so badly takes the joy out of it & can make you want to run for the hills.
Indeed they do, I avoid them completely. But, congratulations you persevered! Nothing like giving a gift to someone who appreciates it!
May i ask what a double point needle is? Google was not helpful…
Ball point or Stretch needle, that is a typo thanks for letting me know.
I bought the pattern but I need to know how to print the instructions
Hi Dee, what do you mean you bought the pattern? where did you buy it because this patter is free.
Thank you for your easy and functional patterns. i wish i could pay you what you desirve for the knowledge and time spent helping us
thank you again. vickie
I cannot wait to make this pattern, in fact you have several patterns I eventually want to make, I think your variety of patterns is great.
My pleasure Rosemary, I do hope you share a photo with me
I printed out and taped the pattern together, added 3/8 inch for my SA all the way around and the pattern is inches too small. My box measured 2” perfectly. Instructions say that it fits a bust and hip up to 56” for the XL. The Completed bust measures 42, and hip measures 48. That is miles difference! I cannot squeeze a 48 inch bust into a 42 inch garment and if this is supposed to be flowy at the hip for plenty of room (pattern says 4 to 6 inches of ease at the hip), my 48 inch hips will match exactly the 48 inches of the finished garment with zero ease, no way will it fit up to 56”! Tell me if I’m missing something here…
Thank you for letting me know, I loaded the wrong measuring table and I would have never known if you do not make the comment. Let me update it and I will refund your donation.
Does printing at 80% really work to make a small?
I downloaded without seeing the “put in your own suggested price” so I went back and downloaded again. Thank you so much.
Thanks so much Sherry. I really appreciate your support.
I added a comment yesterday that was either deleted or not approved. I tried using your contact button but it continued to give me an error message so I had to post here the issue I was having with the sizing. Is there anyway someone can contact me about the difficulty I am having? I did pay for the pattern as well.
What is the problem with the sizing?
Thank you for making the changes to the sizing table I will try again tomorrow. Please do not refund my donation.
I think you are awesome. Just the fact that you do all this for what I believe is almost nothing, purely out of the love of what you do, that’s what makes you so great. I appreciate all you do, thank you from the bottom of my heart!
It is my pleasure Peg. I am simply sharing my happy corner. So thank you for taking the time to read the blog.
This long sleeve T-Shirt pattern is wonderful. I am going to make it in several different stretch fabrics, even a dressy fabric. Thank you.
Dear Sandra, please use #soseweasy on Instagram so I have the pleasure of seeing your T-shirts.
Pity you don’t do smaller sizes as these are to big for me
I do, I just ran out of energy to grade down, M is my size so stopped at that. When I do I will let you know.
Print at 80%
This doesn’t always work but in this case it will because both front and back are the same.
This doesn’t always work, but in this case I might since the front and back are the same and I am assuming you are XS-S or 30 to 32″ around the bust.