


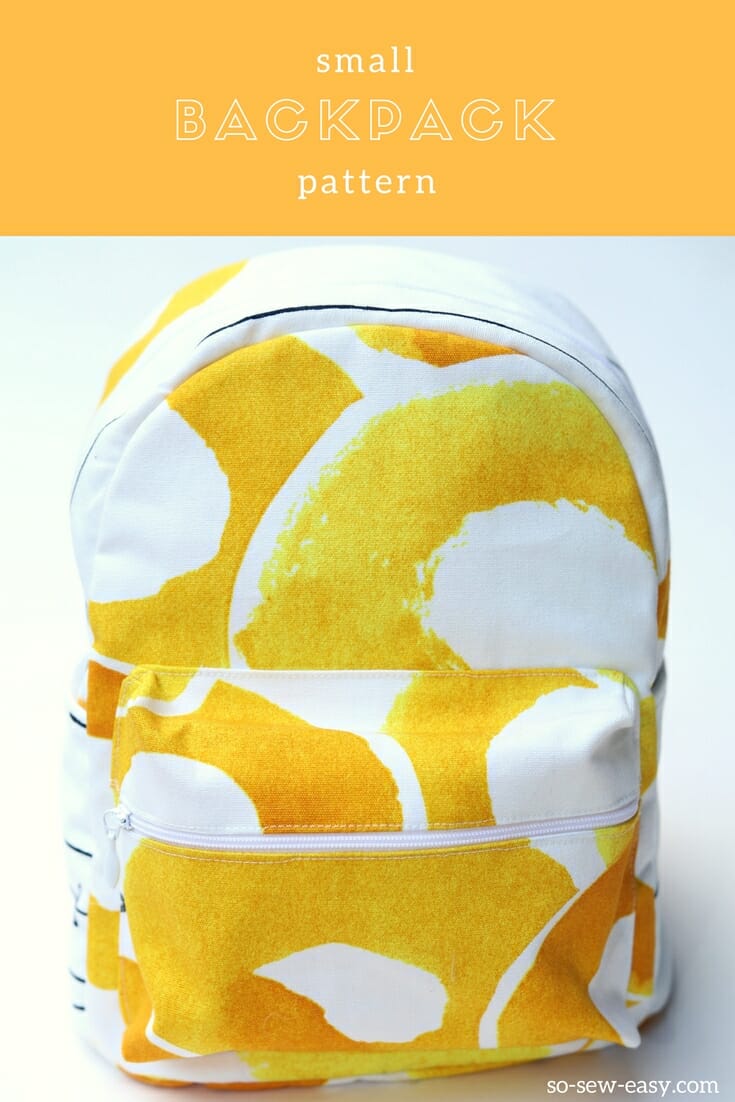
If you have been watching the size and style of bags lately, you've probably noticed all those impossibly cute little backpacks everyone is carrying. Along those lines, I've made this small backpack pattern to be small (and cute) but still big enough to be practical.
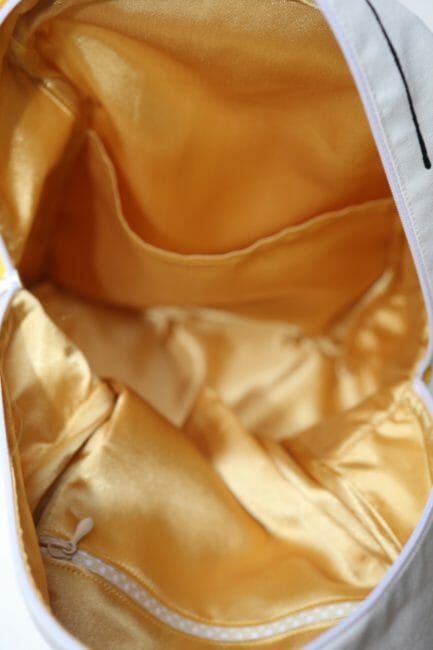
You can also use this small backpack as a cross-over or cross body bag as well. I made that way because I like to have options and truth-be-told, I am a bit paranoid with a backpack. I guess having grown up in Panama where, as the saying goes, “pickpockets can remove your socks without even taking off your shoes” I have had my share of missing money and wallets. This is why I've added a pocket in the back with a zipper. There's an internal pocket, also with a zipper, and even the outside pocket has a zipper. So if you can remember where you put your wallet, the chances of keeping it are high..
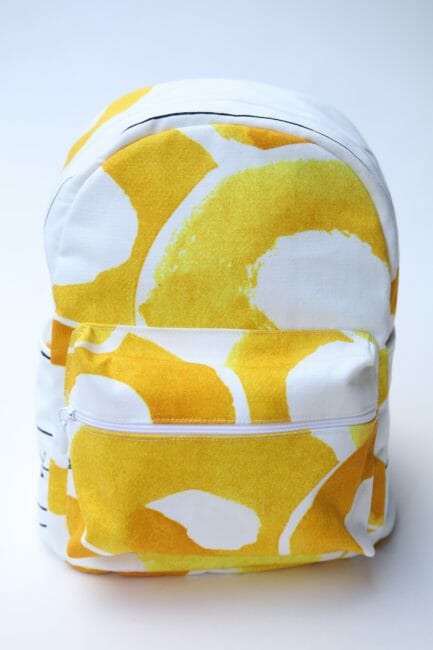
There's also a possibility of adding one more pocket to stash your mobile phone, but I will leave that up to you. I will show you how to add it you want it. Please note, however, it will not be included in the pattern, so this is probably for the intermediate to advanced sewists. The rest of the project is suitable for beginners.
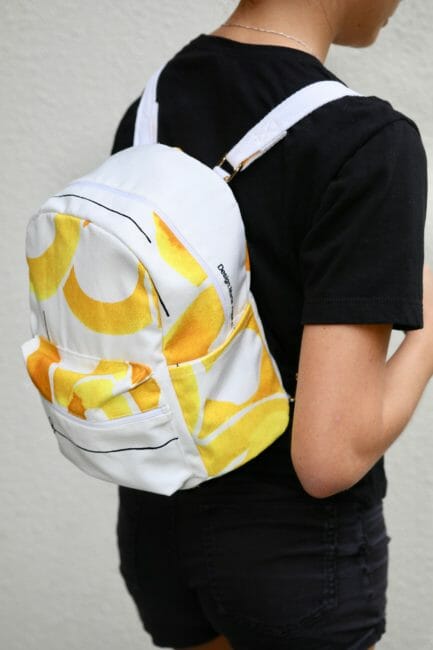
This is not an easy-to-make backpack because it involve a few steps, so I have decided to offer this pattern and project as a kind of sew along. The first part will give you a general idea on how to make the backpack and the inside components. You'll find this below.
If you want to find all the parts and instructions to make this free small backpack project, the easiest way is to navigate to this page where you'll find links to all three parts and the video tutorial.
Part two will show you how to make the straps and attach them to the small backpack, and part three will show you how to assemble and finish the bag. Combine this with the our complete video tutorial, and you should have all you need to make this mini backpack pattern.
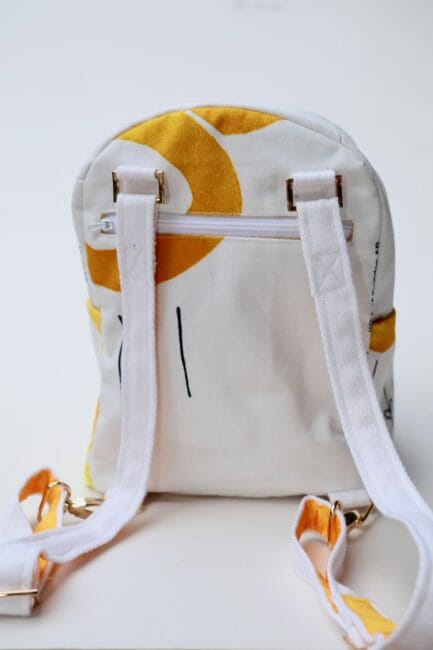
This is an advanced project but if you love to be challenged particularly if you have just started out making bags you will find rewarding to make. It will make a great accessory for your wardrobe or a fantastic gift for a friend or a loved one. I made two for this tutorial and I'm keeping one and giving the other to my teenage daughter. She loves it.
Video Tutorial
Materials:
- 1/2 yard of canvas, oilcloth, thick nylon fabric.
- 1/2 yard fusible interfacing
- 1/2 yard of lining
- 2″ cotton tape (66″ in total)
- 1″ ribbon (66″ in total)
- Thread to match
- One (1) 18″ Nylon zipper
- One (1) 10″ nylon zipper
- One (1) 10″ nylon zipper (inner pocket optional)
- Jeans needle or leather needle
- Four (4) D Rings
- Two (2) Lobsters Claw
- Two (2) 1″ Rectangular buckles for tensioning the straps
Tools:
- Zipper foot
- Scissors or a rotary cutter
- Walking foot (optional)
Small Backpack Pattern Download:
You can download the pattern for this Small Backpack from our account at Payhip.
For help downloading and printing PDF patterns, please CLICK HERE.
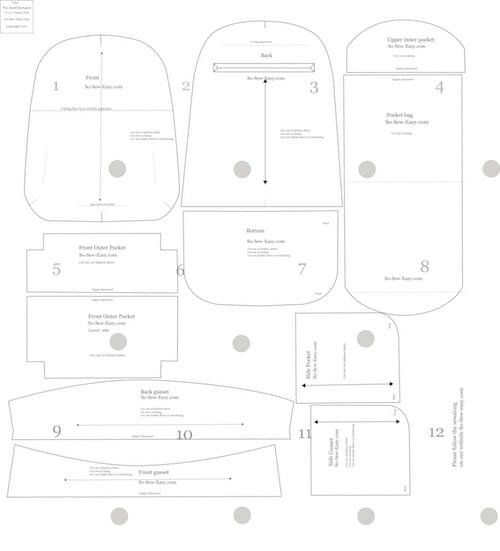
Pattern layout:
This is just meant to show you what the pattern will look like once it is printed and assembled.
Part One [of the Three Part Series]
In this part of the sew along, we're going to be printing the pattern, assembling the materials, and sewing the inside pocket as well as the gusset and the main zipper.
Cut all pattern pieces following the pattern.
A note on fusible interfacing: The use of fusible interfacing will depend on the fabric you choose to work with. Canvas and think upholstery fabric do not need it. Cotton quilting will need both in the outside fabric and it the lining.
I am using 100% cotton fabric from the upholstery section at IKEA and have opted to fuse a medium weight interfacing to both outside and lining fabrics. In hindsight, I wish I hadn't since it made it impossible to sew a cotton tape handle (to hand carry the bag) on the top of the backpack. I could have done it, had I used my industrial machine to finish the bag. However, not everyone has an industrial machine at home. Before placing the handle or using thick upholstery fabric make sure your machine can handle many layers of fabric.
Step One: Attaching the outer zipper
Place the right side of the fashion fabric up.
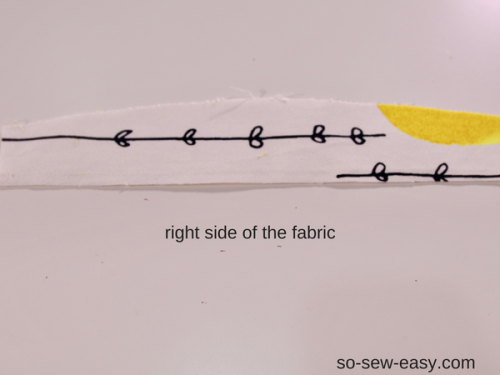
Place the zipper right side down.
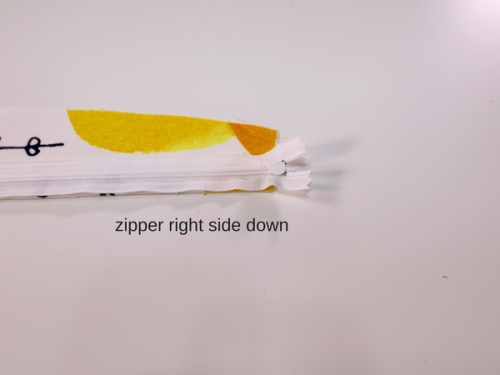
Place the lining wrong side up on top of the zipper.
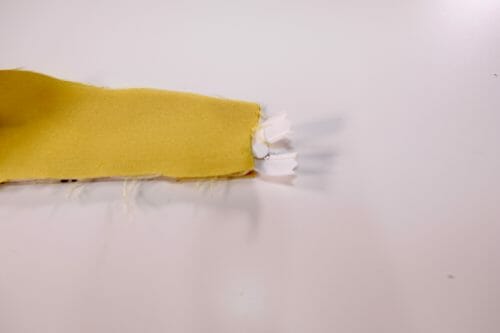
This will make a sandwich with the fashion fabric.
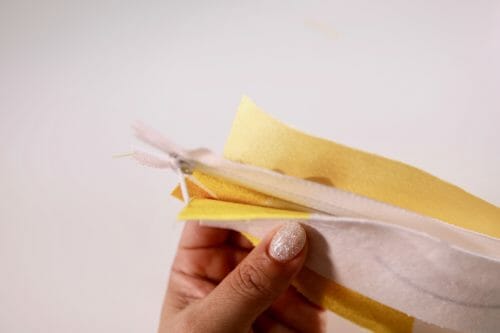
Use the zipper foot and sew at 3/8″. Once you have sewn the zipper down, open to turn to the work to the right side and iron. (We show this in the video tutorial, as this might be a bit confusing for the beginners in the group.)
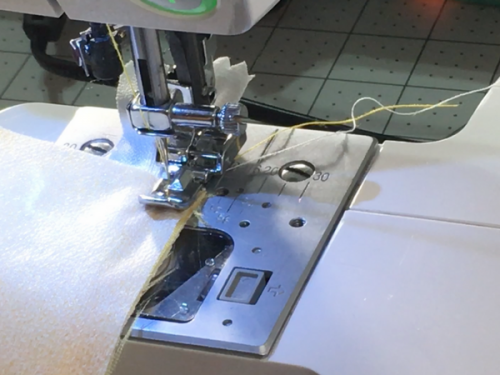
We will repeat the same procedure, but this time on the other side of the zipper. Lay the fabric right up and place the other side of the gusset wrong side up aligning the sides. Pin together and turn to the lining side.
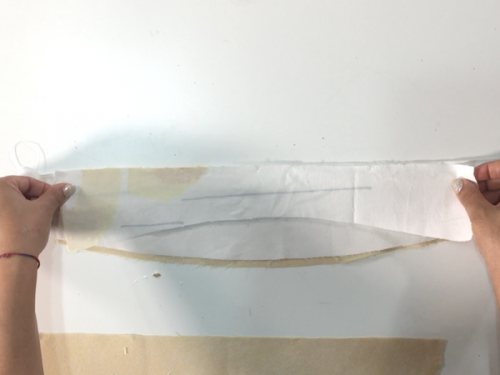
Pin the lining and sew at 3/8″. Iron once again and topstitch.
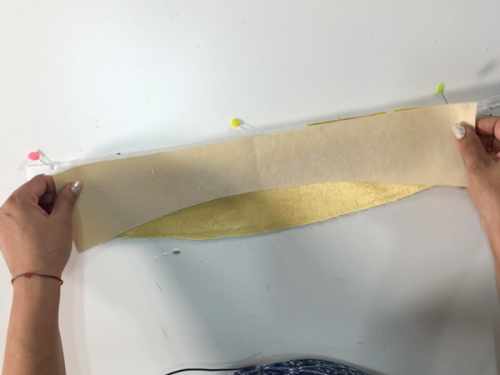
Sew 1/8″ from the edge using the zipper foot.
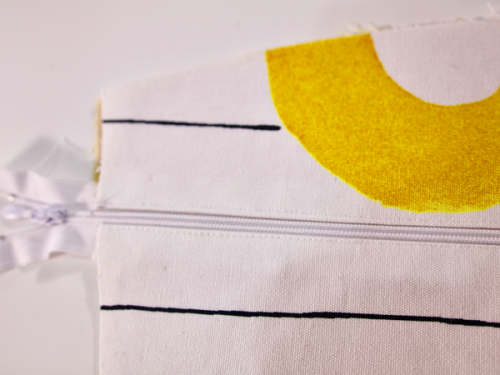
Pin the lining and fashion fabric and sew at 3/8″.
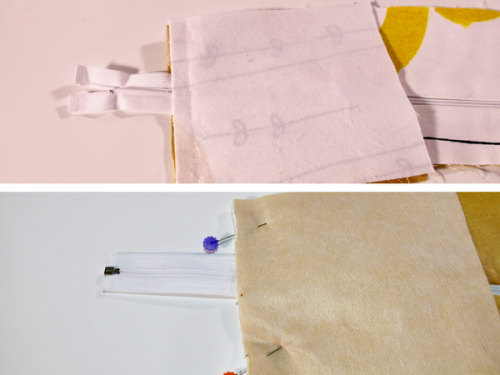
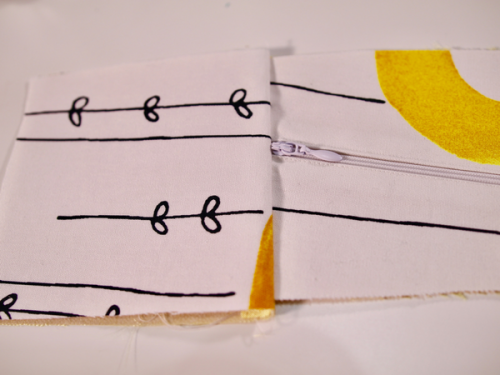
Top stitch 1/8″ from the seam and trim the seam allowance. You can trim the zipper to the edge of the gusset at this point as well.
Step Two: Adding the lateral small pockets
Following the pattern, fold the top edge 1/2″ and iron. Use the crease to fold the edge 1/4″ in so it does not show.
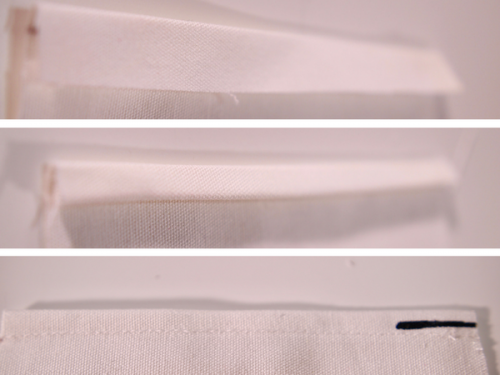
Pin the pocket to the bottom of the gusset.
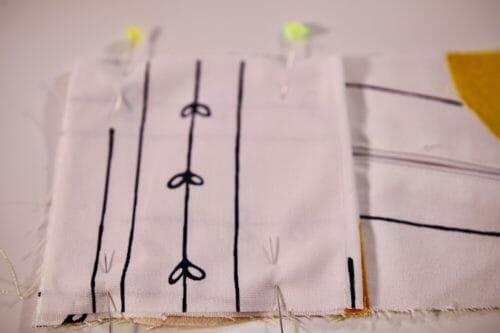
Step Three: Making the small inner pocket
I have chosen to use the lining to make this little pocket. This pocket is small enough for a small wallet but you can adapt it to a bigger size if you wish.
On the wrong side of the fabric, pin the zipper right side down and sew using your zipper foot.
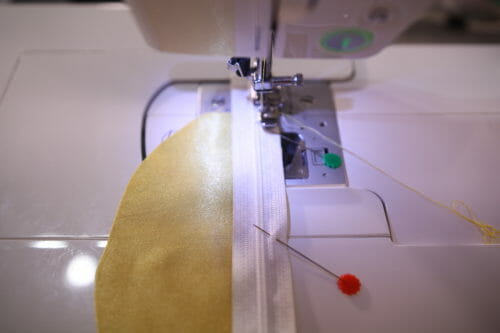
Turn the fabric to the right side and topstitch the zipper at 1/8″.
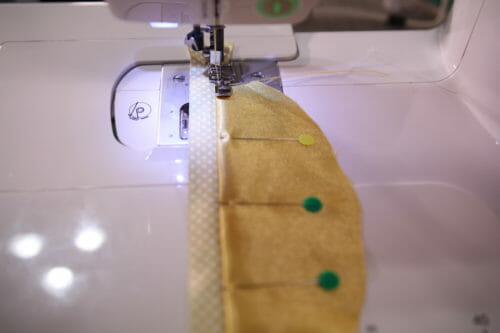
Place your zipper horizontally with the piece you just sewed up.
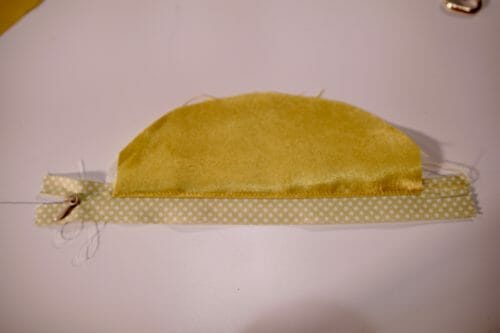
Place the other part of the pocket right side down on the lower side of the zipper.
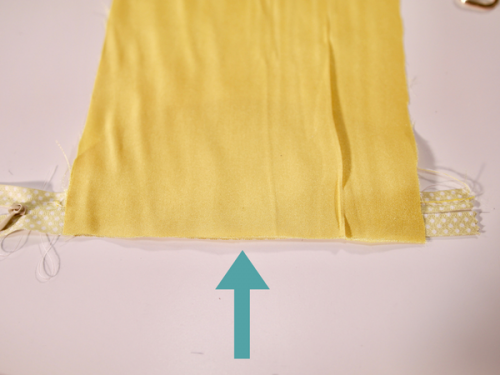
Sew the zipper using the zipper foot turn and topstitch at 1/8″.
Open the zipper half way.
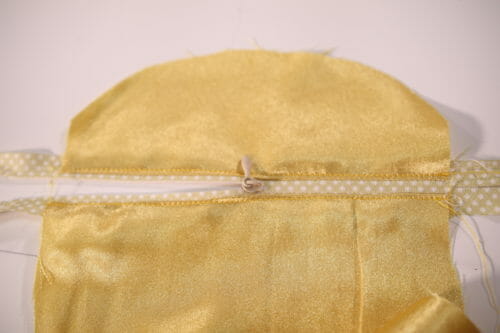
Sew, zigzag and trim both sides but not the top.
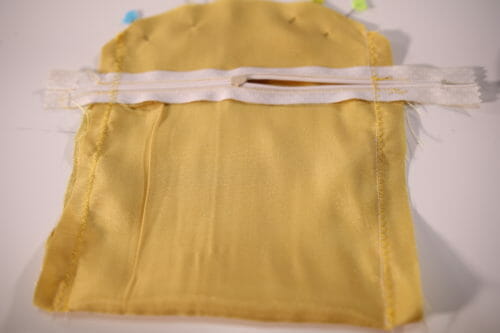
Iron your work.
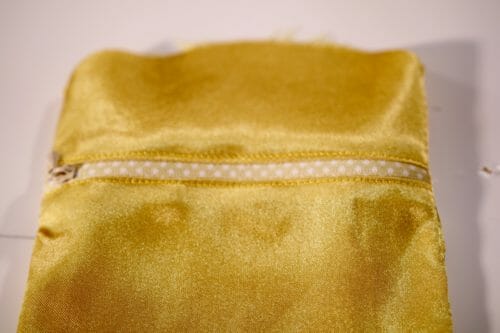
Pin the pocket to the back lining of the small backpack.

As I have mentioned above, there is no pattern for the internal pocket that is big enough for your phone. However, this is very easy to add. Depending on your phone size.
Trace the bottom part of the front pattern side, add 1/2″ for seam allowance on the top fold and stitch as you did on the lateral small pockets.
End Of Part One Of This Mini Backpack Project
And you're done with this part of the project. I really hope you enjoyed this project so far. As a further refinement of this design, I am going to make one in leather which should be fantastic. When I am done will share it with you on Pinterest.

Access All Parts Of The Small Backpack Pattern
All three parts with a video tutorial are out! Click the link here or the panel below to find all three tutorials.































I was interested in sewing the backpack. However, after researching the cost of the hardware I would need to purchase to make the bag, I decided not to make it. It was going to cost around $19.00 just for the hardware.
How can I enlarge the pattern please
Love pattern but would like it alot bigger for high school back pack size. Can this pattern be purchased?
I have had the pattern for about 2 years & finally get the enthusiasm to make this for my granddaughters June birthday. Thanks for the sew along to be ablecto watch the process and follow.
My pleasure Gillian, and Happy Birthday to your granddaughters!
What are the measurements for the size of this finished mini backpack?
I found your pattern quite a few yrs. ago and have made 3 over time. I always have trouble sewing the front pocket on straight. Also will modify the zipper as when sewing on, the thickness is hard to sew over the zipper. I made these for my great grand kids and they love them.Thank you.
Hi Marjorie, indeed the thickness makes it very hard to sew the zipper, and it is the reason I skipped the handle at the top, and industrial sewing machine would be able to take care of this issues the use of a walking foot would make it easier to sew the backpack; as for sewing the pocket straight, marking the position using a tailor’s chalk or erasable pen would ensure the pocket be sewn straight.
As an older woman with severe scoliosis, I’ve worn backpack purses for years because they distribute the weight evenly and Very COMFORTABLY, and free up both arms and hands, plus any bag on just one shoulder is very painful for me. I have soft all leather ones smaller than this one, that are beautiful. I LOVE your offering here! The zippers are crucial for feeling safe, I believe! I have a few travel chic purse backpacks that have something that sewers may want to add. They have a snap hook attached to the zipper pull, and a metal clasp attached to the purse where it closes, so that anyone attempting to open the bag would have to fiddle with removing the snap hook off the clasp before unzipping it. I do love this backpack, and if I were to make one now, I’d make it smaller myself. Great pattern, Great Instructions!!!
Thank you Jeanette, for your review, and great suggestions, I will keep them in mind for the next pattern.
I am a true beginner but I’m doing my best to take my time and make this cute little bag so far so good just wanted to say thank you… this is giving me the push I needed to really get in there and go for it!!! Thank you again
Hi Lisa, I am thrilled you have persevered, and it made me happy that it has inspired you; this is my goal. So thank you for letting me know.
Hi, What size should the D rings and lobster claws be?
Hi Mel, Check the list of materials, please.
Your list of supplies does not specify the size of D-rings required, merely the amount. Ditto to the lobster claws. You say 1″ rectangular buckles, so is it safe to assume that 1 inch D rings are also required? And what size of lobster claw 8s best ?
” …. (4) D Rings
Two (2) Lobsters Claw
Two (2) 1″ Rectangular buckles for tensioning the straps
Yes, all the hardware needs to match since you are making the straps the same size.
I just finished my backpack and it’s SOOO adorable! I learned so much making this bag and can’t wait to make another. Thank you so much!!
My pleasure!
hey! just starting this project 🙂 i can’t tell which zipper is used first – i have both the 10in and the 18in but the length of the back gusset is about 17in when measured? i assumed the shorter zipper was for this part but in the video the zipper used goes the entire length of the gusset..
You assume right.
Hi
Do I need to cut out too gussets ?? (2 outer fabric 2 lining )
Thank you sherrie
Yes you do!.
When I try to print the pattern it takes me to a page with only photos of the bag, am I missing something? Thanks for all the work you are doing!!!
I’m so sorry if this has already been addressed, but how do you convert it from a backpack to a crossbody? do you just attach the lobster clips to each other? i can’t wait to sew this up, thank you so much!
Yes that is right you have to end the straps with lobster clips on both ends to make it a crossbody bag.
I would love to make this but I can’t even get past the pattern! Pieces are not labeled as to what pieces are joined together, many even without the name of the pattern piece to help find the joining section, or whether or not to cut on the fold or how many pieces to cut although the pattern does seem to designate lining pieces from fashion fabric. I’d also love to know the finished size – it looks fairly large when modeled on person but in the video it appears to be smaller! I’m looking for a smaller backpack and hope this one is it. I’m confident if I could get the pattern cut out I could sew it without further problems, especially with the help of the video. I’m really discouraged just by the pattern – glad it is by donation and not some set price!
Hello Fran, I will be returning your money, my philosophy is that if you are not happy with my work don’t make your life more difficult than the current global situation makes it to be. If this pattern was for sale it would have all the labels that required as it is for free I encourage people to spend some time on the site which is how I make the big companies pay for the 5K a months that it costs to run a site as large as this one. Sending the weekly email alone is 1200 USD. This is an old pattern, made by many people around the world and not for beginners at all since it is a long project. There is a sew-along and all the videos are on YouTube. The instructions to this pattern and all the free ones (OVER 200) are here on this site for free and for as long as the site can stay open. Kind Regards and thank you for your time and feedback.
Bag came out cute. The only problem I had was adding the binding. I couldn’t figure out how to add the binding around the bottom with out distorting the sides. I ended up just zigzagging all the raw edges
I show in the video how to do it but your machine must handle all layers.
Hi! I haven’t started this project yet, I’m still buying the d rings and zippers and such. I’m wondering about the ‘optional pocket?’ In the video there was one that didn’t use a zipper, the large one on the inside, but I’m confused as to which optional pocket uses the zipper? Is it the one that has access through the back, or the one that hangs down from the top on the inside?
Thanks!
can you tell me the finished size?
Helo such a cute backpack. Finished size please. Thanks for sharing
These instructions and pictures are really hard to follow, it doesn’t mention what pattern piece you are using
Yes this is not for beginners, this is for people who want to push their skills to a higher level. Have you watch the video for this project? https://www.youtube.com/watch?v=Uy0_zMvB-ig
You should watch the video in full before starting this project and you will find it makes the pieces so much easier to understand and flow follow. I made this at the end of May, and it came out adorable…my girlfriend loves it. Take your time and follow the video when assembling as it is very helpful.
Is the seam allowance included in the pattern or do I add seam allowance?
It is included and it varies, please read all the instructions before stating this project. What the video so you can have an idea of the sequence.
I truly appreciate all the time and work you have commented to doing this for free. On behalf of all your audience Thank You!
Sharon Hoyle
My pleasure Sharon, and thank you for your support!
Hi! Just starting out with this backpack. I was wondering if the pattern has the seam allowance included or not?
Thank you!
yes, it varies, please watch the video, and all the instructions before you start. Also, I forgot to ask you to buy bias tape.
I am just getting started on making this. I’ve decided to watch the video first before doing anything. As I was watching you got to the part where you are adding bias tape, I was like uh oh I didn’t get any so I rechecked the materials list and it wasn’t listed as an item. I think you should probably add that, now I’m hoping I have enough fabric to make my own.
Thanks for the feedback, three years this pattern has been available and you are the only one that has pointed out. Thanks!
I finished my backpack. I used all the same fabric and quilted my outside pieces. I’m not sure I would call this a small budget project tho. My supplies were just over $40 and then the time it took for all the pattern cutting & sewing time…this could probably be an $80 plus item. I will say I think it turned out very cute and it is a good size. I made this for my best friend’s 50th birthday, I can’t wait to give it to her. I wish there was a place for me to post some pics…..
Please use Instagram, use this #soseweasy and everyone will see your picture. It is small in size, certainly, the materials you use is up to you. The Time it takes is what it takes to make something of good quality such as the one you describe. It took me almost a month of my time, electricity, supplies, website hosting expense, to put this sew-along together all free for you to enjoy…so yes good things take time so personally I am very happy that you made it all the way and to give it to a friend? I hope your friend knows what a wonderful person you are.
I would love to post a picture of my project but I don’t use Instagram…. My girlfriend absolutely loves her backpack and has gotten lots of compliments on it. Is there some where else I could post photos so others can see the project?
You can try our Facebook group chat, or if you like you can send me the picture and I add it to My Instagram account or at the bottom of these post with your name. Let me know which you prefer.
I was unaware there was a facebook group chat, could you send me the link and I’ll try to post it there…Thank You
I’m confused about the lining fabric to make the inside pocket and the backside pocket. Should I cut two of the same pattern?
Hi Julie, please read the instructions, these are separate tutorials and you will; find them on the blog or following the video on youtube.https://www.youtube.com/watch?v=Uy0_zMvB-ig&list=RDCMUCYibABfbKk9SkQirY7es_Fg&start_radio=1&t=0
Hi! I just realized that there doesn’t seem to be a pattern piece for the inside pocket on the back of the bag. It seems like this pocket is larger than the inside pocket, so I don’t think I use that pattern piece. Do you have the dimensions for the back pocket pattern piece? Thanks!
Lovely design – however, could you not give an option for printing on A1 or A0 – I generally get my patterns printed professionally on large format printers, meaning I don’t need to patch and stick the pieces together. Lazy, me! Many thanks and keep the inspiration going. Pat
I could do it, this is true, but my time is so limited I truly can not satisfy everyone. But thank you for your suggestions. I will keep in mind.
If you allow an idea. Considering you do have the pattern layout and I suppose you to have it in full size as well. (Since I imagine it’s your starting point to make it printable on A4.) You could for example release the pattern layout in a better resolution than on the image provided here for people wanting to print on larger formats. This one for example would fit nicely on an A0.
If limited to max 4×4 A4 it fits an A0 perfectly.
Is there a graphic for the section that says “Sew the straps making a large X. Alternatively, you can use rivets or screws with a hole puncher as in this picture.” I cannot find the photo for the hole puncher bit Thank you
HI Janet, watch the video then you will be able to understand how to make the X. https://amzn.to/2w0VPNZ
The Side Gusset – surely there’s two of them? One for each side…
Yes I do make mistakes, it is a typo. But Allas!!! let common sense and gratitude prevail!
Where can find part 2 & 3, for small back pack?
Hi Dottie, at the end of the tutorial are the links. Click on the links please.
Is there any way to print the instructions for the tutorial?
No just follow along with the video on YouTube. Thanks! https://www.youtube.com/watch?v=Uy0_zMvB-ig” rel=”noopener” target=”_blank”>