


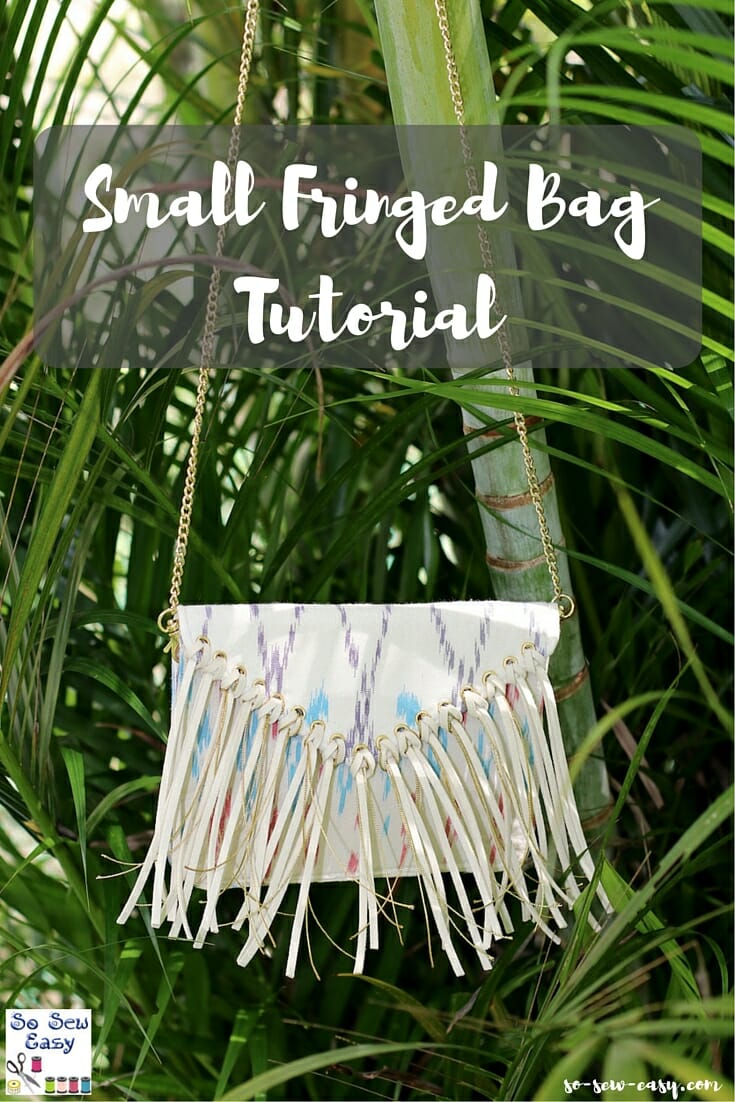
 Small bags are really “in” at the moment and a small fringed bag like this one is particularly fun and easy to make.
A small fringed bag for me represents freedom from the overwhelming amount of things I end up carrying around inside my normal bag. I was in a restaurant recently and my bag fell off the chair and you can imagine all the things that spilled out onto the floor. How embarrassing! With a bag of this size, I will only be taking the essentials –which is fine for a night out or lunch with the girls.
A small bag like this is really a key part of anyone's wardrobe. This pattern will give you the choice of making a clutch or to hang it over your shoulder so you have some flexibility.
This is a self-lined small bag which means we're using the same fabric to line that bag as we're using for the outside of the bag. All seam allowances are 1/4″. For the longevity of the bag, the magnetic snap should be placed on the side with the thicker sewable interfacing or Heat and Bond.
The full video tutorial to guide you through this project is available on our YouTube channel at:
Materials
- 1/2 yard of fabric (medium weight) cotton, cotton/linen
- 1/2 yard of thin fusible interfacing
- 1/2 yard of thicker sewable interfacing or Heat and Bond
- 2 small rings 1/2″ to 5/8″ in diameter. I used these from Dangerous Threads.
- one magnetic snap
- 1/4″ grommets or eyelets
- leather or ultra-suede strips for the fringe
- removable chain with clasp
- hole puncher for leather
- grommet pliers
- a walking foot for your sewing machine
Download the free pattern and print using the latest version of Adobe Reader.
You can download the pattern for this Small Fringed Bag Tutorial from our account at Payhip.
For help downloading and printing PDF patterns, please CLICK HERE.
Step One: Printing the pattern and preparing the pieces
Cut all the pieces of the pattern. There will be four pattern pieces in total. Then cut four pieces in fabric and four pieces in lining as per the instructions on the pattern.
- Take the 4 pieces of fabric and apply thin fusible interfacing to pieces 2 and 3. These pieces do not need to be so stiff.
- Apply Heat and Bond or sewable interfacing to pieces 1 and 4 of the fabric. We want these to be relatively stiff. Cut the interfacing 1/4″ smaller than the fabric to make it easier to turn.
- Take the 4 pieces of lining and apply thin fusible interfacing to each.
Step Two: Applying the snaps to pieces #1 and #4
We need to apply the snaps before we assemble the layers so that the lining covers the back of the snap and you get that professional finished appearance.
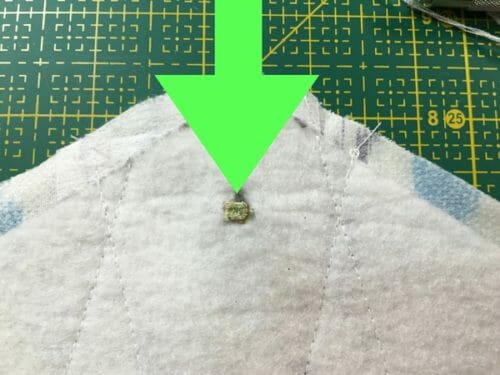 On piece #1, mark the placement of the snap on the right side of the fabric. Use your pattern for guidance.
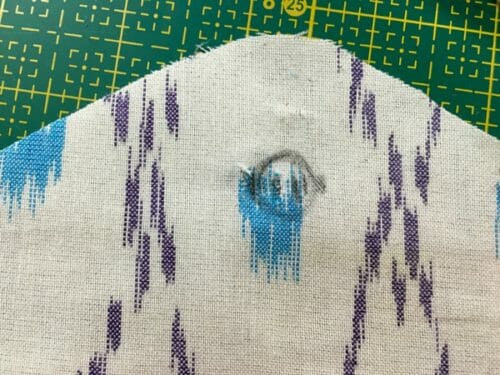
Open the hole for the snap with a seam ripper. Push the snap through and bend the legs.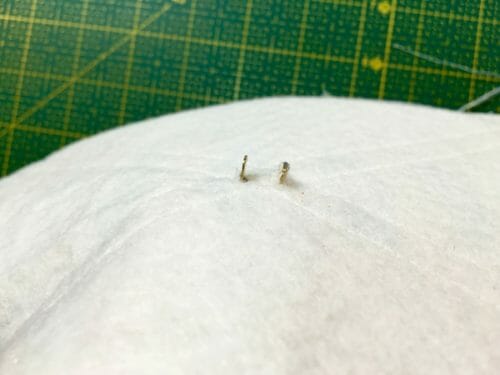
Apply fusible interfacing with your iron in the shape of a cross to cover the legs so the metal doesn't rub against the fabric. 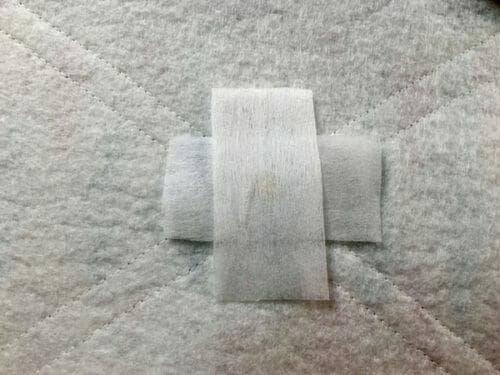 Attach the other side of the magnet on piece #4 using the same techique. Apply the fusible interfacing as above.
For more detail on How to install a magnetic snap, please follow this link to our full tutorial.
Step Three: Lining all the pieces
Once you have attached the magnetic snaps, sew the linings to the pieces at 1/4″. Take note that piece #1 will have the lining on the outside and piece #4 the lining on the inside.
Leave a gap of 2″ at the bottom to turn all the pieces of the bag inside out.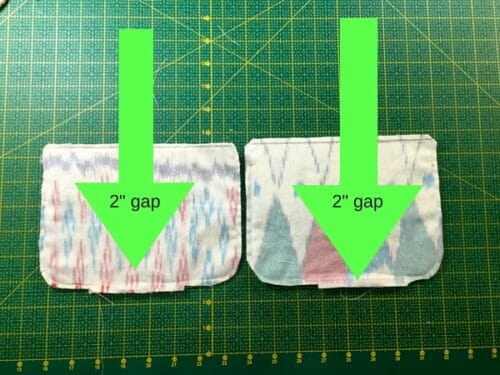
Step Four: Sewing the inner pockets
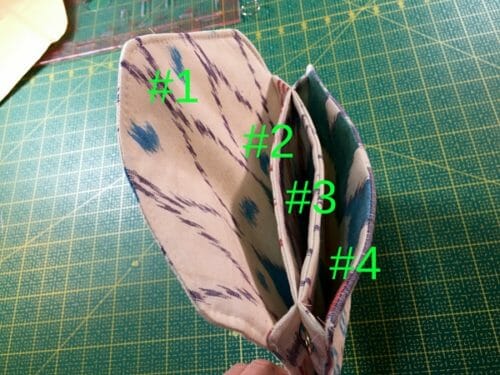
Now we're going to make a “sandwich” of the inner sides to attach the rings for the clasps. This creates the inner pockets and it will look like this when you're done.
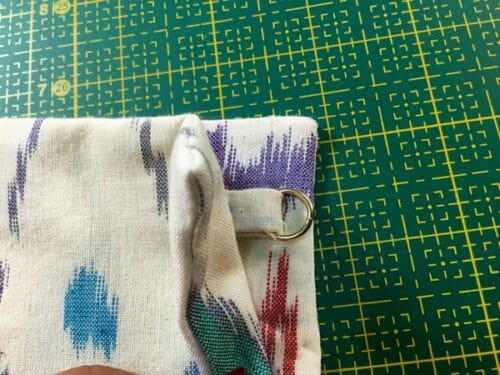
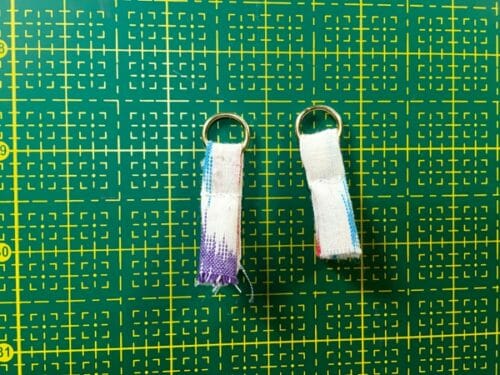
We need to make the tabs to hold the rings. Cut a 2″x 2″ square piece of fabric, fold it and half and iron. Then fold each half in and sew. Thread this through a ring and place on piece #2 at 3/4″ from the top.
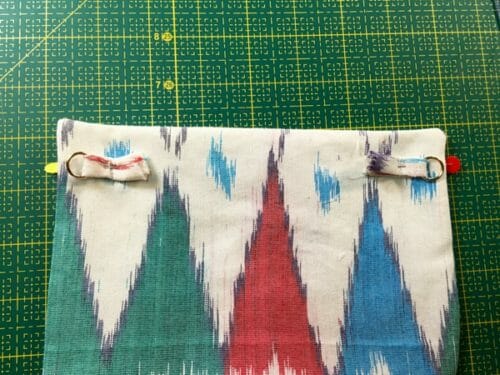
Mark a 3/4″ line around piece #3 as shown in the picture. Stack up piece #2 and #3 and sew along the mark. This will join pieces #2 and #3 while catching the tabs for the rings and holding them in place.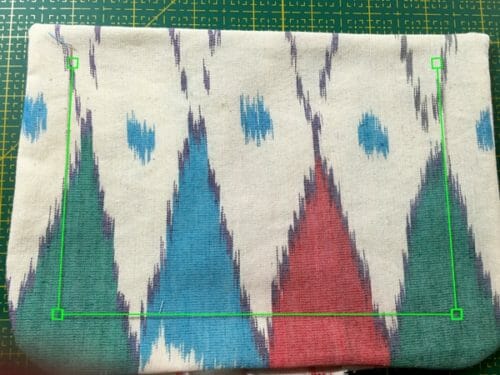

Step Five: Sewing pieces #3 and #4 together
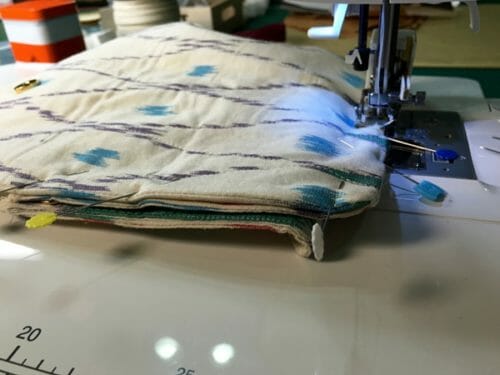
Line up piece #4 on top of piece #3 taking care to tuck in the gap you use to turn the pieces inside out. Pieces #2 and #3 have become the inner pockets and are joined together but we want to be attached piece #4 to the piece #3 side of the now joined inner pockets.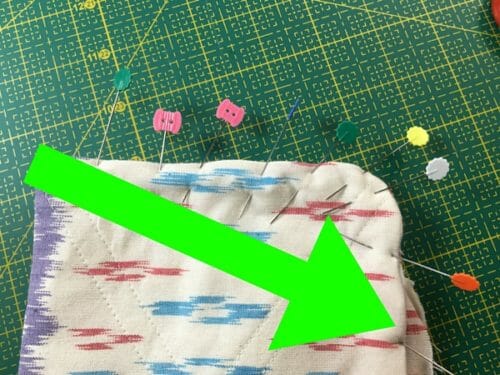 Pin the piece underneath so it is out of the way. Sew at 1/8″. If you want you can add another stitch line at 2/8″. Make sure you catch both pieces and that you do not sew fast. Take your time. Let your walking foot move the fabric for you.
Step Six: Sewing piece#1 and #2 together
Sew the same way as Step Five. We're attaching piece #1 to what is piece #2 side of the inner pockets.
Iron the bag with a cloth on top to avoid ironing on the metal and to shape the bag. Cut all loose threads.
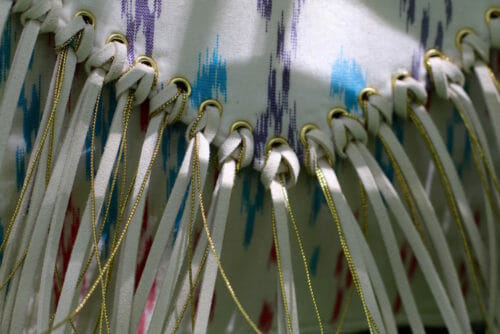
Step Seven: Making the fringe
 Step Seven: Making the fringe
On the outside of your bag, mark the placement of the eyelets or grommets. The marks in the pattern are for 1/4″ eyelets or grommets. If you have smaller eyelets space them out in a symmetrical way.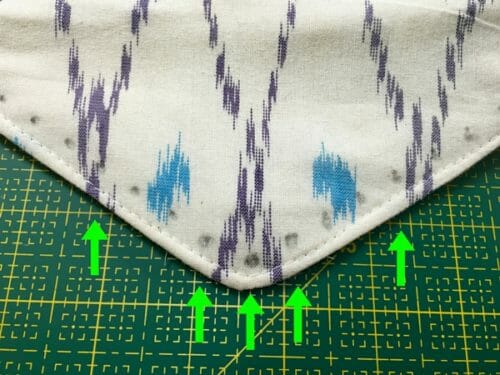 Cut two strips of the leather fringe for the corners at 13″ and work your way to the center reducing the length of each set by 1/4″. This will allow the fringe to be the same length along the bottom which looks nice and professional.
Fold the strip of leather in half and thread it through the front of the eyelet. Leave a small loop. Re thread the leather strip through this small loop.
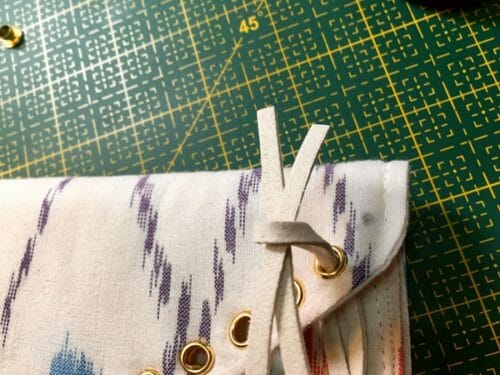 Make sure to thread the loops the same way for each grommet so they all look the same.
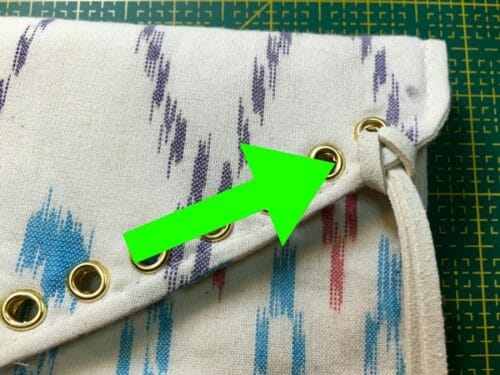
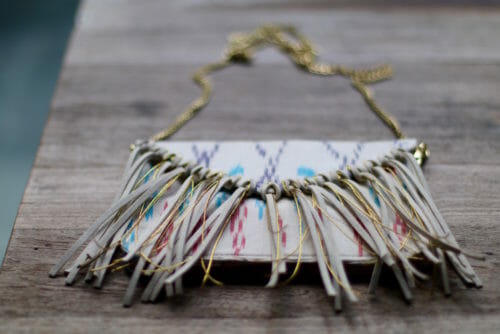
Step Eight: Finishing the small fringed bag
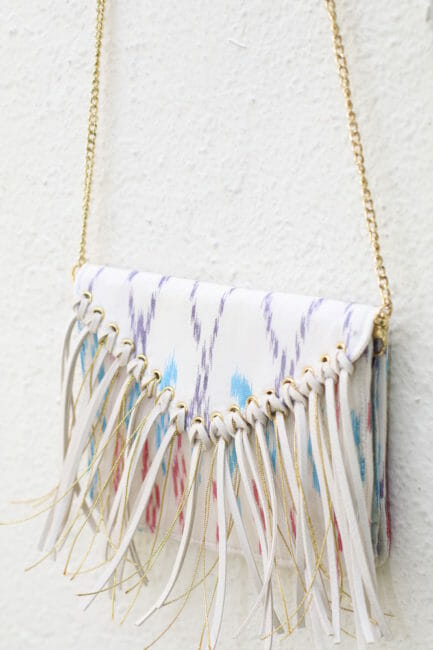
I have added a very thin gold thread along with the leather strip for added bling. You can use anything from chains, fabric, wool, any number of different threads. Use your designer license and show me what you can come with. I hope you enjoy this little tutorial. As for me, I am off to a party with my new little fringe bag!


very cute! going to make this wknd!
Enjoy please, do share a photo!
This is a cute and fun bag – can’t wait to work with the pattern! Thanks for giving us this at no charge. 🙂
Thanks Beth. Please enjoy!