


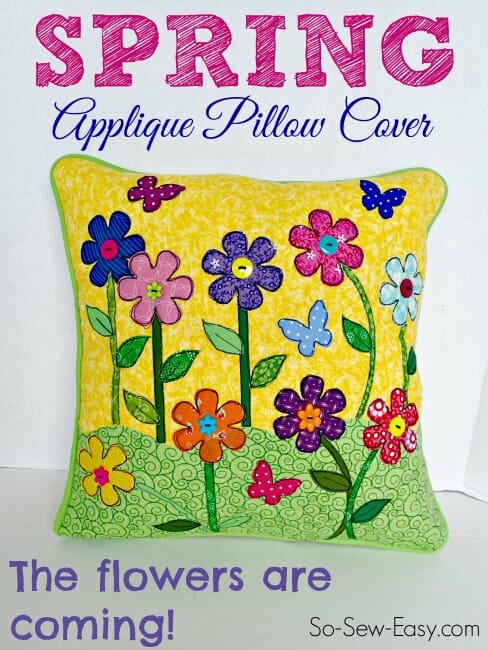
Feeling like Spring is in the air? Tulips and daffodils starting to brighten up your garden yet? I suppose it depends where you are, but when I lived in the UK I loved to see my garden burst into life this time of year with crocus, and all the spring bulbs and bright colors.
Last year I made the Spring mug rug – remember that one? I actually gave a pair of those away as a prize and then felt bad about it so I made myself a new Spring project to cheer myself up. Love the bright colors, the bold flowers and butterflies.

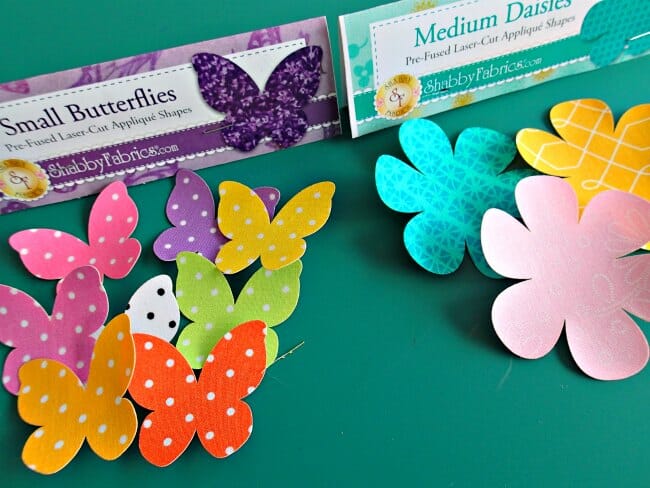
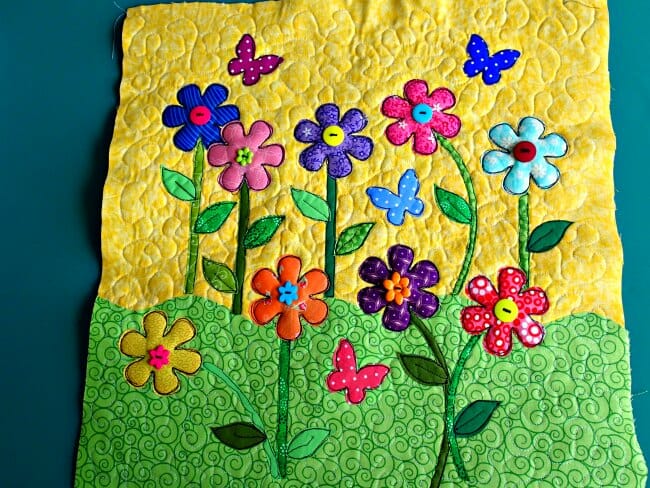
I used a new product from Shabby Fabrics, their pre-fused laser-cut shapes. They have a nice range of flowers, butterflies, letters, hearts and more, all in different sizes and different colorways. I used the medium printed daisies and the small pindot butterflies for my Spring Applique Pillow Cover.
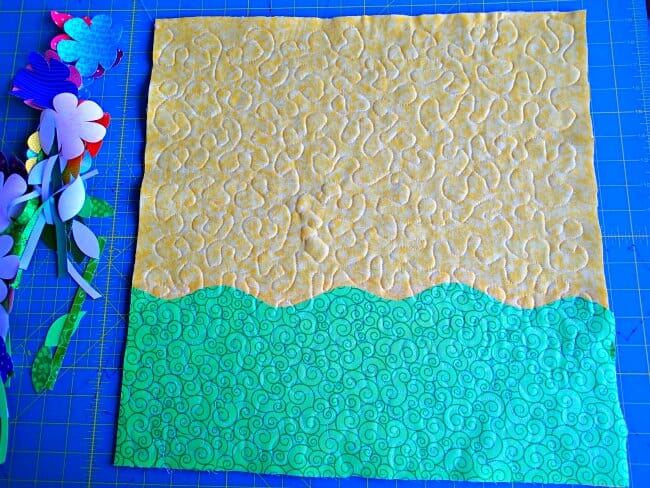
First I started with a background in a nice bright yellow and fused on a wavy piece of green using Heat N Bond Lite. I really wanted it quilted however my free-motion quilting skills leave a lot to be desired. I always seem to back myself into a corner or try to make things smooth and still end up with them jagged.
So I drew on my organic pattern in a Frixion Heat Erasable Pen and used that as a rough guide to make sure my quilting was smooth and didn't end up in a place I couldn't recover from. Then just a quick once over with the iron and the pen marks vanish! Love these pens 🙂
Then time to plan the placement of all the pretty colored pieces. I found it hard not to over do it and cover the whole thing in flowers and butterflies, but sometimes, less is more. Plus it means I have some of the pretty shapes left over to create something else in future too.
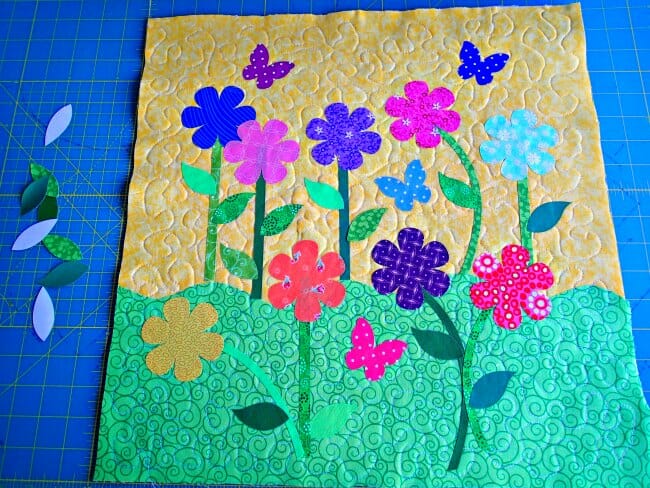
A quick blast with the iron and everything was fused in place. for some reason my camera is a little off with the colors here, I think because I'm using my cutting mat as a background. We all know it's green, but here it looks blue! But still, bright and cheerful as they are, I still wanted my flowers to have some more definition.
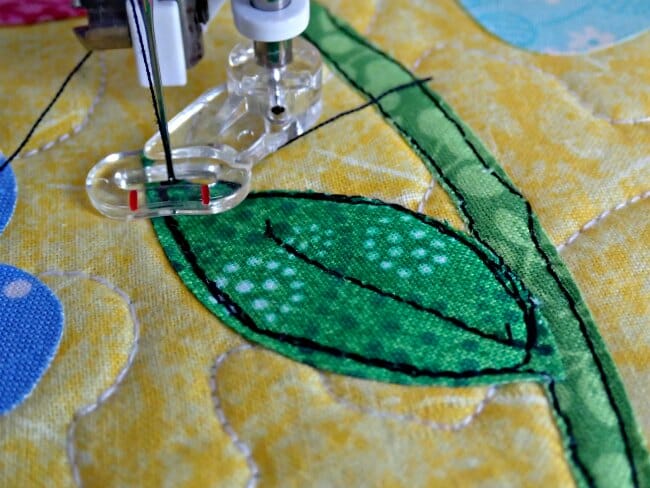
I had read some time back about ‘sketching' with your sewing machine and I thought this project was perfect for that. I used the free-motion foot again, started out with the leaves and stems and using a black thread, roughly outlined them in a straight stitch. I went around the leaves two or three times and added a vein up through the middle.
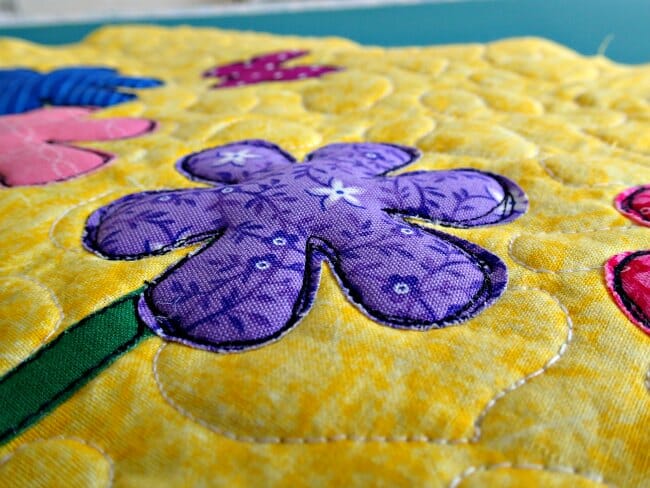
I wanted the flowers to have some more definition, so I added a couple of layers of quite lofty poly-batting to the back and then free-motion sketched roughly around the outside 3 times with the black thread.
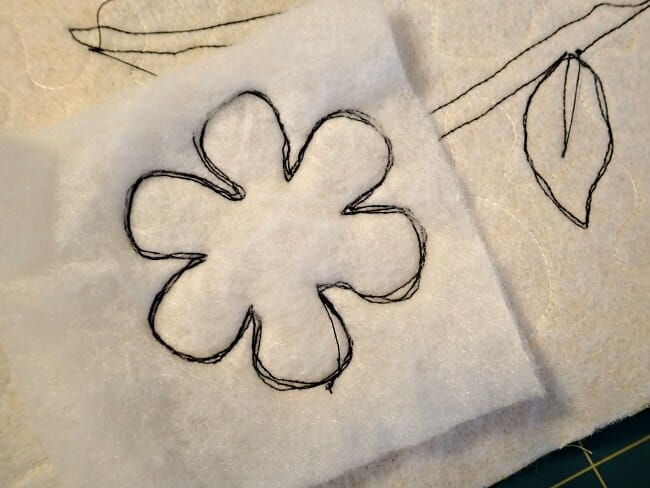
Then I cut away the extra batting, cutting right up close to the stitching line around the outside of the daisy. This resulted in the flower being more ‘lofty' than the surroundings and give it more of a raised up and puffy look. So pretty!
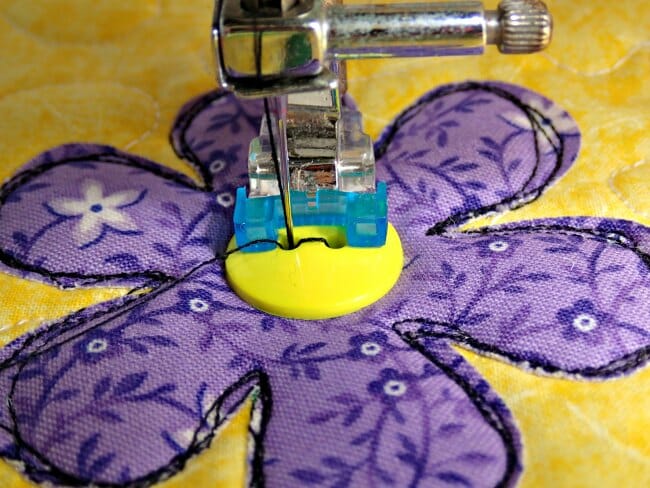
Once all the stems, leaves, flowers and butterflies were outlined, I added some buttons to the inside of the flowers. I got some great floral buttons from JoAnn in a really big collection that were perfect for this. I sewed them on with the machine.
Check out this tutorial on how to sew on buttons with your machine.
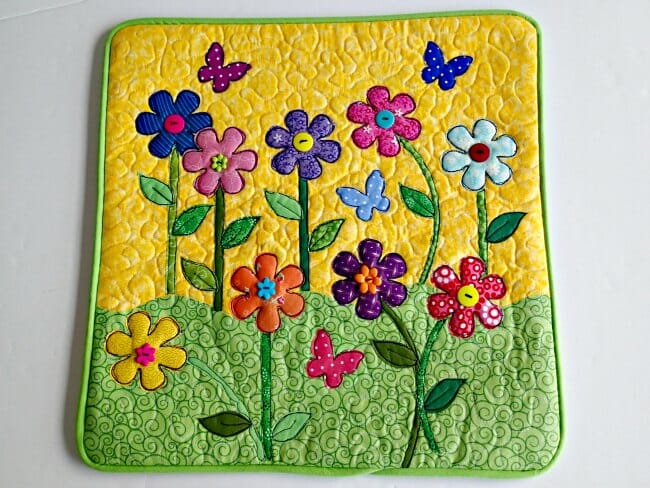
And that was it, the front of my Spring Applique Pillow Cover was completed.
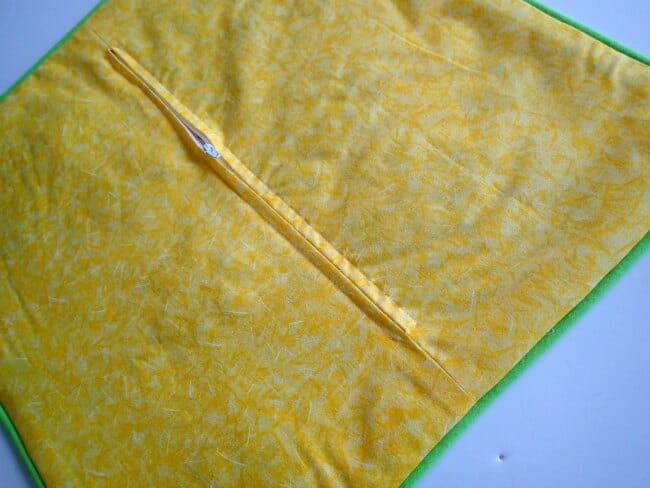
I made a simple back with a center back zipper using the same nice bright yellow fabric. I'd never done a zipper like this before, but actually it was pretty easy and went in nicely. The pillow has an obvious front and back so I wasn't worried that the zip was across the middle instead of at a side seam. The pieces of fabric I had determined where the zip had to go.
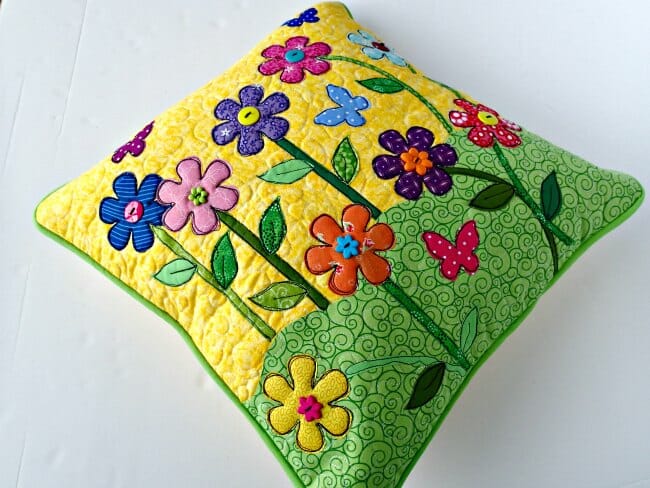
I also found some awesome bright spring green bias tape at my local store which went with the pillow covers perfectly so I cheated and didn't make my own bias tape for the piping, although I did make the piping using a length of washing line. Want to make your own piping? Check out this tutorial on how to make and use piping.
Sew it all together and tah-dah, a bright floral pillow (or cushion for the UK readers) cover for Spring. I love it. Makes me smile every time I look at it.
You need a mortgage to buy a ready-made pillow form here so I made a quick pillow form from some cheap fabric remnant and stuffed it. Stuffed that inside the cover and now this is ready to throw on my bed to give the room a bit of a dash of Spring color.
It was quite a bit of work but totally worth it. I got to try out some new materials with the Shabby Fabrics Laser-Cut shapes and some new sewing techniques too.


Adorable and just what I need to make as I watch the snow melting outside.
I like your tutorial and your pillows and i made these if you like to check and leave your comments please .
I absolutely love this project! It doesn’t seem difficult…but, I’ve never done machine applique or machine quilting, I’ve always hand appliqued and hand quilted. This will be a big challenge for me. Fortunately it’s a small project. Looking forward to trying my hand at it.
Your pillow cover is adorable. You did great on the fabric sketching! I’ve been wanting to do that again but have no extra time.
Great pillow,love the colors.
Beautiful. I’d LOVE to up-do my shower curtain. Can the flowers & butterflies come in larger size? Where do you get them? I think the size you used would be to small for a shower curtain, don’t you? Thank you.
Yes you can get them in larger sizes. These come from Shabby Fabrics. There are links in the blog article to the ones I used and to Shabby Fabrics where you can find the full range. I think they would look wonderful on a shower curtain. You’ve given me some great new ideas now.
Oh your pillow is just wonderful. I really love it. SO bright and happy.
VERY cute!
I love your pillow. what a very cute project
That is so pretty! Thanks & God bless!
Your Pillow is Radiating Summer!! LOOOOVE IT!!
This is such a spring-y project!
I love, love your pillow. So bright and cheery.
Totally adorable!
Love the pillow!! So glad I found your site, I signed up right away! 🙂
Pretty spring pillow.
Your cheerful pillow turned out great! I think that the fusible cut outs are a super fun idea.
What a difference the sketching and buttons make! Love those warm colours. Love your clothing patterns too Deby!
I love this cushion cover.
Your pillow turned out perfectly adorable! Very pretty!
As we have been hammered by snowstorms, this pillow makes me long for Springtime flowers.
I love your definition of the shapes with black thread.
Every entry just gets better and better using the fusible shapes. The spring pillow gives me promise spring is on its way===even in Alaska.
That is just delightful! I love the flowers.
I love your pillow, so bright and cheerful!
Very happy and fun pillow! Love the flower appliques with the button centers–so cute.
I love the butterflies!
What a fun way to use the precut shapes! I’m so curious about these!! Beautiful pillow!
I sew love your Spring pillow!!! Perfect for the season. Thanks for some great ideas and techniques.
This looks like a small, fun project, especially with the Shabby precuts!
Beautifully springy , love it & glad I found you!
HI, WHAT A PRETTY PROJECT!
THANKS FOR SHARING!
Oh my goodness, I definitely want to make something like this. It looks like a page out of a child’s coloring book the way you stitched around the shapes in black thread. Wonderful tips. Thank you!
I love that effect! So glad I gave it a try. I was a bit worried, but I love the organic feel and the slighty messy stitching.
Deby, this pillow is so cute. I love the bright colors, it really does make me think of spring. Great tutorial too!
So pretty! Just what I need after a long snowy winter!
What a pretty cushion! thank you for the tutorial!
Wow i just love it! I wanted to try the sketching also, so now i have something to try it out on. I will also cheat on the quilting, got a template to trace with my frixon pens. Those pens are awesome!
Hello from HaberdasheryFun… Love your pillow!
It makes me smile too, love it.