


Step Three: Attaching the ribbing

Fitting Tip: try the hoodie on and decide how long you want it. Two inches of ribbing is the norm but 3″ (7.5cm) is fine as well if you want the hoodie to cover your bum a bit more.
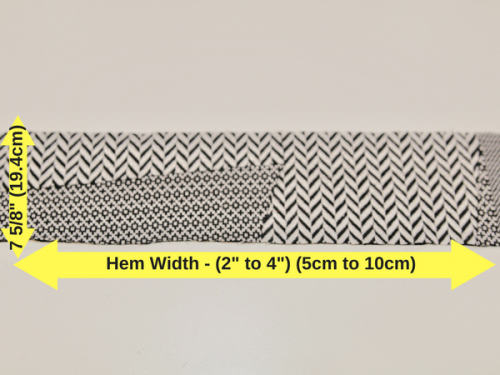
The ribbing is not provided as a pattern and this is done to save you paper. Simply measure the hem of the hoodie minus 2 ” or 4 ” (5cm x 10cm) depending on how much volume you want around your waist and the elasticity content of your fabric. Mine has very little recovery, so I will be taking out 2″ (5cm). In my case, I am making a rectangle that is 37 ” x 4 ” (94 cm x 12 cm).
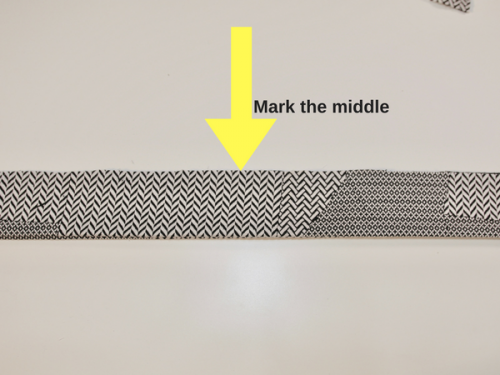
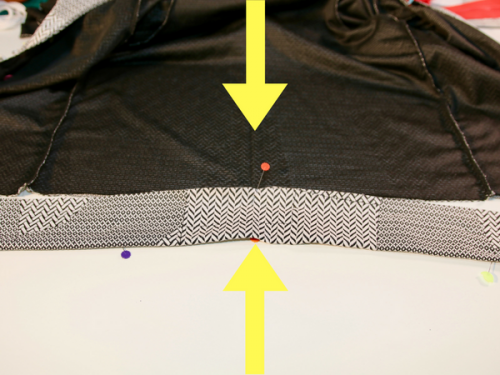
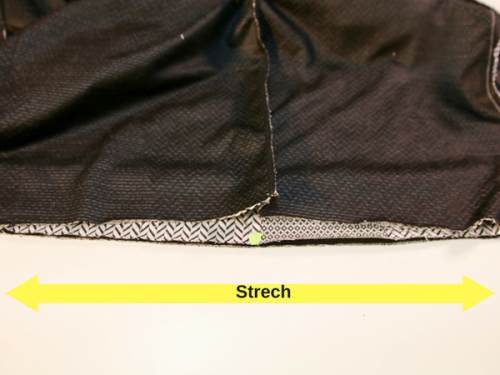
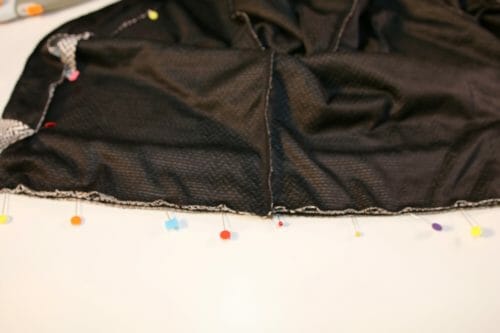
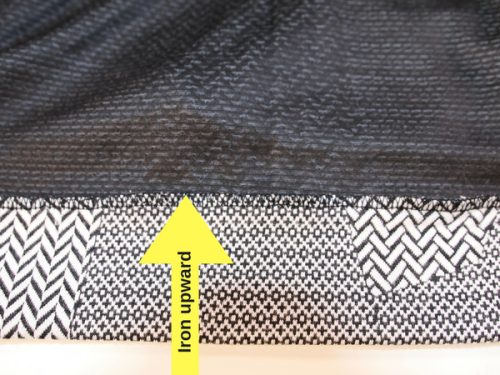
Fold the ribbing in half and place a pin to mark the middle. Pin the middle of the ribbing to the middle back of the hoodie. Then stretch the ribbing while you sew. Sew at 3/8″ using your serger or overlocker. Topstitch the seam allowance by folding upwards or simply iron.
Tracing the ribbing for the sleeves
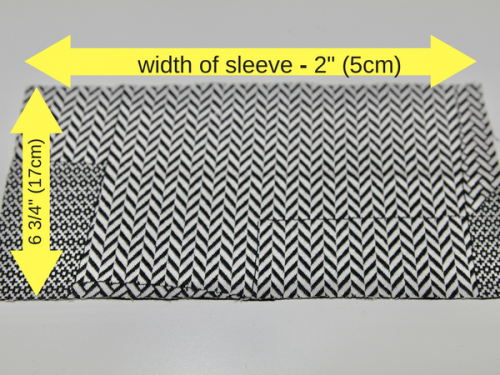

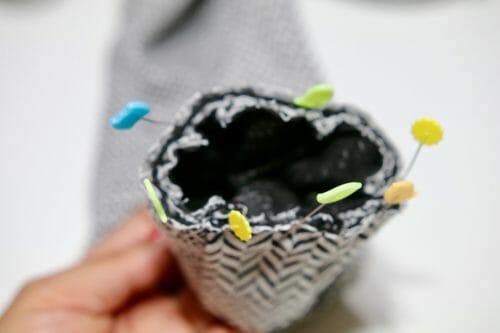
Measure the sleeves minus 2″ x 6 3/4″. Right Sides together, sew the 6 3/4″ side at 3/8″. Turn right side out and fold. Insert the cuff on the sleeve aligning the seam of the cuff ribbing to that of the sleeve. Pin in place, then sew at 3/8″. Use your serger if you have one or simply zigzag the seam, then press.
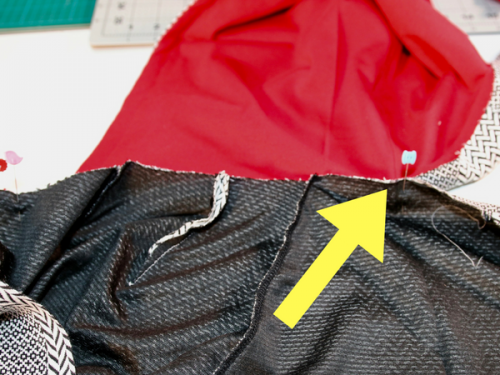
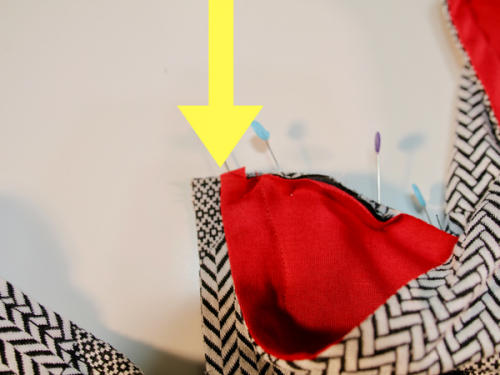
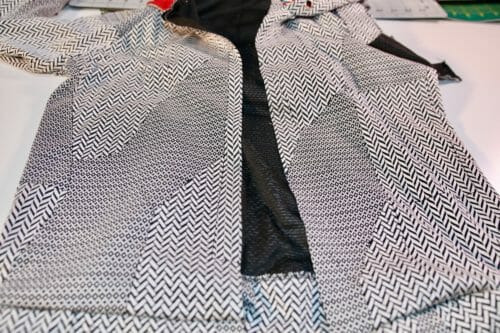
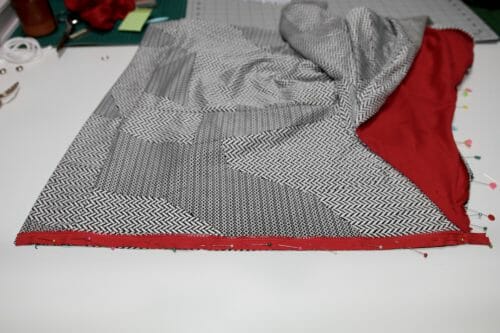
Step Four: Attaching the hood, facing and zipper all at once
Yes, you read right, I will show you how the people in the sewing factories do it. It's very simple really and saves tons of time. All you need is courage and patience and a bunch of pins, however, people in the factories do not use pins.
This is, of course, optional and below are the steps to follow if you want to sew each item one at a time:
- Pin the hood to the collar area and sew
- Pin the zipper and sew
- Pin the facing (trace the facing from the pattern hoodie) and sew
Here are the steps if you're brave and want to sew it all at once:
1.Pin the hood
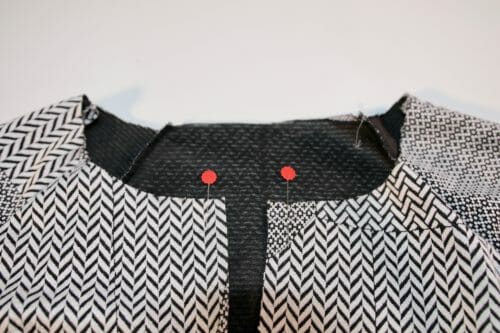
We will start by pinning the hood to the jacket. Mark the 3/8″ as shown in the picture below. Do this on both sides. The hood can not go beyond this point because that is where the zipper will go.

Find the middle seam of the hood and align it with the middle of the back piece. Pin from the center of the hood to the middle of the back then work your way to the 3/8″ mark you made previously.
Notice the 3/8″ hanging at the end. We need this to attach the zipper.
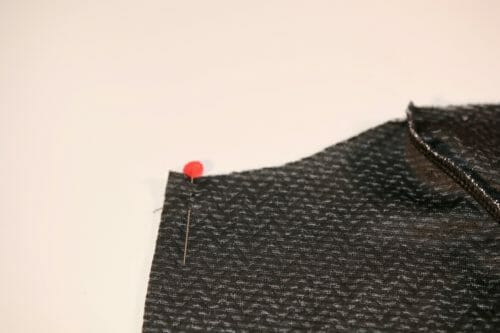
2. Pin the zipper
Lay the jacket right side out.
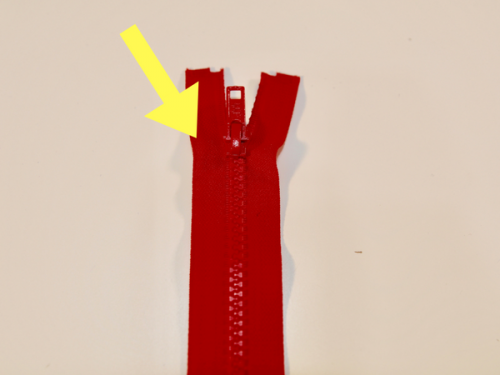
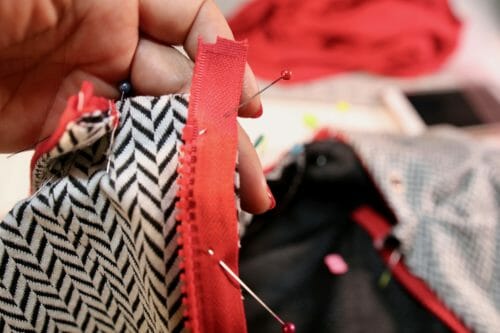
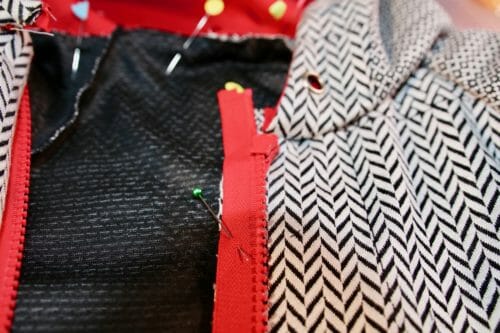
Separate the zipper, pin the left side of the zipper upside down to the right side of the hoodie. You will know you are doing it right when the teeth of the zipper are on the left side from the edge. Pin the right side of the zipper on the left of the hoodie. The pull of the zipper will be upside down. Make sure the zipper is at least 1/8″ from the hem.


I have a question. Would I be able to adapt a ‘Mandarin’ collar on the garment if I chose to make another one without the hood?
I printed the pattern this morning. It looks fantastic. I especially like the raglan sleeves with the dart at the shoulder top. I have fairly broad shoulders but not large shoulder bones. This type of sleeve always fits so much better. I can’t wait to put the pieces together and get started.
I am glad I have read the comments. I will be sure to add seam allowance to my pattern size.
I am grateful for the opportunity to use another of your patterns.
Your photo instructions are very helpful.
Thank you so much for this lovely pattern.
Hi, and thanks for the pattern!
I have just a quick question, about how to draw and cut the facing and wrist/waist ribbing not included in the pattern. I’m a little scared about doing these wrong.
Can someone tell me what bits of the pattern we’re meant to trace for the facing, what kind of facing we should optimally use, and the sizes to cut and what material to use for the ribbings?
Thank you so very much <3
Is there a link to download instructions for the hoodie pattern?
Add 3 3/4 to where? Your words day bottom but the picture is confusing. Please help
could this pattern possibly be used for a man as well?
I would like to use this pattern to make a hoodie, but instead of the suggested cotton linen & jersey knit fabric, I’d like to use a faux fur. Can you please tell me if I would still need a serger machine? Or could I accomplish the pattern using a regular sewing machine?
It says it’s unisex
I just made this. I’m happy with it overall, but differed slightly in construction order: I did the pockets before the zipper, so that the edges were enclosed in the seams. The only issue I had was with the size!! My measurements are 36″ around bust. I wanted space in it, so I made the size to measure 42″. It turned out WAY smaller: finished size is only 32″!!!
It looks like you did not add seam allowance to the pattern; am I correct?
This item is gorgeous ! Can you let me know where I can get the fabric ? I like the graphic pattern !!
Hi Noemie, sadly, I purchased this fabric eons ago at a Spotlight store in Australia. It is a jacquard knit. I leave you the link here https://www.spotlightstores.com/
I got this pattern to make for my 16 yr old granddaughter. Had to print patten twice to get scale correct. Cut out for a size 14, which is her size. NOT! It is so small it fits my 8 year old grandson. Good thing I made it out of turtle fleece. He loves it. SO pattern not for adults.
Hi Sherry, the pattern is not to be scaled at all. You can only print any patterns in this blog using adobe acrobat reader. That is the only way the pattern will turn out the size it should.
Hi Sherry,
I wonder if you possibly made the same mistake I nearly made, which was assuming a 5/8′ seam allowance was already built into the pattern – as it is with just about every other ‘commercial’ pattern. The section on ‘no seam allowance included’ can be easily missed if you start cutting, without reading – as I nearly did – the bit at the front before the sewing instructons. I only caught it as I compared the hood section in size to one I alreadly have, and wondered why there was no seam allowance past the grommet for the inner layer.
Mayra, also about the scaling I use adobe photoshop elements to print from as it is more easily adjusted (in 1% increments) if the 2″ square does not equate to exactly 2″. Be aware therefore, that not everybody is using the same printing options.
Hi Angie, I only use adobe acrobat reader as stated in my patterns. They are free, and I use only free programs so people can use them. So yes! I am very happy you know how to account for the differences.
Hooded cardigan
Love it bit in Sweden se idé om in sted of inch somtime its hard to change it
Love this pattern. So many different combinations of color and fabric to consider!!
Although, I won’t be attempting this real soon, it’s definitely on my top list for the year. Need to get back into making garments with a few simpler patterns first.
One of the main reasons I used to make a lot of my clothes, is because of my size. I’ve always had a difficult time finding clothes “off the rack” that fit, so I either had to pay to have them altered or do it myself. That can add up quickly. I learned early on, it’s not only less expensive, but much more satisfying to know I’ve done it myself!
The only request I would like to suggest, is to see more patterns which include smaller sizes. I’m 5’3″, and 100-104 pounds. So a size 4 is best, and sometimes a 2, depending on the garment-2’s are next to impossible to find though.
Just something to keep in mind for the future, if you could?
I still do a lot in knitting, and in that particular maker’s community, there’s been a huge increase these past few years for size inclusivity. This should include from the smallest to the largest, in order to cover the greatest number. Would love to see this move forward in sewing as well.
Thank you for all your helpful tips and techniques, as well as the free patterns you so graciously provide. ????????????
(Apologies for the lengthy comment.)
Thank u for this perfect pattern. May I ask where the fabric is from? It’s perfect weight for So Florida.
Retired but love to sew
Great pattern – and fabulous fabric – where did you find that fabric?
I am loving this hoodie. Finally a hoodie that fits!! The raglan sleeve is just what my narrow shoulders needed, yet my bigger parts fit too. I plan to make more of these. The one small thing I might alter on the next one is to sew the pocket into the zipper and band seam instead of topstitching it all around. Excellent patter – thanks for making it available. I look forward to making more garments from your patterns.
Hi, I lovr this hootie!!! Where can I find that fabric????