


When I was pregnant with my first child, my husband and I were living in Sydney, Australia. The beach was never far –take your pick north or south you are bound to find one of the finest quality water lifestyles known to man. Pristine, unpolluted water that can go on for miles along the coast. So it comes as no surprise that the weekend activity for many Australians is generally beach-related.
I was due around February 14th and I started to feel uncomfortable with a huge belly around New Years Eve. It's usually very hot at that time of year, and the only respite is to go to the beach. However, the water current in summer changes and cold water from the south pole makes its way up the shore, dropping the temperature of the water to an average of 66 degrees. So while the air is hot, the water can sometimes be very cold. For a tropical fish like me, this is not particularly pleasant. It doesn't help that I had a huge belly and that my innate distrust of pounding waves did not make it easy for me to relax in the surf.
You see, Australians have a thing called “nippers” and from the moment a child can walk, talk and follow directions, they join a class taught on the weekends by volunteers lifesavers or swimming clubs. The point is for the kid to grow up respecting the surf…..But no nippers, for me, as there were only a couple of beaches in my country where you could surf. In Sydney, you can surf at practically in any beach. The surf is rough and tumbles you as if you were in a cold wash washing machine. If the surf doesn't scare you, the temperature of the water will.

So, being pregnant and not too keen on a cold rough wash, I would spent my hours of sunshine dipping in the water to cool down and laying on the sand with a book. For those, few minutes I was gone I could never relax leaving the car keys, money and mobile phone unattended. A beach bag makes it an easy target. A multi-purpose beach blanket was my solution.
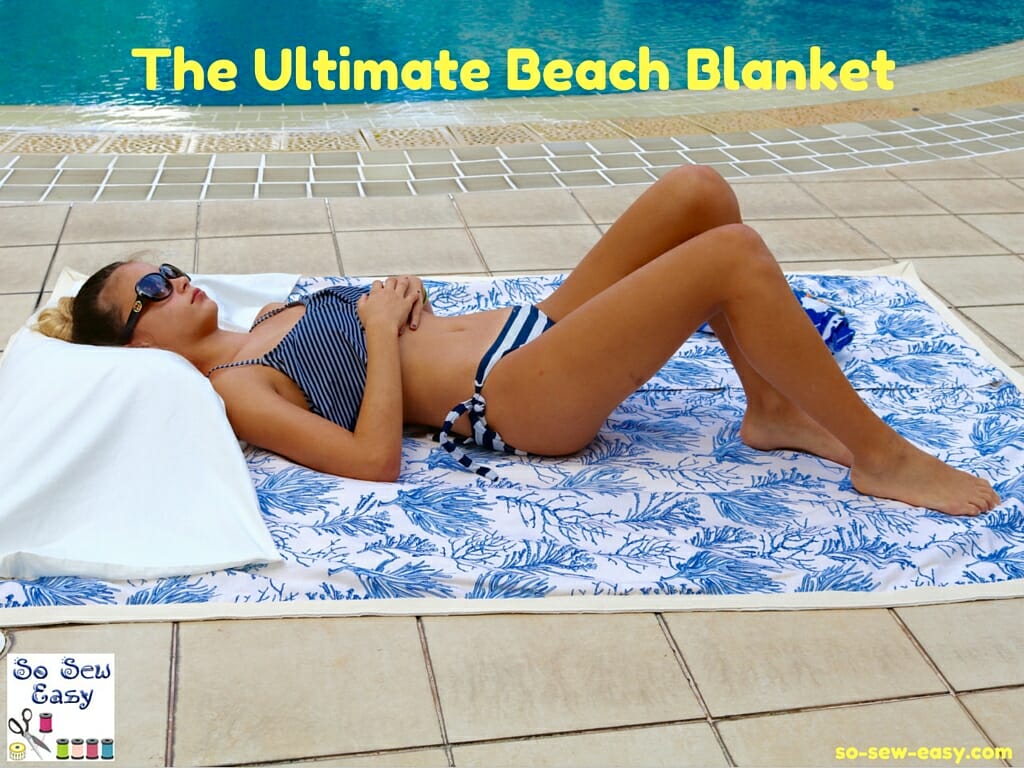
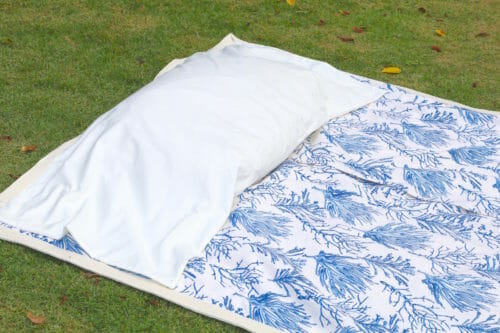
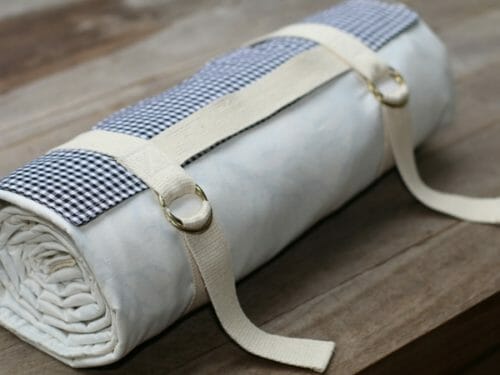
I'd like to share my design for this ultimate beach blanket with you. The Ultimate Beach Blanket features an insert for three pillows or storage, a small pocket under the blanket to hide your mobile phone and car keys. Straps for easy handling and storage. The blanket is big enough to accommodate two adults. This is an intermediate or above level project.
Materials
- 4 yards of thick outdoors 100% cotton canvas, marine canvas, or upholstery fabric 60″ wide
- 2 old bed sheets or 4 yards of cotton fabric 60″ wide
- 1/2 yard of oilcloth
- 10 yards of 2″ bias tape, or canvas tape 1″ wide
- 1 nylon zipper 14″ in length
- 3 nylon zippers 18″ in length
- 4 rings 1″ in diameter
Disclaimer: The following procedure applies for fabric that is 60″ wide only. If you are using a narrower fabric or decide to make the blanket smaller, you need to work out how much fabric you will need.
Please note that many of the drawings and diagrams below are not to scale and for illustrative purposes only. Please follow the instructions.
Cutting out the Canvas Pieces for Your Ultimate Beach Blanket
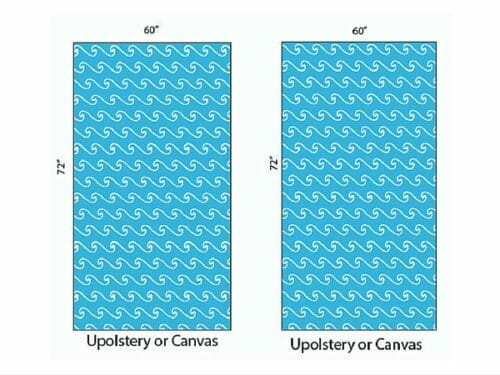
Cut two rectangles of canvas fabric 72″ length x 60″ wide.
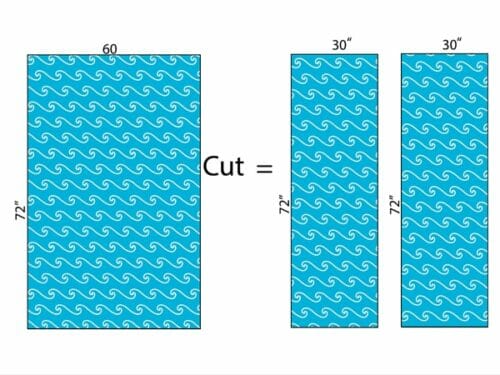
Take one rectangle and cut it lengthwise to form two rectangles of 72″ x 30″.
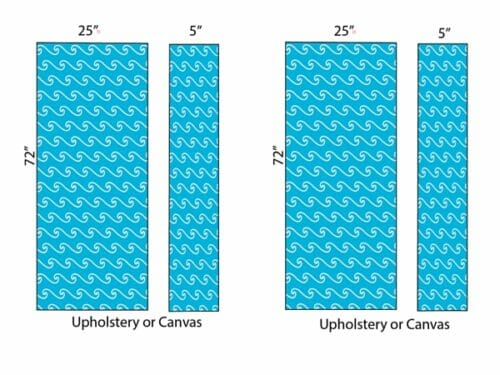
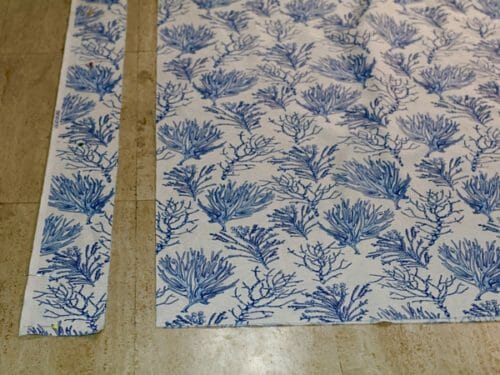
Cut a strip 5″ wide from both rectangles.
Cutting the Bed Sheets
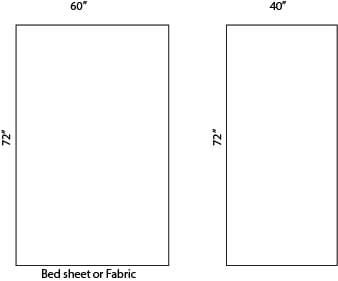
Cut two rectangles of bed sheet fabric 72″ length x 60″ wide and 72″ length x 40″ wide. You will still need some of this fabric for later steps so keep the remainder handy.
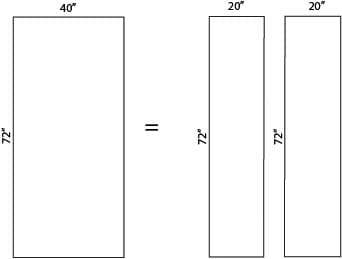
Cut two rectangles of 100% fabric 72″ x 20″.
Making The Full-Length Side Pockets
This design has two, full-length side pockets for storing your clothes, towels, whatever. You can also use these for pillows. This was particularly helpful for me when I was pregnant. If you've ever been pregnant, I think you'll know what I'm talking about.
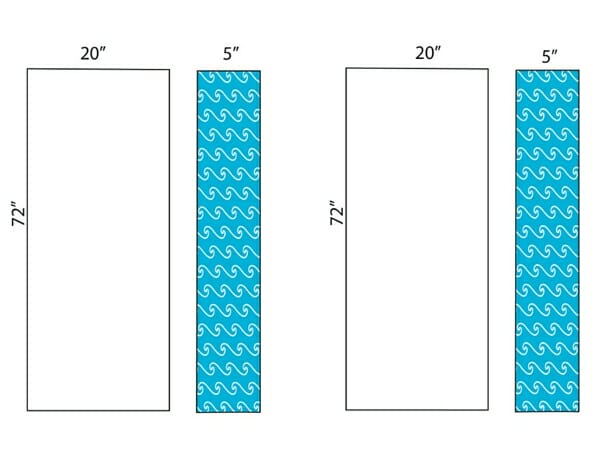
Sew the bed sheet rectangle 72″x 20″ to the canvas strip that was cut previously and attach the zipper in the middle. Repeat this procedure for the other side.
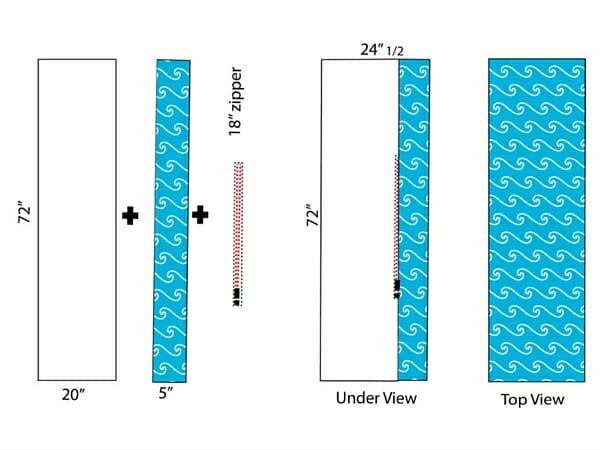
Pin these two rectangles to the bigger canvas rectangle. This forms your two side pockets.
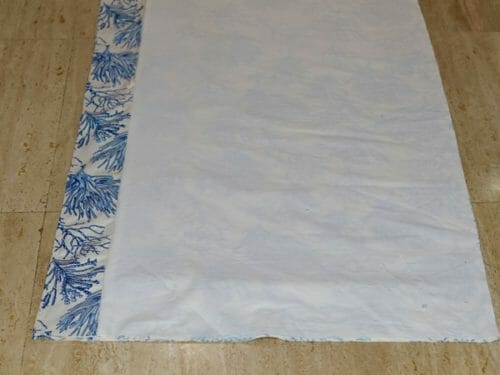
Attaching the zipper
All zippers are sewn in the same way.
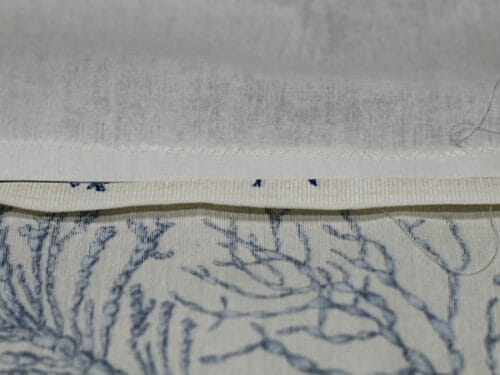
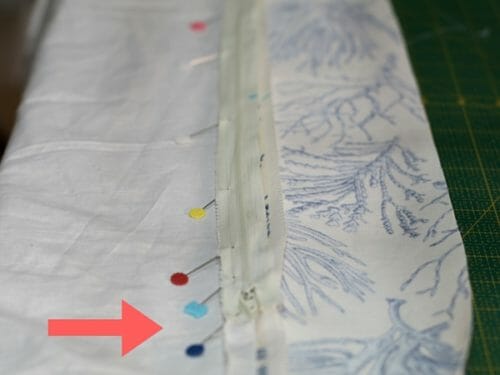
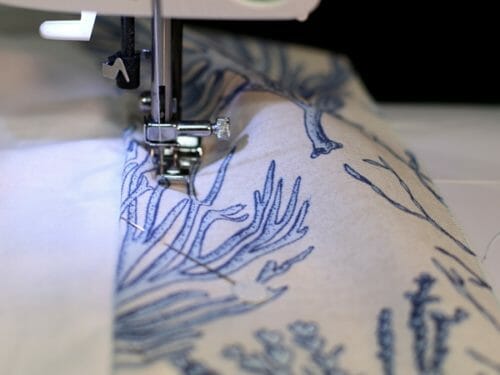
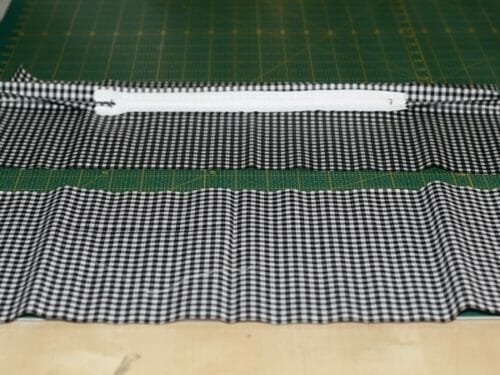
Sew the pieces together print side in, up to the head of the zipper leave the length of the zipper open and continue sewing from the end of the zipper until the end of the fabric.
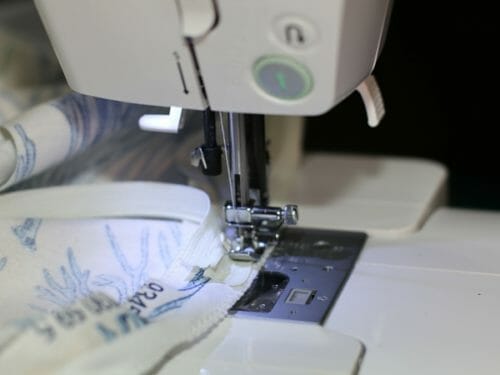
Iron the seams open. Print side down as in the picture above, place the zipper right side down, and sew starting at the top.
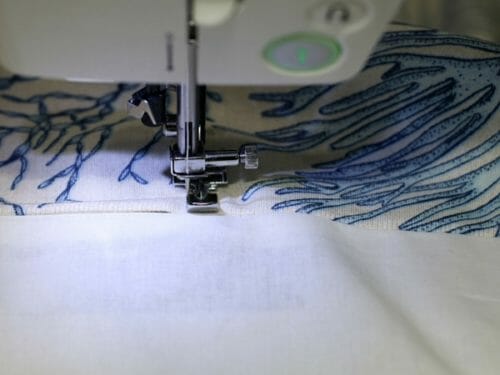
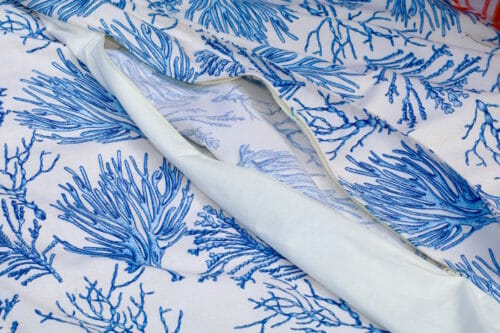
Turn the piece print side up and stitch the other side of the zipper tape.
Making The Small Pouch from Oilcloth
Cut three rectangles from the oilcloth with the following measurements
- 18″ x 9″1/2 (A)
- 18″ x 6″1/8 (B)
- 18″ x 4″ (C)
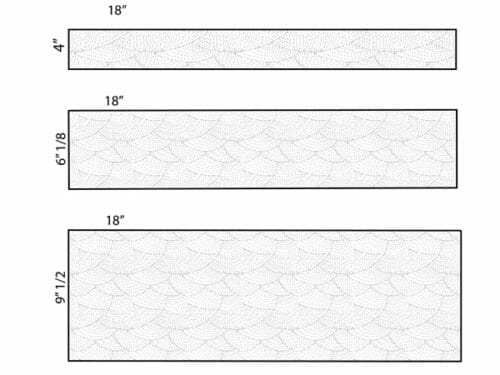
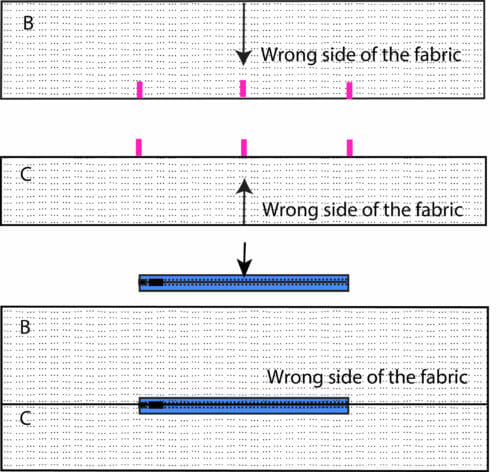
Take piece B + C and mark the middle of the rectangle.
Mark the middle of the zipper.
Then mark the head of the zipper and the end.
Sew pieces B + C until the mark of the head of the zipper and front the end of the zipper until the end.
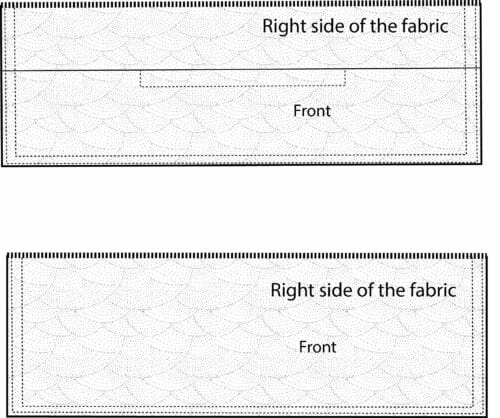
Sew pieces B + C together.
Making the Pillow Case from Bed Sheet Fabric
You will need the remainder of the bed sheet fabric for this step.
Cut a piece for fabric 50″ x 25″.
Cut another piece 50″ x 15″5/8.
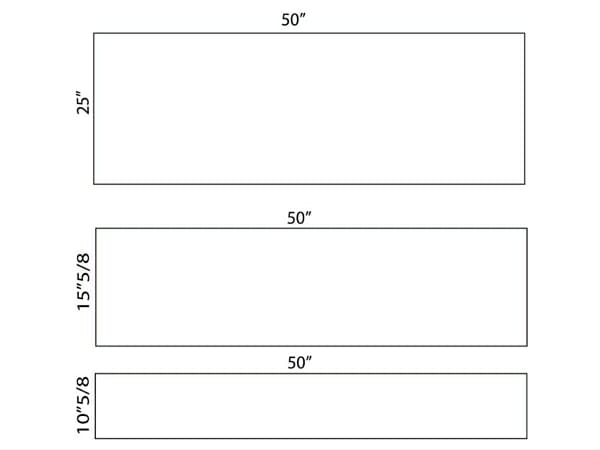
Last piece cut at 50″ x 10″5/8.
Assemble the pillow case and zipper using the same method as with the Small Pouch above.
Assembling your Ultimate Beach Blanket
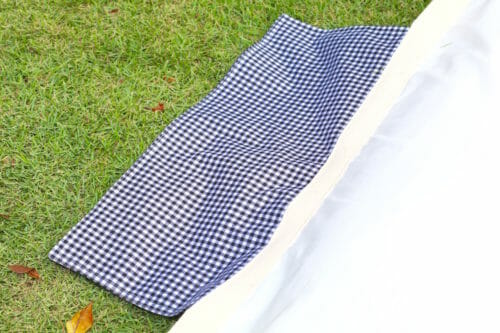
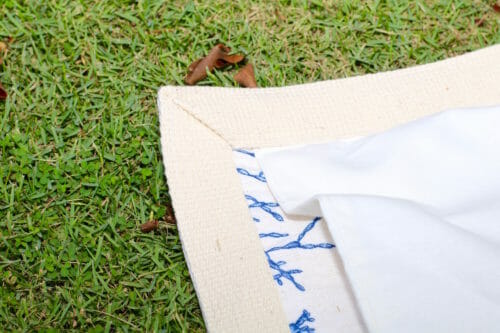
Take the pocket and pin it to the blanket under the bed sheet. Sew all the pieces together at 5/8″ and cut cut the seam allowance except of the last which is the bed sheet fabric. Fold the remaining seam allowance to the front and pin the canvas tape. Make sure you miter the corner. For a tutorial on turning corners with bias binding, please check out our tutorial.
- Lay the sheet or fabric print side down.
- Place the canvas print side up.
- Lay the pockets on the side.
- Lay the pillowcase on the top.
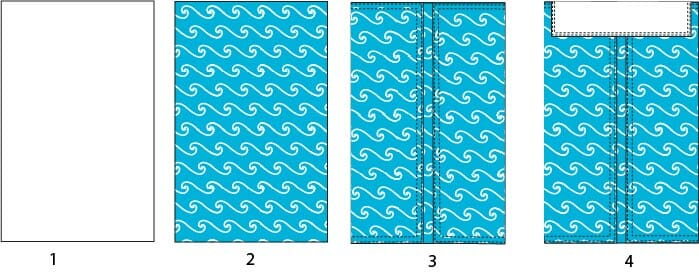
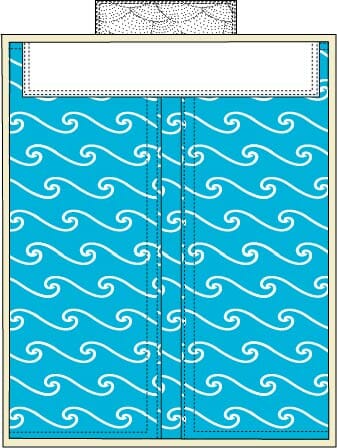
Sew all the pieces together at 5/8″ and cut the seam allowance except for the last which is the bed sheet. Fold the remaining seam allowance to the front and pin the canvas tape.
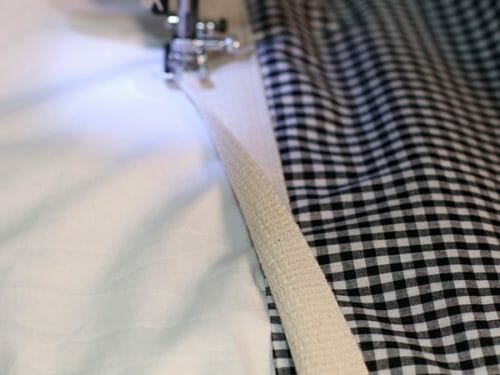
Make sure you miter the corners as in the step above.
Making The Straps Of Your Ultimate Beach Blanket
- 2 strips of canvas tape 28″ long
- 1 strips of 11″ long
- 4 metal rings 1″ diameter
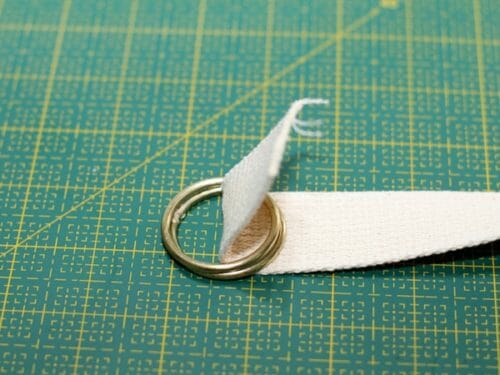
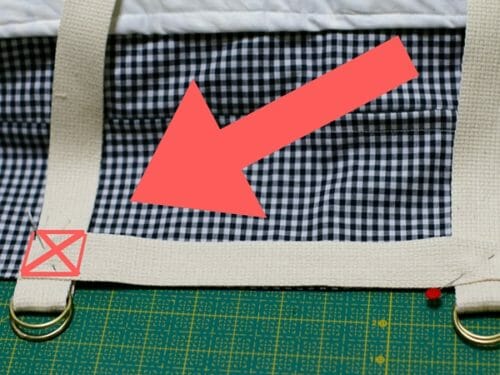
Thread the tape through the ring. Fold the tape 2″ from the rings.
Pin the smaller 11″ strip forming a 90 degrees angle on top of the longer strip.
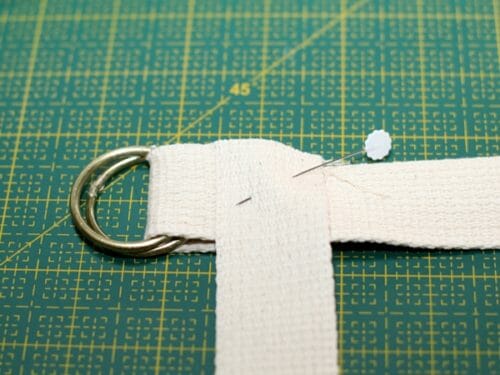
Thread the other strap through the other two rings and pin the shorter strap as done above.
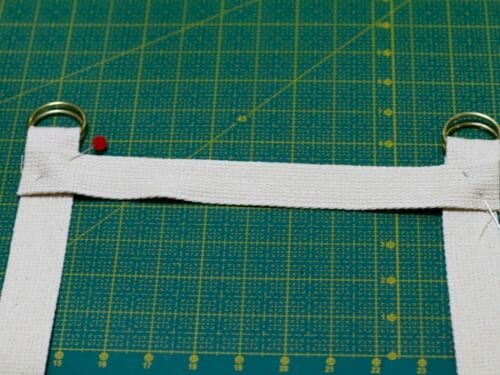
Pin the straps to the small pocket and sew a square and a cross in the middle to reinforce the straps.
I have to say though, I have never had anything stolen while at the beach in Australia –ever. Unfortunately, I can't say the same about other parts of the world, but that is a story for another day. I hope you enjoy the ultimate beach blanket. I am off with mine to wrap as a present and give it to a friend who is soon going to have her baby.































i cant wait to make the blanket!
Would the canvas from an inexpensive painting dropcloth be an economical way to get the canvas?
If your machine can handle it, yes
THANK YOU for not suggesting Terrycloth which I cannot tolerate at the beach or as a regular bath towel because of the weight and tendency to dry so slowly (not to mention it’s not the most absorbent option)…
My pleasure, Sadly the terry cloth available for purchase by yards or meter are made of 40% polyester and that makes it impossible to have a nice bathrobe or a good smelling towel after just one use. Because of the many layer in this project the use of tightly woven cotton is the best option.
Thank you so much for this pattern and tutorial. Once I’m well enough I’m hoping to make this for my beach going children and grands. God bless.
Hi Angel, I wish you a speedy recovery. Sun, see clan air surrounded by people you love is the best medicine. Kind Regards, MC
I would like to find this place where the instructions are for this blanket this Beach blanket
They are above Dolores.
Hello. This looks like a great project. Can you please offer it in printable form? Thank you. 🙂
How clever is this. Now all I have to do is remember to do this in summer as right now it’s pretty nippy down here ( 2 hrs south of Sydney) so I am definitely not thinking of the beach right now.
Hi Mayra,
Brilliant pattern, and great tutorial! Only, I got a little lost when you were describing what to do with the oil cloth. I think it would have helped to have had a visual, either a photo or one of your clear illustrations.
Any clarification or further explanation from you or another reader/sewer would be helpful!
Thanks!
Renee
Hi Renee, unfortunately, PrintFriendly only seems to work on the first page of the tutorial. I think the comments you saw before related to another post and sorry for the confusion and the wild goose chase. I have since corrected the comments. This particular project doesn’t have a downloadable pattern or instructions. The pattern is really just dimensions in any case.
Is there a way to download this pattern?
Hi Sue, we haven’t done this one in downloadable format. Perhaps we will at some point but for the moment, you can just follow along each page from the website. Many people use tablets or iPads to be able to have instructions right at their sewing tables.
[…] Ultimate Beach Blanket If you frequent the beach, you know one can never have too many beach blankets (or towels) to lay out and relax upon. This pattern by So Sew Easy claims to be the […]
Mayra, this is a fabulous blanket. I love how it includes a carry handle, but my favourite part is the hidden pocket underneath. I’m showcasing your fab tutorial today.
so useful, picnics, play mat in the garden, beach, this is so versatile, cant wait to make one … or two what a great gift idea for the couple that has everything.. personalise it and there you go!!
Great!. Never thought about this, now I´m impatient for make it. Thanks for sharing
Great tutorial. Thanks for sharing it.
I cannot WAIT to make this!
I would pay for a video tutorial!!
This is the perfect beach blanket! Thanks for sharing!
I think it is a great idea. My only concern is the zippers in the middle of the blanket rather than along the outside edge. How can they be comfortable to lay or sit on?
I have tested this same issue and found that the zipper drops down with your weight due to the sand, placing the zippers along the outsides makes it difficult to feed a pillow, however with any design you are most welcome to change it to your taste and needs, hope you enjoy the project, it does make a great Christmas present.
That is awesome!! Thank you for sharing!! 🙂
Ultimate Beach Blanket is great and can be adapted to sit with children watching youth soccer games or picnicing at parks as well!