


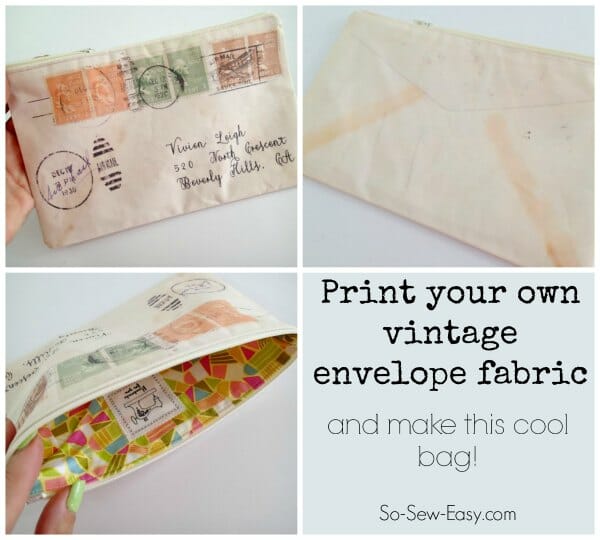
Here's the big wrap-up to our Print Your Own Fabric At Home series with a unique sewing project for you. We've looked in the earlier articles at:
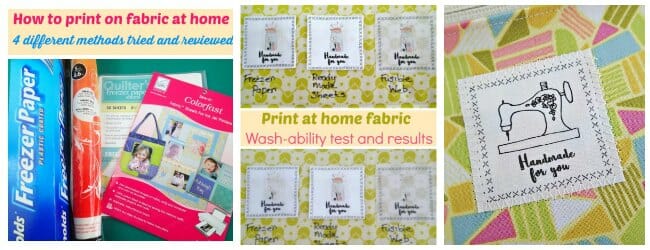
How to print on fabric at home – 4 different ways
Printing on fabric – washing and fading
Handmade For You Printable Fabric Labels
Now it's time to put everything we've learned into creating our own custom sewing projects. I'll get you started with this fabric download to create this unique vintage envelope zipper pouch.
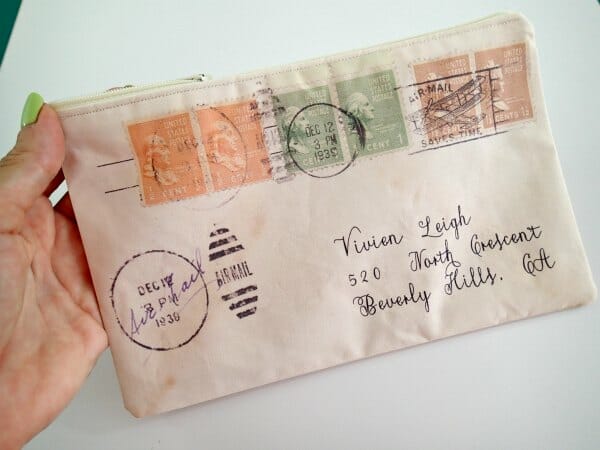
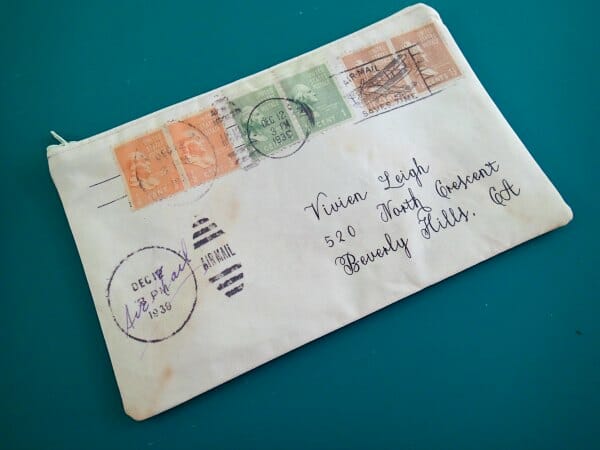
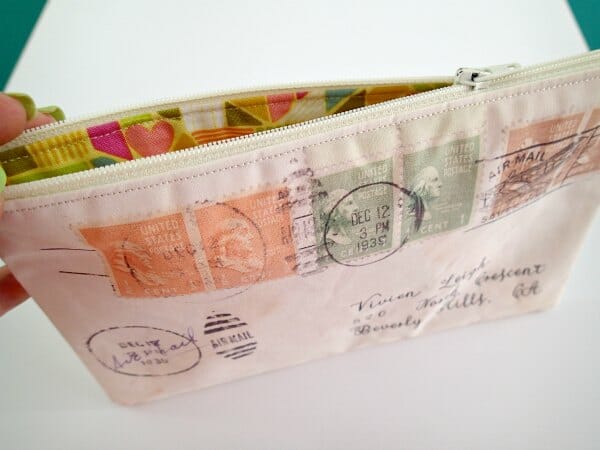
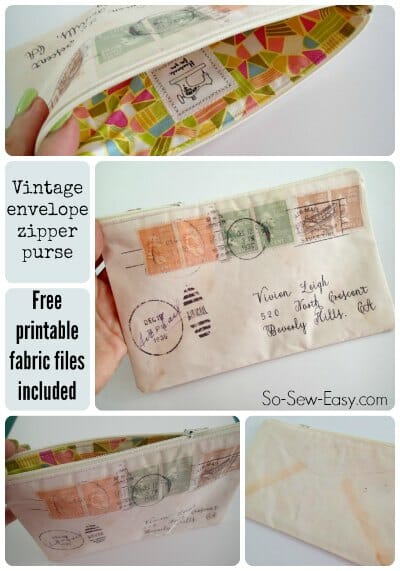
Vintage envelope zipper pouch
You will need:
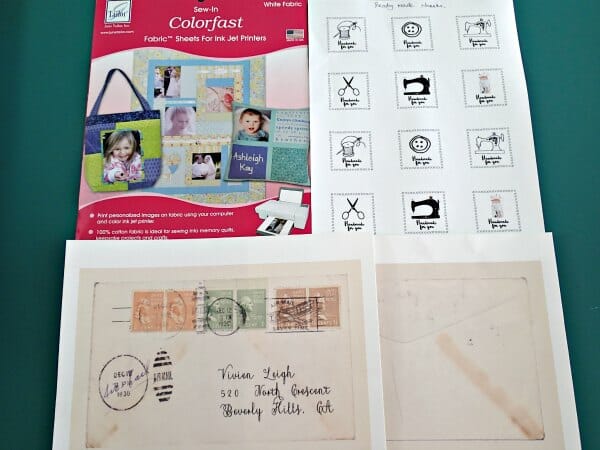
- 2 or 3 sheets of pre-treated printable fabric ( I tested these by June Tailor and was very happy with them (Amazon US here and UK here)
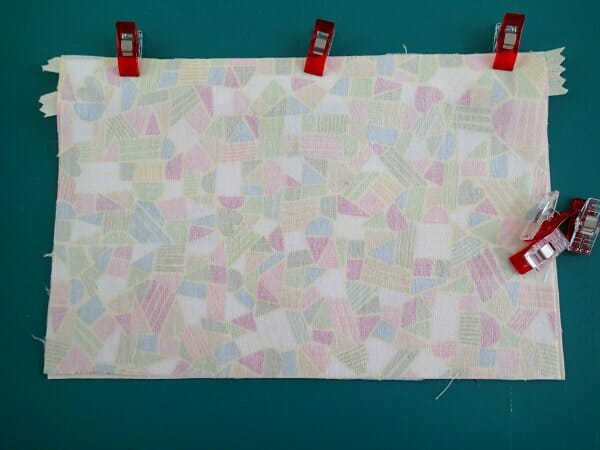
- Lining fabric, two pieces 9 by 6.5 inches
- 8 inch zipper (or longer)
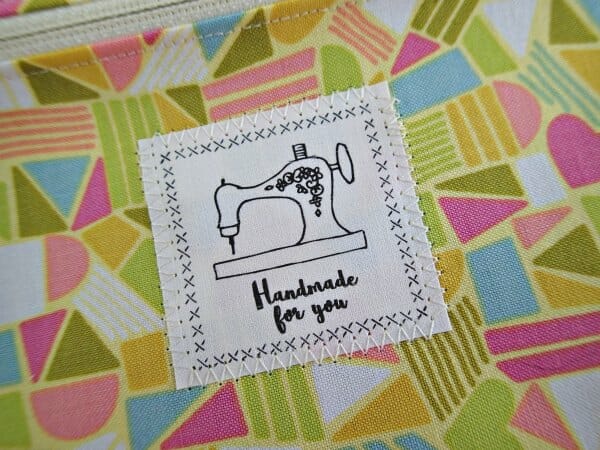
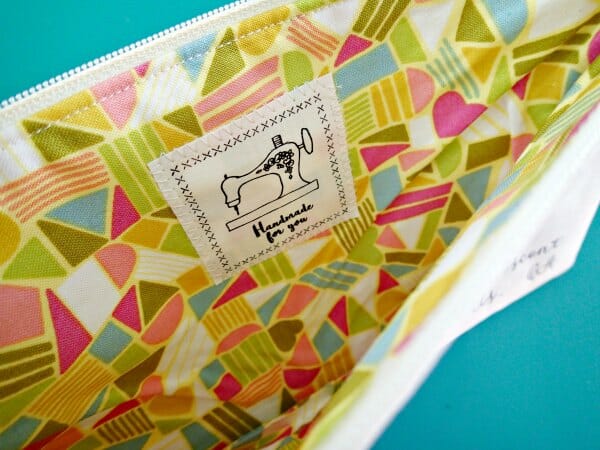
- Optional – ‘Handmade' printable fabric labels sheet for your designer label
- Color bubble jet printer
- Interfacing of your choice
- The vintage envelope fabric download below
This is a 'pay what you can afford' download. Choose your price - anywhere from $0.00 upwards. Free downloads are fine - I won't come hunt you down or think badly of you! Print, sew and enjoy using these vintage envelope files for your print-at-home fabric projects.
How to make the vintage envelope zipper pouch
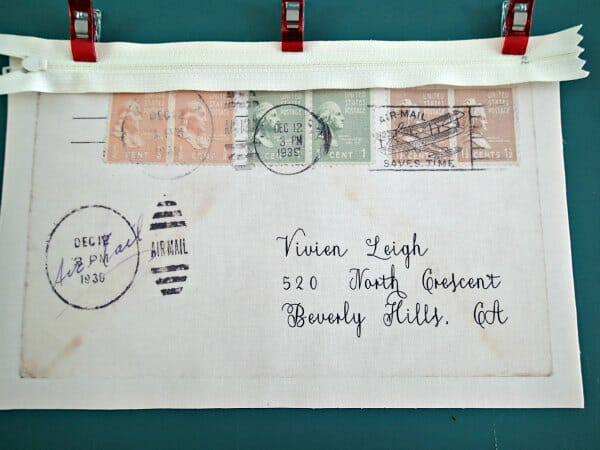
Download and print out your PDF files for the front and back of the envelope onto your fabric sheets. Print at 100%, no scaling or fit to page. If you want to add a ‘designer' label from the Handmade labels sheet, then print that one too.
Follow the instructions provided with your sheets on how to ‘set' your ink. I had to leave the ink to dry for 10 minutes and then iron for 2 minutes.
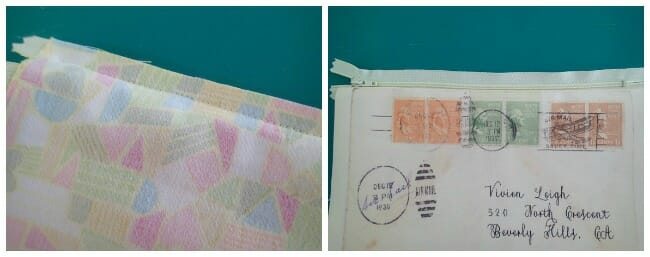
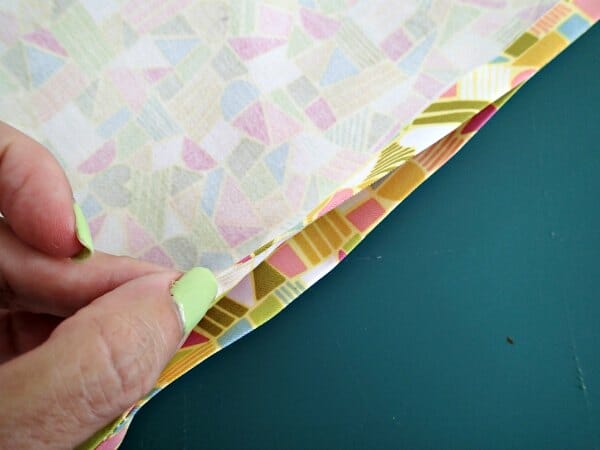
Trim away the white border leaving the envelope and a 1/2 inch seam allowance on all sides. Fuse your interfacing of choice to the outer and lining fabrics.
Now we'll just be creating a simple zipper pouch using these pieces. Lay your zipper face down in the right side of the envelope front, zipper pull to the left.
One piece of your lining fabric goes on top, right side facng down and all raw edges matching up at the to edge of the zipper. Pin or clip in place. (Love these Wonder Clips!)
Use your zipper foot and sew along that top edge, evenly running the foot along the zipper teeth from one side to the other, to sew the zipper between the two layers of fabric. Then fold those layers back wrong sides together and admire your handiwork so far.
Time to add the fabric to the other side of the zipper tape. Place the envelope back face up, with the top of the envelope at the top and line up the zipper face down, so that the envelope front and back are facing each other. Add your second lining piece on top, face down, same as you did before. Pin all the layers in place and sew along the second side of your zip.
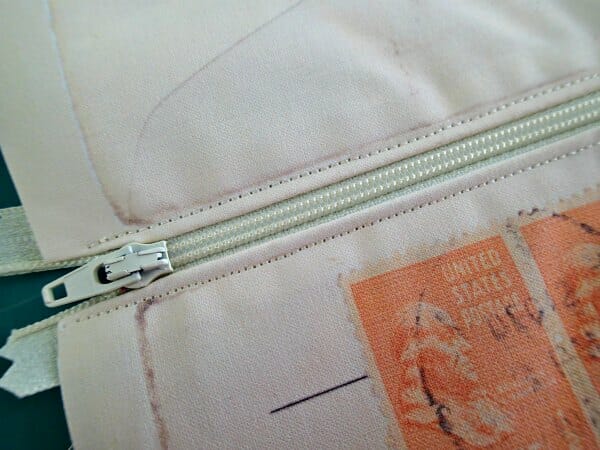
Then open everything out and press the fabric away from the zipper tape on the top and the bottom. We don't want our lining fabric catching in the zipper when we open and close it later.
Still using your zipper foot, top stitch through all layers on either side of the zipper from one end to the next. Give it a good press.
If you want to add a cute ‘Handmade for you' label, you can add this to your lining or to the back of the bag now, if you haven't already. Check back to the earlier article here for the printable labels and how to use them.
Now match your bag right sides together, so the two outer envelope pieces are facing each other, and the two lining pieces are facing each other. Fold the seam allowance at the center towards the lining and fold the zipper so the teeth are facing towards the lining too.
Sew all around the outside of the bag with a 1/2 inch seam allowance. Take care not to hit the metal parts of the zipper stops with your needle as you pass by, and leave a gap open in the bottom of the lining (where shown with pins) so you can turn the bag right side out.

Once sewn, fold back the seam allowances at the bottom of the lining on each side, and press them to create a nice fold. This will help you in closing the bottom of the bag neatly later.
Now turn the bag right sides out through the gap in the lining. Take a look at the ends of your zipper and make sure to get something blunt up in there to give them a good poke and make them sit nicely. I think I should have poked one of my ends a little more (going to do that now…). Then sew the gap in the lining closed by machine or by hand and push that down inside your bag.
Give the bag a good press and try not to actually press creases into it like I did with my lining! Better go back and do that again now…. And then your vintage envelope zipper pouch is completed.
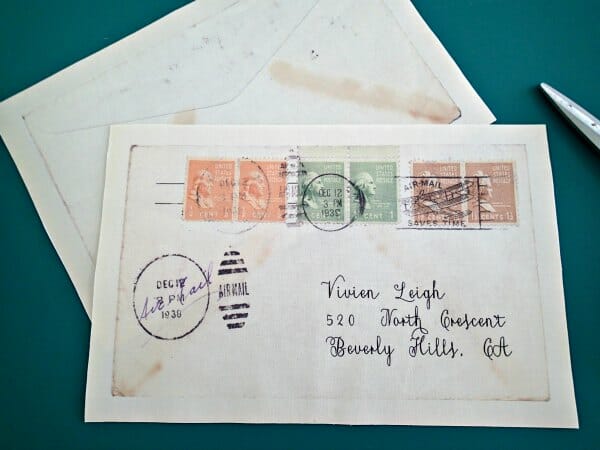
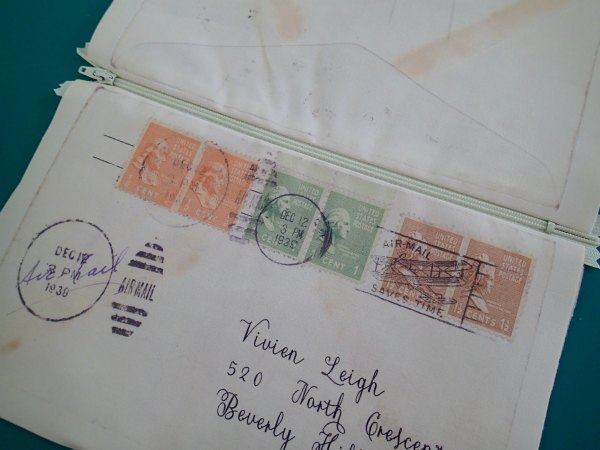
Trivia fact – the post mark on this envelope is Dec 12 1939, just 3 days before the release of Gone with the Wind. 1939 was the most celebrated year in movie history with a number of exceptionally good films released that year. Vivien Leigh of course starred in Gone with the Wind, and it won many Academy Awards but check out this list of other fabulous films that year. How many of these have you seen?
Now get out on the town and show off your interesting bag! What ideas do you have now for printing your own fabric and using it in your sewing projects?
This is a 'pay what you can afford' download. Choose your price - anywhere from $0.00 upwards. Free downloads are fine - I won't come hunt you down or think badly of you! Print, sew and enjoy using these vintage envelope files for your print-at-home fabric projects.


I made 2 of these and before I printed them I changed the name and address. One to mine and one to my BFF. I carry it in my purse with makeup. Love it, thank you!
Susan, how do you change the name and address. I’m kind of new to doing things on the computer besides emails thanks. Jane
Thank you and I can’t wait to try it … FIESTA 😉
What a clever way to enjoy a vintage envelope!
Fabulous tutorial and a great way to get personalised vintage happening. Love it!
I created a .jpg from the .pdf and removed the envelope address & stamps (don’t worry, I kept a copy of the original)
As I go through my family’s keepsakes, I’ll scan envelopes I find and use the vintage envelope as a template to create bags for keepsakes related to the person whose envelope I scanned.
The label will include info on the person’s age at the time the envelope was used, what it was used for and other pertinent data.
That’s a great idea, makes it really personal. I hope you’ll join us in the sewing chat group and share your creations.
Terri, I just read your note saying you removed the address from the vintage envelope jpg.
I too want to remove the address and personalize with one of my own. Would you mind telling me how to delete the original address…..Many thanks
I do love it. I printed out the tutorial. I tried to buy the download printable design (0.50) but was unable to get the buy now processed. Anyone else have a problem?
I think 50c is going to be below the minimum because Paypal take a fee from each payment, both a flat fee and a percentage, and so does Payhip, and the fees on the transaction are probably more than 50c. Thank you for your generosity in offering to pay 50c, but I think that’s why the payment won’t go through. Feel free to download for free and then it should hopefully go through just fine.
This is absolutely brilliant, I love it. I would never have thought you could print direct on to fabric, I am definitely going to have to try this out. 🙂
What a fun idea for a zippered bag, Deby!!!
this is so lovely, best zipper bag i have seen so far, great work hun
Make sure that the zipper is pulled open when sewing around your bag or you wont be able to turn it! That is such a pain, ahaha! After seeing how lovely that envelope looks, I need to try printing my own fabric. Thanks for the idea.
Isn’t the opening in the lining used for turning the bag, and therefore the zipper doesn’t have to be open? Or am I missing something? If you have the zipper open, then maybe you don’t need the opening in the lining? (I’m so easily confused!) 🙂
You actually need both open. Otherwise its really hard to get your hand in there and open the zipper from the back to turn the bag right side out.
Usually with a bag you sew the bag and lining right sides tog. Making the bag this way creates TWO right sides tog, requiring turning the bag right side out twice. Open the zipper before sewing! Don’t bother to ask how I know!! LOL