


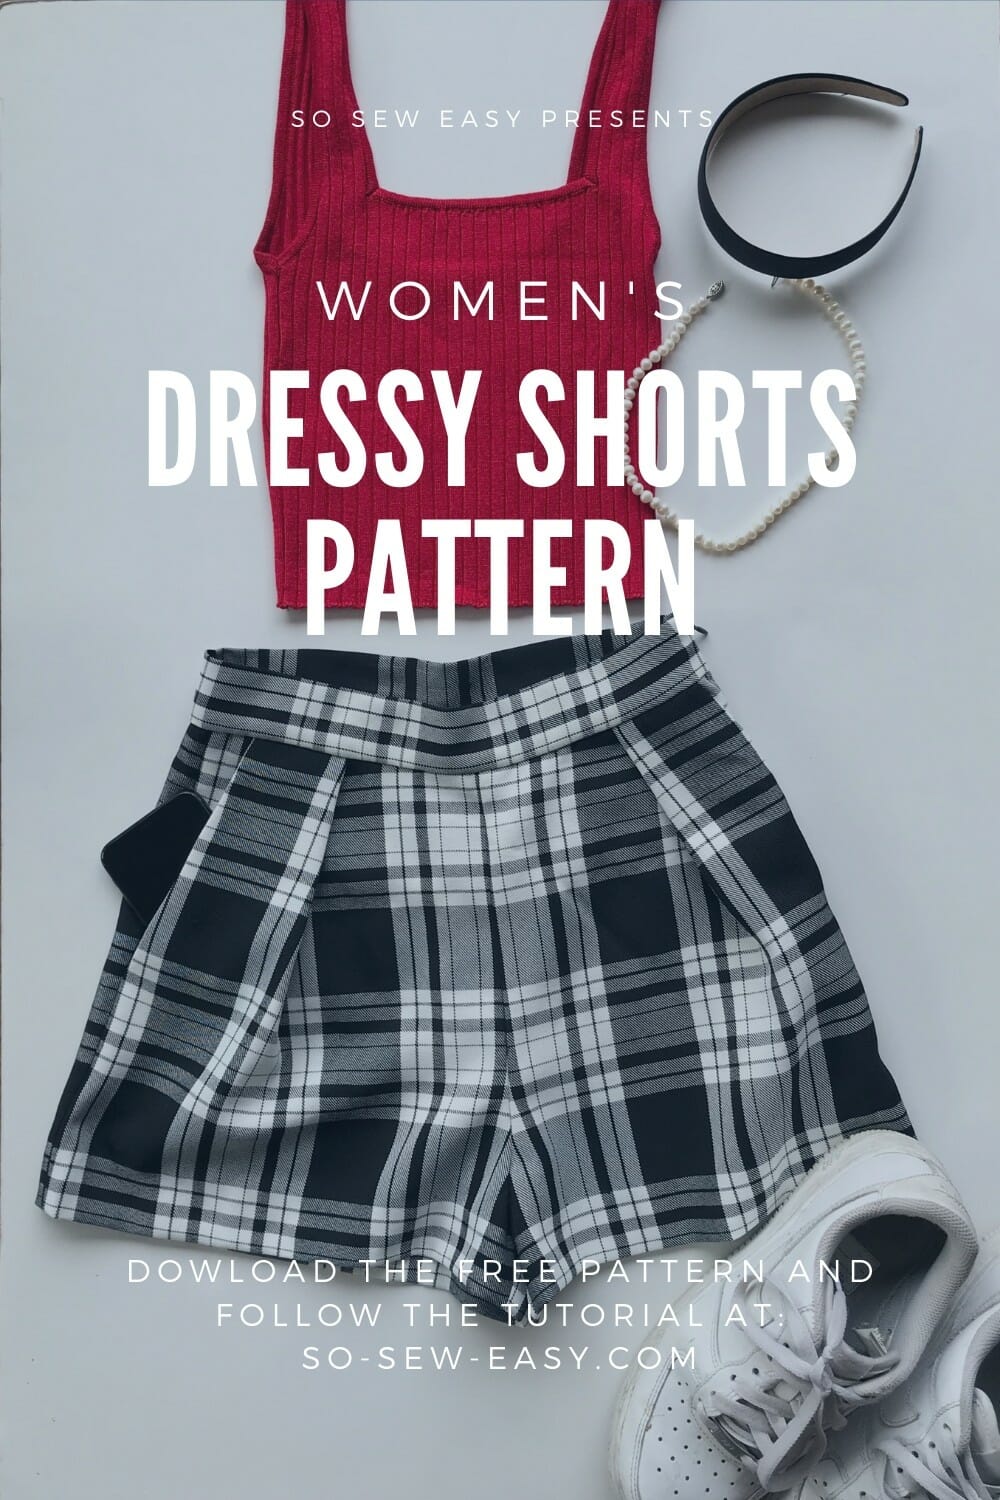
This women's dressy shorts pattern is perfect for all seasons. On top of that, it's also ageless and season-less as long as you choose the right fabric. Please have a look at my fabric recommendation from the Fashion Fabrics Club they appear as four pictures and you might ignore them because you think the pictures are an advertisement.
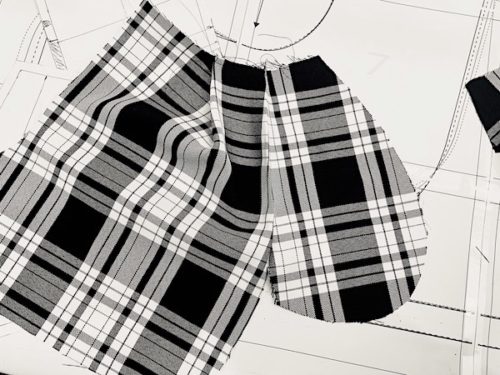
The fabric that I am using a mix of 50 percent wool and 50 percent cotton. My daughter picked out this fabric at Casa de Tessuto last year while in Rome. This fabric makes an ideal choice for Spring and Autumn. A thicker fabric would be a really cool pair of shorts for winter. My favorite choice would have to be a cotton sateen for summer that will give you a pair of shorts you are sure to use over and over during those hot summer days.
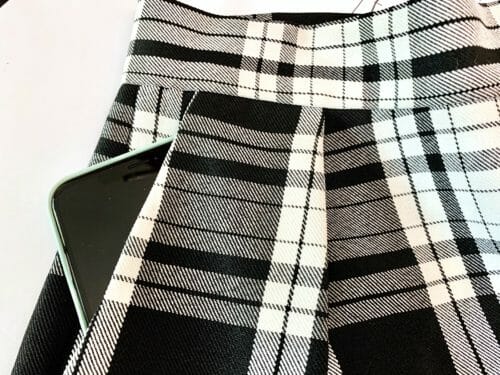
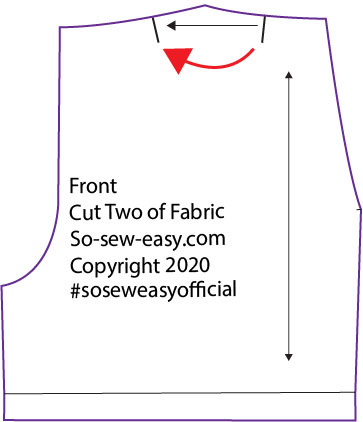
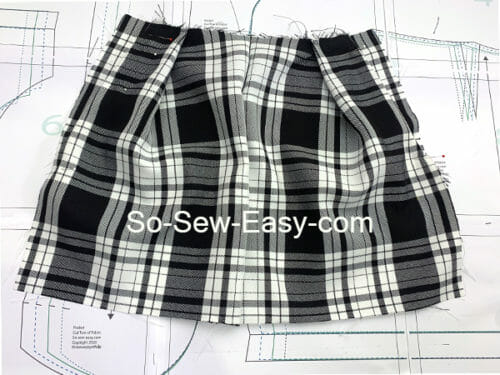
These shorts have two pleats in the front for ease of movement,
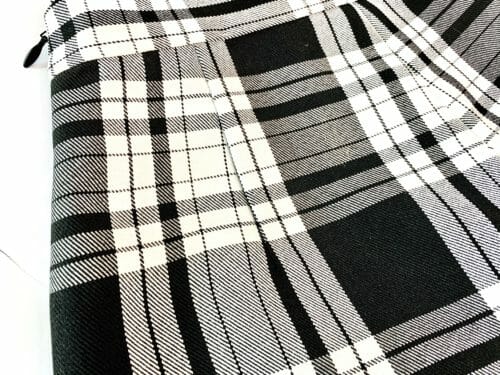
two darts in the back to give shape to your behind
and my favorite kind of pockets, slanted pockets to carry just the necessary things or to put your hands inside to strike a pose.
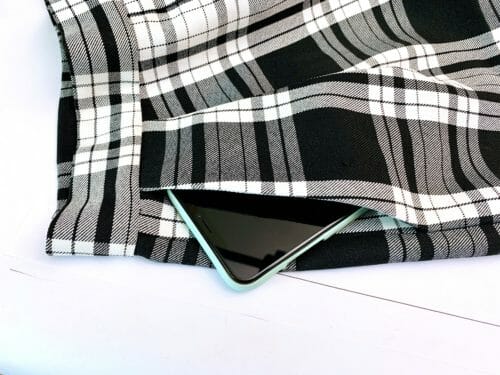
I love these pockets because they do not add bulk to the tummy area, while the pleats help accommodate a bulge should you have one there.
For this project, I have used a different way of finishing the pockets. I hope this technique gives you another useful tool in your pocket-making arsenal.
Also, this project is ideal for those wanting to push their sewing skills a bit further. Also, the shorts are a perfect pair to practice the Hong Kong finish should you find yourself without a serger.
Materials
- 1 yard of 60″ wide heavy linen, or cotton twill, or cotton sateen, or plaid wool
- Thread to match
- 1 invisible zipper seven inches long
Tools
- Sewing machine
- Hand needle
- Invisible zipper foot
- Regular zipper foot
- Scissors
- Iron and ironing board
- Pins
Experience Level: Intermediate
Beginners => You will need details instructions and step by step photographs with video to be able to finish the project.
Confident Beginner: You will need details instruction with photographs to finish the project.
Intermediate => You will need little guidance to put these shorts together.
Advanced Intermediate: Knowledge of most sewing techniques, the ability to manipulate a pattern to fit your body, requires very little guidance.
Advanced => You know all sewing techniques, fitting, pattern manipulation and do not require instructions at all just a photo and the pattern to finish a project.
Sewing this women's dressy shorts pattern is quite easy, what makes the project more complicated is the fitting, due to the fact that the zipper is on the side. This means that you have to measure the pattern against your body and decide what size you will be able to fit.
This decision is a personal one, whether you like it on the shorter and tighter side, or with a bit of room to move around depends on your taste.
However, it is always easier to add to a pattern than to take away. Women who perform alterations can tell you that this is a job that is poorly appreciated but that entails a huge amount of detail, skill, and time.
Additional Resources:
Mistakes To Avoid When Cutting Fabric
Fabric recommendations
How To Print Your Women's Dressy Shorts Pattern
Use Adobe Reader to download and print the pattern. Print on Landscape and use the Actual Size setting. Do not scale at all.
How To Download
We will continue using the new Payhip web store to distribute our patterns.
Our patterns are still free, but now you have the option of making a small contribution if you like our work! We'd appreciate it, and it will help us keep going with new and fun designs like this. Even a dollar or two goes a long way.
Thanks so much in advance for helping us out. You can use any credit card, and you don't need a Paypal account, although you can use one if you have one.
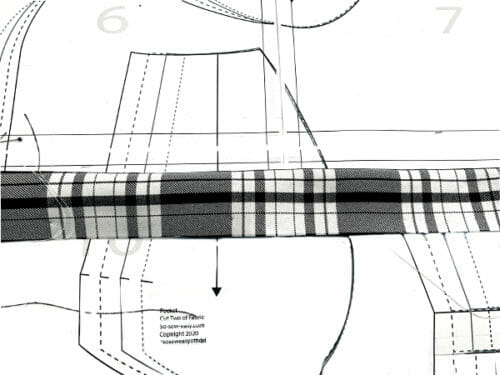
Pattern Layout
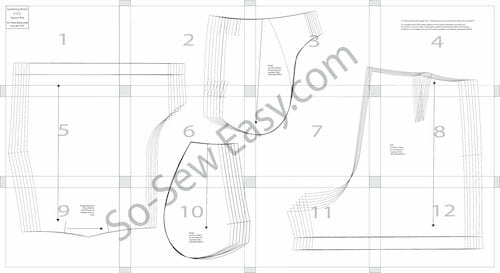
Additional pattern pieces: The waistband is not included in this pattern in order to save paper.
The waistband will have a width of 3″ (7.62cm), the length will depend on the size you are making.
If you have performed any alterations to the pattern using the dart and the pleats, measure the waist, and cut the waistband according to the new measurement.
Body Measurements
| Size | Waist | Hips | Length |
| S | 26 | 36 | 14 |
| M | 28 | 38 | 14 |
| L | 30 | 40 | 14 1/4 |
| XL | 32 | 42 | 14 1/2 |
How To Sew Your Women's Dressy Shorts Pattern
The seam allowance is NOT included in this pattern, for advanced sewists use a 3/8″, for an intermediate a 5/8″. If your fabric ravels like mine use a 5/8″ as you might have a hard time sewing the zipper on.
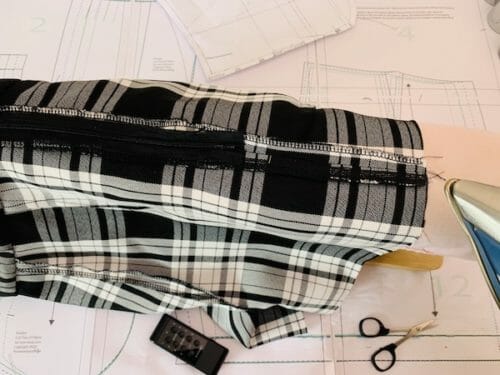
You will notice in my photos that at one point I have serged all the sides, this is because I am using a fabric that is very easily raveled and I am afraid I will lose so much seam allowance that it will be difficult to sew the zipper.
Step One: Sew The Darts And The Pleats
Please read the following article if you have never sewn a dart or have had trouble sewing one.
The dart and the pleat are folded and iron towards the center or the crotch.
Step Two: Sew The Pockets
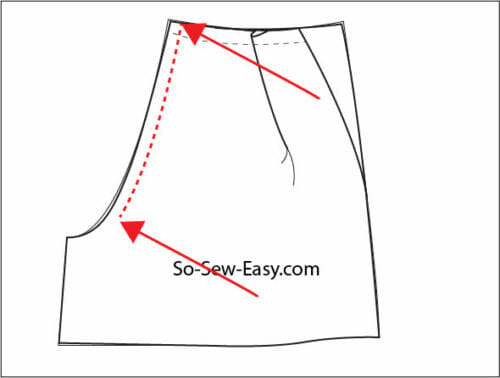
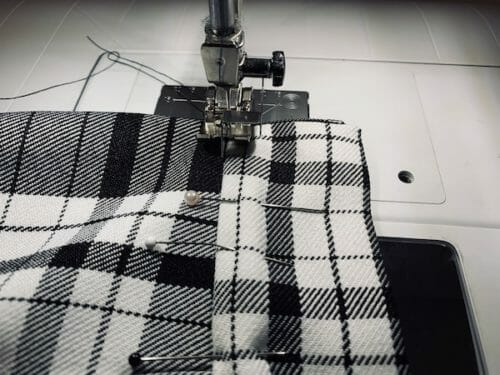
Place the front piece of the shorts print side up. Align the pocket lining (marked in your pattern) to the front of the dressy shorts print side down. Sew the pocket maintaining the seam allowance all the way to the edge.
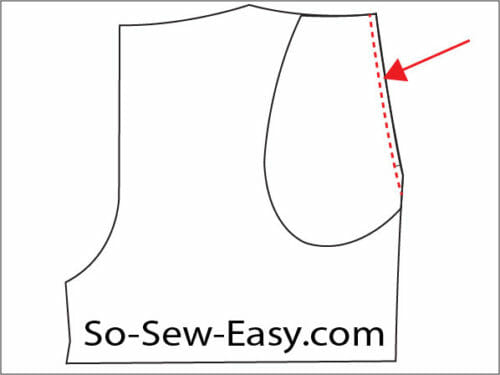

Move the pocket lining away from the front piece including the seam allowance and iron. Once you have ironed the pocket lining together with the seam allowance, topstitch to make the pocket opening lay flat.
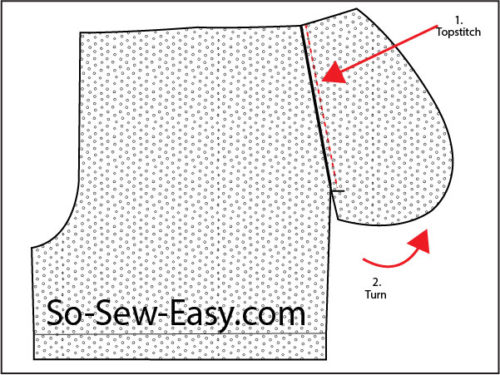
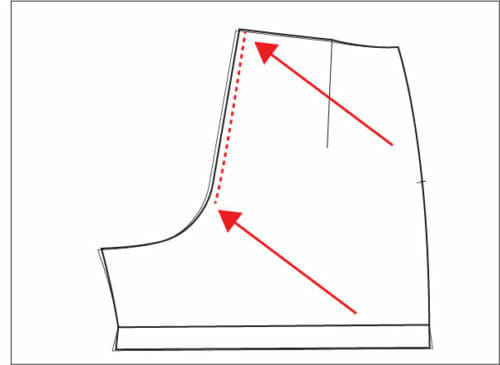
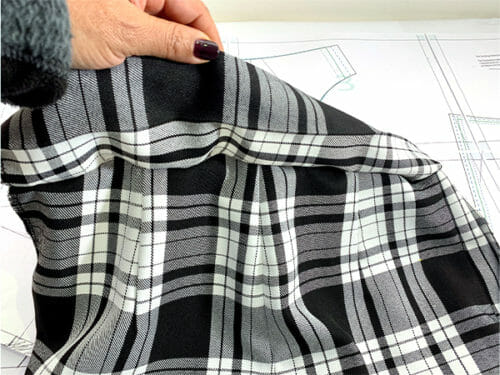
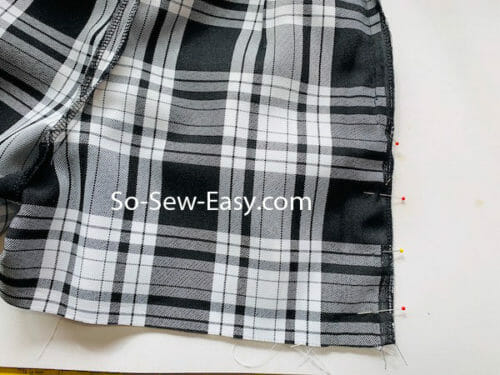
Turn the pocket to the wrong side of the shorts and iron. Make sure the lining is not seen on the top.
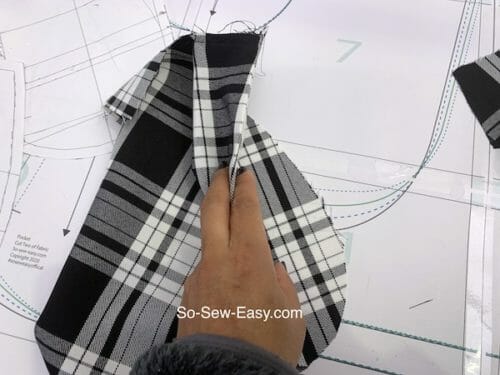
Join the pocket backing with the pocket lining. Use the pattern as a reference to place the front of the shorts over the pocket backing and pin together. This is how your shorts should look like so far.
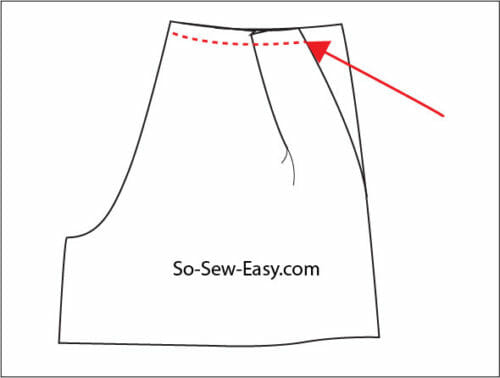
Looking at your pattern, you next will have to sew the pocket lining so that the pocket backing closed.
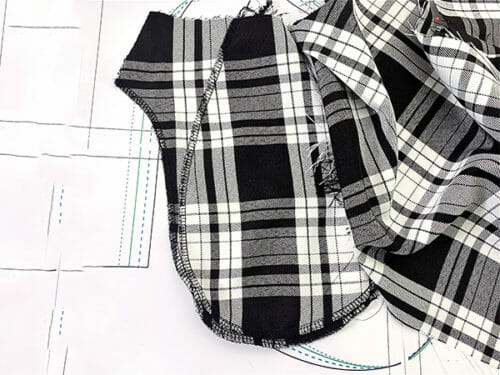
Baste from the pocket to the center seam.
Step Three: Sewing The Front And Back Sides
Sew the fronts together from the waist to the beginning of the curve.
Place the backs print facing each other, sew from the waist to the beginning of the curve of the crotch.
Join from and back together and sew the right sides only.
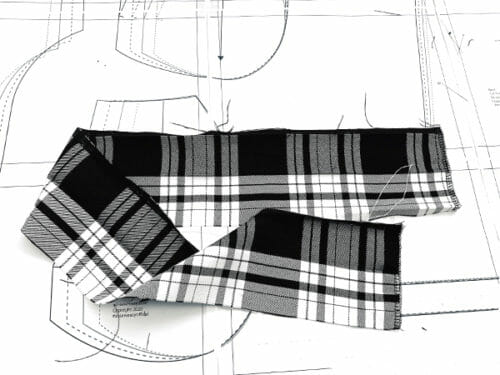
Step Four: Adding The Waistband
Measure the waistband of your shorts. Cut the waistband the length of the measurement you just took and for the width have 3 1/4″ wide plus your seam allowance. Mine is 4″s wide and as long as the waistband of my shorts. I have adjusted the shorts to my daughter's waist but I am using the smaller size.
Fold the waistband in half lengthwise and iron. Iron the seam allowance of one of the sides, this will make it easier to finish sewing the waistband to the shorts.
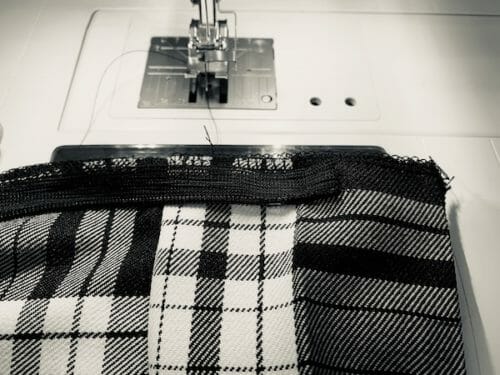
Print sides facing each other, sew the waistband around the waist.
Step Four: Sew The Zipper And The Waistband
Place the head of the zipper 1/4″ from the center (the crease left by the iron when you folded the waistband lengthwise).

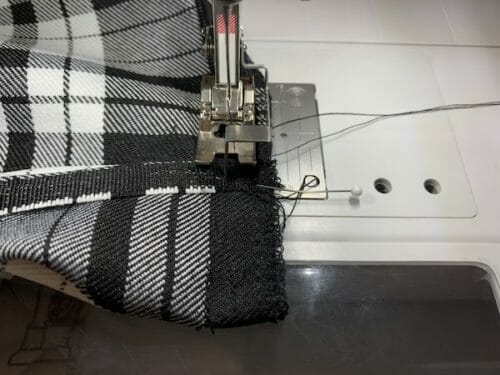
Here seen from a different angle.
Turn the waistband at the end and remember to keep the edge folded, then sew as close as you can get to the zipper.
Turn the waistband right side out and sew using either the stitch in the ditch on the right side of the shorts or using a running stitch with a needle and thread.
Finish sewing the side of the shorts.
Iron the seam allowance open and serge the hem.
Finally, sew the hem. I chose to finish the hem by hand because in a future post I'll be using these shorts to show you different ways to hem a garment and how to add a cuff. In hindsight, I wish I would have added a pair of cuffs to these women's shorts pattern to make them more elegant.
Would you like a bigger pair of shorts with cuffs? Try this three-part sew-along.
I hope you've enjoyed this women's dressy shorts pattern. Let me know in the comments below what type of fabric you used and how it turned out. Feel free to post your work on Instagram and tag us using #soseweasyoffical.
And, Until Next Time, Happy Sewing!


Hi, loving this pattern so far! I’m just stuck on how to do the crotch. The front and back panels are each sewed down to the curve. How do we get neatly from there to a finished inseam/crotch?
Did the video for these shorts ever get made? I have searched, but have not found one. Thank you so much!
Between which steps should I sew the crotch and inseam?
I’m piecing together my printed pattern and I have a co questions.
Is there an easy way to add the seam allowance to the pattern, I just measured 5/8 in multiple places around the pieces and joined them as best I could.
If I altered the waistline to add 3″ (by adjusting the pleats) do I need to adjust the pocket pieces?
The pocket lining piece did not print entirely. Is the lining pattern the same as the pocket but where that line is in the middle?
Thanks, excited to try this. I know it will be a challenge but I’m going to try my best!
HI Marlene, I have linked the article on how to alter a pattern to make the waist larger, I hope you take a look at it before you cut the fabric. The pocket lining should have printed well along the rest of the shorts, you will also need to alter that piece if you are increasing the waist unless you simplify the lining of the pocket. The line in the middle? you mean the grainline?
Thanks I will look for thew tutorial. The line on the pocket I am talking about is to the right of the grain line and now I think I see it is where the lining should be so I could use that as my lining pattern correct?
Hi Marlene I have provided all the pieces of the pattern that you will need. The line you see is the stitching line. Please see the instructions. If this is your forst pair of shorts please wait for the video it should come out in a few days, I am almost finished with the editing.
Thank you so much for this pattern. I have been looking, to no avail, for a slightly dressy shorts pattern with pockets. Woohoo! One question: when you say the seam allowance is not included, does that mean that it a) is not shown/printed on pattern, or b) that I need to add seam allowance when cutting out the pieces? Thank you! Gonna start on a muslin soon!
You need to add it when you cut the fabric. Use a ruler and a tailor’s chalk to do so directly on the fabric or add it on the pattern before you pin it to the fabric.
Thanks, I will try again. Look forward to the tutorial, let us know when it’s done!
I’m eager to make these shorts. My weight is always in flux (trending downward, fortunately!) and shorts are always a challenge. Quick question I’m sure would be answered if I looked at the pattern: what’s the inseam measure? How do I adjust for longer or shorter?
HI Katheleen, the first part of this sew-along addresses this question in detail. https://so-sew-easy.com/walking-shorts-pattern-tutorial-sew-along/
I had money today. Thank you for your patterns.
Thanks for the great pattern and tutorial, will definitely try it out! A quick question: is it possible to replace the side zipper with a wide elastic in the back portion of the waistband?
I found the instructions confusing and it didn’t help to have the the actual fabric shorts on top of the printed pattern. I also noticed the failure to sew the crotch seams and was never quite sure what happens to the extension on the under pocket. Also would you refer to the fashion fabric in terms of right side and wrong side–“printed” side makes absolutely little sense when both sides could be printed. Thanks.
Really want to try this pattern, thanks for sharing! I feel like with shorts it’s all about your body shape and so I wonder if you could post a few photos of the shorts being worn by someone? Im a column shape with only 6in difference between my waist and widest hips and I worry they won’t be flattering.
Not at all, as long as the shorts are not tight on you That it will deform the pleats you are fine. You can always reduce the width of the pleat. do try on a cheeper fabric so achieve a perfect fitting.
What’s the maximum inches that can be added to each side of the pattern? I’m bigger than XL.
Did you get an answer? I have the same question- it’s difficult to find Plus size patterns and/instructions on how to adjust those patterns that only go to XL
I have a tutorial on how to do just this and I placed a link in the instructions for this purpose.
Thank you!
Hi Jo. No, I didn’t. ????
I am new to this site, and I am enjoying it. Thank you for this great platform.
Welcome Ty, there are 989 articles here with over 150 patterns, hope you stay awhile.
Sewing the inseam and the curve of the crotch was left off the post. ????♀️????
WOW! you’re right! Thank you!
Have you updated your instructions to include the curve of the crotch? Also, when I print (actual size, landscape, US letter, 2″ square measures perfect), the grey squares do not create a 1 inch border unless the papers are butted up against each other and not overlapped. Is this correct?
Ye sit is correct, no I have not updated the instructions, it is clear to me people understand that they need to sew the crotch.
I will try these soon – I am looking for a womens short pattern with a elastic waist band for summer ( wondered if you have one like that? )
Craftsy (Bluprint) is NOT closing but re-opening under new management,
Hi Terry, yes, we’ve been following this pretty closely. It’s still unclear how and if they will how or if they will again work with independent designers like ourselves. We’ll write an article about it when things become more clear.
I really enjoy your work. I have been sewing for at least 58 years and taught sewing for over twenty years as a profession and privately for multiple years. Your tutorials and patterns are excellent!
Everything except the waistband printed. I cannot find sew along video.
Silly question, where on the hips do i measure. I see different parts of the hips on different pattern producers sites so i like to be sure? (some use the hip bones, some use the seat area, i am never sure)
Great question Esca, the reason for that is because it depends on the style. This shorts need to be a-little loose on you so the pockets do not stretch or gape. Technically you should always measure on the widest part of your hips. IF you are an hourglass figure that will be on the sitting area. If your hips are more of an inverted triangle as many apple figure have this would be a little higher and you should alter the pattern accordingly. The key in fitting is knowing the body you have today. This shorts are a little looser on the sitting area, tighter on the waist but that can easily be altered using the darts and the pleat on the front. Use a cheap fabric to test the fitting then cut your fashion fabric.
Many thanks for such an amazing pattern and tutorial! I’m definitely going to try it out! I have a question tho: with this pattern, is it possible to omit the zipper and sew in a wide elastic in the back of the shorts?
You would have to raise the waist to accommodate an elastic, but if you are patient I am going to share a pair of linen shorts that use an elastic waistband. So hang in there if you can.
Oh, that would be great! I’ll try this pattern anyway cause it looks so lovely but will be on the lookout for the new one as well:) Thank you Mayra Cecilla!
Thank you! Yes i often find if it fits on the hips its too big on the waist and vice versa, i’ll follow your advice.