


This is a relaunch of one of our most popular patterns ever on So Sew Easy. This cute wrap dress pattern is fun and easy to make and looks great.
The front has a cross-over bodice with pleats, there's a straight skirt and an optional elastic waist, with a matching tie belt. Only the bodice wraps over leaving you safe from embarrassing wardrobe malfunction that can happen with wrap skirts.

How To Download
We will continue using the new Payhip web store to distribute our patterns.
Our patterns are still free, but now you have the option of making a small contribution if you like our work! We'd appreciate it, and it will help us keep going with new and fun designs like this. Even a dollar or two goes a long way.
Thanks so much in advance for helping us out. You can use any credit card, and you don't need a Paypal account, although you can use one if you have one.
Can I see some more pics before I decide?
Of course you can. Here are some other views of the wrap dress.

Features:
- Cross-over bodice
- Optional tie belt
- Waist seam with optional elastic waist
- Pleats on front bodice
- Separate sleeves
- Straight skirt
- Multi-sizes pattern from small to extra large
Making up your pattern
Your pattern is conveniently split into 4 pieces to make it more manageable. Each is labeled with a letter and number. Numbers run top to bottom and left to right. Cut off or turn under the page edges and match the borders with the adjoining pages. If you need more information on how to put together your pattern, you can read more in the Summer Drape Top.
The bodice back pattern consists of 6 pages starting B and should be laid out as below.

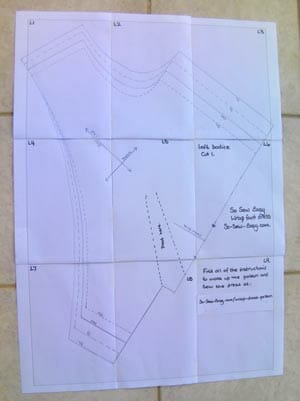
The left bodice front comes on its own and it prefixed with L, pages 1-9. Laid out 3 rows of 3 sheets.
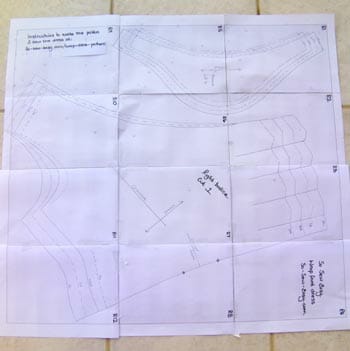
The right-hand side bodice piece and the sleeve come on 12 pages, prefixed with R, and are set out as below.
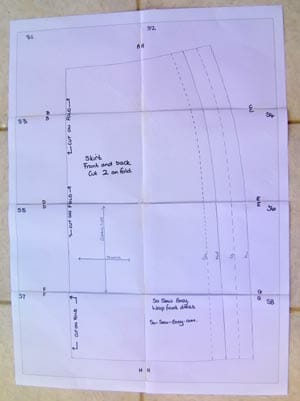
And lastly, the skirt piece is prefixed S, pages 1-8 as below.
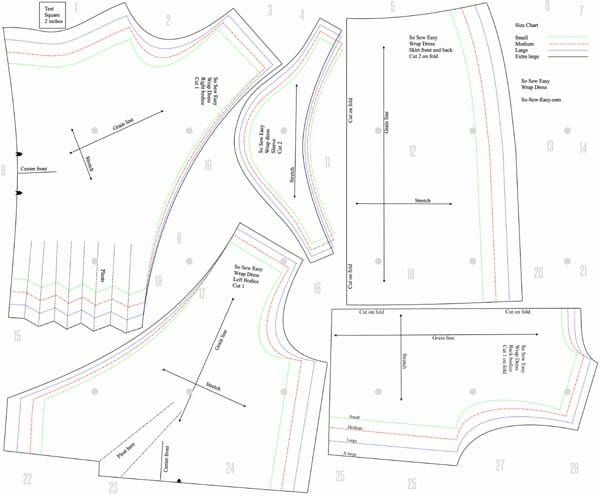
{UPDATE} – a new digital pattern is now available to download. It replaces this hand-drawn one from 15th June 2014. It is easier to print, uses 20% fewer sheets, and should be easier to put together. There are 28 sheets, and these are set out 1 to 7 in each row. Once assembled, it should look like this –>
What Size Do I Need?
The dress is made from a stretchy knit fabric and is intended to be a comfortable fit on the body with ease in both the bodice and skirt. Fitting ease is also included in the pattern so you can adjust and take in for your own personal measurements. The size I made for myself I am calling the Medium. My measurements are high bust (around the back and over the bust high under the arms) 36, Bust 37, Waist 32, Hips/Thigh widest point 40.
The amount of stretch and drape in the fabric will alter the fit and feel of the dress so use this table as a guide only.
| Bust | Waist | Hips | |
| Small | 32-34 | 25-28 | 34-36 |
| Medium | 36-38 | 29-32 | 38-40 |
| Large | 40-42 | 33-36 | 42-44 |
| Extra Large | 44+ | 37+ | 46+ |
If you fall in between sizes, you can also cut between the lines, and you can ‘grade' from one size to another by, for example, cutting a large in the waist curving out to an extra-large at the hip if you need to.
Always test the fit using the paper pattern pieces, or an inexpensive test fabric before cutting your expensive fabric for this dress. If in doubt test the larger size and adjust for fitting at the side seams during construction.
Adjustments to length. The dress is designed to fit an average height – I am 5'6″, and hits above the knee. If you are taller or prefer the skirt to be longer, simply add some length to the skirt piece at the bottom.
Cutting your fabric
If you need directions for cutting out your fabric, follow the general directions for the Summer Drape Top. I was able to comfortably cut the size Medium from 2 yards of 54-inch wide fabric, with some leftover.
Wrap Dress Sewing Instructions
Seam allowances – 5/8th of an inch throughout unless mentioned. Use stitches appropriate for stretch such as a narrow zigzag or a stretch stitch if your machine has one.
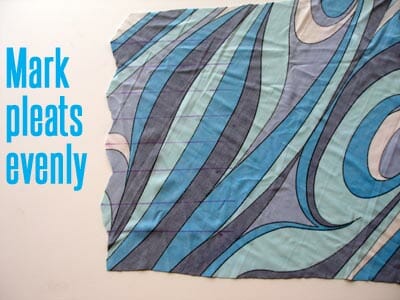
Start with the right-hand front bodice piece and using a disappearing fabric marker, draw lines from the inward and outward points of the zig-zags at the side seam, following the length shown on the pattern, making all lines finish evenly.
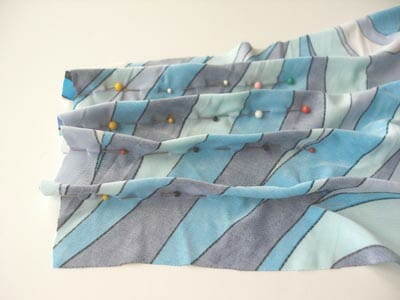
Pleat those lines together, matching the lines carefully and evenly, and pin in place. You should make 4 pleats.
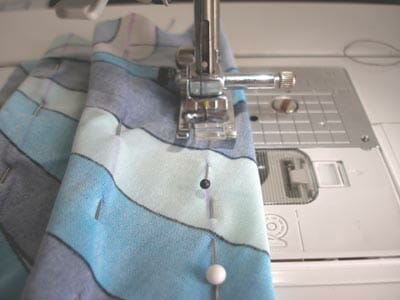
Sew along the lines marked.
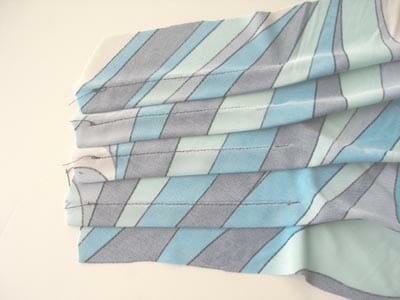
Press pleats downwards. Don't worry if they are a bit uneven (like mine), it will look just fine.
On the left front bodice piece, mark the pleat on the wrong side, pin, and then sew.

Press the pleat.

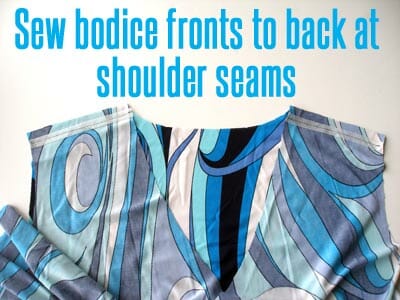
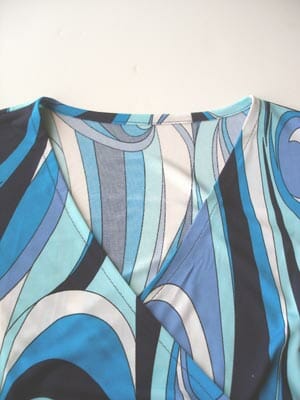
With right sides together, match shoulder seams, pin and sew. You may choose to stablise with a stay tape such as this knit stay tape at the shoulder seam (optional). Press shoulder seams open.
Iron on stay tape to the whole front cross-over edge on both bodice pieces and along the back neckline.
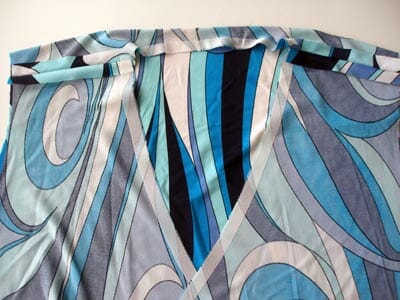
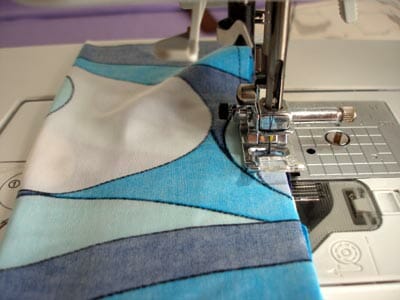
Turn over a 5/8 inch hem along the whole edge and topstitch.
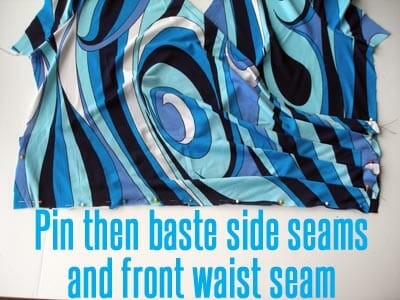
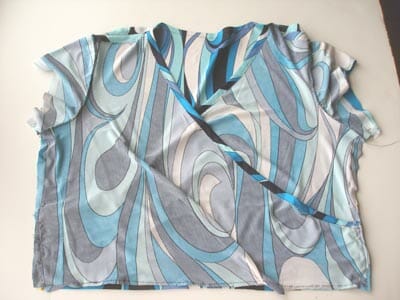
Cross over front bodice pieces with the right-hand piece on top, showing the 4 pleats. Match up the center front and notches, then pin and baste into place close to the edge, along both of the side seams and the waist seam.
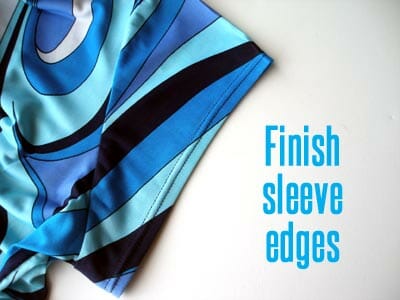
Optional – add a stay tape to the bottom edge of the sleeves.

Pin the sleeves to the bodice, matching the sleeve center with the shoulder seam, and ease the sleeves to fit the opening. Sew. Trim seam and finish edges (optional.)
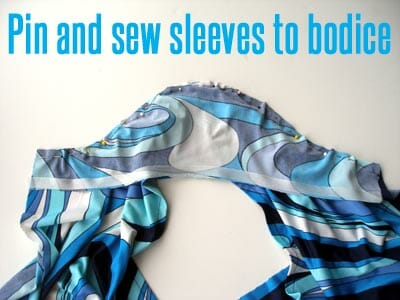
Pin side seams and sleeve seam. Try on to check fit. Adjust as necessary.
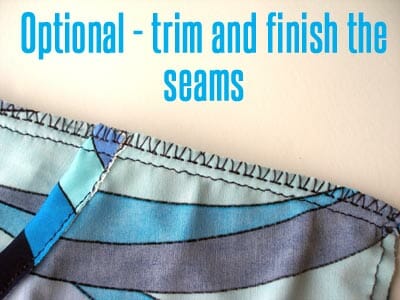
Sew side seams and close underside of sleeves all in one seam.
Optional – trim seams and finish edges.
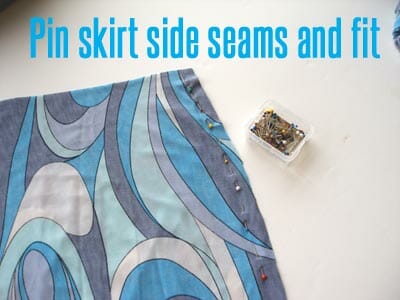
With right sides facing, pin skirt side seams. Try on for fit, adjust as necessary and sew side seams.
With right sides facing, match bodice with the skirt at the waist seam. Match center front and center back of the bodice with the center of skirt pieces and match side seams. Pin in place, then try on for fit and adjust if necessary.

Sew waist seam with 5/8th inch seam allowance. You may either leave as is and trim and finish the seams, or add an optional elastic waist.
To add elastic waist, make a casing by closing edges of waist seam without trimming, using an overcasting foot and stitch, or by sewing close to the edge. Leave an inch open and thread through a narrow 3/8th inch elastic.
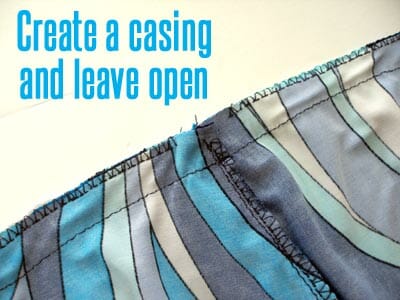
Adjust to fit waist comfortably then stitch elastic ends together with a zig-zag stitch and close casing.
Try on and check skirt length. Optional – iron your knit stay tape all along the bottom hemline of the skirt for a crisp wrinkle-free finish.
Turn up skirt hemline and finish. I prefer a twin needle finish, but you can finish with a narrow zig-zag if you like.
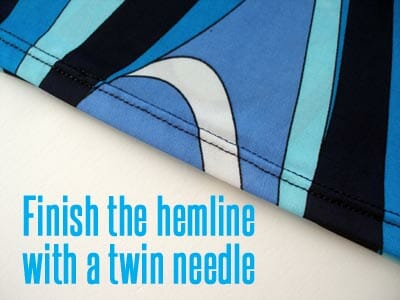
Turn up the hem on sleeves and finish with a twin needle or using your preferred method.
Cut 6-inch wide length of fabric for tie belt. Test to check what length works best for you. With right sides together, sew close to the edge with a narrow zig-zag stitch along the whole length and to close one end, either square or to a point. Turn tube the right sides out, turn under a small hem on the open end and finish either by hand or with a machine topstitch.
You may also like the belt made from contrasting fabric or use an existing belt. The dress can also be worn without a belt if you prefer.
And you are finished! Wear and enjoy your new dress and don't forget to send me your photos.


I’ve done a lot of sewing but the pleats on the right bodice have got me beat. I see others have asked questions about them too. You replied to one query that if we should fold the pleats so as to get a straight edge. The only way I can get a straight edge on the bodice side seam is by folding the pleats as I would normally fold pleats, matching the marked lines to form a pointy triangle at the top. But if I do this then sew along the marked line there is no space at all between any of the pleats which is clearly not right. The way the zigzags are drawn in the pattern would also suggest that there is no space between the pleats. I can see in the photos in the instructions above that there is quite a bit of space between each pleat but I can’t see how I can replicate this from the pattern. Can you help me please because this looks like a lovely dress to make. Obviously I’m missing something.
Yes, pleats can be tricky…
Loved this pattern here is my picture finally I had posted earlier that this was the best wrap dress patter I ever did, I am a new sewing and this was so easy I made 5 dresses with different sleeves
Oh Yes!! What a fabulous dress on you!
Most addictive pattern i have ever downloaded. I made 5 dresses with different variation sleeves on this. I will post a picture for ease of reference. I am a plus size and recently been feeling unhappy with weight gain and wardrobe freeze. I am an advanced beginner in sewing and this was so easy to put together and still look so elegant. i am using the pattern to make the same for my cotton with variations to the measurements. Best pattern ever. thank you for giving me confidence back
Great to hear; if you are using cotton, don’t forget to place a zipper from the neckline to at least 3″ past the waistline.
I downloaded this pattern: wrap dress pattern Thank you for the opportunity to get such a pattern for free. my a question is how I can know what color is the right pattern for me. By the tablet I’m Large. Thank you so much. Shoshi
Hi thx for this great pattern, busy making it. The steps are very clear and easy to follow. Cant wait to finish it and wear it!!!!!!!!